
Kailan Growing Tips: Unlock the Secrets to a Thriving Home Garden!
Have you ever dreamt of stepping into your backyard and harvesting vibrant, leafy greens for a delicious and healthy meal? I know I have! Growing your own kailan (also known as Chinese broccoli) can make that dream a reality, and it’s easier than you might think. For centuries, kailan has been a staple in Asian cuisine, prized for its slightly bitter, yet incredibly flavorful stalks and leaves. It’s not just delicious; it’s packed with vitamins and nutrients, making it a fantastic addition to any diet.
But let’s be honest, sometimes gardening can feel a little intimidating, right? That’s where these DIY tricks and hacks come in! Maybe you’ve struggled with pests, or perhaps your kailan plants just aren’t thriving the way you hoped. Don’t worry, I’m here to share my tried-and-true kailan growing tips that will transform your gardening experience. From choosing the right soil to mastering the art of watering, I’ll guide you through every step of the process.
Why do you need these DIY tricks? Because growing your own food is incredibly rewarding! Not only will you have access to fresh, organic kailan right at your fingertips, but you’ll also save money, reduce your environmental impact, and connect with nature in a meaningful way. So, let’s dive in and discover the secrets to a bountiful kailan harvest!
Growing Kale Like a Pro: A DIY Guide to Bountiful Harvests
Okay, kale lovers, let’s get down to business! I’m going to walk you through everything you need to know to grow kale that’s so good, you’ll be adding it to everything from smoothies to stir-fries. We’re talking vibrant, healthy, and delicious kale, right from your own backyard (or balcony!).
Choosing the Right Kale Variety
First things first, let’s talk kale varieties. There’s more to kale than just the curly stuff you see at the grocery store. Each type has its own unique flavor and texture, so picking the right one is key.
* Curly Kale (e.g., ‘Dwarf Blue Curled Vates’): This is your classic kale. It’s got that slightly bitter, earthy flavor and holds up well in cooking. It’s also super cold-hardy.
* Lacinato Kale (aka Dinosaur Kale, Tuscan Kale, or Cavolo Nero): My personal favorite! It has long, dark blue-green leaves with a slightly sweeter, more delicate flavor than curly kale. It’s fantastic in soups and salads.
* Red Russian Kale: This variety has flat, fringed leaves with a reddish-purple hue. It’s milder in flavor and great for salads and sauteing.
* Redbor Kale: A beautiful ornamental kale with deeply ruffled, purple leaves. It’s edible, but often grown for its visual appeal. The flavor is similar to curly kale.
Tip: Consider your climate and what you plan to use the kale for when choosing your variety. If you live in a colder area, curly kale is a safe bet. If you want something for salads, Red Russian or Lacinato are excellent choices.
Starting Your Kale Journey: Seeds vs. Seedlings
You have two main options for starting your kale: from seed or from seedlings (also known as transplants). Both have their pros and cons.
* Starting from Seed: This is the more economical option. You’ll have a wider selection of varieties to choose from, and it’s incredibly rewarding to watch your kale grow from tiny seeds. However, it requires a bit more patience and attention.
* Starting from Seedlings: This is the faster and easier option, especially for beginners. You’ll get a head start on the growing season, and you’ll be less likely to lose plants to pests or diseases. However, seedlings can be more expensive, and your variety selection may be limited.
My Recommendation: If you’re new to gardening, starting with seedlings is a great way to get your feet wet. But if you’re up for a little challenge, starting from seed is definitely worth it!
Step-by-Step Guide: Growing Kale from Seed
Alright, let’s dive into the nitty-gritty of growing kale from seed.
1. Gather Your Supplies:
* Kale seeds (choose your favorite variety!)
* Seed starting trays or small pots
* Seed starting mix (a light, well-draining soil)
* Spray bottle or watering can with a gentle nozzle
* Grow lights (optional, but recommended for indoor starting)
* Heat mat (optional, but helps with germination)
2. Sow Your Seeds:
* Moisten the seed starting mix. It should be damp but not soggy.
* Fill your seed starting trays or pots with the moistened mix.
* Make a small indentation (about 1/4 inch deep) in the center of each cell or pot.
* Place 2-3 kale seeds in each indentation.
* Gently cover the seeds with the seed starting mix.
* Lightly water the soil with a spray bottle or gentle watering can.
3. Create the Ideal Germination Environment:
* Place the seed starting trays or pots in a warm location (around 65-75°F). A heat mat can help maintain a consistent temperature.
* If you’re starting your seeds indoors, place them under grow lights. Keep the lights on for 14-16 hours per day.
* Keep the soil consistently moist, but not waterlogged. Check the soil daily and water as needed.
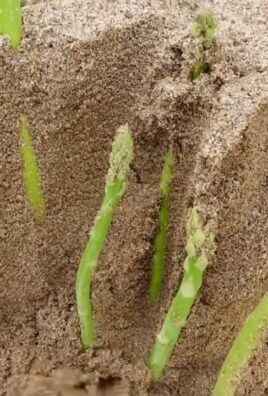
4. Thin the Seedlings:
* Once the seedlings emerge (usually within 5-10 days), thin them to one plant per cell or pot. Choose the strongest, healthiest-looking seedling and snip off the others at the soil line. This prevents overcrowding and ensures that each plant has enough space to grow.
5. Harden Off the Seedlings:
* Before transplanting your kale seedlings outdoors, you need to “harden them off.” This process gradually acclimates the seedlings to outdoor conditions, such as sunlight, wind, and temperature fluctuations.
* Start by placing the seedlings outdoors in a sheltered location for a few hours each day. Gradually increase the amount of time they spend outdoors over the course of a week or two.
* Protect the seedlings from direct sunlight and strong winds during the hardening-off process.
Step-by-Step Guide: Growing Kale from Seedlings (Transplants)
If you’re opting for seedlings, here’s how to get them established in your garden.
1. Choose Healthy Seedlings:
* Look for seedlings that are vibrant green, sturdy, and free from pests or diseases. Avoid seedlings that are leggy (tall and spindly) or have yellowing leaves.
2. Prepare Your Garden Bed:
* Kale prefers well-drained soil that is rich in organic matter. Amend your garden soil with compost or well-rotted manure before planting.
* Choose a location that receives at least 6 hours of sunlight per day.
* Space the seedlings 12-18 inches apart.
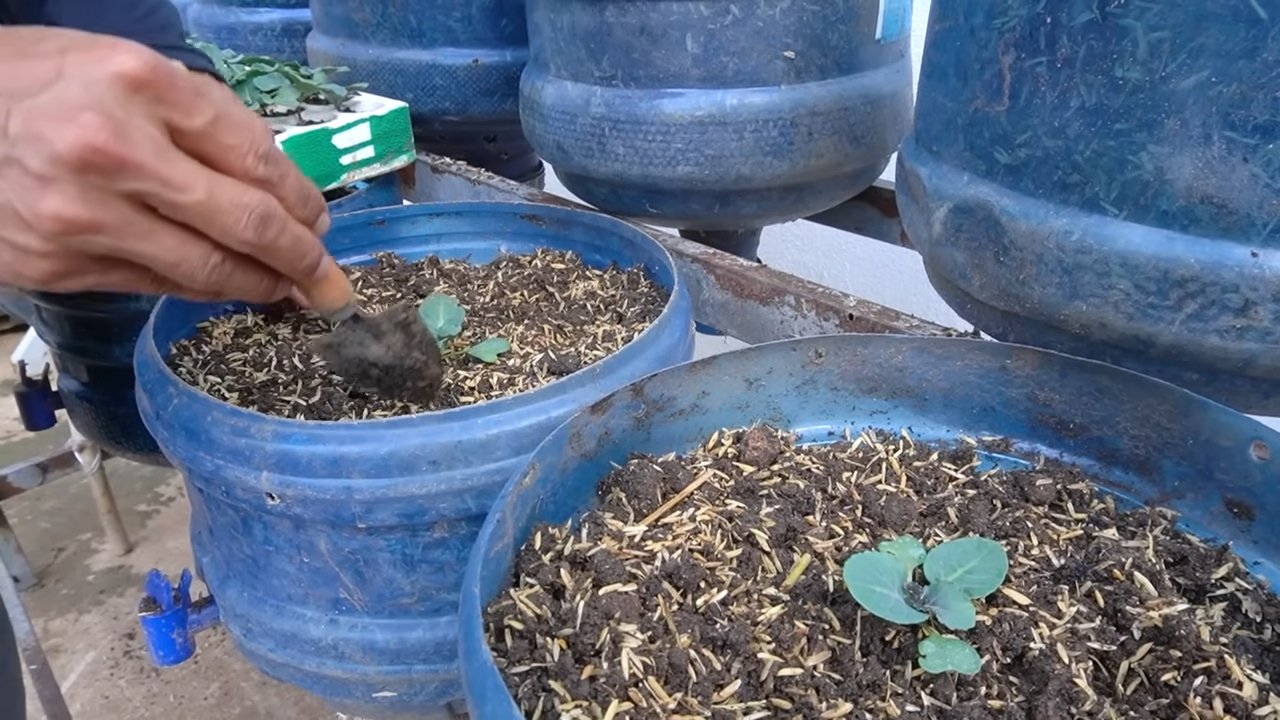
3. Plant the Seedlings:
* Dig a hole that is slightly larger than the root ball of the seedling.
* Gently remove the seedling from its container and loosen the roots.
* Place the seedling in the hole and backfill with soil.
* Water thoroughly after planting.
Caring for Your Kale Plants: The Key to a Thriving Harvest
Now that your kale is planted, it’s time to provide it with the care it needs to flourish.
* Watering: Kale needs consistent moisture, especially during hot, dry weather. Water deeply whenever the top inch of soil feels dry. Avoid overwatering, as this can lead to root rot.
* Fertilizing: Kale is a heavy feeder, meaning it needs a lot of nutrients to grow. Fertilize your kale plants every 2-3 weeks with a balanced organic fertilizer. You can also side-dress with compost or well-rotted manure.
* Weeding: Keep your garden bed free of weeds, as they can compete with your kale plants for nutrients and water.
* Mulching: Apply a layer of mulch around your kale plants to help retain moisture, suppress weeds, and regulate soil temperature. Straw, wood chips, or shredded leaves are all good options.
Dealing with Pests and Diseases
Unfortunately, kale can be susceptible to a few pests and diseases. Here’s how to deal with them:
* Cabbage Worms: These green caterpillars can devour kale leaves. Handpick them off the plants or use a biological insecticide like Bacillus thuringiensis (Bt).
* Aphids: These tiny insects suck the sap from kale leaves. Spray them off with a strong stream of water or use insecticidal soap.
* Flea Beetles: These small, jumping beetles can create tiny holes in kale leaves. Cover your plants with row covers to prevent flea beetles from reaching them.
* Downy Mildew: This fungal disease can cause yellow spots on kale leaves. Improve air circulation around your plants and avoid overhead watering.
Important Note: Always use organic pest control methods whenever possible to protect beneficial insects and pollinators.
Harvesting Your Kale: The Sweet Reward
The best part of growing kale is, of course, harvesting it!
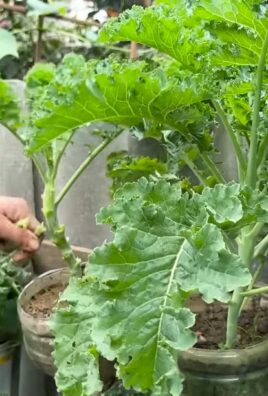
* When to Harvest: You can start harvesting kale leaves when they are about 6-8 inches long.
* How to Harvest: Harvest the outer leaves first, leaving the inner leaves to continue growing. You can harvest kale leaves continuously throughout the growing season.
* Storage: Store kale leaves in the refrigerator for up to a week. Wash and dry the leaves thoroughly before storing them.
Tip: Kale tastes best after a frost, as the cold temperatures help to sweeten the leaves.
Extending Your Kale Season
Want to enjoy fresh kale even longer? Here are a few tips for extending your kale season:
* Succession Planting: Plant new kale seeds or seedlings every few weeks to ensure a continuous harvest.
* Cold Frames or Hoop Houses: Use cold frames or hoop houses to protect your kale plants from frost and extend the growing season into the winter
Conclusion
So, there you have it! Mastering these simple yet effective DIY kailan growing tips can truly transform your gardening experience and bring a bounty of fresh, nutritious greens right to your table. We’ve explored everything from optimizing soil conditions and crafting the perfect DIY fertilizer to warding off pests with natural solutions and ensuring proper watering techniques. These aren’t just theoretical concepts; they are practical, actionable steps that you can implement today to see a tangible difference in the health and yield of your kailan plants.
Why is this a must-try? Because store-bought kailan simply can’t compare to the vibrant flavor and nutritional density of homegrown. Plus, knowing exactly what goes into nurturing your plants – no harmful pesticides or mystery ingredients – provides unparalleled peace of mind. You’re not just growing vegetables; you’re cultivating a healthier lifestyle.
But the beauty of gardening lies in its adaptability. Feel free to experiment with these kailan growing tips to suit your specific environment and preferences. For instance, if you live in a particularly hot climate, consider providing your kailan with some afternoon shade to prevent bolting. Or, if you’re short on space, try growing kailan in containers on your balcony or patio. You can even explore different varieties of kailan, each with its unique flavor profile and texture. Some gardeners swear by the sweeter taste of Chinese kale, while others prefer the more robust flavor of curly kale. The possibilities are endless!
Consider adding companion plants like marigolds to deter pests naturally, or intercropping with herbs like dill or chamomile to attract beneficial insects. These small additions can significantly enhance the overall health and productivity of your kailan patch. Don’t be afraid to get creative and tailor these tips to your own gardening style.
We’ve also touched upon the importance of consistent monitoring. Regularly inspect your plants for signs of pests or diseases, and address any issues promptly. A little vigilance can go a long way in preventing major problems down the line. Remember, gardening is a journey, not a destination. There will be successes and setbacks along the way, but each experience is an opportunity to learn and grow.
Ultimately, the goal is to create a thriving ecosystem in your garden, where your kailan plants can flourish and provide you with a continuous supply of fresh, delicious greens. By embracing these DIY kailan growing tips, you’re not just improving your gardening skills; you’re also connecting with nature and reaping the rewards of your hard work.
So, what are you waiting for? Grab your gardening gloves, gather your supplies, and embark on this exciting adventure. We’re confident that you’ll be amazed by the results. And most importantly, we want to hear about your experiences! Share your successes, your challenges, and your own unique kailan growing tips in the comments below. Let’s create a community of passionate gardeners who are dedicated to growing the best kailan possible. Happy gardening!
Frequently Asked Questions (FAQ)
What is the best time of year to plant kailan?
The ideal time to plant kailan depends on your local climate. Generally, kailan thrives in cooler weather, so planting in early spring or late summer/early fall is recommended. This allows the plants to mature before the heat of summer or the deep freeze of winter sets in. If you live in a region with mild winters, you may be able to grow kailan year-round. Check your local planting calendar for specific dates.
How much sunlight does kailan need?
Kailan requires at least 6 hours of direct sunlight per day to thrive. While it can tolerate some shade, insufficient sunlight can lead to leggy growth and reduced yields. If you’re growing kailan indoors, use grow lights to supplement natural sunlight.
What type of soil is best for growing kailan?
Kailan prefers well-draining soil that is rich in organic matter. A slightly acidic to neutral pH (6.0-7.0) is ideal. Amend your soil with compost or well-rotted manure before planting to improve its fertility and drainage. You can also add a slow-release fertilizer to provide essential nutrients.
How often should I water my kailan plants?
Water kailan regularly, especially during dry periods. Aim to keep the soil consistently moist but not waterlogged. Overwatering can lead to root rot, while underwatering can stress the plants and reduce their growth. A good rule of thumb is to water deeply when the top inch of soil feels dry to the touch. Mulching around the plants can help retain moisture and suppress weeds.
What are some common pests and diseases that affect kailan?
Common pests that attack kailan include aphids, cabbage worms, flea beetles, and slugs. Diseases include black rot, clubroot, and downy mildew. Regularly inspect your plants for signs of infestation or disease. Use organic pest control methods such as insecticidal soap, neem oil, or diatomaceous earth to control pests. Ensure good air circulation and avoid overhead watering to prevent fungal diseases. Crop rotation can also help reduce the risk of soilborne diseases.
How do I harvest kailan?
You can begin harvesting kailan leaves when they are about 6-8 inches long. Harvest the outer leaves first, leaving the inner leaves to continue growing. This cut-and-come-again method allows you to harvest kailan continuously throughout the growing season. Use a sharp knife or scissors to cut the leaves cleanly from the stem.
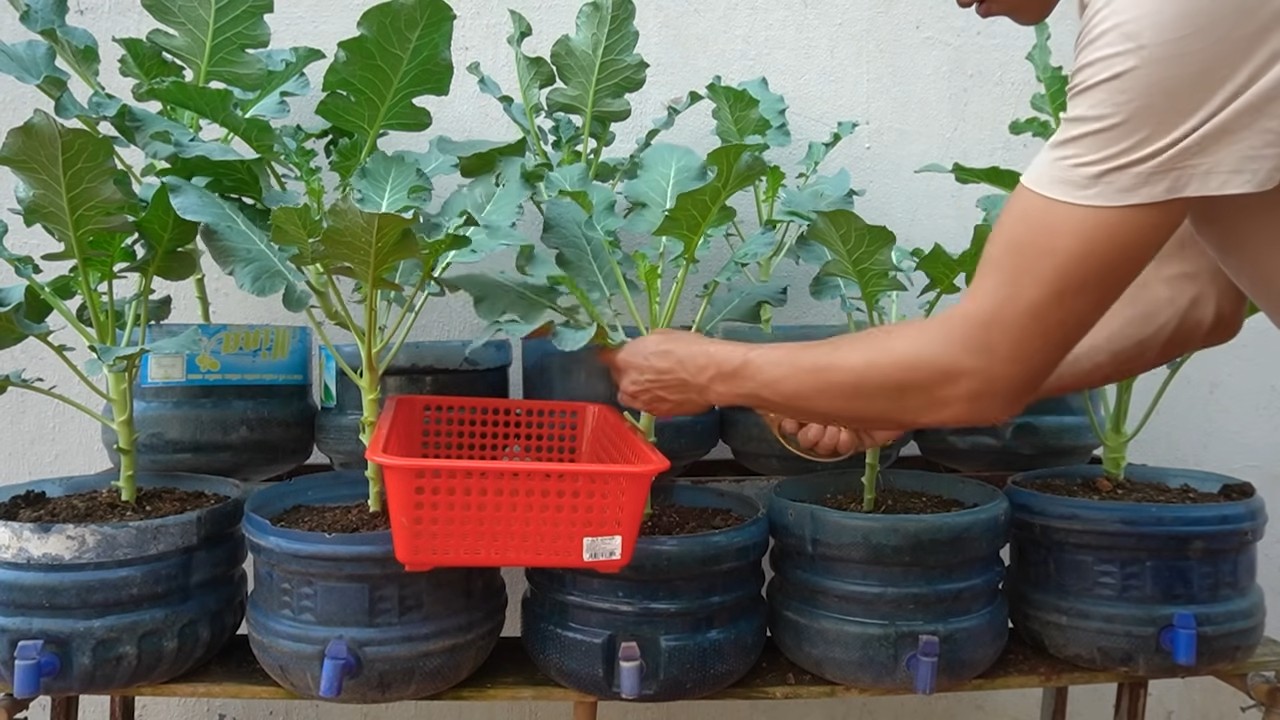
Can I grow kailan in containers?
Yes, kailan can be successfully grown in containers. Choose a container that is at least 12 inches deep and wide to provide enough space for the roots to grow. Use a high-quality potting mix that is well-draining and rich in organic matter. Water regularly and fertilize every few weeks with a balanced fertilizer.
How do I prevent kailan from bolting (going to seed)?
Bolting is a common problem with kailan, especially in hot weather. To prevent bolting, plant kailan in early spring or late summer/early fall to avoid the hottest months. Provide shade during the hottest part of the day. Water regularly to keep the soil consistently moist. Choose bolt-resistant varieties of kailan.
What are some good companion plants for kailan?
Good companion plants for kailan include marigolds, nasturtiums, dill, chamomile, and garlic. Marigolds and nasturtiums deter pests, while dill and chamomile attract beneficial insects. Garlic can help repel aphids and other pests. Avoid planting kailan near other brassicas, such as broccoli, cabbage, and cauliflower, as they can attract the same pests and diseases.
How can I improve the flavor of my kailan?
The flavor of kailan can be improved by harvesting it after a frost. The cold temperatures cause the plant to convert starches into sugars, resulting in a sweeter flavor. You can also blanch the leaves in boiling water for a few minutes before cooking to reduce their bitterness. Adding acidic ingredients such as lemon juice or vinegar to your kailan dishes can also help balance the flavor.
Leave a Comment