
Growing Kale in Soil Bags: Unlock the secrets to a thriving garden, even without a traditional plot! Have you ever dreamed of harvesting fresh, vibrant kale right outside your door, but felt limited by space or soil conditions? Well, dream no more! This DIY guide will walk you through the surprisingly simple and incredibly rewarding process of growing kale in soil bags.
For centuries, resourceful gardeners have found innovative ways to cultivate food, adapting to their environments and maximizing limited resources. From ancient rooftop gardens to modern urban farms, the spirit of ingenuity lives on. Growing kale in soil bags is a testament to this enduring tradition, offering a practical and accessible solution for anyone eager to embrace the joys of home gardening.
Why should you try this DIY trick? Because it’s a game-changer! Whether you have a tiny balcony, a rocky backyard, or simply want a convenient and contained gardening solution, growing kale in soil bags offers a multitude of benefits. It’s cost-effective, requires minimal effort, and allows you to control the soil quality, ensuring your kale receives the perfect nutrients. Plus, it’s a fantastic way to recycle those old soil bags! I’m excited to share my tips and tricks to help you achieve a bountiful kale harvest. Let’s get started!
Growing Kale in Soil Bags: A Beginner’s Guide
Hey there, fellow gardening enthusiasts! I’m so excited to share one of my favorite gardening hacks with you: growing kale in soil bags! It’s a fantastic way to cultivate this superfood, especially if you’re short on space or have less-than-ideal soil conditions. Trust me, even if you’re a complete newbie, you can totally rock this. Let’s dive in!
Why Grow Kale in Soil Bags?
Before we get our hands dirty, let’s talk about why this method is so awesome:
* Space-Saving: Perfect for balconies, patios, or small yards. You don’t need a traditional garden bed.
* Improved Drainage: Soil bags naturally provide excellent drainage, preventing root rot, which kale hates.
* Easy to Move: Need to chase the sun or protect your kale from a sudden frost? Just move the bag!
* Weed Control: Less weeding compared to in-ground gardening. Hallelujah!
* Soil Control: You get to choose the perfect soil mix for your kale, ensuring it gets all the nutrients it needs.
* Cost-Effective: Often cheaper than building raised beds or buying large containers.
Materials You’ll Need
Alright, let’s gather our supplies. Here’s what you’ll need to get started:
* Soil Bags: Choose heavy-duty polypropylene woven bags. These are durable and can withstand the elements. You can usually find them at garden centers or online. I recommend bags that are at least 15-20 gallons in size for ample root space.
* Potting Mix: Don’t skimp on the quality of your potting mix! A good mix should be well-draining and rich in organic matter. I like to use a blend of compost, peat moss (or coco coir), and perlite.
* Kale Seeds or Seedlings: You can start from seeds or buy seedlings from a local nursery. If you’re a beginner, seedlings might be easier to manage. Choose your favorite kale variety! I personally love ‘Lacinato’ (dinosaur kale) and ‘Red Russian’ for their flavor and visual appeal.
* Fertilizer: A slow-release organic fertilizer is ideal for feeding your kale throughout the growing season. Look for one that’s specifically formulated for vegetables.
* Watering Can or Hose: For, well, watering!
* Utility Knife or Scissors: To make drainage holes in the bags.
* Gloves: To protect your hands.
* Trowel or Small Shovel: For transferring soil and seedlings.
Step-by-Step Instructions: Planting Your Kale
Okay, let’s get planting! Here’s a detailed guide to walk you through the process:
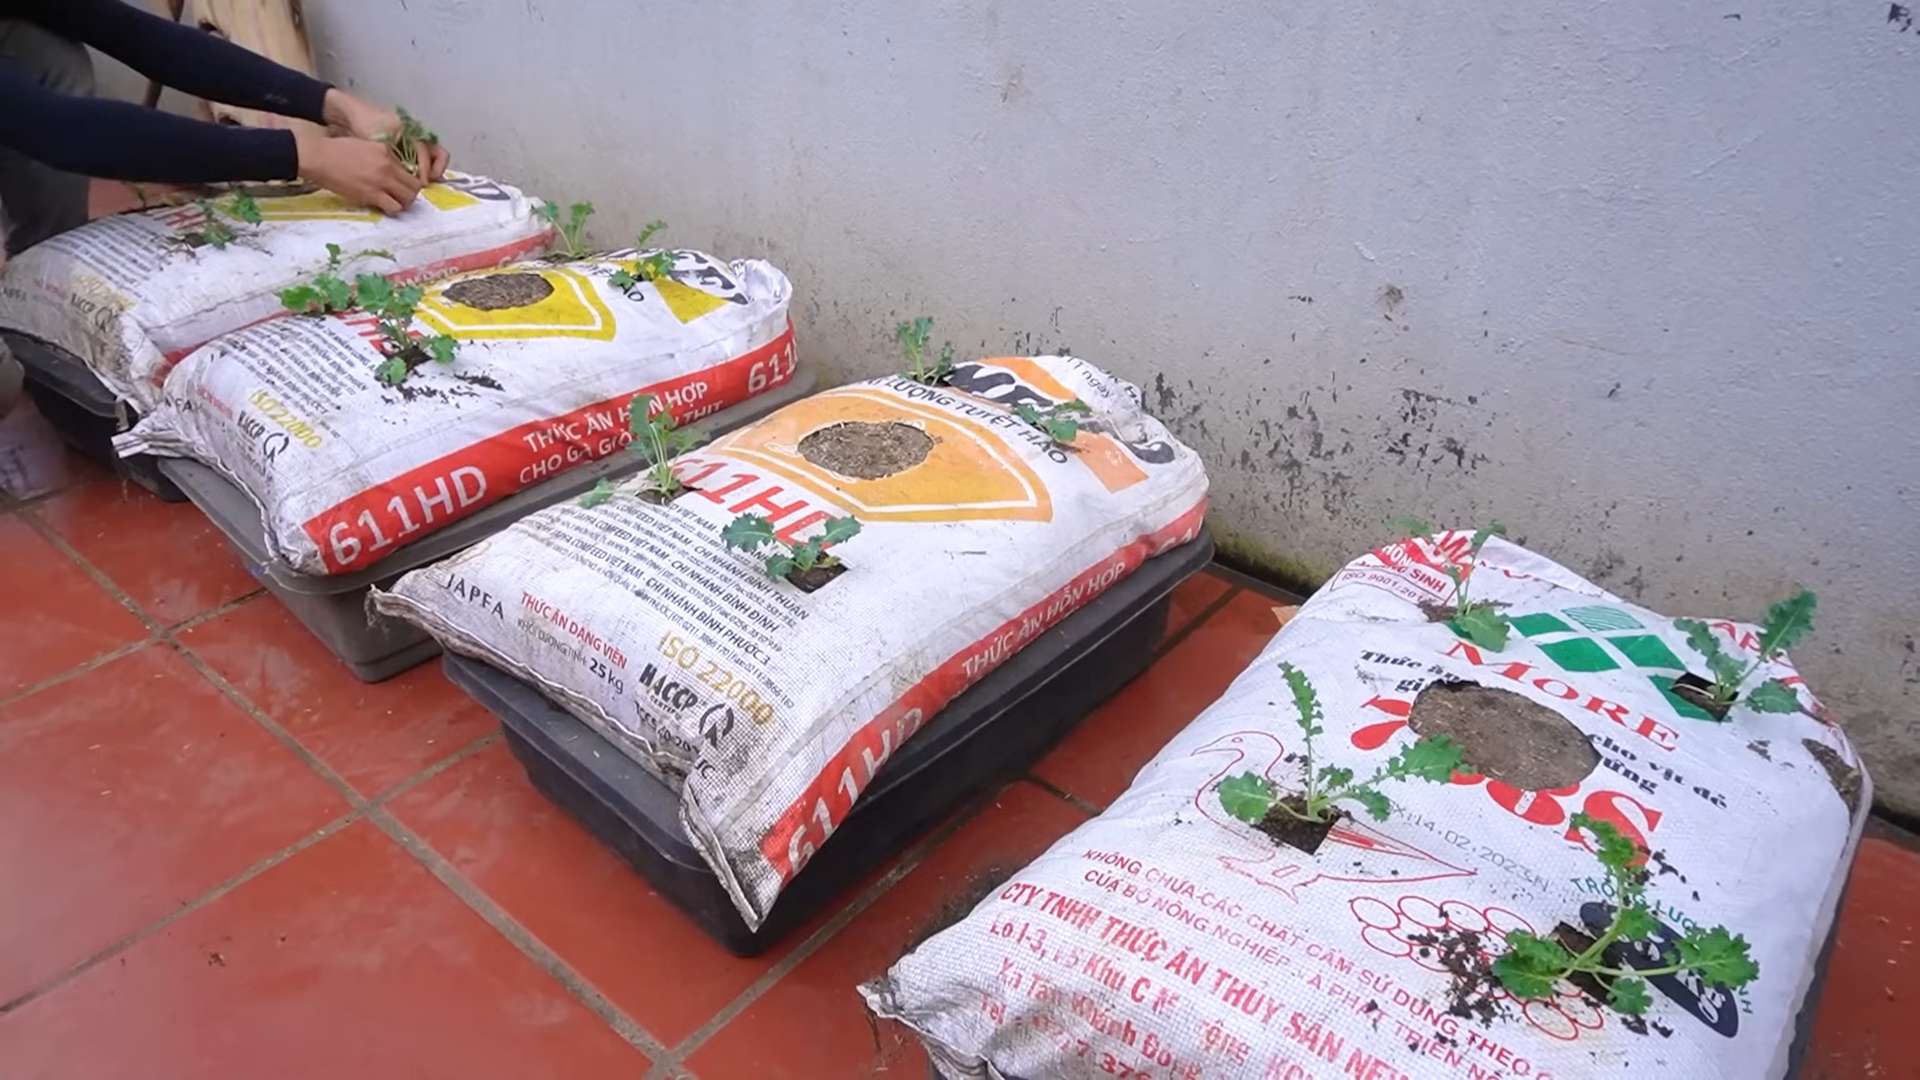
1. Prepare the Soil Bags:
* First, find a suitable location for your kale bags. Kale needs at least 6 hours of sunlight per day.
* Lay the soil bags flat on the ground.
* Using your utility knife or scissors, carefully cut several drainage holes in the bottom of each bag. I usually make about 6-8 holes, spaced evenly apart. This is crucial to prevent waterlogging.
* Roll down the top edges of the bags a few times. This will make it easier to fill them with soil and provide a more stable structure.
2. Fill the Bags with Potting Mix:
* Now, it’s time to fill the bags with your potting mix.
* Using your trowel or small shovel, gradually add the potting mix to the bags.
* Fill the bags to about 2-3 inches from the top. Don’t pack the soil down too tightly; you want it to remain loose and well-aerated.
3. Plant Your Kale Seeds or Seedlings:
* From Seeds:
* If you’re starting from seeds, sow them directly into the soil bags.
* Make small indentations in the soil, about 1/2 inch deep, spaced about 6-8 inches apart.
* Place 2-3 seeds in each indentation.
* Gently cover the seeds with soil and water thoroughly.
* Keep the soil consistently moist until the seeds germinate, which usually takes about 5-10 days.
* Once the seedlings emerge, thin them out, leaving only the strongest seedling in each spot.
* From Seedlings:
* If you’re using seedlings, gently remove them from their containers.
* Loosen the roots slightly with your fingers.
* Dig small holes in the soil bags, spaced about 6-8 inches apart.
* Place the seedlings in the holes, making sure the top of the root ball is level with the soil surface.
* Fill in the holes with soil and gently firm the soil around the seedlings.
* Water thoroughly.
4. Fertilize Your Kale:
* Sprinkle a slow-release organic fertilizer over the surface of the soil in each bag.
* Follow the instructions on the fertilizer package for the correct amount to use.
* Gently mix the fertilizer into the top inch of soil.
5. Watering and Ongoing Care:
* Water your kale regularly, especially during hot, dry weather.
* The soil should be consistently moist, but not waterlogged.
* Check the soil moisture by sticking your finger into the soil. If the top inch feels dry, it’s time to water.
* Avoid overhead watering, as this can promote fungal diseases. Water at the base of the plants.
* As your kale grows, you may need to add more soil to the bags to support the plants.
* Remove any yellowing or damaged leaves to encourage new growth.
* Side-dress your kale with compost or fertilizer every few weeks to provide additional nutrients.
Troubleshooting and Tips for Success
Even with the best planning, sometimes things don’t go exactly as expected. Here are a few common issues and how to address them:
* Pests: Kale can be susceptible to pests like aphids, cabbage worms, and flea beetles. Regularly inspect your plants for signs of infestation. You can control pests with organic insecticides like neem oil or insecticidal soap. Handpicking pests is also an effective method.
* Diseases: Fungal diseases like powdery mildew can sometimes affect kale. To prevent diseases, ensure good air circulation around your plants and avoid overhead watering. If you notice signs of disease, treat your plants with a fungicide.
* Yellowing Leaves: Yellowing leaves can be a sign of nutrient deficiency or overwatering. Make sure your kale is getting enough fertilizer and that the soil is well-draining.
* Bolting: Bolting (when the plant starts to flower) can occur in hot weather. To prevent bolting, try to provide some shade for your kale during the hottest part of the day. You can also choose bolt-resistant varieties.
* Sunlight: Kale needs at least 6 hours of sunlight per day. If your kale isn’t getting enough sun, it may become leggy and produce fewer leaves.
* Soil pH: Kale prefers a slightly acidic to neutral soil pH (around 6.0 to 7.0). You can test your soil pH with a soil testing kit and amend it if necessary.
Harvesting Your Kale
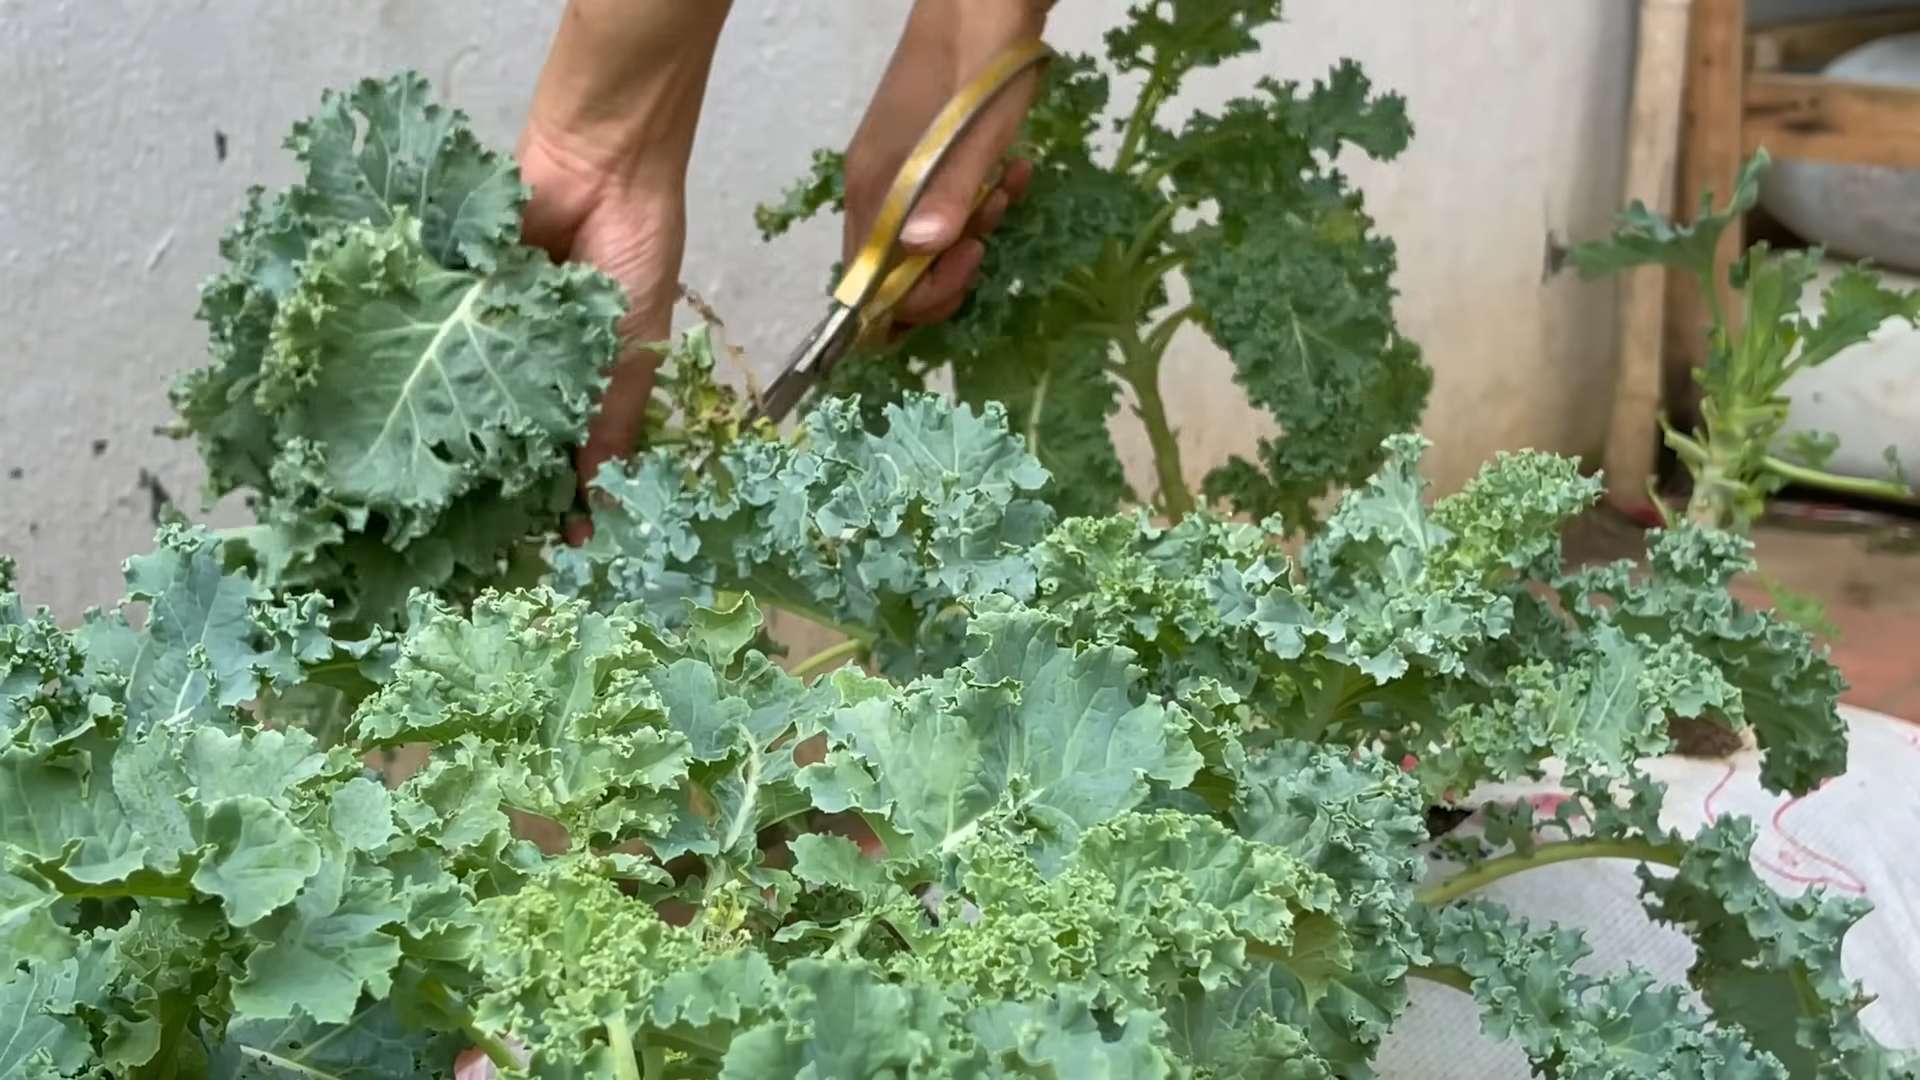
The best part! You can start harvesting kale leaves once they are about 4-6 inches long.
* Simply cut off the outer leaves with a knife or scissors, leaving the inner leaves to continue growing.
* Harvesting from the bottom up encourages continuous production.
* Avoid harvesting more than one-third of the plant at a time.
* Kale is most flavorful after a frost, so don’t be afraid to leave it in the garden during the winter months.
Choosing the Right Kale Variety
There are so many different types of kale to choose from! Here are a few of my favorites:
* Lacinato (Dinosaur Kale): This variety has long, dark green leaves with a slightly bumpy texture. It has a mild, slightly sweet flavor and is great for salads, soups, and stir-fries.
* Red Russian: This variety has flat, fringed leaves with a reddish-purple hue. It has a slightly peppery flavor and is delicious in salads or sauteed.
* Curly Kale: This is the most common type of kale, with tightly curled, green leaves. It has a slightly bitter flavor and is best cooked.
* Redbor Kale: This variety has deeply fringed, purple leaves. It’s very ornamental and also edible.
* White Russian Kale: Similar to Red Russian, but with white veins and a milder flavor.
Extra Tips for Super Kale Growth
* Companion Planting: Plant kale with companion plants like
Conclusion
So, there you have it! Growing kale in soil bags is not just a gardening hack; it’s a game-changer for anyone looking to enjoy fresh, homegrown greens with minimal effort and maximum yield. We’ve walked through the simple steps, highlighting the benefits of this method – from its space-saving nature and improved drainage to its portability and ability to extend your growing season.
Why is this DIY trick a must-try? Because it democratizes gardening. You don’t need acres of land or a green thumb passed down through generations. All you need is a soil bag, some kale seeds or seedlings, a sunny spot, and a little bit of enthusiasm. The beauty of this method lies in its accessibility. Apartment dwellers, balcony gardeners, and even those with limited mobility can easily participate in the joy of growing their own food.
But the advantages extend beyond mere convenience. Growing kale in soil bags allows for better control over the growing environment. You can easily move the bags to chase the sun, protect them from harsh weather, or even bring them indoors during unexpected frosts. The improved drainage prevents waterlogging, a common problem in traditional gardens that can lead to root rot and other diseases. And because the soil is contained, you have more control over the nutrient content, ensuring your kale receives the optimal nourishment for healthy growth.
Looking for variations? Absolutely! Consider these ideas to personalize your soil bag kale garden:
* Companion Planting: Interplant your kale with herbs like rosemary, thyme, or sage. These herbs not only add flavor to your culinary creations but also act as natural pest repellents, protecting your kale from unwanted visitors. Marigolds are another excellent choice, known for their ability to deter nematodes and other soil-borne pests.
* Succession Planting: Don’t just plant all your kale at once. Stagger your planting every few weeks to ensure a continuous harvest throughout the growing season. This way, you’ll always have fresh kale on hand for salads, smoothies, and other delicious dishes.
* Vertical Gardening: If space is truly limited, consider creating a vertical kale garden using multiple soil bags stacked on top of each other or hung from a sturdy structure. This maximizes your growing area and adds a visually appealing element to your outdoor space.
* Different Kale Varieties: Experiment with different types of kale to discover your favorites. From the curly leaves of Scotch kale to the flat, broad leaves of Lacinato (dinosaur) kale, there’s a variety to suit every taste and preference. Red Russian kale adds a splash of color to your garden and offers a slightly sweeter flavor.
* Organic Amendments: Enhance the soil in your bags with organic amendments like compost, worm castings, or aged manure. These amendments provide essential nutrients and improve soil structure, leading to healthier and more productive kale plants.
We are confident that once you experience the ease and rewards of growing kale in soil bags, you’ll be hooked. It’s a simple, sustainable, and satisfying way to connect with nature and enjoy the freshest, most nutritious greens imaginable.
So, what are you waiting for? Grab a soil bag, some kale seeds or seedlings, and get started today! We encourage you to try this DIY trick and share your experiences with us. Post photos of your soil bag kale gardens on social media using the hashtag #SoilBagKale and let us know what you think. We can’t wait to see your green thumbs in action! Happy gardening!
Frequently Asked Questions (FAQ)
What type of soil bag should I use for growing kale?
The best type of soil bag for growing kale is a heavy-duty polypropylene bag, often used for landscaping or construction materials. These bags are durable, UV-resistant, and can withstand the weight of the soil and plants. Look for bags that are at least 18 inches in diameter and 24 inches tall to provide ample space for root growth. Alternatively, you can use grow bags made from fabric, which offer excellent drainage and aeration. Avoid using thin plastic bags, as they are prone to tearing and may not provide adequate drainage.
How often should I water my kale plants in soil bags?
Watering frequency depends on several factors, including the weather, the size of the bag, and the type of soil you’re using. As a general rule, water your kale plants whenever the top inch of soil feels dry to the touch. During hot, dry weather, you may need to water daily, while during cooler, wetter periods, you may only need to water every few days. Be sure to water thoroughly, allowing the water to drain out of the bottom of the bag. Avoid overwatering, as this can lead to root rot. A good way to check if your kale needs water is to lift the bag. If it feels light, it’s likely time to water.
What kind of fertilizer should I use for kale grown in soil bags?
Kale is a heavy feeder, so it’s important to provide it with adequate nutrients. A balanced organic fertilizer, such as a 10-10-10 or 5-5-5 formulation, is a good choice. You can also use compost tea, worm castings, or aged manure to provide essential nutrients. Apply fertilizer according to the package directions, typically every 2-4 weeks. Avoid using synthetic fertilizers, as they can harm beneficial soil microbes and may lead to nutrient imbalances. Side-dressing with compost or adding a layer of mulch around the base of the plants can also help to provide a slow-release source of nutrients.
How do I protect my kale plants from pests and diseases?
Growing kale in soil bags can help to reduce the risk of pests and diseases, but it’s still important to take precautions. Regularly inspect your plants for signs of pests, such as aphids, cabbage worms, or flea beetles. Handpick any pests you find or use insecticidal soap or neem oil to control infestations. To prevent diseases, ensure good air circulation around your plants and avoid overwatering. If you notice any signs of disease, such as yellowing leaves or spots, remove the affected leaves immediately. Crop rotation and companion planting can also help to prevent pest and disease problems.
Can I grow kale in soil bags during the winter?
Yes, you can grow kale in soil bags during the winter, especially in mild climates. Kale is a cold-hardy vegetable that can tolerate temperatures down to 20°F (-7°C). In colder climates, you can protect your kale plants by moving the soil bags to a sheltered location, such as a garage or greenhouse, or by covering them with a frost blanket. Choose cold-hardy varieties of kale, such as Winterbor or Red Russian, for best results. Even in colder climates, you can often extend the growing season by starting kale indoors and transplanting it to soil bags in the spring.
How do I harvest kale from soil bags?
Harvesting kale from soil bags is easy. Simply cut off the outer leaves of the plant, leaving the inner leaves to continue growing. This is known as “cut-and-come-again” harvesting. Harvest the leaves when they are about 6-8 inches long and a deep green color. Avoid harvesting more than one-third of the plant at a time, as this can stress the plant and reduce its yield. Regular harvesting encourages the plant to produce more leaves. Wash the harvested leaves thoroughly before using them in salads, smoothies, or cooked dishes.
What are the benefits of growing kale in soil bags compared to traditional gardening?
Growing kale in soil bags offers several advantages over traditional gardening. Soil bags are portable, allowing you to move your plants to chase the sun or protect them from harsh weather. They also provide excellent drainage, preventing waterlogging and root rot. Soil bags are space-saving, making them ideal for small gardens or balconies. They also allow you to control the soil quality and nutrient content, ensuring your kale receives the optimal nourishment. Additionally, soil bags can help to reduce the risk of soil-borne pests and diseases. Finally, growing kale in soil bags is a simple and accessible way to enjoy fresh, homegrown greens, even if you don’t have a traditional garden.
Leave a Comment