
Best Oven Cleaner for Grease: Are you tired of battling stubborn, baked-on grease in your oven? I know I am! It feels like a never-ending chore, doesn’t it? You’re not alone. For generations, keeping the heart of the kitchen – the oven – sparkling clean has been a household challenge. From using simple ash in ancient hearths to the modern chemical concoctions, the quest for a grease-free oven has been ongoing.
But what if I told you that you could conquer that greasy beast without harsh chemicals or endless scrubbing? This DIY guide is packed with clever tricks and hacks to help you find the best oven cleaner for grease, using ingredients you probably already have in your pantry. We’ll explore natural solutions, effective techniques, and preventative measures to keep your oven looking its best.
Why is this so important? A clean oven not only improves the taste of your food but also ensures even cooking and prevents potential fire hazards. Plus, let’s be honest, a sparkling oven just makes you feel good! So, ditch the elbow grease and get ready to discover the secrets to a spotless oven with these easy and effective DIY solutions. Let’s get started!
DIY Oven Cleaner: Banishing Grease with Baking Soda and Vinegar
Okay, let’s face it: cleaning the oven is probably nobody’s favorite chore. But a sparkling clean oven makes cooking so much more enjoyable (and probably even cooks food better, right?). Store-bought oven cleaners can be harsh and full of chemicals I’d rather avoid. So, I’m going to share my go-to method for a DIY oven cleaner that’s effective, budget-friendly, and uses ingredients you likely already have in your pantry: baking soda and vinegar!
This method works wonders on baked-on grease and grime. It requires a little elbow grease and patience, but the results are totally worth it. Plus, you’ll feel good knowing you’re not exposing yourself or your family to harsh chemicals.
What You’ll Need
Before we dive in, let’s gather our supplies. Here’s what you’ll need to tackle that greasy oven:
* Baking Soda: This is our main cleaning agent. It’s mildly abrasive and helps to loosen baked-on messes.
* White Vinegar: The acid in vinegar reacts with the baking soda to create a fizzing action that helps lift grime.
* Water: We’ll use water to make a paste and to rinse the oven.
* Spray Bottle: For applying the vinegar.
* Spatula or Scraper: To help remove stubborn baked-on bits. A plastic one is ideal to avoid scratching the oven surface.
* Rubber Gloves: To protect your hands from the baking soda paste.
* Sponge or Cloth: For wiping down the oven.
* Old Towels or Rags: For soaking up spills and messes.
* Trash Bag or Newspaper: To protect your floor.
* Small Bowl: For mixing the baking soda paste.
Step-by-Step Instructions: Cleaning Your Oven with Baking Soda and Vinegar
Alright, let’s get started! Here’s the breakdown of how to clean your oven using baking soda and vinegar:
1. Prepare the Oven:
* First things first, unplug your oven or turn off the breaker to ensure safety.
* Remove the oven racks, baking stones, and any other items inside the oven.
* Place old towels, newspaper, or a trash bag on the floor in front of the oven to catch any drips or spills. This will save you from having to clean the floor later!
* Give the inside of the oven a quick wipe with a damp cloth to remove any loose crumbs or debris. This will help the baking soda paste adhere better.
2. Make the Baking Soda Paste:
* In your small bowl, combine about ½ cup of baking soda with enough water to form a thick, spreadable paste. The consistency should be similar to frosting.
* You might need to add a little more water or baking soda to get the right consistency. Don’t worry about being too precise; just aim for a paste that’s easy to apply.
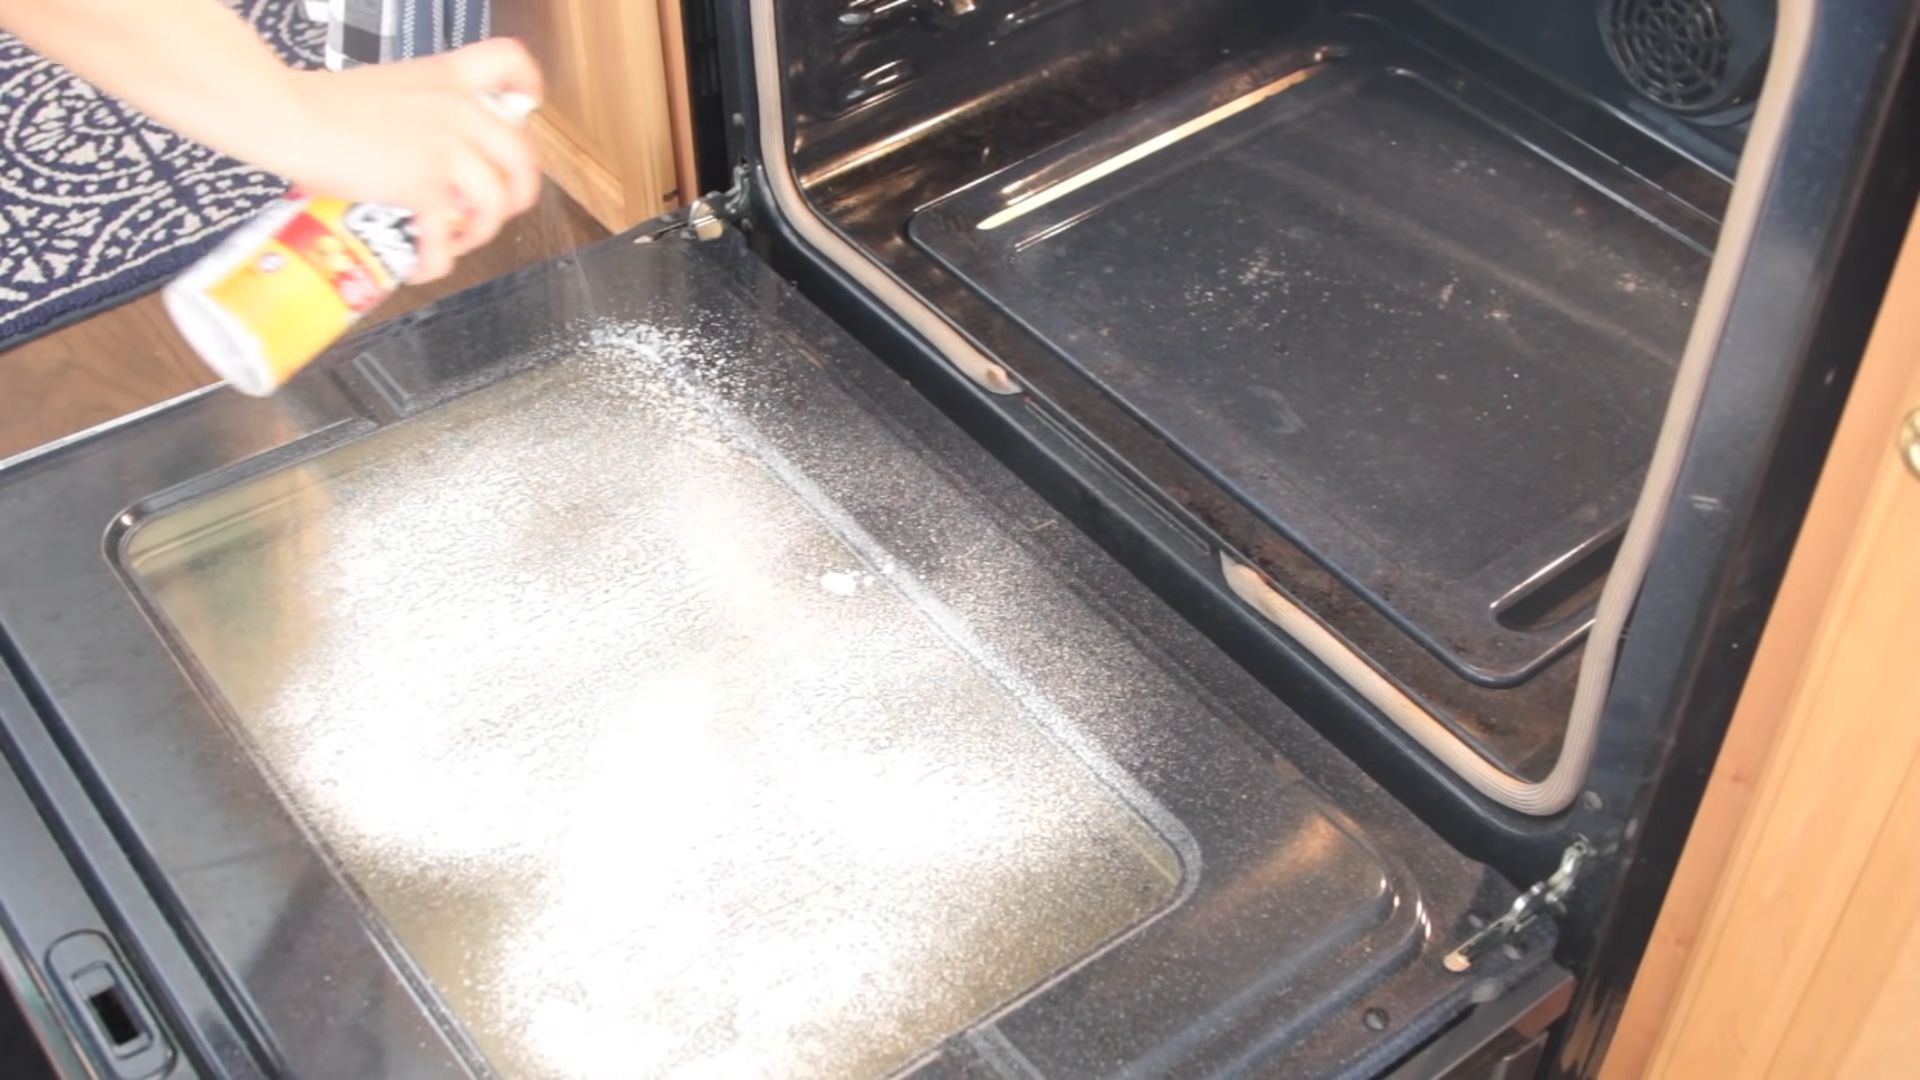
3. Apply the Baking Soda Paste:
* Put on your rubber gloves to protect your hands.
* Using your hands or a spatula, spread the baking soda paste all over the inside surfaces of the oven, avoiding the heating elements.
* Be generous with the paste, especially on areas with heavy grease buildup.
* Don’t forget to apply the paste to the oven door, both inside and out.
* If you have a particularly stubborn area, you can apply a thicker layer of paste.
4. Let the Paste Sit (and Work Its Magic!):
* This is the most crucial step! Let the baking soda paste sit for at least 12 hours, or even overnight. The longer it sits, the more time it has to loosen the baked-on grease and grime.
* I usually apply the paste before I go to bed and let it sit overnight. That way, it’s ready to be cleaned in the morning.
5. Clean the Oven Racks:
* While the baking soda paste is working its magic inside the oven, let’s tackle those greasy oven racks.
* Fill your bathtub or a large utility sink with hot, soapy water.
* Add about ½ cup of dish soap and ½ cup of baking soda to the water.
* Submerge the oven racks in the water and let them soak for at least 2-3 hours, or even overnight.
* After soaking, use a scrub brush or sponge to scrub away the grease and grime. You might need to use a little elbow grease, but the soaking should have loosened most of the mess.
* Rinse the racks thoroughly with clean water and let them dry completely before putting them back in the oven.
6. Wipe Down the Oven:
* After the baking soda paste has sat for the recommended time, it’s time to wipe it away.
* Use a damp sponge or cloth to wipe away as much of the baking soda paste as possible. You might need to rinse the sponge frequently to remove all the paste.
* For stubborn areas, use a spatula or scraper to gently scrape away the loosened grime. Be careful not to scratch the oven surface.
* Once you’ve removed most of the paste, you’ll likely notice some residue. Don’t worry, that’s where the vinegar comes in!
7. Spray with Vinegar:
* Fill your spray bottle with white vinegar.
* Spray the inside of the oven with vinegar, focusing on areas where there’s still baking soda residue.
* The vinegar will react with the baking soda, causing it to fizz. This fizzing action helps to lift any remaining grime.
8. Final Wipe Down:
* Use a clean, damp sponge or cloth to wipe away the vinegar and any remaining residue.
* Rinse the sponge frequently to ensure you’re removing all the vinegar.
* If you still see some stubborn spots, repeat the vinegar spray and wipe-down process.
9. Dry the Oven:
* Once you’ve wiped down the oven thoroughly, use a clean, dry towel to dry the inside surfaces.
* This will help prevent water spots and ensure the oven is completely dry before you use it.
10. Reassemble and Admire Your Work:
* Place the clean oven racks back into the oven.
* Plug the oven back in or turn the breaker back on.
* Step back and admire your sparkling clean oven!
Troubleshooting and Tips
Even with the best instructions, sometimes things don’t go exactly as planned. Here are a few troubleshooting tips and extra hints to help you get the best results:
* Stubborn Grease: If you have areas with particularly stubborn grease, you can try applying a thicker layer of baking soda paste and letting it sit for longer. You can also try using a more abrasive scrubber, but be careful not to scratch the oven surface.
* Baking Soda Residue: If you’re having trouble removing all the baking soda residue, try using a stronger vinegar solution. You can also try using a steam cleaner to loosen the residue.
* Oven Door Glass: The oven door glass can be tricky to clean. If you have baked-on grease on the glass, try using a razor blade scraper to gently scrape it away. Be careful not to scratch the glass.
* Self-Cleaning Ovens: While this method is generally safe for self-cleaning ovens, it’s always a good idea to check your oven’s manual before using any cleaning products. Some manufacturers recommend against using baking soda or vinegar in self-cleaning ovens.
* Preventative Measures: To keep your oven cleaner for longer, try wiping up spills as soon as they happen. You can also use oven liners to catch drips and spills.
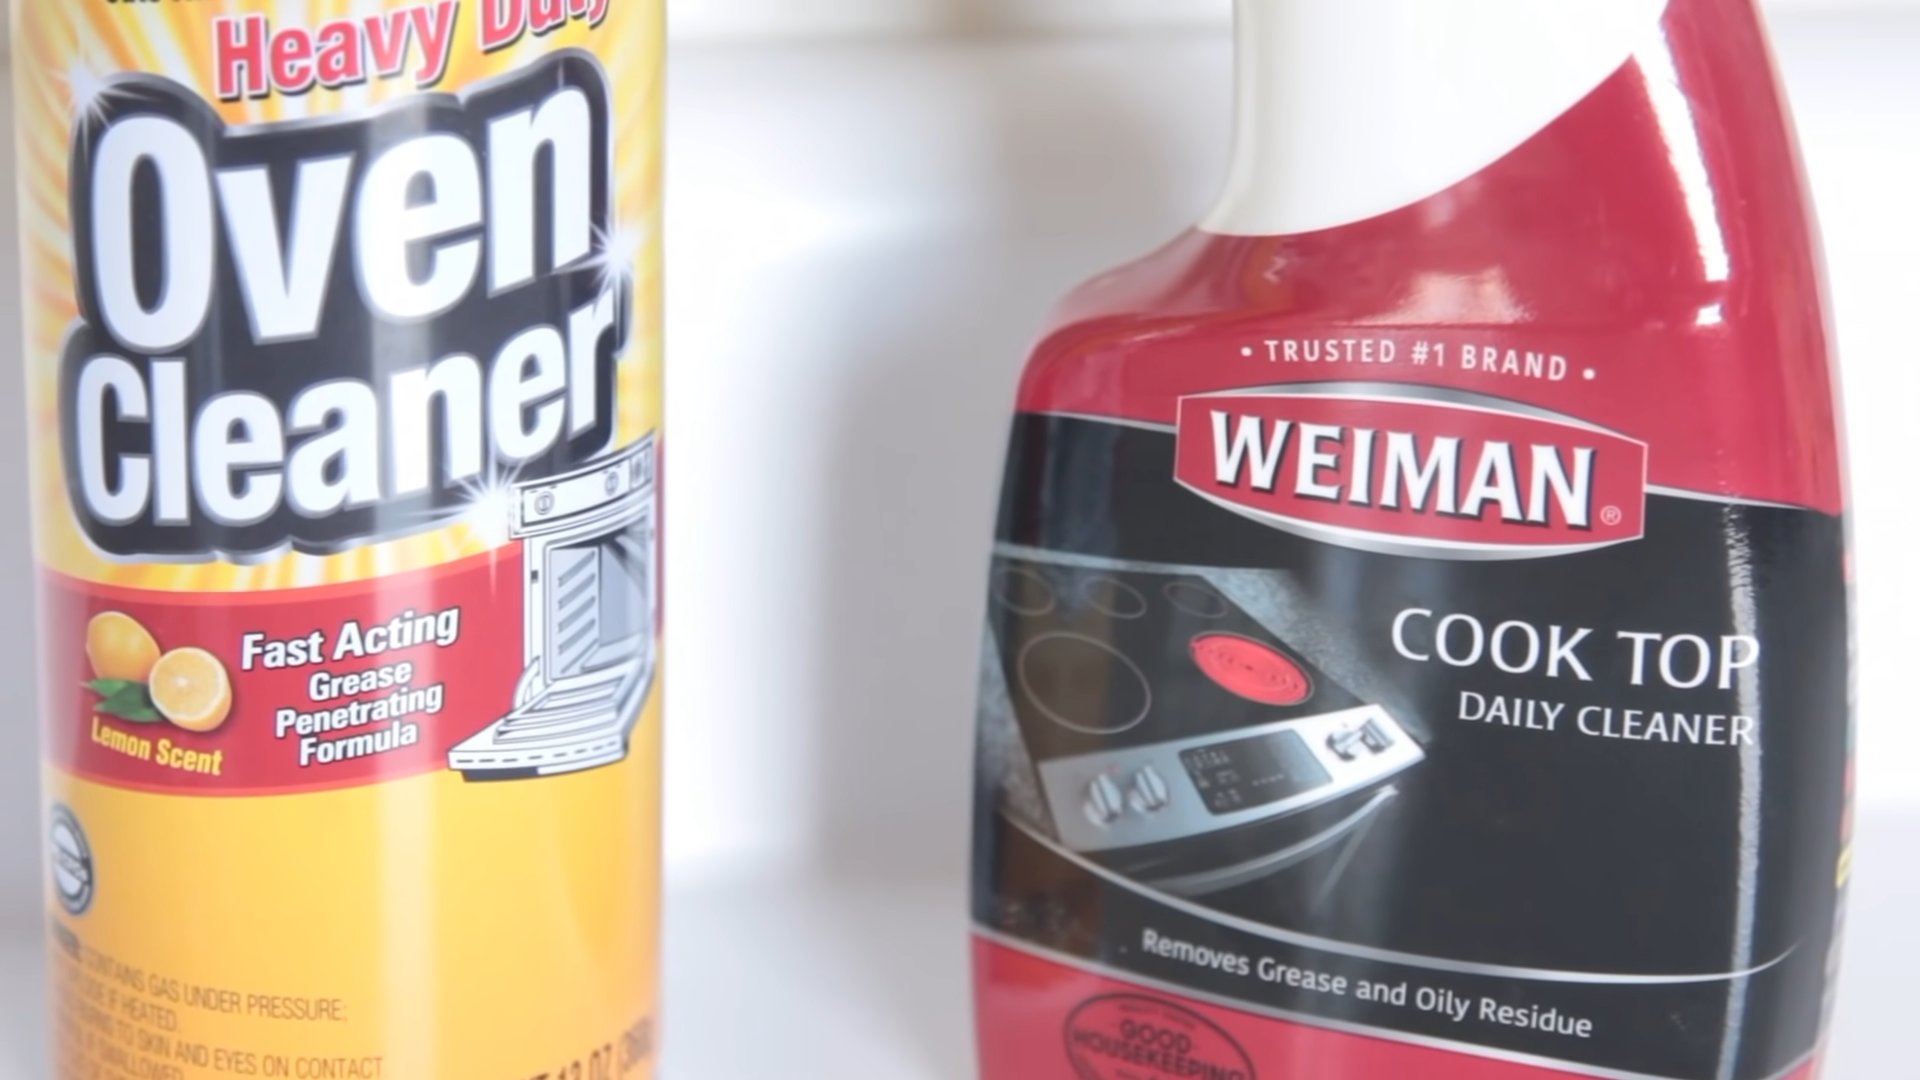
Alternative Cleaning Solutions (If Baking Soda Isn’t Cutting It)
While baking soda and vinegar are my go-to for oven cleaning, sometimes you need a little extra oomph. Here are a couple of alternative solutions you can try:
* Dish Soap and Water: For light grease and grime, a simple solution of dish soap and water can be effective. Mix a few drops of dish soap with warm water and use a sponge or cloth to wipe down the oven.
* Lemon Juice: Lemon juice is a natural degreaser and can help to remove stubborn stains. Cut a lemon in half and rub it on the affected areas. Let it sit for a few minutes, then wipe it away with a damp cloth.
* Borax: Borax is a natural mineral that can be used as a cleaning agent. Mix borax with water to form a paste and apply it to the oven. Let it sit for a few hours, then wipe it away with a damp cloth. **Important Note:** Borax can be irritating to the skin, so be sure to wear gloves when using it.
Maintaining Your Clean Oven
Once
Conclusion
So, there you have it! Ditching those harsh chemicals and embracing this simple, effective, and budget-friendly DIY oven cleaner is a game-changer for anyone who wants a sparkling clean oven without the lingering fumes and potential health risks. We’ve walked you through the process, highlighting how easy it is to create a powerful cleaning solution using ingredients you likely already have in your pantry.
But why is this DIY trick a must-try? Beyond the obvious cost savings and health benefits, it’s about taking control of your cleaning routine and making conscious choices for your home and family. Commercial oven cleaners are notorious for their aggressive chemicals, which can irritate your skin, eyes, and respiratory system. This DIY alternative offers a gentler, safer approach without sacrificing cleaning power. You’ll be amazed at how effectively baking soda and vinegar can cut through even the most stubborn baked-on grease and grime.
Think of the satisfaction of opening your oven door to reveal a gleaming interior, knowing you achieved that result with natural ingredients. It’s a small victory, but it contributes to a healthier and more sustainable lifestyle. Plus, the process itself is surprisingly therapeutic. There’s something deeply satisfying about watching the baking soda and vinegar fizz and bubble, knowing they’re working their magic to loosen years of accumulated gunk.
Looking for variations? Consider adding a few drops of your favorite essential oil, like lemon or tea tree, to the baking soda paste for an extra boost of freshness and antibacterial properties. For particularly tough stains, you can let the baking soda paste sit overnight before scrubbing. You can also use a pumice stone (carefully!) to gently scrub away stubborn residue after the baking soda has done its work. Remember to always test any cleaning method in an inconspicuous area first.
We wholeheartedly encourage you to give this DIY oven cleaner a try. It’s a simple, effective, and eco-friendly way to tackle a dreaded chore. Once you experience the results, you’ll wonder why you ever relied on harsh chemicals in the first place.
But don’t just take our word for it! We’re eager to hear about your experiences. Did this DIY oven cleaner work wonders for you? Did you discover any helpful variations or tips? Share your thoughts and photos in the comments below. Let’s build a community of DIY cleaning enthusiasts who are committed to creating healthier and more sustainable homes. Your feedback will not only help others but also inspire us to continue exploring and sharing innovative cleaning solutions. So, grab your baking soda, vinegar, and a little elbow grease, and get ready to transform your oven! You’ll be amazed at the difference this simple DIY trick can make.
Frequently Asked Questions (FAQ)
1. Is this DIY oven cleaner safe for all types of ovens?
Generally, yes, this DIY oven cleaner is safe for most ovens, including electric, gas, and convection ovens. However, it’s always a good idea to exercise caution and test the cleaner in an inconspicuous area first, especially if you have a self-cleaning oven with a special coating. Avoid applying the baking soda paste to any heating elements or electrical components. If you have any doubts, consult your oven’s user manual or contact the manufacturer. For self-cleaning ovens, it’s generally recommended to use the self-cleaning function as directed in the manual, but this DIY method can be used for spot cleaning or light maintenance between self-cleaning cycles.
2. How long should I leave the baking soda paste on the oven surfaces?
The ideal time to leave the baking soda paste on the oven surfaces depends on the severity of the grime. For light cleaning, 3-4 hours might be sufficient. However, for heavily soiled ovens with baked-on grease, it’s best to leave the paste on overnight (at least 12 hours). This allows the baking soda to effectively penetrate and loosen the stubborn residue. The longer you leave it on, the easier it will be to scrub away the grime. Just be sure to keep the paste moist by spritzing it with water occasionally if it starts to dry out.
3. What’s the best way to scrub the oven after the baking soda paste has sat?
After the baking soda paste has had time to work its magic, use a non-abrasive sponge, scrub brush, or even an old toothbrush to scrub the oven surfaces. For stubborn areas, you can use a plastic scraper or a pumice stone (use very gently to avoid scratching). Avoid using steel wool or abrasive scouring pads, as these can damage the oven’s interior. Work in small sections, applying gentle pressure and scrubbing in a circular motion. Rinse the sponge or brush frequently with warm water to remove the loosened grime.
4. How do I remove the baking soda residue after scrubbing?
After scrubbing, use a clean, damp cloth or sponge to wipe away the baking soda residue. Rinse the cloth or sponge frequently with warm water. You may need to repeat this process several times to remove all traces of the baking soda. For hard-to-reach areas, you can use a spray bottle filled with water to rinse away the residue. Once you’ve removed all the baking soda, dry the oven interior with a clean towel.
5. Can I use this DIY oven cleaner on the oven door glass?
Yes, this DIY oven cleaner is safe and effective for cleaning the oven door glass. Apply the baking soda paste to the glass, let it sit for a few hours or overnight, and then scrub with a non-abrasive sponge. Rinse thoroughly with water and dry with a clean cloth. For particularly stubborn stains on the glass, you can try using a razor blade scraper (carefully!) to gently remove the residue.
6. What if the baking soda and vinegar mixture doesn’t fizz?
The fizzing action is a result of the chemical reaction between baking soda (a base) and vinegar (an acid). If you don’t see fizzing, it could be due to a few reasons:
* **Old baking soda:** Baking soda can lose its potency over time. Make sure your baking soda is fresh.
* **Weak vinegar:** Use white vinegar with at least 5% acidity.
* **Incorrect proportions:** Ensure you’re using the correct ratio of baking soda to vinegar.
* **Surface already clean:** If the surface is relatively clean, there may not be much to react with.
Even if it doesn’t fizz dramatically, the mixture will still work to loosen grime.
7. How often should I clean my oven using this DIY method?
The frequency of cleaning depends on how often you use your oven and how messy it gets. For most households, cleaning the oven every 1-3 months is sufficient. However, if you frequently cook messy dishes or notice a buildup of grease and grime, you may need to clean it more often. Regular cleaning will prevent the buildup of stubborn stains and make the cleaning process easier.
8. Can I use this DIY cleaner on other kitchen appliances?
While this DIY cleaner is primarily designed for ovens, it can also be used on other kitchen appliances, such as stovetops, microwaves, and even stainless steel surfaces. However, it’s important to test the cleaner in an inconspicuous area first to ensure it doesn’t damage the surface. Avoid using it on delicate surfaces like painted cabinets or natural stone countertops.
9. What are some alternative ingredients I can use if I don’t have baking soda or vinegar?
While baking soda and vinegar are the key ingredients in this DIY oven cleaner, you can try using alternatives in a pinch. For example, you can use cream of tartar mixed with water to create a paste similar to baking soda. Lemon juice can also be used as a substitute for vinegar, although it may not be as effective at cutting through grease. However, for the best results, we recommend sticking with baking soda and vinegar.
10. Is there a way to prevent my oven from getting so dirty in the first place?
Absolutely! Prevention is key to keeping your oven clean and reducing the need for frequent deep cleanings. Here are a few tips:
* **Use oven liners:** Oven liners can catch spills and drips, preventing them from baking onto the oven floor.
* **Cover dishes:** When cooking dishes that are prone to splattering, cover them with a lid or aluminum foil.
* **Wipe up spills immediately:** If you notice a spill in the oven, wipe it up as soon as possible before it has a chance to bake on.
* **Regularly clean the oven door:** The oven door is often the first place to show signs of grime. Wipe it down regularly with a damp cloth.
* **Consider a splatter guard:** Using a splatter guard on your stovetop can also help reduce the amount of grease and grime that ends up in your oven.
By following these simple tips, you can keep your oven cleaner for longer and reduce the need for harsh chemicals.
Leave a Comment