
Grow Mini Carrots at Home? Absolutely! Imagine plucking sweet, perfectly sized mini carrots straight from your own garden – a delightful addition to salads, snacks, or even a charming garnish. Forget those bland, store-bought carrots; we’re talking about vibrant, flavorful, homegrown goodness!
For centuries, cultivating our own food has been a deeply ingrained part of human culture. From ancient civilizations tending to their plots to modern-day urban gardeners, the desire to connect with the earth and nurture life has always been present. While large-scale agriculture has its place, there’s something incredibly satisfying about growing your own produce, even on a small scale. And let’s be honest, who wouldn’t want to impress their friends and family with their gardening prowess?
But why grow mini carrots at home specifically? Well, for starters, they’re incredibly easy to manage, even in limited spaces like balconies or patios. Plus, they mature quickly, meaning you’ll be enjoying your harvest sooner than you think! In this article, I’m going to share some simple yet effective DIY tricks and hacks that will help you cultivate a thriving mini carrot patch, regardless of your gardening experience. We’ll cover everything from choosing the right seeds and soil to mastering watering techniques and pest control. Get ready to unleash your inner gardener and enjoy the delicious rewards of your labor!
Grow Your Own Adorable Mini Carrots: A DIY Guide
Hey there, fellow gardening enthusiasts! Ever dreamed of harvesting a batch of perfectly petite, sweet mini carrots right from your own home? Well, dream no more! This guide will walk you through every step of growing these delightful veggies, even if you’re a complete beginner. I promise, it’s easier than you think, and the reward of fresh, homegrown mini carrots is totally worth it!
Choosing Your Carrot Variety
First things first, you need to pick the right carrot variety. Not all carrots are created equal when it comes to mini-ness! Look for varieties specifically bred to be small and round. Here are a few of my favorites:
* ‘Paris Market’: These are classic round carrots, about the size of a golf ball. They’re super cute and have a lovely sweet flavor.
* ‘Thumbelina’: Similar to Paris Market, these are also round and perfect for small spaces.
* ‘Little Finger’: These are more cylindrical than round, but still very small and tender.
* ‘Short n Sweet’: As the name suggests, these are short, sweet, and perfect for snacking.
You can usually find seeds for these varieties at your local garden center or online. Make sure to check the seed packet for specific growing instructions, as they can vary slightly.
Preparing Your Growing Space
Mini carrots don’t need a ton of space, which makes them perfect for container gardening. You can grow them in pots, raised beds, or even window boxes! Here’s what you need to consider:
* Container Size: Choose a container that’s at least 6-8 inches deep. This will give the carrots enough room to develop properly. The wider the container, the more carrots you can grow.
* Drainage: Excellent drainage is crucial. Carrots hate sitting in soggy soil, which can lead to rot. Make sure your container has drainage holes at the bottom.
* Soil: Carrots thrive in loose, well-draining soil. Avoid heavy clay soils, as they can restrict root growth. I recommend using a mix of potting soil, compost, and a little bit of sand or perlite to improve drainage.
* Sunlight: Carrots need at least 6 hours of sunlight per day. Choose a sunny spot for your container.
Planting Your Mini Carrot Seeds
Now for the fun part – planting! Here’s how to get your mini carrot garden started:
1. Prepare the Soil: Fill your container with your chosen soil mix, leaving about an inch of space at the top. Gently pat the soil down to create a firm surface.
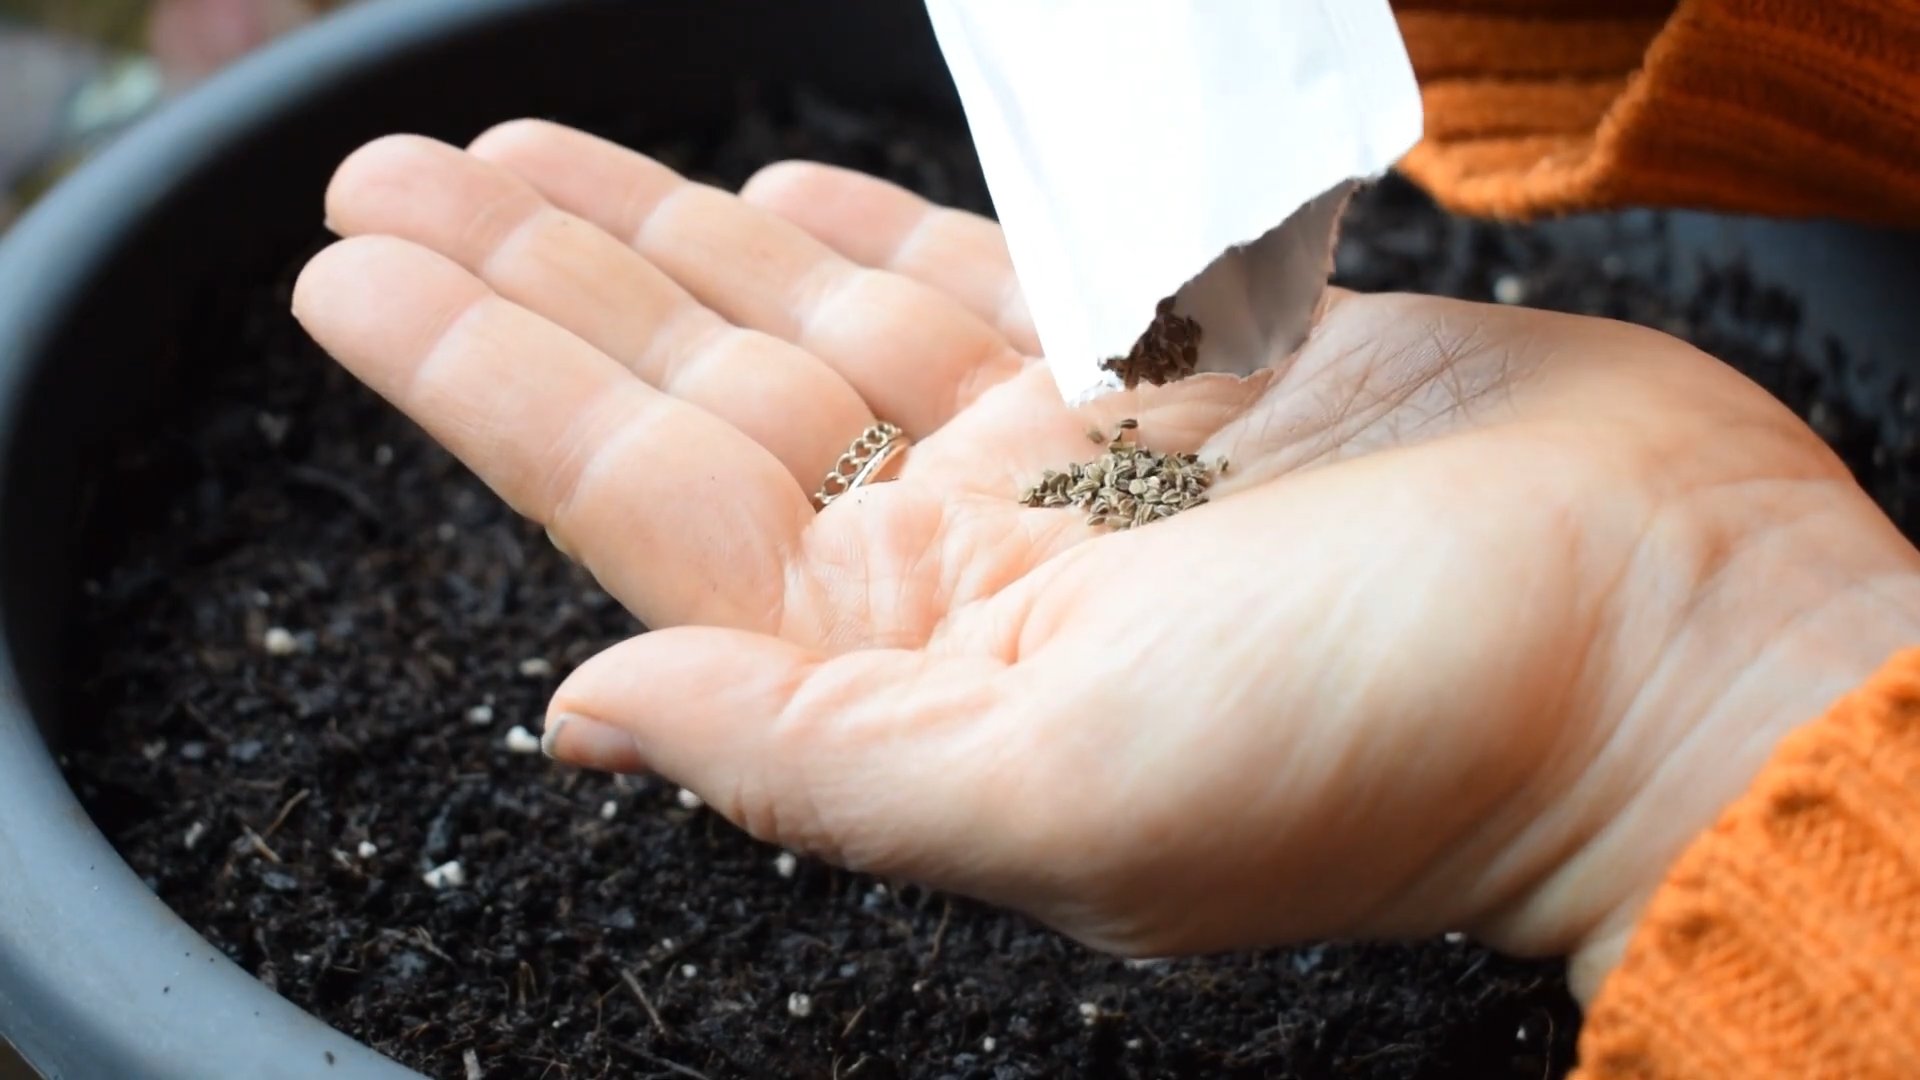
2. Sow the Seeds: Carrot seeds are tiny, so it’s easy to sow them too densely. To avoid overcrowding, try mixing the seeds with a bit of sand before sowing. This will help you spread them out more evenly. Sprinkle the seeds thinly over the surface of the soil.
3. Cover the Seeds: Lightly cover the seeds with a thin layer of soil (about ¼ inch). Gently pat the soil down again.
4. Water Thoroughly: Water the soil gently but thoroughly, using a watering can with a rose head or a spray bottle. You want to moisten the soil without disturbing the seeds.
5. Keep it Moist: Carrot seeds need consistent moisture to germinate. Keep the soil consistently moist, but not waterlogged, until the seedlings emerge. You can cover the container with plastic wrap or a humidity dome to help retain moisture.
Caring for Your Mini Carrots
Once your seedlings emerge (usually within 1-3 weeks), it’s time to start caring for them. Here’s what you need to do:
1. Thinning: This is probably the most important step for growing healthy mini carrots. If you don’t thin your seedlings, they’ll compete for resources and you’ll end up with a bunch of stunted carrots. Once the seedlings are about 1-2 inches tall, thin them to about 1-2 inches apart. Gently pull out the weaker seedlings, leaving the strongest ones to grow. Don’t be afraid to thin aggressively – it’s better to have fewer, healthier carrots than a crowded mess.
2. Watering: Water your carrots regularly, especially during dry spells. The soil should be consistently moist, but not waterlogged. Water deeply, allowing the water to soak into the soil. Avoid watering the foliage, as this can encourage fungal diseases.
3. Fertilizing: Carrots are not heavy feeders, but they will benefit from a light feeding of fertilizer. Use a balanced fertilizer (e.g., 10-10-10) diluted to half strength. Fertilize every 2-3 weeks. Alternatively, you can amend the soil with compost tea.
4. Weeding: Keep your carrot patch free of weeds. Weeds compete with carrots for resources and can also harbor pests and diseases. Gently pull out any weeds that you see.
5. Sunlight: Ensure your carrots are getting at least 6 hours of sunlight per day. If you’re growing them indoors, you may need to supplement with grow lights.
6. Pest Control: Carrots can be susceptible to a few pests, such as carrot rust flies and aphids. Inspect your plants regularly for signs of pests. If you find any, you can try spraying them with insecticidal soap or neem oil. You can also use row covers to protect your carrots from pests.
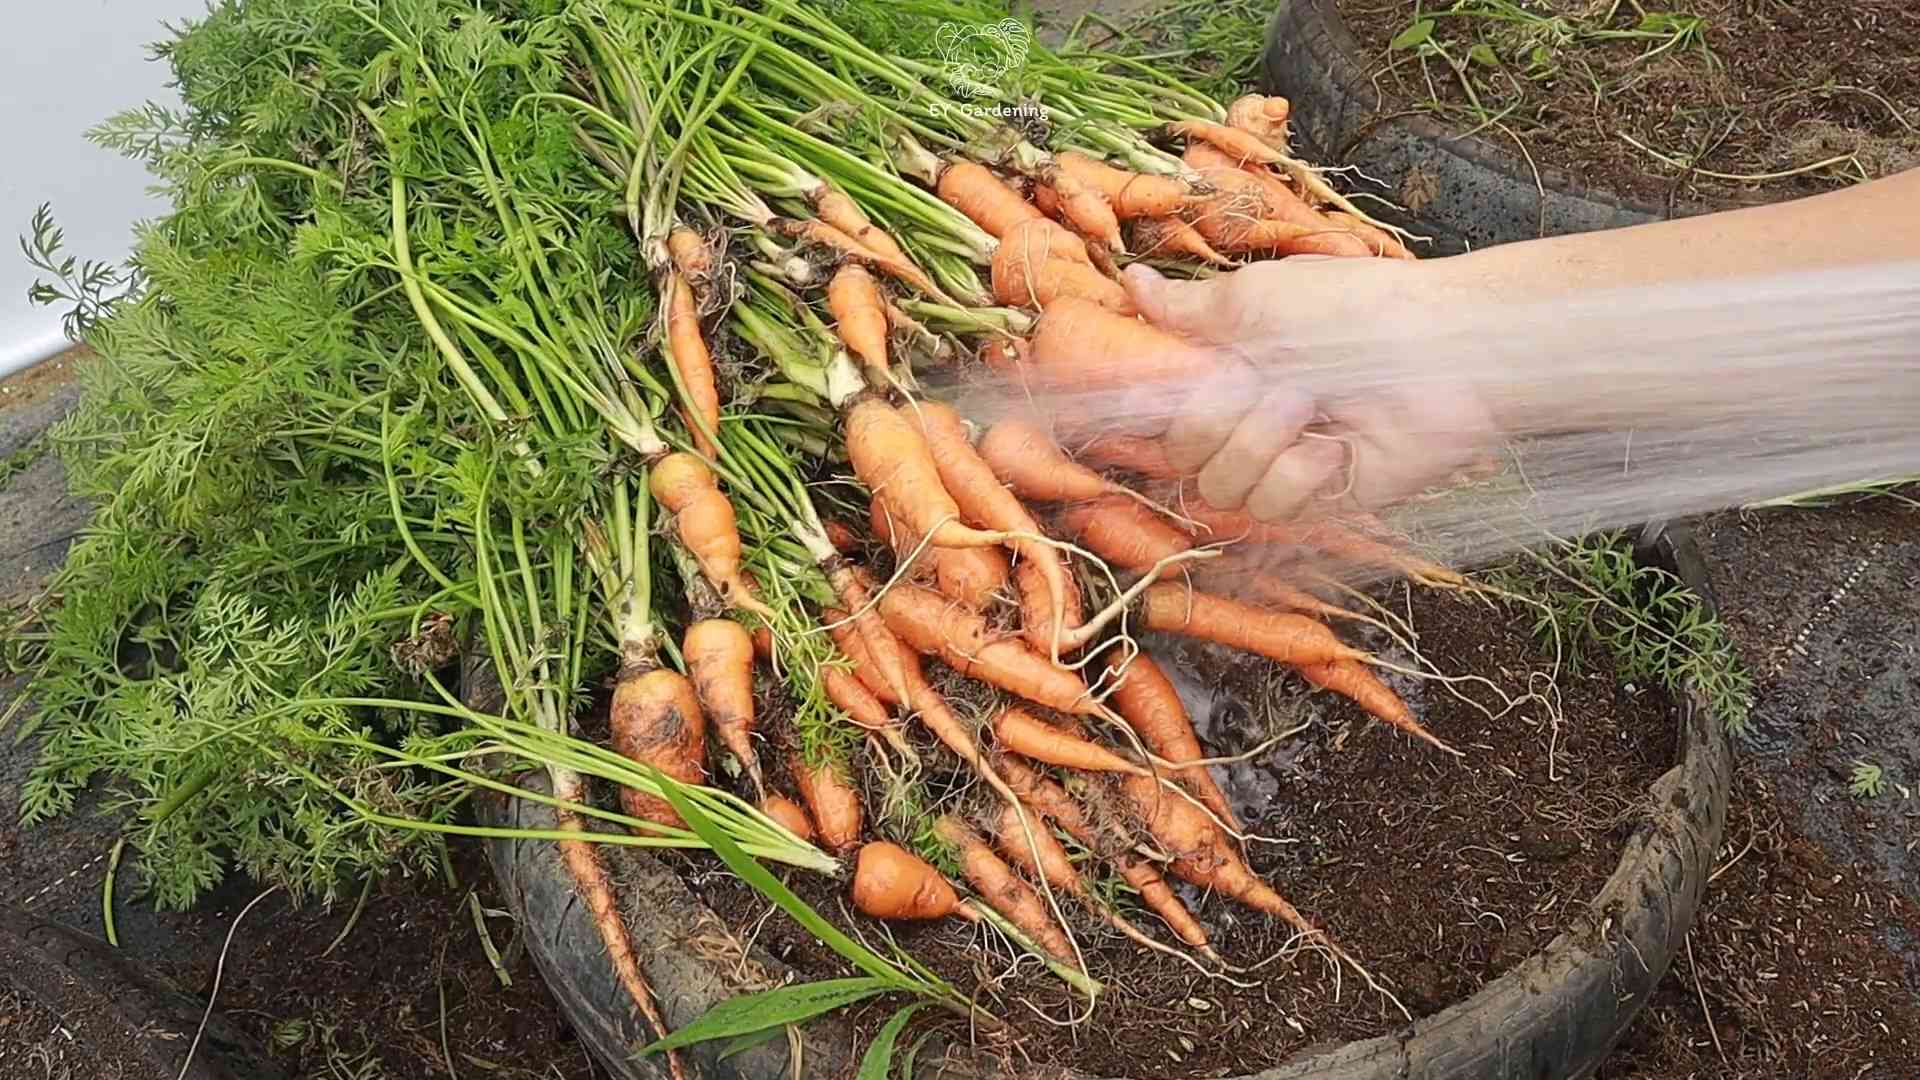
Harvesting Your Mini Carrots
The best part! Mini carrots are usually ready to harvest in 50-70 days, depending on the variety. Here’s how to tell when they’re ready:
* Size: Check the seed packet for the expected size of your chosen variety. Mini carrots are usually ready to harvest when they’re about 1-2 inches in diameter.
* Color: The carrots should be a vibrant orange color.
* Feel: Gently feel the top of the carrot. It should feel firm and plump.
To harvest your carrots, gently loosen the soil around them with a trowel or fork. Then, carefully pull them out of the ground. If the soil is dry, you may need to water it first to make it easier to pull the carrots.
Troubleshooting
Even with the best care, you might encounter a few problems along the way. Here are some common issues and how to fix them:
* Poor Germination: If your seeds aren’t germinating, it could be due to several factors:
* Old Seeds: Carrot seeds have a relatively short shelf life. Make sure your seeds are fresh.
* Dry Soil: Carrot seeds need consistent moisture to germinate. Keep the soil consistently moist.
* Cold Soil: Carrot seeds germinate best in warm soil. If the soil is too cold, they may not germinate.
* Forked Roots: Forked roots are usually caused by compacted soil or rocks in the soil. Make sure your soil is loose and well-draining. Remove any rocks or debris from the soil before planting.
* Stunted Growth: Stunted growth can be caused by several factors:
* Overcrowding: Thin your seedlings to give them enough space to grow.
* Poor Soil: Carrots need loose, well-draining soil. Amend your soil with compost and sand or perlite.
* Lack of Sunlight: Carrots need at least 6 hours of sunlight per day.
* Lack of Nutrients: Fertilize your carrots regularly with a balanced fertilizer.
* Pests and Diseases: Inspect your plants regularly for signs of pests and diseases. Treat any problems promptly.
Enjoying Your Homegrown Mini Carrots
Congratulations! You’ve successfully grown your own mini carrots. Now it’s time to enjoy the fruits (or rather, vegetables) of your labor. Mini carrots are delicious raw, dipped in hummus or ranch dressing. They’re also great roasted, steamed, or added to salads and soups.
Here are a few ideas for using your homegrown mini carrots:
* Snack on them raw: They’re perfect for a healthy and delicious snack.
* Add them to salads: They add a pop of color and sweetness to any salad.
* Roast them with other vegetables: They’re delicious roasted with potatoes, Brussels sprouts, and other root vegetables.
* Steam them and serve them with butter and herbs: A simple and elegant side dish.
* Make carrot juice: Freshly squeezed carrot juice is packed with vitamins and nutrients.
* Pickle them: Pickled carrots are a tangy and flavorful condiment.
Growing your own mini carrots is a rewarding experience that’s both fun and educational. I hope this guide has inspired you to give it a try. Happy gardening!
Conclusion
So, there you have it! Growing mini carrots at home is not only achievable, but it’s also a rewarding and surprisingly simple process. Forget those bland, pre-packaged baby carrots from the grocery store. With a little patience and these easy steps, you can cultivate your own vibrant, sweet, and tender mini carrots right in your own backyard, balcony, or even on a sunny windowsill.
Why is this DIY trick a must-try? Because it puts you in control. You choose the variety, ensuring you get the flavor profile you crave. You control the growing conditions, guaranteeing organic and pesticide-free produce. And perhaps most importantly, you experience the unique satisfaction of nurturing something from seed to table. Imagine the delight of serving a salad featuring carrots you grew yourself, knowing exactly where they came from and how they were cared for.
Beyond the basic method, there’s plenty of room for experimentation. Try different varieties of carrots specifically bred for smaller sizes, such as ‘Parisian’ or ‘Thumbelina’. These round, bite-sized carrots are perfect for container gardening and offer a delightful sweetness. You could also explore companion planting, pairing your mini carrots with herbs like rosemary or sage, which are said to deter pests and enhance flavor. Consider adding a layer of mulch to help retain moisture and suppress weeds, further simplifying the growing process.
For those with limited space, vertical gardening is an excellent option. Utilize hanging baskets or tiered planters to maximize your growing area and create a visually appealing display. Remember to choose a well-draining potting mix and provide adequate sunlight for optimal growth.
Don’t be intimidated if you’re a beginner gardener. Growing mini carrots is a forgiving process, and even if you encounter a few bumps along the way, the learning experience is invaluable. The key is to start small, be patient, and observe your plants closely. Pay attention to their needs and adjust your care accordingly.
We wholeheartedly encourage you to give this DIY trick a try. It’s a fun, educational, and ultimately delicious way to connect with nature and enjoy the fruits (or rather, vegetables) of your labor. Once you’ve harvested your first batch of homegrown mini carrots, we’d love to hear about your experience! Share your photos, tips, and any variations you’ve tried in the comments below. Let’s create a community of mini carrot enthusiasts and inspire others to embrace the joy of homegrown produce. So, grab your seeds, get your hands dirty, and embark on your mini carrot growing adventure today! You’ll be amazed at how easy and rewarding it is to **grow mini carrots** at home.
Frequently Asked Questions (FAQ)
What is the best time of year to plant mini carrots?
The best time to plant mini carrots depends on your climate. In general, carrots are a cool-season crop, so the ideal planting times are early spring or late summer/early fall. For spring planting, sow seeds as soon as the soil can be worked, typically a few weeks before the last expected frost. For fall planting, sow seeds about 2-3 months before the first expected frost. This will give the carrots enough time to mature before the weather turns too cold. If you live in a region with mild winters, you may be able to grow carrots year-round.
What kind of soil is best for growing mini carrots?
Mini carrots thrive in loose, well-drained soil that is rich in organic matter. Avoid heavy clay soils, as they can restrict root growth and result in misshapen carrots. Amend heavy soils with compost, aged manure, or other organic materials to improve drainage and aeration. The ideal soil pH for carrots is between 6.0 and 6.8. Before planting, remove any rocks, stones, or debris from the soil, as these can also hinder root development. A raised bed or container filled with a high-quality potting mix is an excellent option for growing mini carrots, especially if your native soil is poor.
How much sunlight do mini carrots need?
Mini carrots require at least 6 hours of direct sunlight per day to grow properly. Choose a planting location that receives full sun for most of the day. If you are growing carrots indoors, place them near a sunny window or use grow lights to supplement natural light. Insufficient sunlight can result in leggy growth and smaller, less flavorful carrots.
How often should I water my mini carrots?
Consistent moisture is essential for growing healthy mini carrots. Water deeply and regularly, especially during dry periods. Aim to keep the soil consistently moist but not waterlogged. Overwatering can lead to root rot, while underwatering can cause the carrots to become stunted and bitter. A good rule of thumb is to water when the top inch of soil feels dry to the touch. Mulching around the plants can help retain moisture and reduce the need for frequent watering.
How long does it take for mini carrots to mature?
Mini carrots typically mature in 50-70 days, depending on the variety and growing conditions. Check the seed packet for specific maturity dates. You can start harvesting carrots when they reach the desired size, even if they are not fully mature. Baby carrots can be harvested as early as 50 days, while larger varieties may take longer. To harvest, gently loosen the soil around the carrot and pull it out by the greens.
Do I need to thin my mini carrots?
Yes, thinning is crucial for growing healthy mini carrots. Carrots seeds are tiny, and it’s easy to sow them too densely. Overcrowding can lead to stunted growth and misshapen carrots. Thin seedlings when they are about 1-2 inches tall, spacing them about 1-2 inches apart. Use scissors to snip off the unwanted seedlings at the soil line, rather than pulling them out, as this can disturb the roots of the remaining plants.
What are some common pests and diseases that affect mini carrots?
Some common pests that can affect mini carrots include carrot rust flies, aphids, and nematodes. Carrot rust flies lay their eggs near the base of the plants, and the larvae burrow into the roots, causing damage. Aphids suck sap from the leaves, weakening the plants. Nematodes are microscopic worms that can damage the roots. To prevent pest problems, practice good garden hygiene, such as removing weeds and debris, and consider using row covers to protect your plants. Common diseases that can affect mini carrots include leaf blight and root rot. Leaf blight causes brown spots on the leaves, while root rot causes the roots to decay. To prevent disease problems, ensure good air circulation around the plants and avoid overwatering.
Can I grow mini carrots in containers?
Yes, mini carrots are well-suited for container gardening. Choose a container that is at least 6-8 inches deep and has drainage holes. Fill the container with a high-quality potting mix. Sow seeds directly into the container, following the spacing guidelines on the seed packet. Water regularly and fertilize as needed. Place the container in a sunny location that receives at least 6 hours of direct sunlight per day.
How do I store mini carrots after harvesting?
To store mini carrots after harvesting, remove the greens and wash the carrots thoroughly. Pat them dry and store them in a plastic bag or container in the refrigerator. Carrots can last for several weeks when stored properly. You can also freeze carrots for longer storage. To freeze carrots, blanch them in boiling water for 2-3 minutes, then transfer them to an ice bath to stop the cooking process. Drain the carrots and store them in freezer bags or containers.


Leave a Comment