
Growing Cherry Tomatoes can feel like a daunting task, especially if you’re new to home gardening. But what if I told you that with a few clever DIY tricks and hacks, you could be harvesting baskets of these sweet, juicy gems right from your own backyard (or balcony!)? Forget those bland, store-bought tomatoes – we’re talking about bursting-with-flavor, sun-ripened goodness that will elevate your salads, snacks, and sauces to a whole new level.
The history of tomatoes is fascinating! Originating in South America, they were initially viewed with suspicion in Europe, even considered poisonous! Thankfully, that misconception faded, and tomatoes, including the delightful cherry tomato, became a culinary staple worldwide. Today, growing your own is a way to connect with that history and enjoy a taste of nature’s bounty.
Why do you need these DIY tricks? Because let’s face it, gardening can be tricky! Pests, diseases, and unpredictable weather can all threaten your precious tomato plants. But with the right knowledge and a little ingenuity, you can overcome these challenges and create a thriving cherry tomato garden. I’m here to share my favorite, tried-and-true methods for growing cherry tomatoes successfully, even if you have limited space or experience. Get ready to roll up your sleeves and discover the secrets to a bountiful harvest!
Growing Cherry Tomatoes: A DIY Guide to Sweet Success
Okay, tomato lovers, let’s dive into the wonderful world of growing your own cherry tomatoes! I’m going to walk you through everything you need to know, from seed to delicious, juicy harvest. Trust me, there’s nothing quite like popping a sun-warmed, homegrown cherry tomato into your mouth. It’s a taste of summer you won’t forget!
Choosing Your Cherry Tomato Variety
First things first, let’s talk varieties. There are so many amazing cherry tomato options out there! Here are a few of my personal favorites, and why I love them:
* Sungold: These are incredibly sweet and have a beautiful golden-orange color. They’re a bit more prone to cracking, but the flavor is worth it!
* Sweet Million: As the name suggests, these produce tons of small, red, super-sweet tomatoes. They’re very prolific and relatively easy to grow.
* Black Cherry: These have a unique, slightly smoky flavor and a gorgeous deep purple color. They’re a bit more disease-resistant than some other varieties.
* Gardener’s Delight: A classic choice! These are reliable, flavorful, and produce well.
* Grape Tomatoes: While technically not cherry tomatoes, they are very similar and easy to grow.
Consider your climate and space when choosing your variety. Some are more compact and suitable for containers, while others need more room to sprawl.
Starting Your Seeds (or Buying Seedlings)
You have two options here: starting your own seeds indoors or buying seedlings from a nursery. Starting from seed gives you more control over the variety and can be more cost-effective, but it requires a bit more time and effort.
Starting Seeds Indoors (6-8 Weeks Before Last Frost)
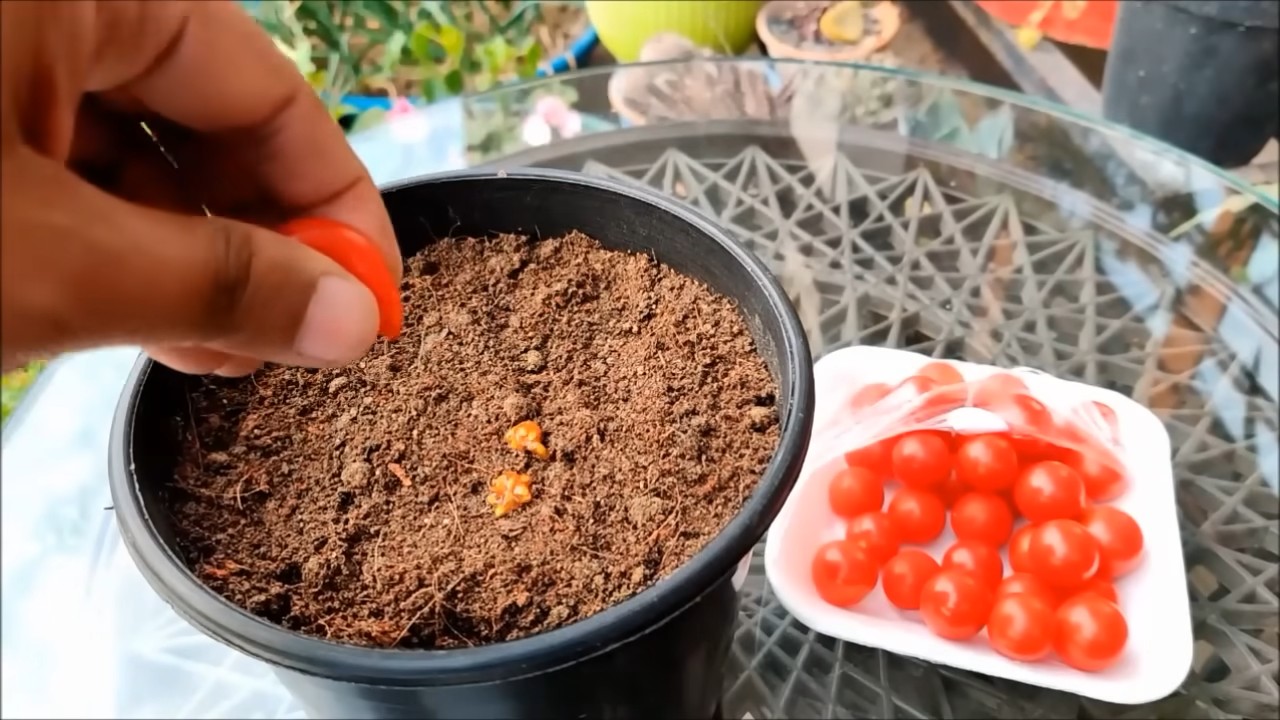
1. Gather Your Supplies: You’ll need seed starting trays or small pots, seed starting mix (not regular potting soil!), a spray bottle, a heat mat (optional but helpful), and a grow light (also optional, but highly recommended).
2. Sow the Seeds: Moisten the seed starting mix and fill your trays or pots. Sow the seeds about 1/4 inch deep, and gently cover them with more mix.
3. Water Gently: Use a spray bottle to mist the soil. You want it to be moist, but not soggy.
4. Provide Warmth and Light: Place the trays on a heat mat (if using) and under a grow light. If you don’t have a grow light, a sunny windowsill will work, but the seedlings might get leggy (tall and spindly).
5. Keep the Soil Moist: Check the soil daily and mist as needed to keep it moist.
6. Thin the Seedlings: Once the seedlings have their first true leaves (the second set of leaves that appear after the initial seed leaves), thin them out so that only one strong seedling remains in each cell or pot.
7. Harden Off the Seedlings: About a week before you plan to transplant them outdoors, start hardening off the seedlings. This means gradually exposing them to outdoor conditions. Start by placing them outside for an hour or two each day, gradually increasing the time over the course of the week. Protect them from strong winds and direct sunlight at first.
Buying Seedlings
If you’re buying seedlings, choose healthy-looking plants with sturdy stems and no signs of disease or pests. Avoid plants that are root-bound (roots circling around the bottom of the pot).
Preparing Your Garden Bed or Containers
Cherry tomatoes need plenty of sunshine (at least 6-8 hours per day) and well-drained soil.
1. Choose a Sunny Location: Select a spot in your garden that gets plenty of sunshine.
2. Prepare the Soil: Amend the soil with compost or other organic matter to improve drainage and fertility. Cherry tomatoes are heavy feeders, so rich soil is essential. If you’re using containers, choose a large pot (at least 10 gallons) with drainage holes and fill it with a high-quality potting mix.
3. Consider Support: Cherry tomatoes can get quite tall and sprawling, so it’s a good idea to provide support. You can use stakes, cages, or trellises. I personally prefer cages because they provide good support and allow the plant to grow naturally.
Transplanting Your Seedlings
Once the danger of frost has passed and the soil has warmed up, it’s time to transplant your seedlings into the garden or containers.
1. Dig a Hole: Dig a hole that’s slightly larger than the root ball of the seedling.
2. Add Fertilizer: Add a handful of slow-release tomato fertilizer to the hole.
3. Remove the Seedling: Gently remove the seedling from its pot, being careful not to damage the roots.
4. Plant the Seedling: Place the seedling in the hole and backfill with soil. Bury the stem up to the first set of leaves. This will encourage the plant to develop more roots along the buried stem, making it stronger and more productive.
5. Water Thoroughly: Water the seedling thoroughly after planting.
6. Add Mulch: Add a layer of mulch around the base of the plant to help retain moisture and suppress weeds. Straw, wood chips, or shredded leaves are all good options.
Caring for Your Cherry Tomato Plants
Now that your plants are in the ground, it’s time to give them the care they need to thrive.
1. Water Regularly: Cherry tomatoes need consistent watering, especially during hot, dry weather. Water deeply and infrequently, rather than shallowly and frequently. Aim to water at the base of the plant to avoid wetting the leaves, which can lead to disease.
2. Fertilize Regularly: Feed your cherry tomato plants every 2-3 weeks with a balanced tomato fertilizer. Follow the instructions on the fertilizer package.
3. Prune Your Plants: Pruning can help improve air circulation and encourage fruit production. Remove suckers (the small shoots that grow between the main stem and the branches) to direct the plant’s energy towards fruit production.
4. Provide Support: As the plants grow, make sure they have adequate support. Tie the stems to the stakes or cage as needed.
5. Watch Out for Pests and Diseases: Keep an eye out for common tomato pests and diseases, such as aphids, tomato hornworms, and blight. Take action promptly if you notice any problems. Insecticidal soap or neem oil can be effective for controlling many pests. For diseases, try to improve air circulation and avoid overhead watering.
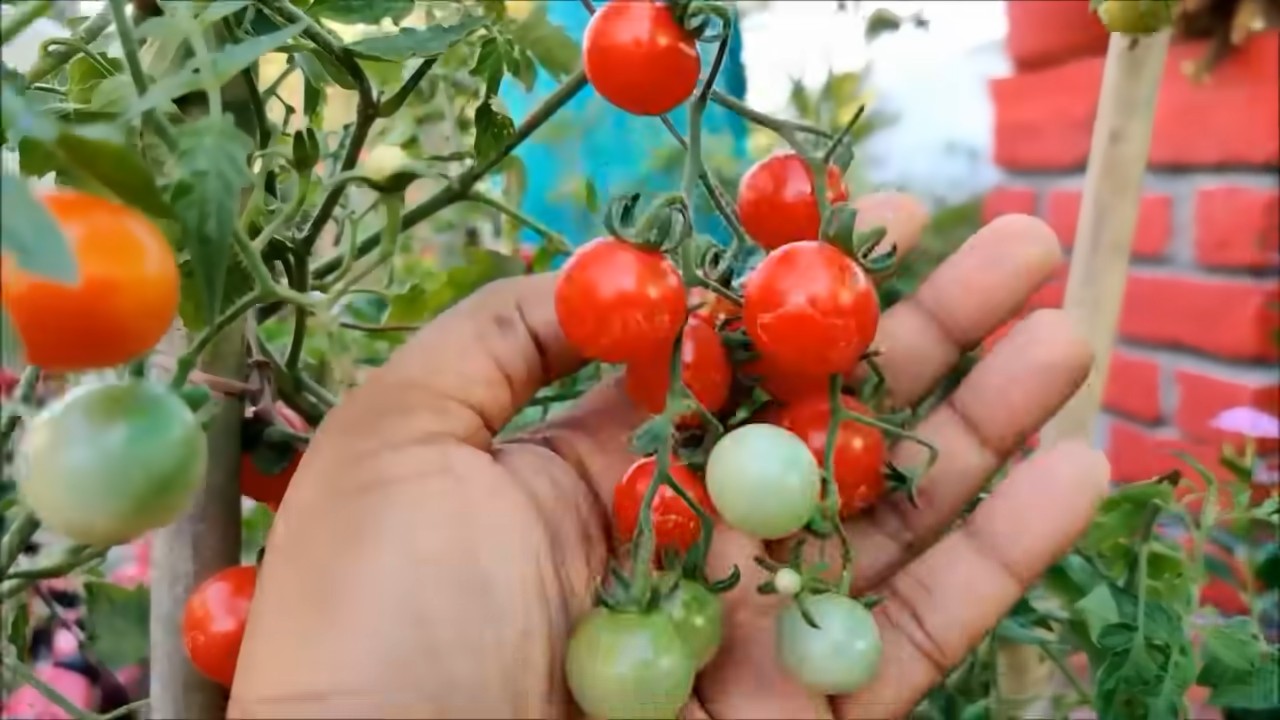
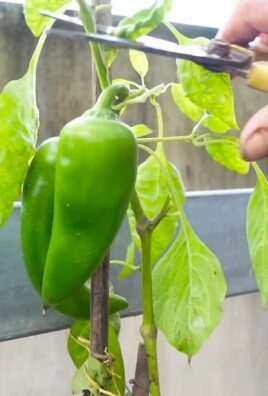
Harvesting Your Cherry Tomatoes
The best part! Cherry tomatoes are usually ready to harvest about 60-80 days after transplanting.
1. Pick When Ripe: Harvest the tomatoes when they are fully colored and slightly soft to the touch.
2. Gently Twist: Gently twist the tomatoes off the vine.
3. Enjoy! Enjoy your delicious, homegrown cherry tomatoes! They’re great in salads, snacks, or just eaten straight off the vine.
Troubleshooting Common Problems
Even with the best care, you might encounter some problems along the way. Here are a few common issues and how to address them:
* Blossom End Rot: This is caused by a calcium deficiency and results in a dark, leathery spot on the bottom of the tomato. To prevent blossom end rot, make sure your soil is rich in calcium and water consistently. You can also add calcium to the soil by mixing in crushed eggshells or bone meal.
* Cracking: This is caused by inconsistent watering. To prevent cracking, water regularly and deeply, especially during hot, dry weather.
* Pests: Aphids, tomato hornworms, and other pests can damage your plants. Inspect your plants regularly and take action promptly if you notice any problems. Insecticidal soap or neem oil can be effective for controlling many pests.
* Diseases: Blight and other diseases can affect tomato plants. To prevent diseases, improve air circulation, avoid overhead watering, and choose disease-resistant varieties.
Extending Your Harvest
Want to keep enjoying fresh cherry tomatoes for as long as possible? Here are a few tips:
* Succession Planting: Plant new seedlings every few weeks to extend your harvest season.
* Cold Frames or Greenhouses: Use cold frames or greenhouses to protect your plants from frost and extend the growing season.
* Pickling or Drying: Preserve your excess tomatoes by pickling or drying them.
Growing cherry tomatoes is a rewarding experience that anyone can enjoy. With a little bit of planning and care, you can have a bountiful harvest of sweet, juicy tomatoes all summer long. Happy gardening!
Conclusion
So, there you have it! Mastering the art of growing cherry tomatoes doesn’t require a green thumb blessed by the gardening gods. It’s about understanding a few key principles and applying some clever DIY tricks to maximize your yield and minimize potential problems. This particular method, focusing on [mention the specific DIY trick discussed in the article, e.g., “vertical support using repurposed materials” or “homemade tomato feed”], is a game-changer because it addresses several critical aspects of cherry tomato cultivation simultaneously.
First, it promotes better air circulation, significantly reducing the risk of fungal diseases that can decimate your crop. Second, it encourages stronger stem development, allowing your plants to support the weight of those abundant, juicy cherry tomatoes. And third, it’s incredibly cost-effective, utilizing materials you likely already have around your home. Who doesn’t love saving money while enjoying the fruits (or vegetables!) of their labor?
But the beauty of this DIY approach lies in its adaptability. Feel free to experiment with variations to suit your specific needs and resources. For instance, if you don’t have access to [mention a specific material used in the DIY trick, e.g., “bamboo stakes”], consider using [suggest an alternative material, e.g., “sturdy branches from pruned trees” or “metal conduit”]. If your soil is particularly poor, supplement your homemade tomato feed with a commercially available organic fertilizer. The key is to observe your plants closely and adjust your approach as needed.
Consider exploring different varieties of cherry tomatoes to find your personal favorite. From the classic red cherry tomato to the sweeter yellow or even the more exotic black varieties, there’s a whole world of flavor waiting to be discovered. You can also experiment with growing them in different locations in your garden to see where they thrive best. Some varieties prefer full sun, while others might appreciate a bit of afternoon shade.
Growing cherry tomatoes using this DIY method is not just about producing delicious, homegrown snacks; it’s about connecting with nature, learning new skills, and enjoying the satisfaction of nurturing something from seed to harvest. It’s a rewarding experience that can be shared with family and friends, and it’s a fantastic way to introduce children to the wonders of gardening.
We wholeheartedly encourage you to give this DIY trick a try. Don’t be intimidated if you’re a beginner; even small steps can lead to big results. And most importantly, don’t be afraid to experiment and learn from your mistakes. Gardening is a journey, not a destination.
Once you’ve tried this method, we’d love to hear about your experience! Share your photos, tips, and challenges in the comments section below. Let’s create a community of cherry tomato enthusiasts who are passionate about growing their own food and sharing their knowledge with others. Your insights could be invaluable to someone just starting out, and together, we can all become better gardeners. Happy growing!
Frequently Asked Questions (FAQ)
What are the best varieties of cherry tomatoes to grow using this DIY method?
While this DIY method is generally applicable to most cherry tomato varieties, some tend to thrive particularly well. Determinate varieties, which grow to a specific size and produce all their fruit at once, are often a good choice for smaller spaces or for those who prefer a more manageable harvest. Indeterminate varieties, on the other hand, continue to grow and produce fruit throughout the season, providing a longer harvest period. Popular choices include ‘Sungold’ (known for its exceptional sweetness), ‘Sweet Million’ (a prolific producer), ‘Black Cherry’ (for its unique flavor and color), and ‘Gardener’s Delight’ (a classic, reliable variety). Experimenting with different varieties is part of the fun!
How often should I water my cherry tomato plants?
Watering frequency depends on several factors, including the weather, soil type, and the size of your plants. As a general rule, aim to keep the soil consistently moist but not waterlogged. Check the soil moisture by sticking your finger about an inch deep. If it feels dry, it’s time to water. During hot, dry weather, you may need to water daily, while during cooler, wetter periods, you can water less frequently. Water deeply and thoroughly, ensuring that the water reaches the roots. Avoid watering the foliage, as this can increase the risk of fungal diseases. Using a soaker hose or drip irrigation system can help deliver water directly to the roots and minimize water waste.
What kind of soil is best for growing cherry tomatoes?
Cherry tomatoes prefer well-draining soil that is rich in organic matter. A slightly acidic to neutral pH (around 6.0 to 7.0) is ideal. Before planting, amend your soil with compost, aged manure, or other organic materials to improve its fertility and drainage. If your soil is heavy clay, consider adding sand or perlite to improve drainage. If your soil is sandy, add organic matter to help it retain moisture. You can also purchase a commercially available potting mix specifically formulated for tomatoes.
How much sunlight do cherry tomato plants need?
Cherry tomato plants need at least 6-8 hours of direct sunlight per day to thrive. Choose a location in your garden that receives plenty of sunlight throughout the day. If you live in a particularly hot climate, some afternoon shade may be beneficial to prevent the plants from overheating. If you are growing your cherry tomatoes indoors, you will need to supplement with grow lights to provide adequate light.
How do I prevent pests and diseases from affecting my cherry tomato plants?
Prevention is key when it comes to pests and diseases. Start by choosing disease-resistant varieties. Ensure good air circulation around your plants by spacing them properly and pruning away any suckers (small shoots that grow between the main stem and branches). Regularly inspect your plants for signs of pests or diseases. Common pests include aphids, tomato hornworms, and whiteflies. Common diseases include early blight, late blight, and blossom end rot. If you spot any problems, take action immediately. Organic pest control methods include hand-picking pests, using insecticidal soap, or introducing beneficial insects. For diseases, you can try using copper fungicide or neem oil. Proper watering and fertilization can also help strengthen your plants and make them more resistant to pests and diseases.
Can I grow cherry tomatoes in containers using this DIY method?
Absolutely! In fact, this DIY method can be particularly well-suited for container gardening. Choose a container that is at least 12 inches in diameter and has drainage holes. Use a high-quality potting mix and follow the same principles of watering, fertilizing, and pest control as you would for plants grown in the ground. The DIY support structure can be adapted to fit the size and shape of your container. Container-grown cherry tomatoes may require more frequent watering and fertilization than those grown in the ground, as the soil in containers tends to dry out more quickly.
What is blossom end rot and how can I prevent it?
Blossom end rot is a common problem in tomatoes, characterized by a dark, leathery spot on the bottom of the fruit. It is caused by a calcium deficiency, which is often due to inconsistent watering. To prevent blossom end rot, ensure that your plants receive consistent watering, especially during fruit development. Avoid letting the soil dry out completely between waterings. You can also add calcium to the soil by incorporating bone meal or crushed eggshells. If you suspect a calcium deficiency, you can also use a foliar spray containing calcium.
How do I know when my cherry tomatoes are ripe?
Cherry tomatoes are typically ripe when they are fully colored and slightly soft to the touch. The exact color will depend on the variety you are growing. Ripe cherry tomatoes should also detach easily from the vine. Taste one to make sure it is sweet and flavorful. Overripe cherry tomatoes will be mushy and may have a fermented taste.
How can I store my harvested cherry tomatoes?
Store your harvested cherry tomatoes at room temperature for the best flavor. Avoid refrigerating them, as this can make them mealy. Cherry tomatoes will typically last for about a week at room temperature. If you have a large harvest, you can also freeze them, dry them, or make them into sauce or salsa.
Leave a Comment