
Heirloom Tomatoes Kitchen Garden: Imagine biting into a juicy, sun-ripened tomato bursting with flavor, a flavor unlike anything you’ve ever tasted from the grocery store. That’s the magic of growing your own heirloom tomatoes! For generations, these open-pollinated varieties have been passed down, each with a unique story and a taste that reflects its heritage. From the Brandywine’s creamy texture to the Cherokee Purple’s smoky sweetness, heirloom tomatoes offer a culinary adventure right in your backyard.
But let’s be honest, starting a kitchen garden, especially with finicky heirloom tomatoes, can feel a little daunting. That’s where this DIY guide comes in! I’m going to share some simple yet effective tricks and hacks to help you cultivate a thriving heirloom tomatoes kitchen garden, even if you’re a complete beginner. We’ll cover everything from choosing the right varieties for your climate to building DIY supports and warding off common pests.
Why bother with the effort? Because beyond the incredible taste, growing your own heirloom tomatoes connects you to a rich history and provides a sustainable source of fresh, healthy food. Plus, there’s nothing quite as satisfying as nurturing a plant from seed to harvest. So, grab your gardening gloves, and let’s get started on creating your own delicious and rewarding heirloom tomato haven!
Creating Your Own Heirloom Tomato Kitchen Garden
Okay, tomato lovers, let’s dive into the wonderful world of heirloom tomatoes! I’m going to walk you through creating your very own kitchen garden dedicated to these flavorful beauties. It’s easier than you think, and the reward of fresh, unique tomatoes all summer long is absolutely worth the effort.
Choosing Your Heirloom Varieties
First things first, let’s talk tomatoes! Heirloom tomatoes are open-pollinated varieties that have been passed down through generations. This means they breed true to type, and you can even save the seeds to grow them again next year! The best part? They come in a rainbow of colors, shapes, and flavors that you just won’t find in your average grocery store tomato.
Here’s what to consider when choosing your varieties:
* Taste Preference: Do you prefer sweet, tangy, smoky, or earthy tomatoes? Research different varieties to find flavors that appeal to you. ‘Brandywine’ is a classic for its rich, complex flavor, while ‘Cherokee Purple’ offers a smoky sweetness. ‘San Marzano’ is perfect for sauces.
* Size and Shape: From tiny cherry tomatoes to giant beefsteaks, heirlooms come in all sizes. Consider how you plan to use them. Cherry tomatoes are great for snacking, while beefsteaks are perfect for slicing on sandwiches.
* Growth Habit: Tomatoes are either determinate or indeterminate. Determinate varieties grow to a certain size and produce all their fruit at once, making them ideal for canning. Indeterminate varieties continue to grow and produce fruit throughout the season. Most heirlooms are indeterminate.
* Disease Resistance: Heirlooms can be more susceptible to diseases than modern hybrids. Look for varieties that are known to be resistant to common tomato diseases in your area.
* Days to Maturity: This indicates how long it takes for the tomato to ripen after transplanting. Choose a mix of early, mid-, and late-season varieties to extend your harvest.
Some popular and reliable heirloom choices include:
* ‘Brandywine’ (Pink or Red)
* ‘Cherokee Purple’
* ‘San Marzano’
* ‘Black Krim’
* ‘Green Zebra’
* ‘Roma’
* ‘Yellow Pear’
* ‘Amish Paste’
Preparing Your Garden Space
Now that you’ve chosen your tomatoes, let’s get your garden ready! Tomatoes need plenty of sunshine and well-drained soil.
1. Choose a Sunny Location: Tomatoes need at least 6-8 hours of direct sunlight per day. Pick a spot in your yard that gets plenty of sun.
2. Test Your Soil: A soil test will tell you the pH and nutrient levels of your soil. Tomatoes prefer a slightly acidic soil with a pH of 6.0-6.8. You can purchase a soil test kit at your local garden center or send a sample to your local agricultural extension office.
3. Amend Your Soil: Based on your soil test results, amend your soil with compost, aged manure, or other organic matter. This will improve drainage, fertility, and water retention. I like to add a generous amount of compost to my tomato beds each year.
4. Consider Raised Beds: If your soil is heavy clay or poorly drained, consider growing your tomatoes in raised beds. Raised beds provide better drainage and allow you to control the soil quality.
5. Prepare the Planting Holes: Dig holes that are deep enough to bury the bottom third of the tomato plant. This will encourage the plant to develop more roots along the buried stem, resulting in a stronger, healthier plant. Space the holes according to the mature size of the variety you’re growing. Generally, allow 2-3 feet between plants.
Starting Your Tomato Plants (or Buying Seedlings)
You have two options here: start your own tomato plants from seed indoors, or buy seedlings from a local nursery. Starting from seed gives you more control over the varieties you grow, but it requires more time and effort. Buying seedlings is more convenient, but you’ll have fewer choices.
Starting from Seed (Indoor Method)
1. Start Seeds 6-8 Weeks Before Last Frost: Sow your tomato seeds indoors 6-8 weeks before the last expected frost date in your area. You can find this date online or by contacting your local agricultural extension office.
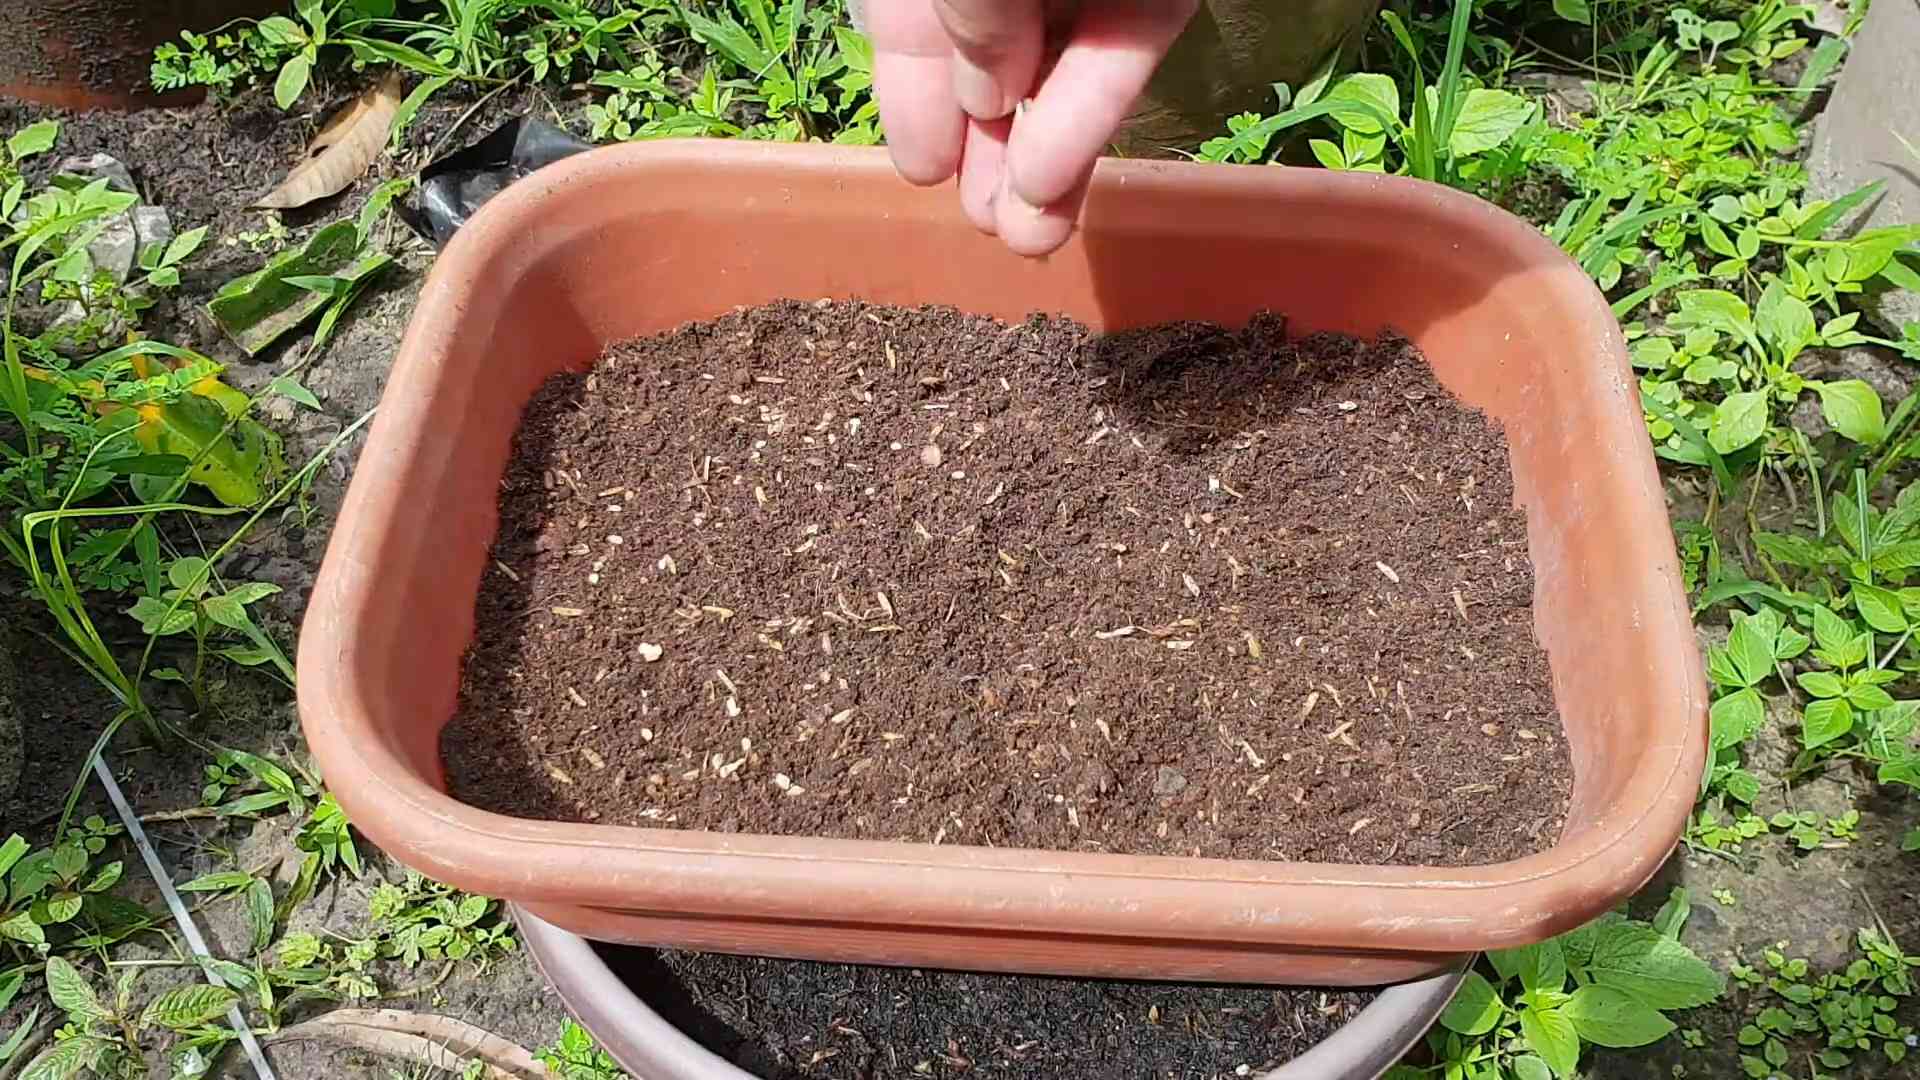
2. Use Seed Starting Mix: Use a seed starting mix, which is a sterile, lightweight mix that’s designed for starting seeds. Don’t use garden soil, as it can contain diseases and pests.
3. Sow Seeds Shallowly: Sow the seeds about ¼ inch deep in seed starting trays or small pots.
4. Keep Soil Moist and Warm: Keep the soil moist but not soggy. Use a spray bottle to mist the soil regularly. Place the trays or pots in a warm location, such as on top of a refrigerator or on a heat mat. The ideal temperature for germination is 70-80°F.
5. Provide Light: Once the seeds germinate, provide them with plenty of light. Place them under grow lights or in a sunny window. If using a window, rotate the trays or pots regularly to prevent the seedlings from becoming leggy.
6. Harden Off Seedlings: Before transplanting your seedlings outdoors, you need to harden them off. This means gradually exposing them to outdoor conditions over a period of 1-2 weeks. Start by placing them in a sheltered location for a few hours each day, gradually increasing the amount of time they spend outdoors.
Buying Seedlings (Nursery Method)
1. Choose Healthy Seedlings: Look for seedlings that are healthy and vigorous, with green leaves and sturdy stems. Avoid plants that are yellowed, spotted, or have signs of pests or diseases.
2. Check the Roots: Gently remove the seedling from its pot and check the roots. They should be white and healthy, not brown or circling the pot.
3. Choose the Right Size: Select seedlings that are a good size for transplanting. They should be at least 6 inches tall and have several sets of true leaves.
Transplanting Your Tomato Plants
Whether you started your own seedlings or bought them from a nursery, it’s time to transplant them into your garden!
1. Wait Until After Last Frost: Make sure all danger of frost has passed before transplanting your tomatoes.
2. Dig a Hole: Dig a hole that’s deep enough to bury the bottom third of the tomato plant.
3. Remove Lower Leaves: Remove the lower leaves from the stem of the tomato plant. These leaves will be buried in the soil, and they can rot and attract pests.
4. Plant Deep: Place the tomato plant in the hole and bury the stem up to the first set of leaves. This will encourage the plant to develop more roots along the buried stem.
5. Water Thoroughly: Water the tomato plant thoroughly after transplanting.
6. Add Support: Tomatoes need support to prevent them from falling over. You can use stakes, cages, or trellises. I prefer using tomato cages because they provide good support and allow the plant to grow naturally.
7. Mulch: Apply a layer of mulch around the tomato plants. Mulch helps to retain moisture, suppress weeds, and regulate soil temperature. I like to use straw or shredded leaves as mulch.
Caring for Your Tomato Plants
Once your tomato plants are in the ground, it’s important to provide them with proper care to ensure a bountiful harvest.
1. Water Regularly: Tomatoes need consistent moisture, especially during hot, dry weather. Water deeply and regularly, aiming for about 1-2 inches of water per week. Avoid watering the foliage, as this can encourage diseases. Drip irrigation or soaker hoses are a great way to water tomatoes.
2. Fertilize: Tomatoes are heavy feeders, so they need regular fertilization. Use a balanced fertilizer that’s specifically formulated for tomatoes. Follow the instructions on the fertilizer label. I like to use a liquid fertilizer every 2-3 weeks.
3. Prune: Pruning tomatoes can improve air circulation, reduce disease, and encourage fruit production. Remove suckers, which are the small shoots that grow between the main stem and the branches.
4. Control Pests and Diseases: Keep an eye out for pests and diseases. Common tomato pests include aphids, tomato hornworms, and whiteflies. Common tomato diseases include early blight, late blight, and blossom end rot. Use organic pest control methods whenever possible. For example, you can spray your plants with insecticidal soap to control aphids or handpick tomato hornworms.
5. Blossom End Rot Prevention: Blossom end rot is caused by a calcium deficiency. To prevent it, make sure your soil has adequate calcium and water your plants consistently. You can also add calcium to the soil by mixing in crushed eggshells or bone meal.
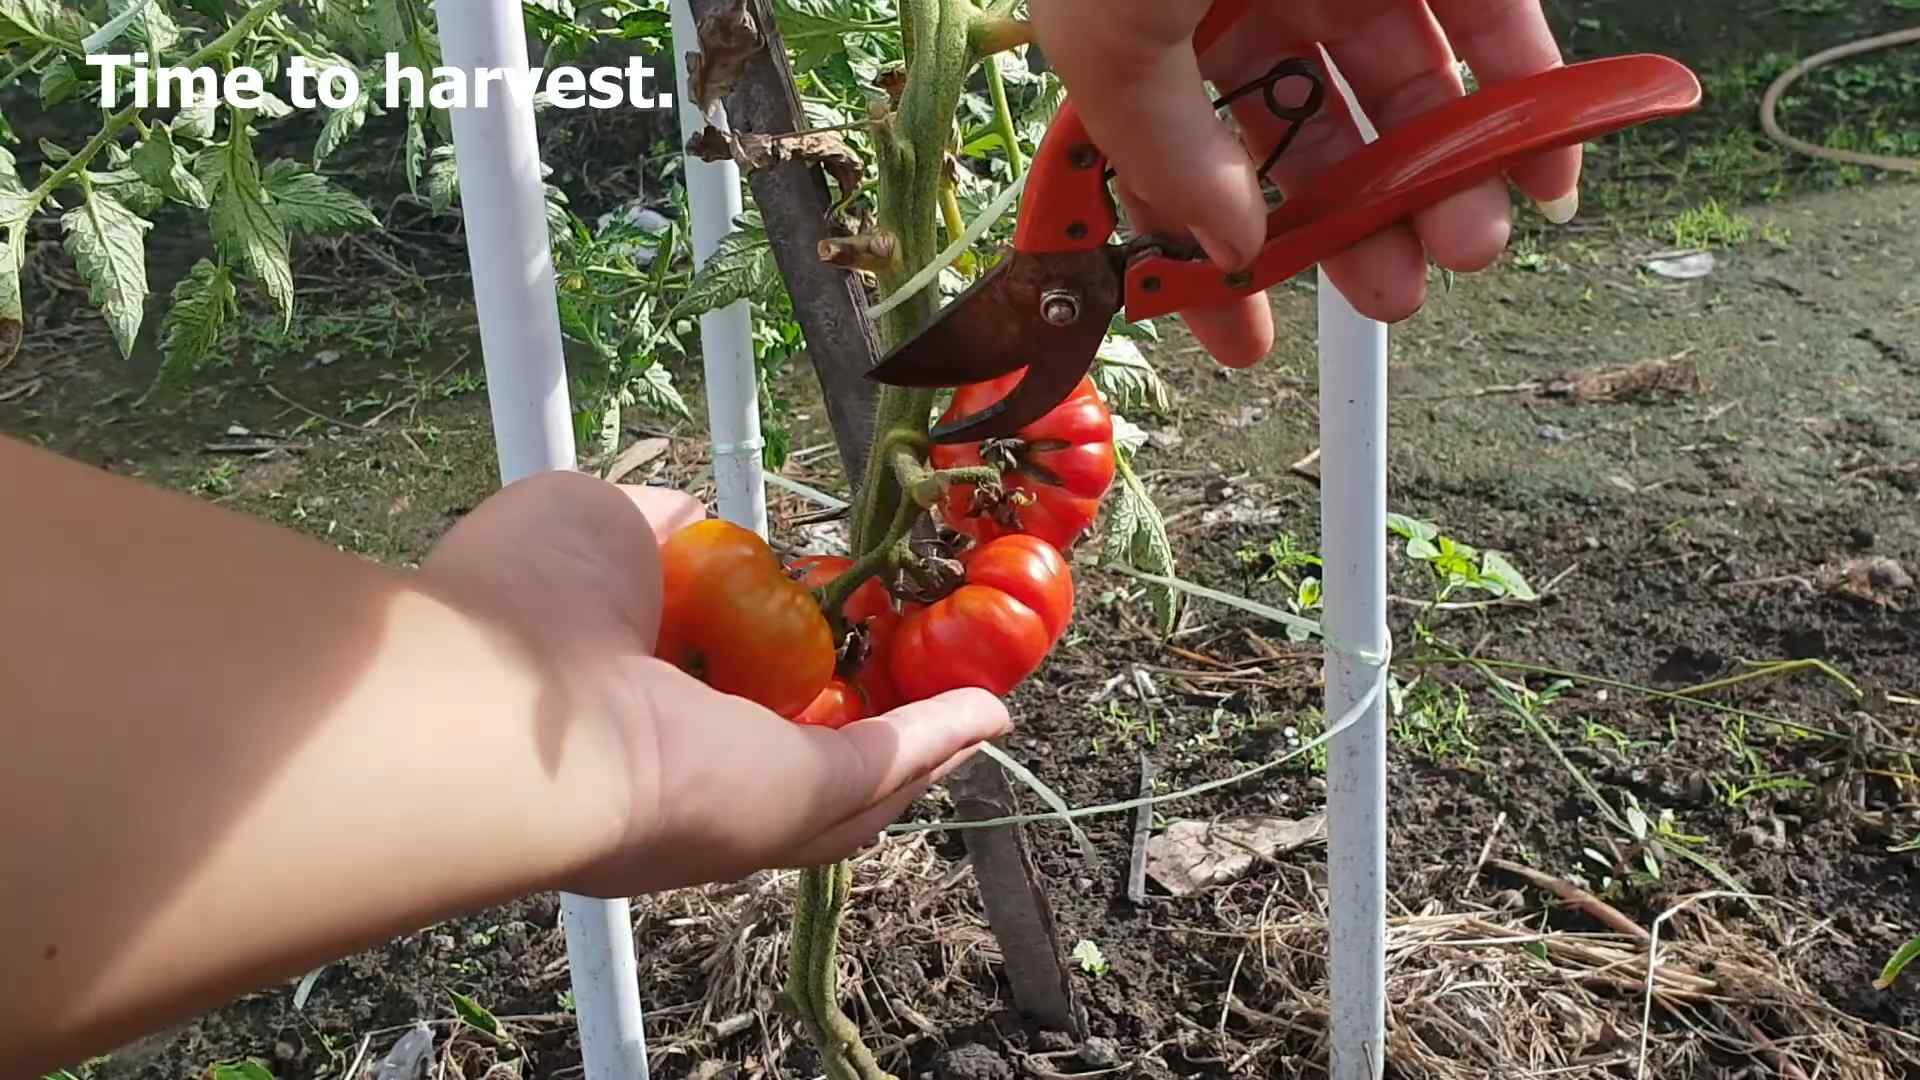
Harvesting Your Heirloom Tomatoes
The moment you’ve been waiting for! Harvesting your delicious heirloom tomatoes.
1. Harvest When Ripe:
Conclusion
So, there you have it! Transforming those gorgeous, sun-ripened heirloom tomatoes from your kitchen garden into a vibrant, flavorful tomato paste is not only achievable but also incredibly rewarding. Forget the bland, mass-produced stuff from the store; this homemade version bursts with the concentrated essence of summer, capturing the unique characteristics of each heirloom variety you’ve lovingly grown.
Why is this DIY heirloom tomato paste a must-try? Because it’s about more than just saving money (though that’s a definite perk!). It’s about connecting with your food on a deeper level, knowing exactly what ingredients are going into your meals, and experiencing the unparalleled taste of truly fresh, unprocessed goodness. Imagine the rich, complex flavors elevating your pasta sauces, stews, pizzas, and even dips. The possibilities are endless!
But the beauty of this process lies in its adaptability. Feel free to experiment with different heirloom tomato varieties to create your own signature blend. Roma tomatoes will give you a classic, robust flavor, while Brandywine tomatoes offer a sweeter, more nuanced profile. Consider adding roasted garlic cloves during the simmering process for an extra layer of savory depth. A pinch of red pepper flakes can introduce a subtle kick, while a sprig of fresh basil or oregano can infuse the paste with herbaceous notes. Don’t be afraid to get creative and tailor the recipe to your personal preferences.
And speaking of variations, if you’re short on time, you can use a slow cooker to simmer the tomatoes. Simply toss the prepared tomatoes into the slow cooker, set it on low, and let it work its magic for 8-10 hours, stirring occasionally. You can also freeze the finished paste in ice cube trays for convenient, single-serving portions. Once frozen, transfer the cubes to a freezer bag for longer storage.
Ultimately, this DIY heirloom tomato paste is a celebration of fresh, seasonal ingredients and the joy of homemade cooking. It’s a simple yet transformative technique that will elevate your culinary creations and impress your family and friends.
We wholeheartedly encourage you to give this recipe a try. It’s easier than you might think, and the results are truly exceptional. Once you’ve experienced the difference that homemade heirloom tomato paste makes, you’ll never go back to the store-bought kind.
Don’t forget to share your experiences with us! We’d love to hear about your favorite heirloom tomato varieties, your unique flavor combinations, and any tips or tricks you discover along the way. Post your photos and stories on social media using #HeirloomTomatoPasteDIY and let’s inspire others to embrace the deliciousness of homemade. Happy cooking!
Frequently Asked Questions (FAQ)
What are the best heirloom tomato varieties to use for tomato paste?
The best heirloom tomato varieties for tomato paste are those that are meaty, have few seeds, and are naturally sweet. Some excellent choices include Roma, San Marzano (technically not always considered heirloom, but often included), Amish Paste, Brandywine (for a sweeter paste), and Black Krim. Experimenting with different varieties or combinations will allow you to create a paste with a unique flavor profile that suits your taste. Remember that the flavor of the tomato will directly impact the flavor of the paste, so choose varieties you enjoy eating fresh.
How long does homemade heirloom tomato paste last?
Properly stored, homemade heirloom tomato paste can last for several months in the refrigerator and even longer in the freezer. In the refrigerator, store the paste in an airtight container and use it within 1-2 weeks. For longer storage, freezing is the best option. You can freeze the paste in ice cube trays for convenient, single-serving portions. Once frozen solid, transfer the cubes to a freezer bag or airtight container. Frozen tomato paste can last for up to 6-8 months. Always check for any signs of spoilage, such as mold or an off odor, before using.
Can I use a food mill instead of a blender or food processor?
Yes, a food mill is an excellent alternative to a blender or food processor for removing the skins and seeds from the cooked tomatoes. In fact, many cooks prefer using a food mill because it creates a smoother, more consistent texture. Simply pass the cooked tomatoes through the food mill, and it will separate the pulp from the skins and seeds. This method is particularly useful if you’re working with a large batch of tomatoes.
How do I prevent the tomato paste from burning while simmering?
Preventing burning is crucial for achieving a delicious, evenly cooked tomato paste. The key is to use a heavy-bottomed pot, which distributes heat more evenly and reduces the risk of scorching. Stir the paste frequently, especially as it thickens, to prevent it from sticking to the bottom of the pot. Reduce the heat to low once the paste starts to thicken significantly. If you notice any signs of burning, immediately remove the pot from the heat and transfer the paste to a clean pot.
Can I add herbs and spices to my heirloom tomato paste?
Absolutely! Adding herbs and spices is a fantastic way to customize the flavor of your heirloom tomato paste. Consider adding roasted garlic cloves, fresh basil, oregano, thyme, or rosemary during the simmering process. A pinch of red pepper flakes can add a subtle kick, while a bay leaf can impart a savory depth. Experiment with different combinations to find your favorite flavor profile. Remember to remove the bay leaf before pureeing the paste.
What if my heirloom tomatoes are not very sweet?
If your heirloom tomatoes are not naturally sweet, you can add a touch of sweetness to the paste by adding a small amount of sugar or honey during the simmering process. Start with a teaspoon and adjust to taste. You can also add a roasted red pepper to the tomatoes before simmering, as this will add both sweetness and depth of flavor.
Is it necessary to remove the tomato skins and seeds?
While it’s not strictly necessary to remove the tomato skins and seeds, doing so will result in a smoother, more refined tomato paste. The skins can be tough and bitter, and the seeds can add a slightly gritty texture. Removing them will create a paste with a more pleasant mouthfeel and a cleaner flavor.
How do I know when the tomato paste is done?
The tomato paste is done when it has reached a thick, spreadable consistency and has reduced significantly in volume. It should be a deep, rich red color and have a concentrated tomato flavor. To test for doneness, place a small spoonful of the paste on a plate and let it cool slightly. If it holds its shape and doesn’t spread out too much, it’s ready. Keep in mind that the paste will continue to thicken slightly as it cools.
Can I use this heirloom tomato paste in place of store-bought tomato paste in recipes?
Yes, you can absolutely use your homemade heirloom tomato paste in place of store-bought tomato paste in any recipe. In fact, it will likely enhance the flavor of your dishes significantly. Because the flavor is more concentrated, you may need to use slightly less homemade paste than store-bought. Start with a smaller amount and add more to taste.
What are some creative ways to use homemade heirloom tomato paste?
Beyond the usual suspects like pasta sauces and stews, homemade heirloom tomato paste can be used in a variety of creative ways. Try adding it to soups, chili, pizza sauce, dips, and even marinades. It can also be used to add depth of flavor to roasted vegetables or as a base for homemade barbecue sauce. A small amount of tomato paste can also be added to ground meat mixtures to enhance their flavor and moisture. The possibilities are truly endless!

Leave a Comment