
Growing Hibiscus Sabdariffa Year Round might seem like a tropical dream reserved for sun-drenched climates, but I’m here to tell you it’s more achievable than you think, even if you’re not living in the tropics! Have you ever sipped on a refreshing glass of hibiscus tea and wondered if you could cultivate those vibrant, ruby-red flowers yourself? Well, get ready to roll up your sleeves because this guide is packed with DIY tricks and hacks to help you enjoy the beauty and benefits of Roselle hibiscus all year long.
Hibiscus Sabdariffa, also known as Roselle, has a rich history, deeply intertwined with cultures across Africa, Asia, and the Americas. For centuries, it’s been cherished not only for its stunning beauty but also for its medicinal properties and culinary uses. From traditional teas and jams to vibrant dyes, this plant has played a significant role in various communities.
But why should *you* bother with growing Hibiscus Sabdariffa year round? Beyond the sheer joy of nurturing a plant and witnessing its growth, cultivating your own Roselle offers a sustainable source of delicious and healthy ingredients. Imagine brewing your own hibiscus tea, knowing exactly where it came from and how it was grown. Plus, with a few clever DIY techniques, you can extend the growing season and enjoy a continuous harvest, regardless of your local climate. Let’s dive in and unlock the secrets to successfully growing Hibiscus Sabdariffa year round!
Growing Hibiscus Sabdariffa Year-Round: Your DIY Guide for Success
Hello plant friends! I am thrilled to show you today how you can grow Hibiscus Sabdariffa – also known as Roselle – all year round. Yes, you read that right! Even though this plant normally thrives in warmer climates, I’ll show you how to be successful even in cooler regions with a few tips and tricks. Let’s get started!
What you need for year-round cultivation
Before we start, here is a list of the things you will need:
- Hibiscus Sabdariffa seeds: Get high-quality seeds from a trusted supplier.
- Seed starting mix: A light, well-draining soil is ideal for starting seeds.
- Pots or seed trays: For sowing and later transplanting.
- Larger pots (min. 20 liters / 5 gallons): For the mature plants.
- All-purpose potting soil: A good base for the plants’ growth.
- Compost or organic fertilizer: to provide the plants with nutrients.
- Grow light (optional): For the winter months when sunlight is insufficient.
- Greenhouse or indoor area: To protect the plants from frost.
- Watering can or spray bottle: For irrigation.
- Pruning shears: For pruning the plants.
- pH meter (optional): To check the soil’s pH level.
- Mulch (optional): To retain moisture in the soil and suppress weeds.
Phase 1: Sowing and Germination
Sowing is the first and most important step. Here I’ll show you how to get the seeds to germinate properly.
- Prepare the seeds: To speed up germination, you can soak the seeds in lukewarm water for 24 hours. This helps to soften the hard seed coat.
- Prepare the seed starting mix: Fill your seed trays or small pots with seed starting mix. Lightly moisten the soil, but avoid waterlogging.
- Sow the seeds: Press the seeds about 1 cm (0.4 inches) deep into the soil. Place 2-3 seeds per pot or tray to ensure that at least one germinates.
- Cover and keep warm: Cover the seed trays with a transparent film or a lid to ensure high humidity. Place them in a warm place (approx. 25-30°C / 77-86°F). A heated indoor greenhouse is ideal, but a warm spot on a windowsill will also work.
- Control moisture: Check the soil regularly and spray it with water if necessary to keep it moist. Avoid waterlogging, as this can lead to mold.
- Wait for germination: Germination usually takes 7-14 days. As soon as the first seedlings appear, remove the film or lid to ensure good ventilation.
- Thin out: When the seedlings are a few centimeters tall and have developed their first true leaves, you can thin them out. Select the strongest seedling per pot and carefully remove the others.
Phase 2: Transplanting and Care
Once the young plants are strong enough, it’s time to transplant them into larger pots.
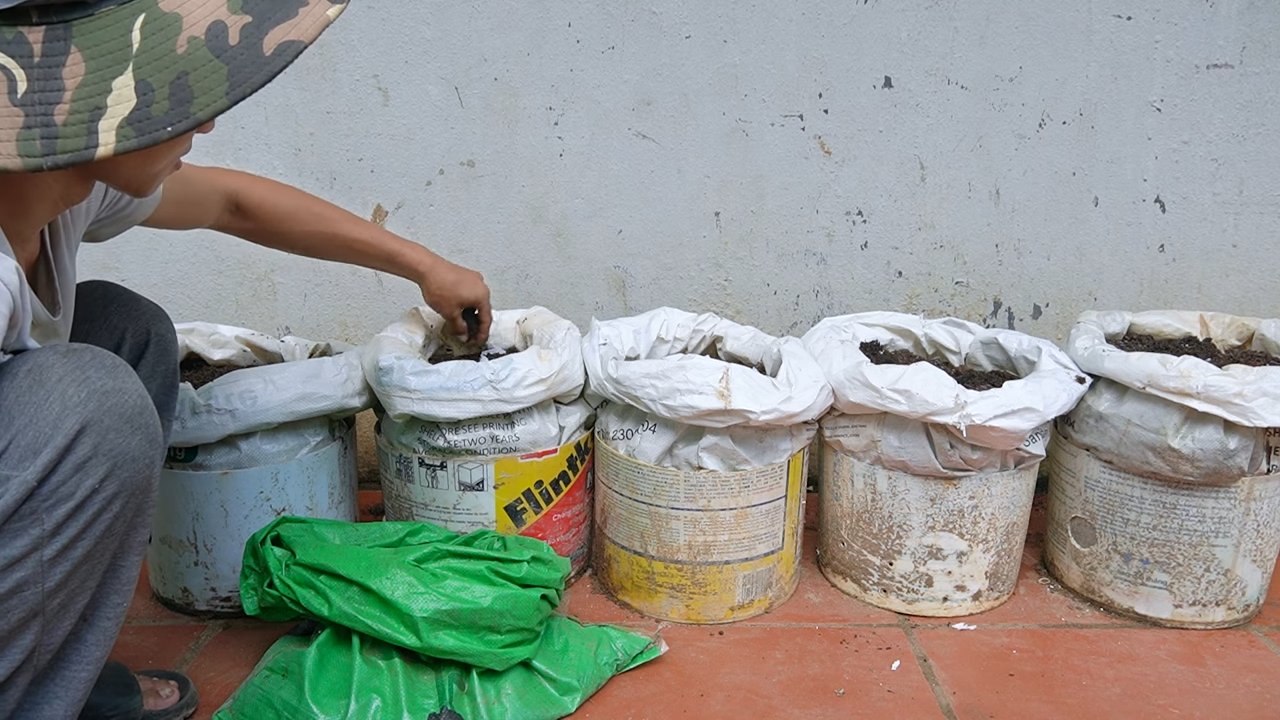
- Prepare larger pots: Fill the larger pots (min. 20 liters / 5 gallons) with a mixture of all-purpose potting soil and compost or organic fertilizer. The ratio should be about 2:1.
- Carefully repot the plants: Dig a hole in the soil large enough to accommodate the young plant’s root ball. Carefully lift the plant out of its starting pot and place it in the hole. Fill the pot with soil and press it down lightly.
- Water thoroughly: Water the plants thoroughly after transplanting.
- Choose a location: Hibiscus Sabdariffa loves the sun! Place the pots in a sunny location that receives at least 6 hours of direct sunlight per day.
- Watering: Water the plants regularly, especially during the growing season. The soil should always be slightly moist, but avoid waterlogging. Check the moisture by sticking your finger about 2-3 cm (about 1 inch) deep into the soil.
- Fertilizing: Fertilize the plants every 2-4 weeks with an organic fertilizer or compost tea. Be sure to follow the instructions on the package to avoid over-fertilizing.
- Pruning: Prune the plants regularly to encourage growth and stimulate flower production. Remove dead or damaged branches and trim long shoots.
Phase 3: Overwintering and Indoor Cultivation
Here’s the trick to keeping Hibiscus Sabdariffa alive in winter and even continuing to harvest from it.
- Prepare for winter: Before the first frost arrives, you should bring the plants inside or place them in a greenhouse. Hibiscus Sabdariffa cannot tolerate frost.
- Indoor location: Choose a bright location near a window. If the sunlight is not sufficient, use a plant lamp to provide additional light.
- Temperature: The ideal temperature for overwintering is between 15-20°C (59-68°F). Avoid sudden temperature fluctuations.
- Watering in winter: Reduce watering in winter, as the plants need less water. Water only when the soil is dry.
- Humidity: Ensure adequate humidity, especially if you keep the plants in a heated room. You can increase humidity by placing a tray of water near the plants or using a humidifier.
- Pest control: Check the plants regularly for pests such as aphids or spider mites. If necessary, you can use organic pesticides.
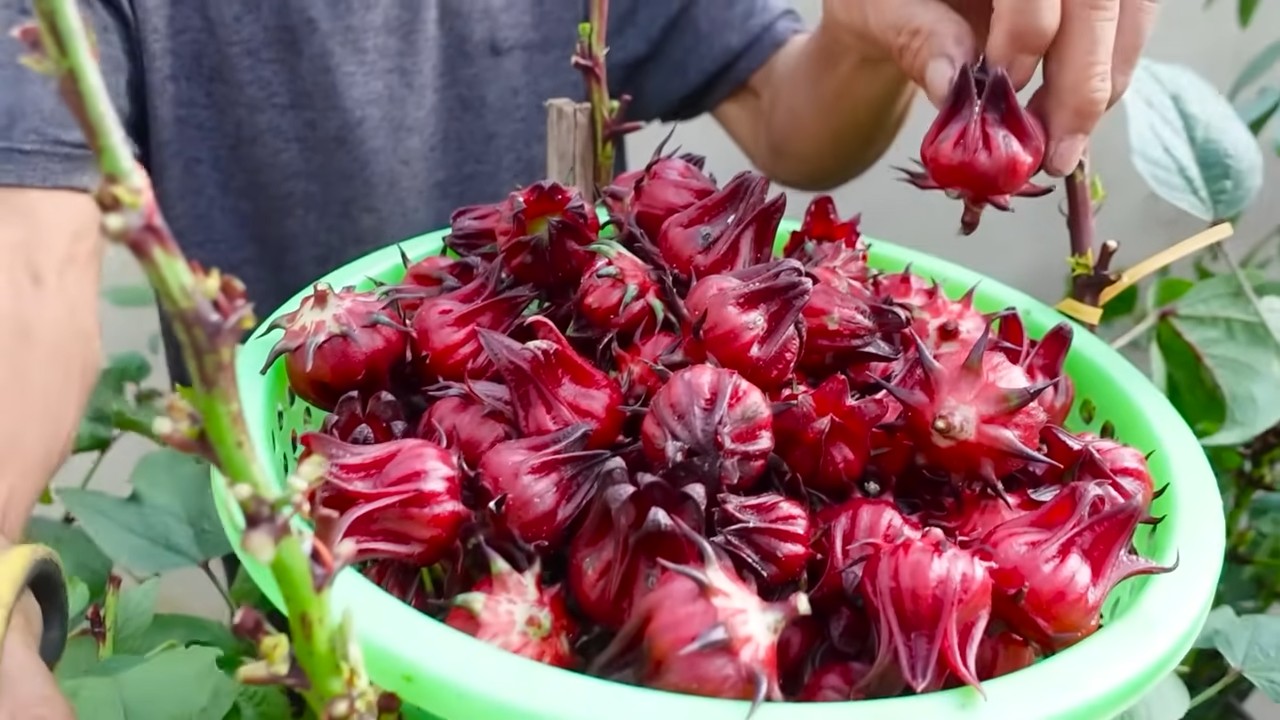
- Harvesting in winter: Even in winter, the calyces of Hibiscus Sabdariffa can be harvested if the conditions are right. Make sure the calyces are ripe before you harvest them. They should have a deep red color and be easily detached from the stem.
Phase 4: Harvest and Use
The harvest is the reward for your efforts! Here’s how to properly harvest and use the calyces.
Syrup: A delicious syrup can be made from the calyces, which can be used to sweeten drinks or desserts.
Harvest time: The calyces of Hibiscus Sabdariffa are ripe when they have a deep red color and are easily detached from the stem. The harvest time is usually in the fall, but with proper care and overwintering, you can also harvest in the winter.
Harvesting method: Cut the calyces off with pruning shears. Be careful not to damage the plant.
Use: The calyces of Hibiscus Sabdariffa can be used for various purposes:
Hibiscus tea: The dried calyces can be steeped to make a refreshing and healthy tea.
Jam and jelly: The calyces can be processed into jam or jelly.
Conclusion
So, there you have it! Growing Hibiscus sabdariffa year-round might seem like a tropical dream reserved for warmer climates, but with a little ingenuity and these simple DIY tricks, you can absolutely cultivate this vibrant and beneficial plant no matter where you live. We’ve walked through the essential steps, from understanding the plant’s needs to creating a controlled environment that mimics its ideal growing conditions.
Why is this a must-try? Beyond the sheer satisfaction of nurturing a plant from seed to harvest, growing your own Hibiscus sabdariffa offers a wealth of benefits. Imagine sipping on homemade hibiscus tea, knowing exactly where it came from and the care that went into its creation. Think of the vibrant color and unique flavor you can add to your jams, jellies, and even savory dishes. Plus, you’ll be reducing your reliance on commercially grown products, contributing to a more sustainable lifestyle.
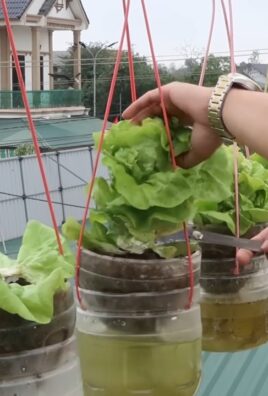
But the real magic lies in the adaptability of this method. Feel free to experiment with different grow light setups to find what works best for your space and budget. Try varying the soil composition to optimize nutrient uptake. Consider using different types of containers, from traditional pots to raised beds, depending on your available space and aesthetic preferences. You could even explore hydroponic systems for a truly innovative approach to growing Hibiscus sabdariffa.
Don’t be afraid to get creative with your harvest, too! Beyond the classic hibiscus tea, explore recipes for hibiscus syrup, hibiscus-infused cocktails, or even dried hibiscus flowers for potpourri. The possibilities are truly endless.
We understand that embarking on a new gardening adventure can be a little daunting, but we’re confident that with a little patience and these DIY techniques, you’ll be enjoying your own homegrown Hibiscus sabdariffa in no time. Remember, the key is to provide consistent warmth, adequate light, and well-draining soil.
Now, it’s your turn! We wholeheartedly encourage you to give this DIY trick a try. Start small, experiment, and most importantly, have fun! We’re eager to hear about your experiences. Share your successes, your challenges, and any variations you discover along the way. Let’s build a community of Hibiscus sabdariffa enthusiasts, sharing knowledge and inspiring each other to grow our own delicious and beautiful plants, regardless of the season. Share your photos and stories in the comments below – we can’t wait to see what you create!
Frequently Asked Questions (FAQ)
What is the ideal temperature for growing Hibiscus sabdariffa indoors?
Hibiscus sabdariffa thrives in warm temperatures, ideally between 65°F and 85°F (18°C and 29°C). Maintaining a consistent temperature within this range is crucial for healthy growth and flower production. Avoid exposing your plants to sudden temperature fluctuations or drafts, as this can stress them and hinder their development. If your home tends to get cooler at night, consider using a heat mat or a small space heater to maintain a stable temperature.
How much light does Hibiscus sabdariffa need when grown indoors?
Adequate light is essential for Hibiscus sabdariffa, especially when grown indoors. These plants require at least 6-8 hours of direct sunlight per day. If you don’t have a south-facing window that provides sufficient sunlight, you’ll need to supplement with grow lights. LED grow lights are a great option, as they are energy-efficient and provide the full spectrum of light that plants need for photosynthesis. Position the grow lights about 12-18 inches above the plants and adjust the height as they grow. Monitor your plants closely for signs of insufficient light, such as leggy growth or pale leaves.
What type of soil is best for growing Hibiscus sabdariffa in containers?
Hibiscus sabdariffa prefers well-draining soil that is rich in organic matter. A good potting mix for these plants would consist of equal parts peat moss, perlite, and compost. The peat moss helps retain moisture, while the perlite ensures good drainage. The compost provides essential nutrients for healthy growth. Avoid using heavy clay soils, as they can become waterlogged and lead to root rot. You can also amend your potting mix with a slow-release fertilizer to provide a steady supply of nutrients throughout the growing season.
How often should I water my Hibiscus sabdariffa plants?
Watering frequency will depend on several factors, including the size of the container, the type of soil, and the ambient temperature. As a general rule, water your Hibiscus sabdariffa plants when the top inch of soil feels dry to the touch. Water thoroughly until excess water drains out of the bottom of the pot. Avoid overwatering, as this can lead to root rot. During the warmer months, you may need to water more frequently than during the cooler months. Monitor your plants closely and adjust your watering schedule accordingly.
How do I fertilize my Hibiscus sabdariffa plants?
Hibiscus sabdariffa plants are heavy feeders and benefit from regular fertilization. Use a balanced fertilizer with an NPK ratio of 10-10-10 or 20-20-20. Fertilize your plants every 2-4 weeks during the growing season (spring and summer). Reduce or stop fertilizing during the dormant season (fall and winter). You can also use a foliar fertilizer to provide a quick boost of nutrients. Be sure to follow the instructions on the fertilizer label carefully to avoid over-fertilizing, which can damage your plants.
How do I prune my Hibiscus sabdariffa plants?
Pruning is essential for maintaining the shape and health of your Hibiscus sabdariffa plants. Prune your plants in late winter or early spring, before new growth begins. Remove any dead, damaged, or diseased branches. You can also prune to shape the plant and encourage bushier growth. Pinch back the tips of new growth to promote branching. Avoid pruning too heavily, as this can reduce flower production.
What are some common pests and diseases that affect Hibiscus sabdariffa?
Hibiscus sabdariffa can be susceptible to several pests and diseases, including aphids, spider mites, whiteflies, and root rot. Inspect your plants regularly for signs of infestation or disease. If you detect any pests, treat them with insecticidal soap or neem oil. Prevent root rot by ensuring that your plants are planted in well-draining soil and that you are not overwatering them.
Can I grow Hibiscus sabdariffa from seed indoors?
Yes, you can absolutely grow Hibiscus sabdariffa from seed indoors. Start by soaking the seeds in warm water for 24 hours to soften the seed coat. Then, sow the seeds in a seed-starting mix and keep them moist. Germination typically occurs within 1-2 weeks. Once the seedlings have developed a few sets of true leaves, transplant them into individual pots. Provide them with plenty of light and warmth, and fertilize them regularly.
How long does it take for Hibiscus sabdariffa to flower when grown indoors?
The time it takes for Hibiscus sabdariffa to flower when grown indoors can vary depending on several factors, including the variety, the growing conditions, and the age of the plant. Generally, you can expect to see flowers within 4-6 months of planting. To encourage flowering, provide your plants with plenty of light, warmth, and fertilizer.
Can I move my indoor Hibiscus sabdariffa plants outdoors during the summer?
Yes, you can move your indoor Hibiscus sabdariffa plants outdoors during the summer, but it’s important to acclimate them gradually to the outdoor conditions. Start by placing them in a shady spot for a few hours each day, gradually increasing the amount of sunlight they receive over a period of 1-2 weeks. Be sure to protect them from strong winds and heavy rain. Bring them back indoors before the first frost.

Leave a Comment