
Grow ginger at home, you say? Absolutely! Imagine stepping into your kitchen and snipping off a piece of fresh, zesty ginger, grown right in your own backyard (or even on your windowsill!). No more last-minute grocery store runs when a recipe calls for that spicy kick. This isn’t just about convenience; it’s about connecting with nature and experiencing the satisfaction of nurturing something from rhizome to harvest.
Ginger, with its rich history spanning millennia, has been prized for its culinary and medicinal properties across various cultures. From ancient Ayurvedic practices to traditional Chinese medicine, ginger has been a staple remedy. Beyond its health benefits, ginger adds a unique flavor profile to dishes worldwide.
But why should *you* learn to grow ginger at home? Well, store-bought ginger can sometimes lack the vibrancy and freshness of homegrown. Plus, let’s be honest, gardening is therapeutic! It’s a fantastic way to de-stress, get your hands dirty, and enjoy the fruits (or, in this case, rhizomes) of your labor. In this DIY guide, I’ll walk you through simple, effective tricks and hacks to cultivate your own thriving ginger patch, regardless of your gardening experience. Get ready to unleash your inner green thumb and enjoy the delicious rewards!
Growing Ginger at Home: Your Comprehensive DIY Guide
Hello, dear garden friends! Have you ever wondered how you can easily grow that spicy, healthy ginger you love in your tea or curry yourself? I’ll show you how! It’s easier than you think and incredibly fun. Let’s dive into the world of ginger cultivation together!
What You Need for Your Ginger Garden
Before we start, here’s a list of the things you’ll need:
- A piece of ginger root (rhizome): Organic ginger is best, as conventional ginger is often treated with growth inhibitors. Make sure it has plump, healthy buds (eyes).
- A planting container: Choose a pot with good drainage that is at least 30 cm (12 inches) wide and deep. Ginger needs space to grow!
- High-quality potting soil: A well-draining, nutrient-rich soil is ideal. You can also make your own mix of potting soil, compost, and perlite.
- Water: Ginger likes it moist, but not soggy.
- A warm, bright location: Ginger loves warmth and indirect sunlight. A spot on a windowsill or in a greenhouse is perfect.
- Spray bottle: To increase humidity.
- Patience: Ginger takes time to grow, so don’t be disappointed if you don’t see results immediately.
Step-by-Step Guide: Planting Ginger
Now that we have everything, we can start planting!
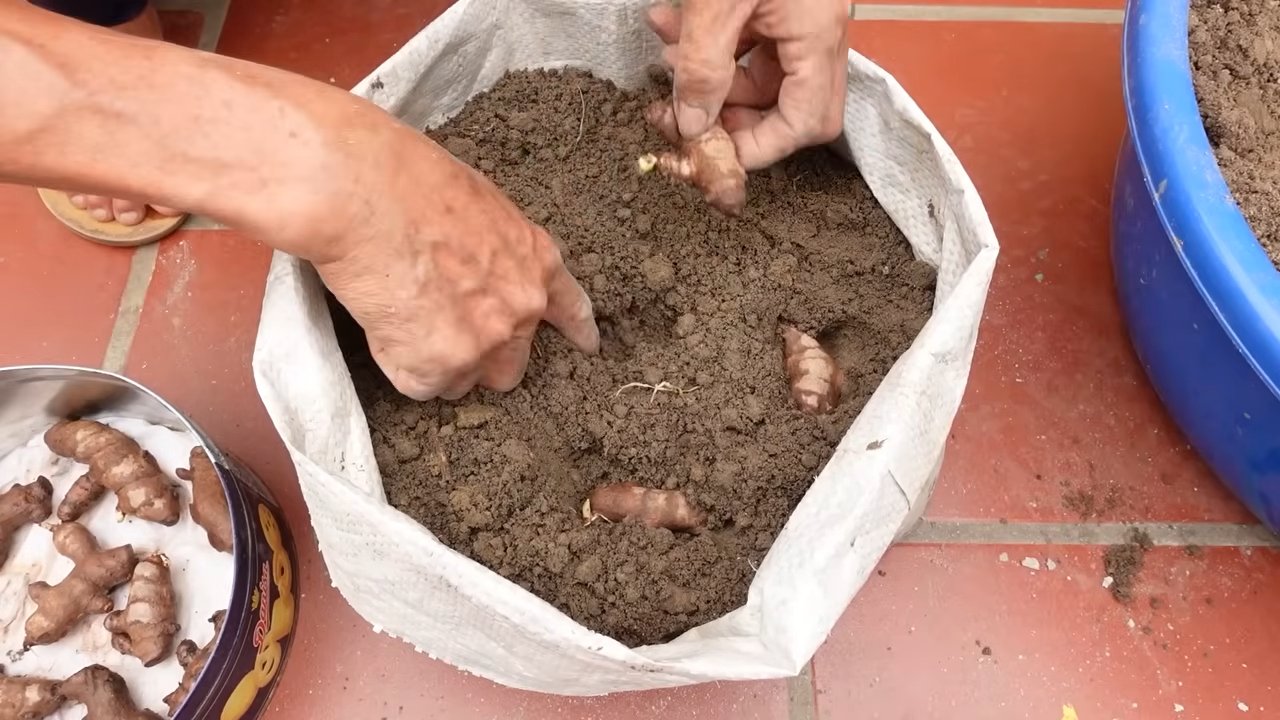
- Prepare the ginger:
- If your piece of ginger is very large, you can cut it into smaller pieces. Each piece should have at least one or two buds.
- Let the cut surfaces air dry for a few days to prevent rot.
- Prepare the container:
- Fill the pot with potting soil, but leave about 5 cm (2 inches) of space at the top.
- Lightly moisten the soil. It should be damp, but not wet.
- Plant the ginger:
- Place the ginger pieces on the soil with the buds facing up.
- Cover them with about 2-5 cm (1-2 inches) of soil.
- Press the soil down lightly.
- Water and choose a location:
- Water the ginger carefully until the soil is moist.
- Place the pot in a warm, bright location with indirect sunlight. Direct sunlight can burn the leaves.
- Be patient:
- It can take a few weeks before you see the first shoots. Be patient and keep the soil moist.
Caring for Your Ginger: How to Keep It Happy and Healthy
Proper care is crucial for successful ginger cultivation. Here are a few tips that will help you:
- Watering:
- Water the ginger regularly, but avoid waterlogging. The soil should always be slightly moist.
- In winter, when growth is slower, reduce the amount of water.
- Humidity:
- Ginger loves high humidity. Spray the leaves regularly with water, especially in dry environments.
- You can also place the pot on a tray filled with pebbles and water. The evaporating water will increase humidity.
- Fertilizing:
- Fertilize the ginger every few weeks with an organic liquid fertilizer.
- Start fertilizing as soon as the first shoots appear.
- Temperature:
- Ginger thrives best at temperatures between 20 and 30 degrees Celsius (68-86°F).
- Protect it from frost and cold drafts.
- Repotting:
- If the ginger becomes too large for its pot, you can repot it into a larger one.
- It’s best to do this in the spring.
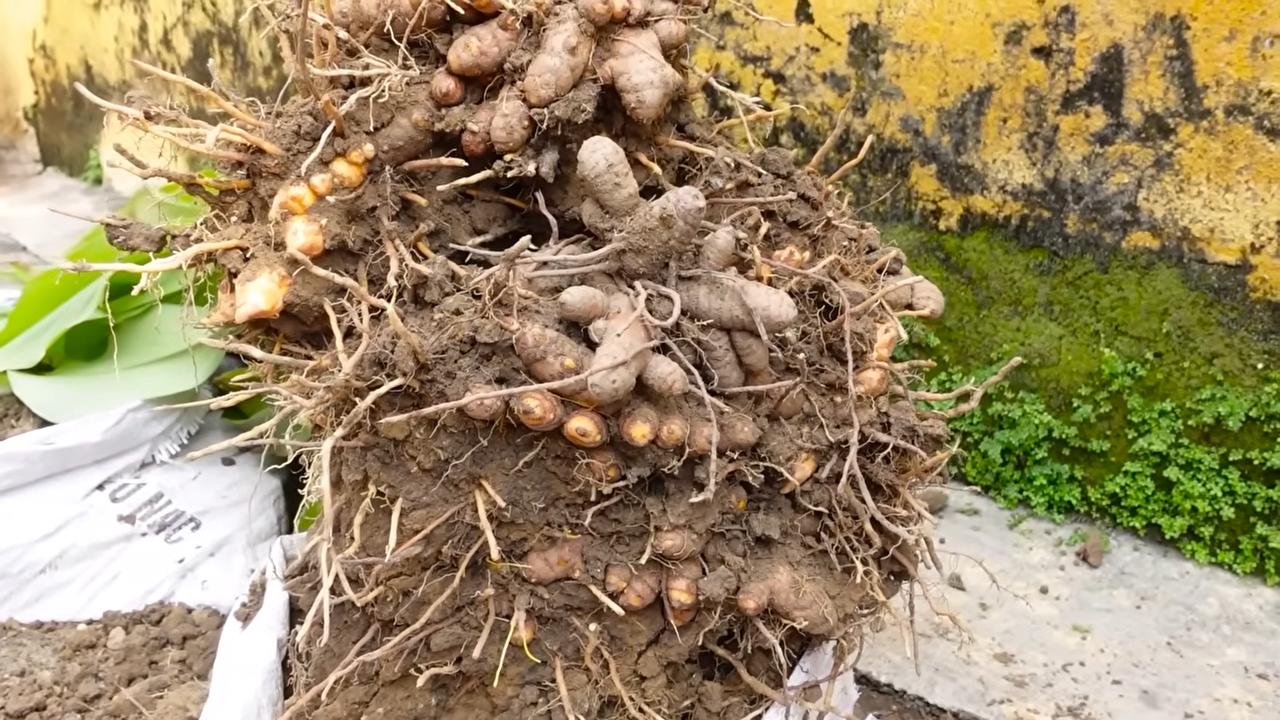
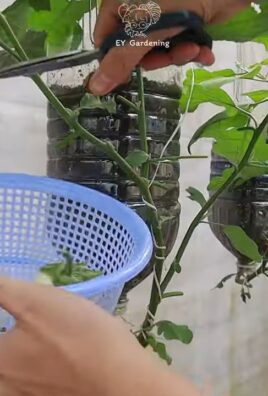
Harvest Time: When is the Ginger Ready?
After about 8-10 months, your ginger is ready to harvest!
- Signs of ripeness: The leaves will start to turn yellow and die back.
- Harvesting:
- Carefully dig the ginger out of the pot.
- Cut off the amount you need and leave the rest in the pot to continue growing.
- You can use the harvested ginger immediately or store it in the refrigerator.
Common Problems and Solutions
Problems can also arise when growing ginger. Here are a few common issues and how to solve them:
- Yellow leaves:
- Cause: Overwatering, nutrient deficiency, or too little light.
- Solution: Adjust watering, fertilize the ginger, and move it to a brighter location.
- Rot:
- Cause: Waterlogging or poor drainage.
- Solution: Ensure the pot has good drainage and don’t overwater the ginger.
- Pests:
- Cause: Infestation by aphids or spider mites.
- Solution: Spray the leaves with a solution of water and neem oil.
Growing Ginger Outdoors
If you have a garden, you can also grow ginger outdoors.
- Location: Choose a warm, sheltered location with partial shade.
- Soil: The soil should be well-draining and nutrient-rich.
- Planting time: Plant the ginger in the spring after the danger of frost has passed.
- Care: Water and fertilize the ginger regularly.
- Protection: Protect the ginger from snails and other pests.
Propagating Ginger
You can easily propagate your ginger by dividing the rhizomes.
- Dividing: Divide the rhizomes in the spring before planting them.
- Planting: Plant the divided rhizomes in separate pots or in the ground.
- Care: Care for the new ginger plants as described above.
Growing Ginger in Hydroponics
For the more adventurous gardeners among you: ginger can also be grown in hydroponics!
- System: Choose a suitable hydroponic system, e.g., a Deep Water Culture (DWC) or Nutrient Film Technique (NFT) system.
- Nutrient solution: Use a special nutrient solution for hydroponics.
- Light: Ensure the ginger gets enough light, either from natural light or artificial plant lamps.
- Care: Regularly monitor the pH and nutrient concentration of the nutrient solution.
Making Your Own Ginger Tea: A Recipe
After you’ve harvested your own ginger, you can of course use it to make a delicious and healthy ginger tea!
Enjoy: Enjoy your homemade ginger tea!
Prepare the ginger: Cut a piece of ginger about 2-3 cm (1 inch) long into thin slices.
Boil: Bring 500 ml (about 2 cups) of water to a boil.
Steep: Add the ginger slices to the boiling water and let the tea steep for about 10-15 minutes.
Strain: Strain the tea and sweeten it with honey or maple syrup as needed.
Conclusion
So, there you have it! Growing ginger at home is not only achievable, but it’s also a deeply rewarding experience that connects you to the source of this incredible spice. Forget those bland, store-bought ginger roots that have been sitting on shelves for weeks. Imagine the vibrant, fresh flavor of homegrown ginger, ready to elevate your culinary creations and soothe your senses.
This DIY trick is a must-try for several compelling reasons. First and foremost, the flavor difference is undeniable. Homegrown ginger boasts a zestier, more intense flavor profile compared to its commercially available counterparts. This is because you’re harvesting it at its peak freshness, ensuring maximum flavor and potency. Secondly, you have complete control over the growing process. You can choose organic methods, avoiding harmful pesticides and herbicides, ensuring a healthier and more sustainable product. Thirdly, it’s incredibly cost-effective. Over time, the initial investment in a ginger root and a pot will pay for itself, saving you money on frequent grocery store trips. Finally, it’s simply a fun and educational project. Watching your ginger plant sprout and thrive is a satisfying experience that connects you to the natural world.
But the beauty of growing ginger at home lies in its versatility. Feel free to experiment with different varieties of ginger. Some are spicier, while others have a milder, more floral flavor. You can also adjust the growing conditions to influence the size and shape of the rhizomes. For instance, if you prefer smaller, more tender ginger, harvest it earlier in the season. If you want larger, more mature rhizomes, allow it to grow for a longer period. Consider adding companion plants like marigolds to deter pests naturally. You can also try growing ginger in different types of containers, from terracotta pots to raised beds, to see what works best for your space and climate.
Don’t be afraid to get creative with your harvest! Beyond using it in your favorite recipes, you can also make your own ginger tea, ginger candies, or even ginger-infused oils and vinegars. The possibilities are endless!
We wholeheartedly encourage you to embark on this ginger-growing adventure. It’s a simple, yet profound way to connect with nature, enhance your culinary skills, and enjoy the unparalleled flavor of fresh, homegrown ginger. We are confident that you’ll find the process both enjoyable and rewarding.
Now, we want to hear from you! Have you tried growing ginger at home before? What challenges did you face? What tips and tricks did you discover? Share your experiences in the comments below. Your insights could help other aspiring ginger growers succeed. Let’s build a community of passionate home gardeners and celebrate the joy of growing our own food. So, grab a ginger root, a pot, and some soil, and get ready to experience the magic of growing ginger at home! We can’t wait to hear about your success!
Frequently Asked Questions (FAQ)
1. What kind of ginger should I use to start growing?
The best type of ginger to start with is a fresh, plump ginger rhizome from your local grocery store or farmers market. Look for rhizomes that are firm, with smooth skin and visible “eyes” (small buds). Organic ginger is often preferred, as it’s less likely to have been treated with growth inhibitors. Avoid ginger that is shriveled, moldy, or has soft spots. You want a healthy, vibrant piece of ginger that’s ready to sprout.
2. How long does it take for ginger to sprout?
Sprouting time can vary depending on factors like temperature, humidity, and the health of the ginger rhizome. Generally, you can expect to see sprouts emerge within 2 to 3 weeks. However, it could take longer, especially in cooler climates. To speed up the process, you can soak the ginger rhizome in water overnight before planting. Make sure the soil is consistently moist but not waterlogged, and provide a warm, bright location. Patience is key!
3. What is the best soil for growing ginger?
Ginger thrives in well-draining, nutrient-rich soil. A good mix would be equal parts potting soil, compost, and perlite or vermiculite. The compost provides essential nutrients, while the perlite or vermiculite improves drainage and aeration. Avoid heavy clay soils, as they can retain too much moisture and lead to root rot. The ideal pH level for ginger is between 6.0 and 6.5.
4. How much sunlight does ginger need?
Ginger prefers partial shade, especially in hot climates. Direct sunlight can scorch the leaves. A location that receives morning sun and afternoon shade is ideal. If you’re growing ginger indoors, place it near a bright window, but avoid direct sunlight exposure. You can also use sheer curtains to filter the light.
5. How often should I water my ginger plant?
Water your ginger plant regularly, keeping the soil consistently moist but not waterlogged. Allow the top inch of soil to dry out slightly between waterings. Overwatering can lead to root rot, so it’s important to ensure good drainage. During the growing season (spring and summer), you may need to water more frequently than in the dormant season (fall and winter).
6. When is the best time to harvest ginger?
You can start harvesting ginger about 8-10 months after planting. The leaves will start to turn yellow and die back, indicating that the rhizomes are mature. However, you can also harvest smaller, more tender ginger earlier in the season. To harvest, gently dig around the plant and lift the rhizomes from the soil. You can harvest the entire plant or just a portion of the rhizomes, leaving the rest to continue growing.
7. Can I grow ginger indoors?
Yes, ginger can be successfully grown indoors, especially in colder climates. Choose a pot that is at least 12 inches in diameter and has drainage holes. Use a well-draining potting mix and provide adequate light, either from a bright window or a grow light. Maintain a consistent temperature and humidity level. Water regularly and fertilize every few weeks during the growing season.
8. What are some common problems when growing ginger and how can I fix them?
Some common problems include root rot (caused by overwatering), pests (like aphids and spider mites), and nutrient deficiencies. To prevent root rot, ensure good drainage and avoid overwatering. If you notice pests, treat the plant with insecticidal soap or neem oil. For nutrient deficiencies, fertilize with a balanced organic fertilizer.
9. Can I grow ginger in containers?
Absolutely! Growing ginger in containers is a great option, especially if you have limited space or live in a colder climate. Choose a container that is at least 12 inches in diameter and has drainage holes. Use a well-draining potting mix and provide adequate light, water, and nutrients. You can easily move the container indoors during the winter months to protect the plant from frost.
10. How do I store harvested ginger?
Freshly harvested ginger can be stored in the refrigerator for several weeks. Wrap it in a paper towel and place it in a plastic bag. You can also freeze ginger for longer storage. Peel and chop the ginger into smaller pieces, then freeze them in a single layer on a baking sheet. Once frozen, transfer the pieces to a freezer bag. You can also pickle ginger or make ginger syrup for longer-term preservation.
Leave a Comment