
Grow Pineapple at Home? Absolutely! Imagine the look on your friends’ faces when you tell them you harvested a juicy, tropical pineapple right from your own backyard (or even your balcony!). It sounds like something out of a dream, right? But trust me, it’s totally achievable, and this DIY guide is going to show you exactly how.
Pineapples, with their spiky exterior and sweet, tangy flesh, have a rich history. Originating in South America, they were a symbol of hospitality and luxury, often displayed at feasts and celebrations. Bringing that tropical vibe into your home is easier than you think, and it’s a fantastic way to connect with nature and enjoy the fruits (literally!) of your labor.
In today’s world, where we’re all looking for ways to be more sustainable and self-sufficient, learning to grow pineapple at home is more relevant than ever. Not only will you reduce your reliance on store-bought produce, but you’ll also gain a deeper appreciation for the growing process. Plus, who doesn’t love the satisfaction of nurturing a plant from start to finish? This DIY project is perfect for beginners and seasoned gardeners alike, offering a rewarding experience and a delicious treat at the end. Let’s get started!
DIY Hanging Mint Container Garden: Fresh Herbs at Your Fingertips!
Hey there, fellow plant enthusiasts! I’m super excited to share one of my favorite DIY projects with you: creating a hanging mint container garden. Not only is it a fantastic way to add some greenery to your space, but it also provides you with a constant supply of fresh mint for teas, cocktails, and culinary creations. Plus, containing mint in a pot is crucial because, trust me, it can take over your entire garden if you let it!
This project is relatively simple, even for beginners, and it’s incredibly rewarding. Let’s dive in!
What You’ll Need:
Before we get started, let’s gather all the necessary materials. Here’s a comprehensive list:
* A Suitable Container: I recommend a hanging basket or a pot with drainage holes that can be easily converted into a hanging planter. Size matters! Aim for something at least 10-12 inches in diameter to give your mint room to grow.
* Hanging Hardware: This depends on your container. For hanging baskets, you’ll likely already have chains or ropes. If you’re using a regular pot, you’ll need to purchase a hanging kit with chains or sturdy rope and S-hooks. Make sure the hardware is strong enough to support the weight of the container, soil, and mature mint plant.
* Potting Soil: Use a high-quality potting mix that drains well. Avoid using garden soil, as it can become compacted in containers and hinder drainage. I prefer a mix that includes peat moss, perlite, and vermiculite.
* Mint Seedlings or Cuttings: You can either start from seeds (which takes longer) or purchase established mint seedlings from a local nursery. Alternatively, you can propagate mint from cuttings. I’ll explain how to do that later!
* Watering Can or Hose: Essential for keeping your mint hydrated.
* Gardening Gloves: To protect your hands from dirt and potential irritants.
* Optional: Slow-Release Fertilizer: This will provide your mint with a steady supply of nutrients.
* Optional: Landscape Fabric or Coffee Filter: To prevent soil from escaping through the drainage holes.
* Optional: Decorative Elements: Pebbles, moss, or small figurines to add a personal touch.
Propagating Mint from Cuttings (Optional):
If you want to save some money and have access to a healthy mint plant, propagating from cuttings is a great option. Here’s how I do it:
1. Select a Healthy Stem: Choose a stem that’s about 4-6 inches long and has several leaves.
2. Remove Lower Leaves: Strip off the leaves from the bottom 2 inches of the stem. This is where the roots will grow.
3. Place in Water: Put the stem in a glass or jar filled with water, making sure the nodes (where the leaves were removed) are submerged.
4. Wait for Roots: Place the glass in a bright, indirect light location. Change the water every few days. You should see roots starting to form within a week or two.
5. Plant the Cutting: Once the roots are about an inch long, you can plant the cutting in your prepared container.
Assembling Your Hanging Mint Garden:
Now for the fun part! Let’s put everything together.
1. Prepare the Container: If your container doesn’t have drainage holes, you’ll need to drill some. This is crucial for preventing root rot. If it does have holes, line the bottom with landscape fabric or a coffee filter to prevent soil from washing out.
2. Add Potting Soil: Fill the container about two-thirds full with potting soil.
3. Plant the Mint: Gently remove the mint seedlings from their containers and loosen the roots slightly. If you’re using cuttings, carefully plant them in the soil. Space the plants a few inches apart to allow for growth.
4. Fill with More Soil: Add more potting soil around the plants, leaving about an inch of space between the soil surface and the rim of the container.
5. Water Thoroughly: Water the soil until it’s evenly moist.
6. Add Fertilizer (Optional): If you’re using slow-release fertilizer, sprinkle it on top of the soil according to the package instructions.
7. Attach Hanging Hardware: Carefully attach the chains or ropes to the container, ensuring they are securely fastened.
8. Hang Your Garden: Choose a location that receives partial to full sunlight. Mint thrives in sunny spots, but it can also tolerate some shade. Make sure the location is easily accessible for watering.
Caring for Your Hanging Mint Garden:
Maintaining your hanging mint garden is relatively easy, but here are a few tips to keep it thriving:
* Watering: Water regularly, especially during hot weather. The soil should be consistently moist but not soggy. Check the soil moisture by sticking your finger into the soil. If it feels dry an inch below the surface, it’s time to water. Hanging containers tend to dry out faster than ground-level gardens, so keep a close eye on the moisture levels.
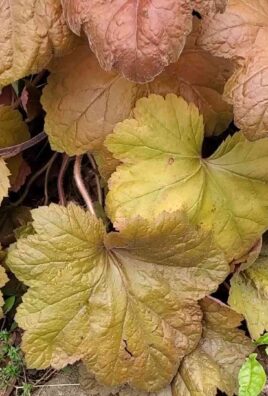
* Sunlight: Mint loves sunlight, but it can also tolerate partial shade. Aim for at least 4-6 hours of sunlight per day. If you notice the leaves are turning yellow, it might be getting too much direct sunlight.
* Fertilizing: If you didn’t use slow-release fertilizer, you can fertilize your mint every few weeks with a liquid fertilizer diluted to half strength.
* Pruning: Regular pruning is essential for keeping your mint plant healthy and productive. Pinch off the top leaves to encourage bushier growth. You can also harvest leaves as needed for cooking or teas. Don’t be afraid to prune it back quite a bit – mint is very resilient!
* Pest Control: Mint is relatively pest-resistant, but it can occasionally be affected by aphids or spider mites. If you notice any pests, you can try spraying the plant with insecticidal soap or neem oil.
* Overwintering: In colder climates, you’ll need to protect your mint plant from frost. You can either bring the container indoors or insulate it with burlap or bubble wrap. Mint is a perennial, so it will come back year after year if properly cared for.
Troubleshooting:
Even with the best care, you might encounter a few problems. Here are some common issues and how to address them:
* Yellowing Leaves: This could be caused by overwatering, underwatering, or too much direct sunlight. Adjust your watering schedule and move the plant to a different location if necessary.
* Leggy Growth: This is usually a sign of insufficient sunlight. Move the plant to a sunnier location.
* Brown Spots: This could be caused by fungal diseases. Ensure good air circulation and avoid overwatering. You can also try using a fungicide.
* Pests: As mentioned earlier, aphids and spider mites can sometimes be a problem. Treat with insecticidal soap or neem oil.
Harvesting Your Mint:
Harvesting your mint is easy and rewarding! Simply snip off the leaves or stems as needed. The more you harvest, the more the plant will grow. For the best flavor, harvest mint in the morning after the dew has dried.
Uses for Your Fresh Mint:
Now that you have a constant supply of fresh mint, the possibilities are endless! Here are just a few ideas:
* Mint Tea: Steep fresh mint leaves in hot water for a refreshing and soothing tea.
* Mojitos: Muddle mint leaves with lime juice, sugar, and rum for a classic mojito.
* Mint Juleps: Muddle mint leaves with sugar and bourbon for a traditional mint julep.
* Salads: Add chopped mint to salads for a burst of fresh flavor.
* Desserts: Use mint to flavor desserts like ice cream, chocolate mousse, and fruit salads.
* Savory Dishes: Mint can also be used in savory dishes like lamb, chicken, and vegetables.
* Garnish: Use mint sprigs as a garnish for cocktails, desserts, and other dishes.
Choosing the Right Mint Variety:
There are many different varieties of mint, each with its own unique flavor and aroma. Here are a few popular options:
* Peppermint: A classic mint with a strong, refreshing flavor. Great for teas and desserts.
* Spearmint: A milder mint with a slightly sweeter flavor. Ideal for mojitos and savory dishes.
* Chocolate Mint: A unique mint with a hint of chocolate flavor. Delicious in desserts and teas.
* Orange Mint: A citrusy mint with a refreshing aroma. Perfect for salads and cocktails.
* Apple Mint: A fruity mint with a subtle apple flavor. Great for teas and desserts.
When choosing a mint variety, consider your personal preferences and how you

Conclusion
So, there you have it! Growing your own pineapple at home isn’t just a fun project; it’s a rewarding experience that brings a touch of the tropics right to your windowsill or garden. Forget those expensive, often bland, store-bought pineapples. Imagine the satisfaction of slicing into a juicy, sweet pineapple that you nurtured from a simple crown. The flavor difference alone is reason enough to embark on this adventure.
This DIY trick is a must-try for several reasons. First, it’s incredibly cost-effective. Instead of discarding the pineapple crown, you’re essentially getting a free plant. Second, it’s a fantastic way to reduce food waste and embrace a more sustainable lifestyle. Third, it’s a fascinating educational experience, especially for children, teaching them about plant propagation and the wonders of nature. Finally, and perhaps most importantly, it’s a conversation starter! Imagine serving a homemade pineapple dessert and proudly announcing that you grew the pineapple yourself.
But the fun doesn’t stop there! Feel free to experiment with different varieties of pineapple. Look for unique cultivars at your local farmers market or specialty grocery store. Each variety offers a slightly different flavor profile, from the tangy sweetness of a Smooth Cayenne to the delicate aroma of a White Pineapple. You can also experiment with different potting mixes. While a standard well-draining potting mix works perfectly well, you might want to try adding some perlite or orchid bark to improve drainage and aeration. Consider using a terracotta pot, which allows the soil to breathe and helps prevent overwatering.
Another variation to consider is the location where you grow your pineapple. While they thrive in warm, sunny environments, you can successfully grow them indoors with adequate light. A south-facing window is ideal, but if you don’t have one, consider using a grow light to supplement the natural light. Remember to rotate the plant regularly to ensure even growth.
Don’t be discouraged if your pineapple doesn’t fruit immediately. It can take anywhere from one to three years for a pineapple plant to produce fruit. Patience is key! But trust us, the wait is well worth it. The moment you see that tiny pineapple emerging from the center of the plant, you’ll be filled with a sense of accomplishment and excitement.
We wholeheartedly encourage you to try this DIY trick and experience the joy of growing your own pineapple at home. It’s a simple, rewarding, and sustainable way to bring a taste of the tropics to your life. And most importantly, it allows you to enjoy the unparalleled flavor of a homegrown pineapple.
So, grab a pineapple, follow our simple steps, and get ready to embark on a tropical adventure. We can’t wait to hear about your experiences! Share your photos, tips, and stories with us in the comments below. Let’s create a community of pineapple growers and spread the joy of homegrown goodness. We are confident that you will find that learning how to grow pineapple at home is easier than you think!
Frequently Asked Questions (FAQ)
How long does it take to grow a pineapple from a crown?
The time it takes to grow a pineapple from a crown can vary depending on several factors, including the variety of pineapple, the climate, and the growing conditions. Generally, it takes anywhere from one to three years for a pineapple plant to mature and produce fruit. Be patient and provide your plant with the proper care, and you’ll eventually be rewarded with a delicious homegrown pineapple.
What is the best type of pineapple to use for growing?
The most common type of pineapple used for growing from a crown is the Smooth Cayenne variety, which is widely available in grocery stores. However, you can experiment with other varieties if you can find them. Look for pineapples with healthy, green crowns that are free from blemishes or signs of disease. The fresher the crown, the better the chances of successful rooting.
How much sunlight does a pineapple plant need?
Pineapple plants thrive in bright, sunny locations. They need at least six hours of direct sunlight per day to grow and produce fruit. If you’re growing your pineapple indoors, place it near a south-facing window where it can receive ample sunlight. If you don’t have enough natural light, consider using a grow light to supplement the light.
What kind of soil is best for growing pineapples?
Pineapples prefer well-draining soil that is rich in organic matter. A good potting mix for pineapples should be slightly acidic, with a pH between 6.0 and 6.5. You can use a standard potting mix or create your own by mixing equal parts of potting soil, perlite, and peat moss. The perlite helps to improve drainage, while the peat moss provides acidity.
How often should I water my pineapple plant?
Water your pineapple plant regularly, but avoid overwatering. Allow the soil to dry out slightly between waterings. During the growing season (spring and summer), you may need to water more frequently than during the dormant season (fall and winter). Check the soil moisture by sticking your finger into the soil. If the top inch of soil feels dry, it’s time to water.
Do I need to fertilize my pineapple plant?
Yes, fertilizing your pineapple plant is important for healthy growth and fruit production. Use a balanced fertilizer that is specifically formulated for tropical plants. Follow the instructions on the fertilizer package for application rates and frequency. Fertilize your pineapple plant regularly during the growing season, but reduce or stop fertilizing during the dormant season.
How do I know when my pineapple is ripe?
There are several signs that indicate a pineapple is ripe. The color of the skin will change from green to yellow or golden. The pineapple will also have a sweet, fragrant aroma. You can also gently tug on one of the leaves. If it comes out easily, the pineapple is likely ripe. Finally, the pineapple should feel slightly soft to the touch.
Can I grow a pineapple in a container?
Yes, pineapples can be successfully grown in containers. Choose a pot that is at least 12 inches in diameter and has drainage holes. Use a well-draining potting mix and provide your pineapple plant with plenty of sunlight and water. Container-grown pineapples may need to be repotted every year or two as they grow larger.
What are some common problems when growing pineapples?
Some common problems when growing pineapples include root rot, mealybugs, and scale. Root rot can occur if the soil is too wet or poorly drained. Mealybugs and scale are common pests that can infest pineapple plants. Inspect your plant regularly for signs of pests or disease and take appropriate action if necessary.
Is it possible to grow pineapple indoors in colder climates?
Yes, it is absolutely possible to grow pineapple indoors, even in colder climates! The key is to provide the plant with enough light and warmth. A south-facing window is ideal, but if you don’t have one, consider using a grow light. Maintain a consistent temperature between 65°F and 80°F (18°C and 27°C). Avoid placing the plant near drafts or cold windows. With proper care, you can enjoy the taste of homegrown pineapple year-round, regardless of your climate.
Leave a Comment