
Yardlong Bean Growing Tips: Ever dreamt of harvesting beans so long they practically touch the ground? I know I have! There’s something incredibly satisfying about growing your own food, and yardlong beans, with their impressive length and delicious flavor, are a fantastic choice for any home gardener looking for a unique and rewarding experience.
These fascinating beans, also known as asparagus beans or Chinese long beans, have a rich history, particularly in Southeast Asian cuisine where they’ve been cultivated for centuries. They’re a staple ingredient in stir-fries, curries, and salads, adding a delightful crunch and subtle sweetness. But beyond their culinary appeal, growing yardlong beans offers a wonderful connection to nature and a sense of accomplishment.
Why should you try these yardlong bean growing tips? Well, for starters, they’re relatively easy to grow, even for beginners! Plus, they’re incredibly productive, providing a bountiful harvest from just a few plants. Imagine the joy of sharing your homegrown bounty with friends and family, or creating delicious meals with ingredients you nurtured yourself. In this article, I’ll share my tried-and-true methods for successfully cultivating these amazing beans, from seed to table. Get ready to impress your neighbors (and yourself!) with your impressive yardlong bean harvest!
DIY: Grow Your Own Bounty of Yardlong Beans!
Hey there, fellow gardening enthusiasts! I’m so excited to share my secrets to growing those amazing, ridiculously long yardlong beans right in your own backyard. Trust me, it’s easier than you think, and the bragging rights alone are worth the effort! Get ready to impress your friends and family with these impressive veggies.
Choosing the Right Variety and Location
Before we get our hands dirty, let’s talk about picking the perfect yardlong bean variety and finding the ideal spot for them to thrive.
* Variety Selection: While “yardlong bean” is the common name, you’ll find different cultivars. Look for names like ‘Chinese Long Bean,’ ‘Asparagus Bean,’ or ‘Snake Bean.’ I personally love the ‘Red Noodle’ variety because of its beautiful color and delicious flavor, but experiment and see what works best for you!
* Sunlight is Key: Yardlong beans are sun-worshippers! They need at least 6-8 hours of direct sunlight each day to produce a generous harvest. Choose a location in your garden that gets plenty of sunshine.
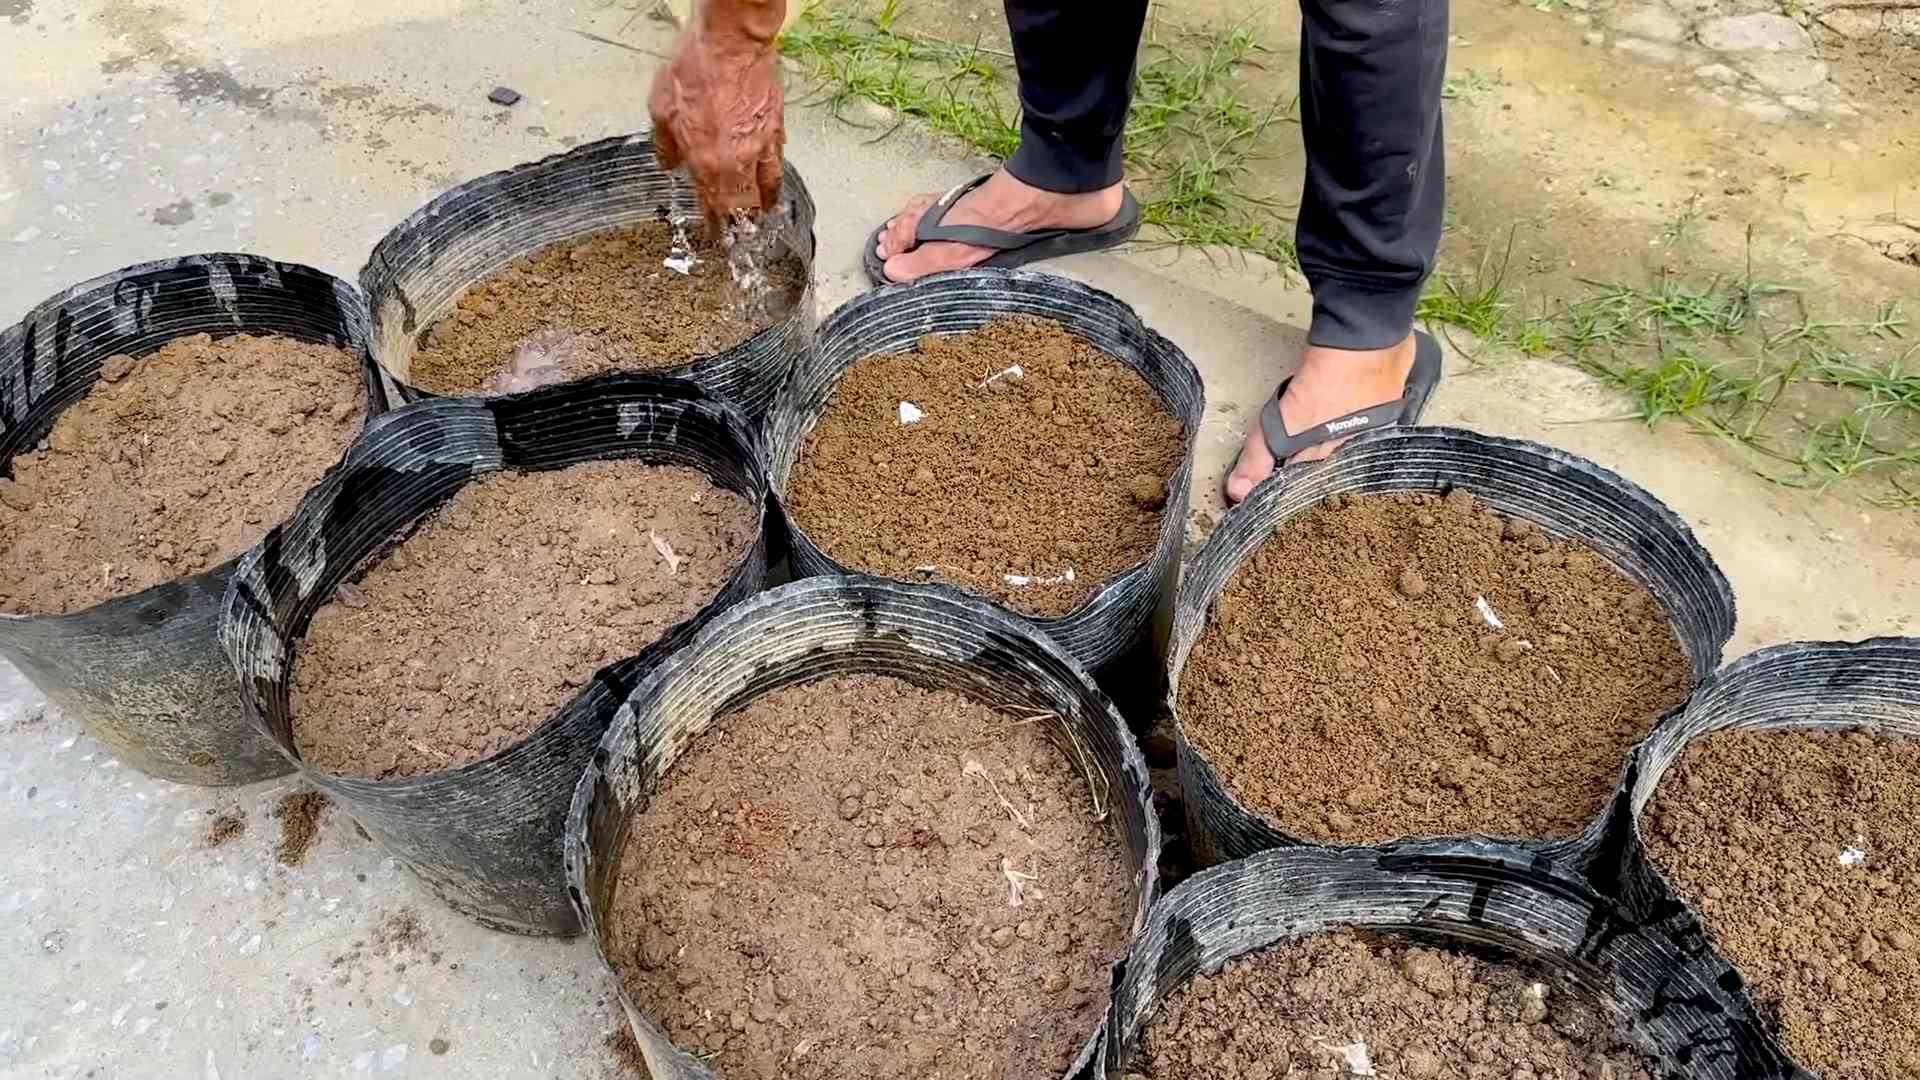
* Soil Matters: These beans prefer well-drained soil that’s rich in organic matter. If your soil is heavy clay or sandy, amend it with compost or well-rotted manure before planting. Good drainage is crucial to prevent root rot.
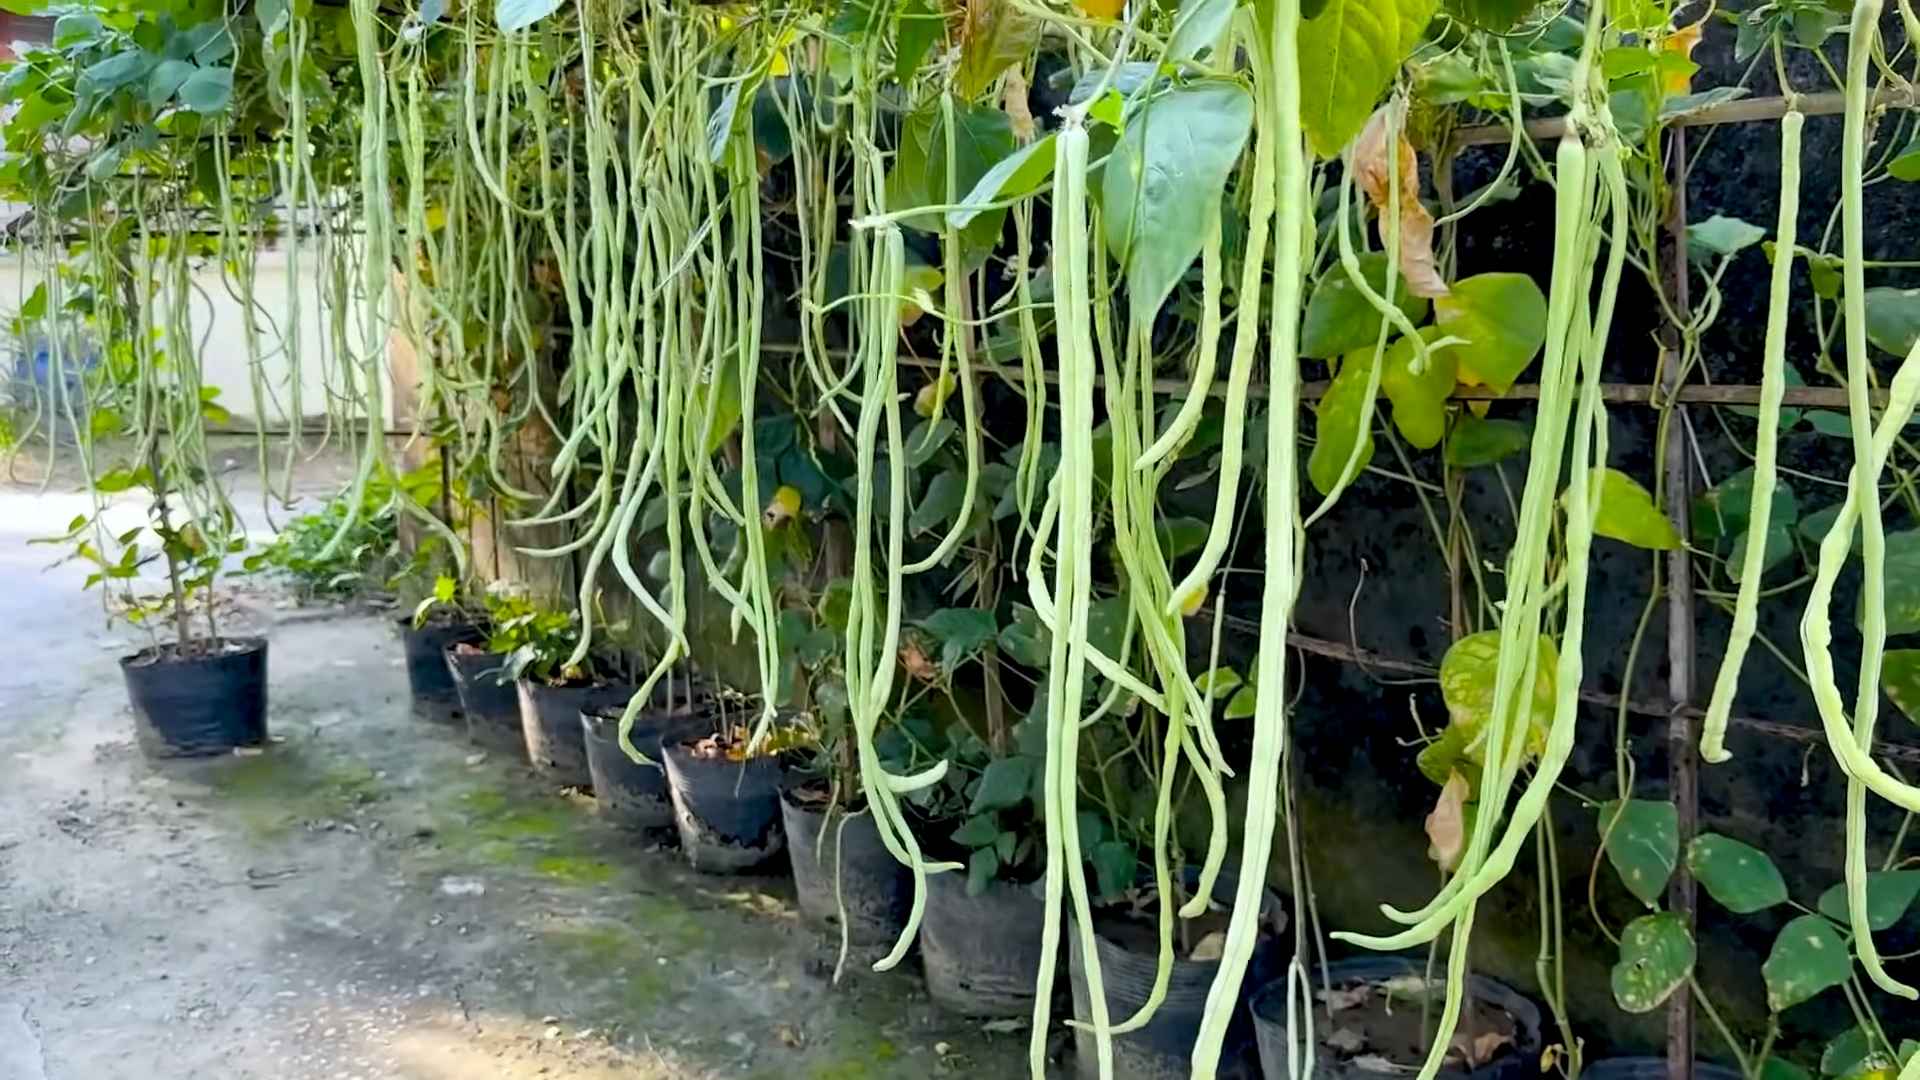
* Support System: Remember, these beans are long – really long! They need a sturdy trellis, fence, or teepee to climb on. I’ve used everything from bamboo poles to repurposed metal fencing, so get creative!
Getting Started: Planting Your Yardlong Beans
Now for the fun part – planting! Here’s how I get my yardlong bean plants off to a great start:
1. Timing is Everything: Yardlong beans are warm-weather crops, so wait until after the last frost in your area to plant them. The soil temperature should be at least 65°F (18°C) for optimal germination. I usually start checking the weather forecast around late spring.
2. Direct Sowing vs. Starting Indoors: You can either direct sow the seeds into the ground or start them indoors a few weeks before the last frost. I prefer direct sowing because it’s less work, but starting indoors can give you a head start.
* Direct Sowing: Sow seeds 1 inch deep and 2-3 inches apart along your trellis or support structure. Once the seedlings emerge, thin them to about 6 inches apart.
* Starting Indoors: Sow seeds in peat pots or biodegradable containers about 3-4 weeks before the last frost. Keep the soil moist and warm. Transplant the seedlings outdoors after the last frost, being careful not to disturb the roots.
3. Prepare the Soil: Before planting, loosen the soil and amend it with compost or well-rotted manure. This will provide the young plants with the nutrients they need to grow strong. I also like to add a little bit of bone meal to the planting hole to encourage root development.
4. Watering: Water the seeds or seedlings thoroughly after planting. Keep the soil consistently moist, but not waterlogged, until the plants are established.
5. Mulching: Apply a layer of mulch around the plants to help retain moisture, suppress weeds, and regulate soil temperature. I use straw, wood chips, or shredded leaves.
Nurturing Your Yardlong Beans: Care and Maintenance
Once your yardlong beans are planted, it’s important to provide them with the care they need to thrive. Here’s what I do to keep my plants happy and productive:
1. Watering Regularly: Yardlong beans need consistent moisture, especially during hot, dry weather. Water deeply and regularly, aiming to keep the soil evenly moist. I usually water in the morning to allow the foliage to dry before nightfall, which helps prevent fungal diseases.
2. Fertilizing: While yardlong beans don’t need a lot of fertilizer, a light feeding every few weeks can help boost their growth. I use a balanced organic fertilizer or compost tea. Avoid over-fertilizing, as this can lead to excessive foliage growth and fewer beans.
3. Weeding: Keep the area around your yardlong beans free of weeds. Weeds compete with the beans for water, nutrients, and sunlight. I like to hand-pull weeds or use a hoe to cultivate the soil.
4. Training the Vines: As the yardlong bean vines grow, gently guide them up the trellis or support structure. This will help them stay organized and prevent them from sprawling on the ground. I use plant ties or twine to secure the vines to the trellis.
5. Pest and Disease Control: Keep an eye out for common bean pests like aphids, bean beetles, and spider mites. I usually start with organic pest control methods, such as insecticidal soap or neem oil. For fungal diseases, ensure good air circulation and avoid overhead watering. If necessary, use a fungicide labeled for use on beans.
6. Pruning (Optional): While not essential, pruning can help improve air circulation and encourage more bean production. I usually prune away any yellowing or diseased leaves. You can also pinch off the tips of the vines to encourage branching.
Harvesting Your Yardlong Beans: The Moment of Truth!
This is the moment you’ve been waiting for – harvesting your own homegrown yardlong beans!
1. Timing is Key: Yardlong beans are typically ready to harvest about 60-80 days after planting. The beans should be long and slender, but still tender. They should snap easily when bent.
2. Harvesting Technique: Use scissors or pruning shears to cut the beans from the vine. Be careful not to damage the plant. Harvest regularly to encourage continued production.
3. Don’t Wait Too Long: Overripe yardlong beans can become tough and stringy. Harvest them when they are still young and tender for the best flavor and texture.
4. Storage: Freshly harvested yardlong beans can be stored in the refrigerator for up to a week. For longer storage, you can blanch and freeze them.
Troubleshooting Common Problems
Even with the best care, you might encounter some challenges when growing yardlong beans. Here are some common problems and how to address them:
* Poor Germination: If your seeds aren’t germinating, make sure the soil is warm enough and consistently moist. You can also try soaking the seeds in water for 24 hours before planting to improve germination rates.
* Yellowing Leaves: Yellowing leaves can be a sign of nutrient deficiency, overwatering, or disease. Check the soil drainage and nutrient levels. If necessary, amend the soil with compost or fertilizer.
* Pest Infestations: As mentioned earlier, keep an eye out for common bean pests. Use organic pest control methods to manage infestations.
* Disease Problems: Ensure good air circulation and avoid overhead watering to prevent fungal diseases. If necessary, use a fungicide labeled for use on beans.
* Lack of Bean Production: If your plants are growing well but not producing beans, it could be due to lack of pollination, insufficient sunlight, or over-fertilization. Make sure the plants are getting enough sunlight and avoid over-fertilizing. You can also try hand-pollinating the flowers by gently shaking the vines.
Enjoying Your Harvest: Delicious Yardlong Bean Recipes
Now that you’ve harvested your bounty of yardlong beans, it’s time to enjoy them! These beans are incredibly versatile and can be used in a variety of dishes. Here are a few of my favorite recipes:
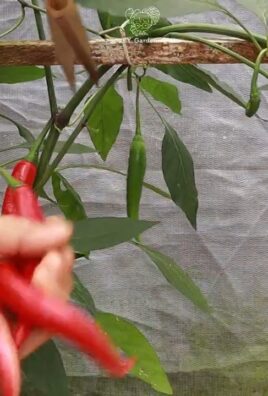
* Stir-Fries: Yardlong beans are a classic ingredient in stir-fries. They add a delicious crunch and subtle sweetness to any stir-fry dish.
* Salads: Add sliced yardlong beans to your favorite salads for a boost of flavor and nutrition.
* Soups and Stews: Yardlong beans can be added to soups and stews for a hearty and flavorful addition.
* Grilled or Roasted: Toss yardlong beans with olive oil, salt, and pepper and grill or roast them for a simple and delicious side dish.
* Pickled: Pickle your yardlong beans for a tangy and flavorful snack or condiment.
Final Thoughts
Growing yardlong beans is a rewarding experience that allows you to enjoy fresh, homegrown produce right from your own backyard. With a little bit of care and attention, you can harvest a bountiful crop of these amazing beans. So, get out there and start planting! Happy gardening!
Conclusion
So, there you have it! Mastering the art of growing yardlong beans doesn’t require a green thumb blessed by the gardening gods. With these simple yet effective DIY tricks, you’re well on your way to harvesting a bountiful crop of these impressive legumes. We’ve covered everything from optimizing your soil with homemade compost to crafting ingenious trellises that will support their vigorous growth. Remember, the key to success lies in understanding the specific needs of your yardlong beans and adapting your approach accordingly.
Why is this a must-try? Because growing your own yardlong beans is not only incredibly rewarding, offering fresh, delicious produce right from your backyard, but it’s also a sustainable and cost-effective way to enjoy this unique vegetable. Imagine the satisfaction of serving a stir-fry featuring beans you nurtured from seed to table! Plus, the towering vines of yardlong beans add a touch of exotic beauty to any garden.
But don’t stop there! Feel free to experiment with different variations to personalize your yardlong bean growing experience. Try interplanting your beans with companion plants like basil or marigolds to deter pests and attract beneficial insects. Explore different trellis designs – perhaps a teepee structure or a sprawling archway – to create a visually stunning and productive garden feature. You could even try growing different varieties of yardlong beans, each with its own unique flavor and texture. Some varieties are more heat-tolerant, while others offer different pod colors, from vibrant green to deep purple.
The possibilities are endless!
We’ve shown you how to create a nutrient-rich soil amendment using readily available kitchen scraps and garden waste, saving you money on expensive fertilizers. We’ve also provided guidance on building sturdy and cost-effective trellises, eliminating the need to purchase pre-made structures. By embracing these DIY methods, you’re not only saving money but also reducing your environmental impact.
Growing yardlong beans is a journey of discovery.
Don’t be afraid to get your hands dirty, experiment with different techniques, and learn from your successes and failures. The more you understand the needs of your plants, the better equipped you’ll be to provide them with the optimal growing conditions.
Now, it’s your turn! We encourage you to put these DIY tricks into practice and embark on your own yardlong bean growing adventure. We’re confident that you’ll be amazed by the results. And most importantly, we want to hear about your experience! Share your tips, tricks, and triumphs in the comments section below. Let’s create a community of yardlong bean enthusiasts who can learn from each other and inspire others to grow their own food.
Share your photos, stories, and questions – we’re all in this together!
So, grab your seeds, gather your tools, and get ready to experience the joy of growing your own delicious and nutritious yardlong beans. Happy gardening!
Frequently Asked Questions (FAQ)
What are the best conditions for growing yardlong beans?
Yardlong beans thrive in warm, sunny locations with well-drained soil. They require at least 6-8 hours of direct sunlight per day to produce a bountiful harvest. The ideal soil temperature for germination is between 70°F and 85°F (21°C and 29°C). Ensure your soil is rich in organic matter and has good drainage to prevent root rot. Amend heavy clay soils with compost or other organic materials to improve drainage and aeration.
How often should I water my yardlong beans?
Water your yardlong beans regularly, especially during hot, dry weather. Aim to keep the soil consistently moist but not waterlogged. Water deeply at the base of the plants, avoiding wetting the foliage, which can increase the risk of fungal diseases. A good rule of thumb is to water when the top inch of soil feels dry to the touch. Mulching around the base of the plants can help retain moisture and suppress weeds.
What kind of trellis is best for yardlong beans?
Yardlong beans are vigorous climbers and require a sturdy trellis to support their growth. A trellis should be at least 6-8 feet tall to accommodate the long vines. Options include:
* **A-frame trellis:** Easy to build and provides ample support.
* **Teepee trellis:** A visually appealing option that can be made from bamboo poles or wooden stakes.
* **Horizontal trellis:** Constructed with wires or netting stretched between posts.
* **Existing structures:** Fences, walls, or even sturdy trees can be used as trellises.
Ensure the trellis is strong enough to support the weight of the mature vines and beans.
How do I deal with pests and diseases affecting my yardlong beans?
Yardlong beans can be susceptible to various pests and diseases, including aphids, bean beetles, and fungal infections. Here are some preventative and control measures:
* **Inspect plants regularly:** Look for signs of pests or diseases and take action promptly.
* **Handpick pests:** Remove aphids, bean beetles, and other pests by hand.
* **Use insecticidal soap:** Spray affected plants with insecticidal soap to control aphids and other soft-bodied insects.
* **Apply neem oil:** Neem oil is a natural insecticide and fungicide that can help control a wide range of pests and diseases.
* **Ensure good air circulation:** Space plants adequately to promote good air circulation and reduce the risk of fungal diseases.
* **Practice crop rotation:** Avoid planting beans in the same location year after year to prevent the buildup of soilborne diseases.
* **Companion planting:** Plant basil, marigolds, or other companion plants to deter pests.
When and how should I harvest my yardlong beans?
Yardlong beans are typically ready for harvest 60-80 days after planting. Harvest the beans when they are young, tender, and about 12-18 inches long. Use scissors or pruning shears to cut the beans from the vine, leaving a short stem attached. Regular harvesting encourages continued production. Overripe beans will become tough and less flavorful.
Can I save seeds from my yardlong beans?
Yes, you can save seeds from your yardlong beans. Allow some of the pods to mature fully on the vine, turning brown and dry. Once the pods are completely dry, shell the beans and store them in an airtight container in a cool, dry place. Label the container with the variety and date. Note that if you grew hybrid varieties, the seeds may not produce plants that are true to type.
How can I improve the soil for growing yardlong beans?
Improving the soil is crucial for successful yardlong bean cultivation. Here are some tips:
* **Amend with compost:** Incorporate plenty of compost into the soil to improve drainage, aeration, and nutrient content.
* **Add aged manure:** Aged manure is another excellent soil amendment that provides essential nutrients.
* **Use cover crops:** Plant cover crops like clover or buckwheat to improve soil health and suppress weeds.
* **Test the soil pH:** Yardlong beans prefer a slightly acidic to neutral soil pH (6.0-7.0). Amend the soil with lime if it is too acidic.
* **Ensure good drainage:** Yardlong beans do not tolerate waterlogged soil. Improve drainage by adding organic matter or creating raised beds.
Are there any specific varieties of yardlong beans that are easier to grow?
While most yardlong bean varieties are relatively easy to grow, some may be better suited to certain climates or growing conditions. Consider these popular varieties:
* **Red Noodle:** Known for its striking red pods and excellent flavor.
* **Chinese Red Noodle:** Similar to Red Noodle but with slightly longer pods.
* **Orient Wonder:** A prolific producer with long, slender green pods.
* **Yardlong Asparagus Bean:** A classic variety with long, tender green pods.
Research different varieties to find one that is well-suited to your local climate and growing conditions.
Can I grow yardlong beans in containers?
Yes, you can grow yardlong beans in containers, but you’ll need a large container (at least 10-12 gallons) to accommodate their extensive root system. Choose a container with good drainage holes and fill it with a high-quality potting mix. Provide a sturdy trellis for the vines to climb on. Water and fertilize regularly, as container-grown plants tend to dry out and deplete nutrients more quickly than those grown in the ground.
What are some common mistakes to avoid when growing yardlong beans?
* **Planting too early:** Yardlong beans are sensitive to cold temperatures. Wait until the soil has warmed up to at least 70°F (21°C) before planting.
* **Neglecting to provide a trellis:** Yardlong beans require a sturdy trellis to support their growth.
* **Overwatering:** Overwatering can lead to root rot. Water deeply but infrequently, allowing the soil to dry out slightly between waterings.
* **Under-fertilizing:** Yardlong beans are heavy feeders. Fertilize regularly with a balanced fertilizer or compost tea.
* **Failing to control pests and diseases:** Inspect plants regularly and take action promptly to control pests and diseases.
* **Harvesting too late:** Overripe beans will become tough and less flavorful. Harvest the beans when they are young and tender.

Leave a Comment