
Grow Bean Sprouts at Home – and unlock a world of fresh, crunchy goodness right on your kitchen counter! Forget those limp, flavorless sprouts from the grocery store. I’m going to show you how incredibly easy and rewarding it is to cultivate your own vibrant bean sprouts, bursting with nutrients and ready to add a delightful crunch to your salads, sandwiches, and stir-fries.
Sprouting, in general, isn’t a new fad. It’s an ancient practice, with roots stretching back thousands of years to cultures in Asia. Bean sprouts, in particular, have been a staple in Asian cuisine for centuries, valued not only for their taste and texture but also for their impressive nutritional profile. Think of all those delicious stir-fries and spring rolls – bean sprouts are often the unsung heroes!
But why should you bother to grow bean sprouts at home? Well, for starters, it’s incredibly cost-effective. A small bag of dried beans can yield a mountain of sprouts, saving you money compared to buying them pre-packaged. More importantly, you control the entire process, ensuring your sprouts are free from harmful chemicals and grown in a clean environment. Plus, let’s be honest, there’s something deeply satisfying about nurturing your own food from seed (or in this case, bean!) to table. So, are you ready to ditch the store-bought sprouts and embark on this simple, yet rewarding, home gardening adventure? Let’s get sprouting!

Grow Your Own Crunchy Bean Sprouts: A Simple DIY Guide
Hey there, fellow DIY enthusiasts! Are you ready to embark on a super easy and rewarding project? I’m going to walk you through how to grow your own delicious and crunchy bean sprouts right in your kitchen. Forget buying them at the store – this method is not only cheaper but also guarantees freshness and lets you control exactly what goes into your food. Plus, it’s incredibly satisfying to watch those little sprouts come to life!
What You’ll Need
Before we dive in, let’s gather our supplies. The beauty of this project is that you probably already have most of these things lying around:
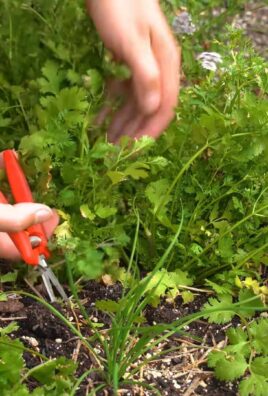
* Bean Seeds: Mung beans are the most common and easiest to sprout, but you can also experiment with lentils, adzuki beans, or even alfalfa seeds. Make sure they’re specifically labeled for sprouting or food use, not for planting in the garden, as those might be treated with chemicals.
* A Wide-Mouth Jar: A quart-sized mason jar works perfectly.
* Sprouting Lid or Cheesecloth and Rubber Band: A sprouting lid is ideal because it allows for easy draining and ventilation. If you don’t have one, a piece of cheesecloth secured with a rubber band will do the trick.
* Water: Filtered water is best, but tap water that’s been sitting out for a while to let the chlorine dissipate is also fine.
* A Bowl or Tray: To hold the jar at an angle for drainage.
* A Dark Place: A cupboard, pantry, or even a covered box will work. Darkness is key for optimal sprout growth.
Getting Started: Soaking the Beans
The first step is to wake up those dormant beans! Soaking them rehydrates them and kicks off the germination process.
1. Rinse the Beans: Place about 1/4 cup of mung beans (or your chosen bean) in the jar. Rinse them thoroughly with cool water to remove any debris or dust.
2. Add Water: Fill the jar with about 2-3 times the volume of the beans with cool, filtered water. The beans will expand as they soak, so make sure they have enough room.
3. Secure the Lid: Attach your sprouting lid or cheesecloth and rubber band.
4. Soak for 8-12 Hours: Let the beans soak in a cool, dark place for at least 8 hours, but no more than 12. I usually soak them overnight so they’re ready to go in the morning.
The Sprouting Process: Rinse and Repeat
This is where the magic happens! The key to successful sprouting is consistent rinsing and drainage.
1. Drain and Rinse: After the soaking period, drain the water completely through the sprouting lid or cheesecloth. Rinse the beans thoroughly with cool water, making sure to get all the nooks and crannies.
2. Drain Thoroughly: This is crucial! Excess water can lead to mold and spoilage. Invert the jar and shake gently to remove as much water as possible.
3. Position for Drainage: Place the jar upside down at an angle in a bowl or tray. This allows any remaining water to drain out and provides good air circulation.
4. Return to Darkness: Put the jar back in your dark cupboard or pantry.
5. Rinse and Drain 2-3 Times a Day: Repeat the rinsing and draining process 2-3 times a day for the next 3-5 days. Consistency is key! I usually do it in the morning, afternoon, and before bed.
6. Observe the Growth: You should start to see tiny sprouts emerging within the first 24 hours. As you continue to rinse and drain, the sprouts will grow longer and thicker.
Harvesting and Storing Your Bean Sprouts
Once your bean sprouts have reached your desired length (usually around 1-2 inches), it’s time to harvest!
1. Final Rinse: Give the sprouts one last thorough rinse to remove any remaining hulls or loose skins.
2. Remove Hulls (Optional): Some people prefer to remove the hulls (the outer skins of the beans). You can do this by gently agitating the sprouts in a bowl of water. The hulls will float to the top and can be skimmed off. This is a bit time-consuming, but it can improve the texture of the sprouts.
3. Dry Thoroughly: This is important for storage. Spread the sprouts out on a clean kitchen towel or paper towels and gently pat them dry. You can also use a salad spinner to remove excess water.
4. Store in the Refrigerator: Place the dried sprouts in a clean, airtight container lined with a paper towel. The paper towel will help absorb any excess moisture and keep the sprouts fresh.
5. Use Within a Week: Bean sprouts are best used within a week of harvesting.
Troubleshooting and Tips for Success
Even with the best instructions, sometimes things don’t go exactly as planned. Here are a few common issues and how to address them:
* Mold: Mold is usually caused by insufficient drainage or poor air circulation. If you see any signs of mold (fuzzy white or gray patches), discard the entire batch. To prevent mold, make sure you’re draining the sprouts thoroughly after each rinse and providing adequate ventilation.
* Unpleasant Smell: A sour or unpleasant smell is another sign of spoilage. This is usually caused by bacteria growth due to poor hygiene or insufficient rinsing. Discard the batch and start over, making sure to use clean equipment and rinse the sprouts thoroughly.
* Slow Growth: Slow growth can be caused by several factors, including low temperature, poor quality seeds, or insufficient rinsing. Make sure your sprouts are in a warm (but not hot) environment, use fresh, high-quality seeds, and rinse them regularly.
* Bitter Taste: A slightly bitter taste is normal, especially with certain types of beans. However, if the sprouts are excessively bitter, it could be a sign that they’re not getting enough light. Try moving them to a slightly brighter location (but still out of direct sunlight) for the last day or two of sprouting.
Extra Tips for Bean Sprouting Success
* Use High-Quality Seeds: This is the most important factor! Don’t use old or damaged seeds. Look for seeds specifically labeled for sprouting.
* Maintain Good Hygiene: Wash your hands thoroughly before handling the sprouts and use clean equipment.
* Don’t Overcrowd the Jar: Start with a small amount of beans (1/4 cup is usually enough for a quart-sized jar). Overcrowding can lead to poor air circulation and increased risk of mold.
* Experiment with Different Beans: Once you’ve mastered mung beans, try sprouting other types of beans and seeds, such as lentils, adzuki beans, or alfalfa. Each type has its own unique flavor and texture.
* Enjoy Your Sprouts! Bean sprouts are a versatile ingredient that can be used in salads, sandwiches, stir-fries, and soups. Get creative and experiment with different ways to incorporate them into your diet.
Beyond the Basics: Advanced Sprouting Techniques
Once you’re comfortable with the basic jar method, you can explore some more advanced sprouting techniques:
* Sprouting Trays: Sprouting trays are shallow trays with drainage holes that are stacked on top of each other. This method allows for better air circulation and is ideal for sprouting larger quantities of beans.
* Automatic Sprouters: Automatic sprouters are electric appliances that automatically rinse and drain the sprouts at regular intervals. This is a convenient option for busy people who don’t have time to rinse the sprouts manually.
* Microgreens: While technically not bean sprouts, microgreens are another type of sprout that can be grown at home. Microgreens are harvested when the first true leaves appear, and they have a more intense flavor than bean sprouts.
I hope this guide has inspired you to try growing your own bean sprouts at home. It’s a fun, easy, and rewarding project that anyone can do. Happy sprouting!

Conclusion
So, there you have it! Growing your own bean sprouts at home is not only incredibly easy and cost-effective, but it also provides you with a constant supply of fresh, crunchy goodness right at your fingertips. Forget those limp, sad-looking sprouts from the grocery store – with just a few simple steps and minimal effort, you can cultivate vibrant, flavorful sprouts that will elevate your salads, sandwiches, stir-fries, and more.
The beauty of this DIY project lies in its simplicity and adaptability. While we’ve focused on mung bean sprouts, don’t hesitate to experiment with other varieties like alfalfa, lentil, or radish sprouts. Each type offers a unique flavor profile and nutritional benefit, allowing you to tailor your sprout production to your specific tastes and dietary needs. You can also adjust the sprouting time to achieve your preferred level of crunchiness – some prefer a shorter sprout with a milder flavor, while others enjoy a longer sprout with a more pronounced taste.
Consider adding a touch of creativity to your sprouting process. Try using different containers, such as mason jars with sprouting lids or even repurposed plastic containers with drainage holes. You can also experiment with different light levels to influence the color and growth of your sprouts. Some people prefer to keep their sprouts in complete darkness for a whiter, more delicate sprout, while others expose them to indirect sunlight for a slightly greener and more robust sprout.
Beyond the culinary benefits, growing bean sprouts at home is also a rewarding and educational experience. It’s a fantastic way to connect with nature, learn about the life cycle of plants, and appreciate the simple pleasures of growing your own food. It’s also a great activity to do with children, teaching them about responsibility, patience, and the wonders of the natural world.
The environmental impact is also a significant advantage. By growing your own sprouts, you’re reducing your reliance on commercially produced sprouts, which often involve transportation, packaging, and potential exposure to pesticides. You’re also minimizing food waste, as you can grow only the amount of sprouts you need, when you need them.
Ultimately, mastering the art of growing bean sprouts at home is a game-changer for anyone who values fresh, healthy, and sustainable food. It’s a simple yet powerful way to enhance your culinary creations, improve your well-being, and connect with the natural world.
We wholeheartedly encourage you to give this DIY trick a try. It’s easier than you think, and the rewards are well worth the effort. Once you’ve experienced the satisfaction of harvesting your own homegrown sprouts, you’ll never go back to store-bought again.
Don’t forget to share your experiences with us! We’d love to hear about your successes, challenges, and creative variations. Share your photos and tips on social media using #HomegrownSprouts or leave a comment below. Let’s inspire each other to embrace the joy of growing our own food and creating a more sustainable future, one sprout at a time. So, get sprouting and enjoy the deliciousness of your own homegrown bean sprouts!
Frequently Asked Questions (FAQs)
What kind of beans can I use to grow sprouts?
While mung beans are the most common and readily available option for growing bean sprouts, you can experiment with other types of beans and legumes. Alfalfa, lentils, adzuki beans, chickpeas, and even radish seeds can be sprouted. Keep in mind that each type will have a slightly different flavor, texture, and sprouting time. Always ensure you are using beans intended for sprouting or consumption, not those treated with chemicals for planting.
How long does it take to grow bean sprouts?
The sprouting time varies depending on the type of bean, the temperature, and the humidity. Generally, mung bean sprouts take about 3-5 days to grow to a desirable length. Alfalfa sprouts may take slightly longer, while radish sprouts can be ready in as little as 2-3 days. Check your sprouts daily and harvest them when they reach your preferred size and crunchiness.
What is the best container to use for sprouting?
There are several options for sprouting containers. Mason jars with sprouting lids are a popular choice, as they provide good ventilation and drainage. You can also use a multi-tiered sprouting tray, which allows you to grow multiple batches of sprouts simultaneously. Alternatively, you can repurpose plastic containers with drainage holes. The key is to ensure that the container is clean, provides adequate drainage, and allows for good air circulation.
How often should I rinse the sprouts?
Rinsing the sprouts is crucial for preventing mold and bacteria growth. You should rinse them at least twice a day, preferably in the morning and evening. Use cool, clean water and ensure that all the sprouts are thoroughly rinsed. After rinsing, drain the water completely to prevent the sprouts from sitting in excess moisture.
What if my sprouts start to smell bad?
A foul odor is a sign of bacterial contamination or mold growth. If your sprouts start to smell bad, discard them immediately. To prevent this, ensure that you are rinsing the sprouts regularly and thoroughly, using clean water, and providing adequate drainage and air circulation. Avoid overcrowding the container, as this can also contribute to bacterial growth.
Can I eat the bean sprout roots?
Yes, the roots of bean sprouts are perfectly edible and nutritious. They have a slightly nutty flavor and add a pleasant crunch to your dishes. Some people prefer to trim the roots before eating, but this is purely a matter of personal preference.
How do I store bean sprouts?
Once your bean sprouts have reached the desired length, rinse them thoroughly and drain them well. Store them in an airtight container lined with a paper towel in the refrigerator. The paper towel will help absorb excess moisture and keep the sprouts fresh for up to a week.
Are there any health benefits to eating bean sprouts?
Yes, bean sprouts are a nutritional powerhouse. They are low in calories and fat but high in vitamins, minerals, and antioxidants. They are a good source of vitamin C, vitamin K, folate, and fiber. Eating bean sprouts can help boost your immune system, improve digestion, and protect against chronic diseases.
Can I grow bean sprouts in the dark?
Yes, you can grow bean sprouts in the dark or in indirect sunlight. Growing them in the dark will result in whiter, more delicate sprouts, while exposing them to indirect sunlight will produce slightly greener and more robust sprouts. The choice is yours, depending on your personal preference.
What are some ways to use bean sprouts in my cooking?
Bean sprouts are incredibly versatile and can be used in a wide variety of dishes. They are a popular addition to salads, sandwiches, stir-fries, soups, and spring rolls. They can also be eaten raw or lightly cooked. Experiment with different recipes and find your favorite ways to enjoy these nutritious and delicious sprouts.
Is it safe to eat raw bean sprouts?
While bean sprouts are generally safe to eat raw, there is a small risk of bacterial contamination. To minimize this risk, always purchase sprouts from a reputable source or grow your own using clean water and proper hygiene practices. Thoroughly rinse the sprouts before eating and consider lightly cooking them if you are concerned about food safety. Individuals with weakened immune systems, pregnant women, and young children should exercise extra caution and may want to avoid eating raw sprouts altogether.
What if my bean sprouts don’t sprout?
If your bean sprouts aren’t sprouting, there could be several reasons. First, ensure that you are using fresh, viable beans. Old or damaged beans may not sprout properly. Second, check the temperature. Bean sprouts prefer a warm, humid environment. If the temperature is too cold, the sprouting process may be slowed down or inhibited. Third, make sure that you are rinsing the sprouts regularly and providing adequate drainage. Lack of moisture or poor drainage can prevent sprouting. Finally, ensure that the beans are not overcrowded in the container. Overcrowding can restrict air circulation and hinder sprouting.
Can I use tap water to grow bean sprouts?
While tap water is generally safe to use for growing bean sprouts, it’s best to use filtered or purified water if possible. Tap water may contain chlorine or other chemicals that can inhibit sprouting or affect the flavor of the sprouts. If you are using tap water, let it sit for a few hours to allow the chlorine to dissipate before using it to rinse your sprouts.

Leave a Comment