
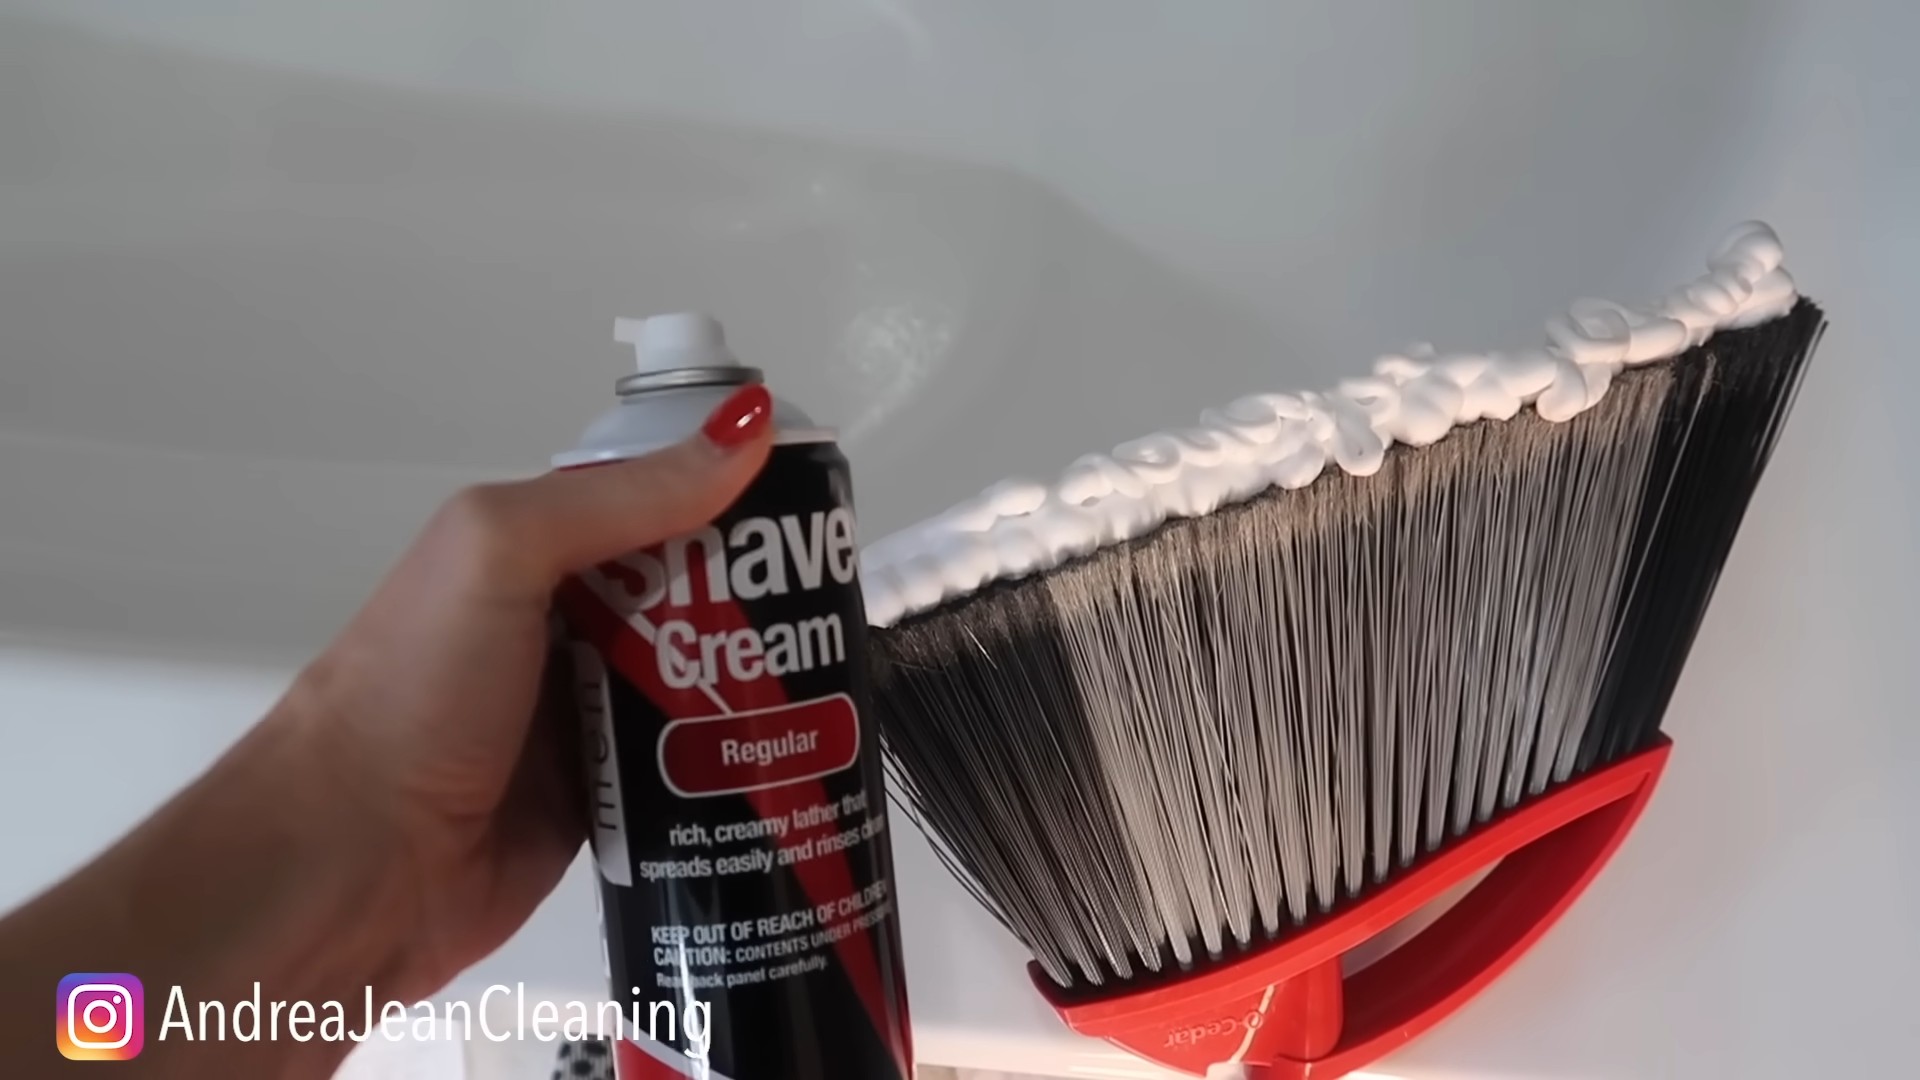
Shaving Foam Cleaning Hacks: Who knew that the fluffy stuff you use to groom could be your secret weapon against household grime? I certainly didn’t, until I stumbled upon a treasure trove of cleaning tips that transformed my chores from a dreaded task into a surprisingly satisfying experience.
For generations, cleaning has relied on harsh chemicals and elbow grease. But what if I told you there’s a gentler, more fragrant way? While shaving foam’s primary purpose is softening facial hair, its unique composition – a blend of soap, moisturizers, and air – makes it surprisingly effective at tackling a variety of cleaning challenges. Think of it as a modern twist on old-fashioned cleaning solutions, repurposing a common household item for a sparkling clean home.
Let’s be honest, nobody enjoys spending their precious free time scrubbing away at stubborn stains. That’s where these shaving foam cleaning hacks come in. From banishing carpet stains to polishing chrome fixtures, I’m going to share some of my favorite and most effective ways to use this unexpected cleaning agent. These DIY tricks are not only budget-friendly but also a fun and creative way to simplify your cleaning routine. Get ready to unlock the cleaning power of shaving foam and say goodbye to those tedious chores!
Shaving Foam: Your Unexpected Cleaning Superhero!
Okay, friends, let’s talk about something amazing: shaving foam. Yes, the stuff you (or your partner) use to get a smooth shave is actually a cleaning powerhouse! I know, it sounds crazy, but trust me, I’ve tried these hacks myself, and they work wonders. Forget expensive specialty cleaners; shaving foam is about to become your new best friend.
Why Shaving Foam Works
Before we dive into the how-to, let’s quickly understand why this works. Shaving foam is designed to lift and lubricate hair, which means it’s also great at lifting dirt, grease, and grime. Plus, it’s gentle enough for many surfaces, making it a versatile cleaning agent. I always recommend testing in an inconspicuous area first, just to be safe!
Hack 1: Sparkling Mirrors and Glass
Tired of streaks on your mirrors and windows? Shaving foam to the rescue! This is one of my favorite hacks because it’s so simple and effective.
What you’ll need:
* Shaving foam (the foamy kind, not gel)
* A clean, lint-free cloth or microfiber towel
* Water (optional)
Step-by-step instructions:
1. Apply the foam: Squirt a generous amount of shaving foam directly onto the mirror or glass surface. Don’t be shy!
2. Spread it around: Using your hand or a cloth, spread the foam evenly over the entire surface. Make sure to cover every inch.
3. Let it sit: Allow the foam to sit for a minute or two. This gives it time to loosen the dirt and grime.
4. Wipe it clean: Using a clean, lint-free cloth or microfiber towel, wipe away the foam. Use circular motions for best results.
5. Buff to a shine: If there are any streaks, buff the surface with a dry, clean cloth until it’s sparkling. You can also lightly dampen the cloth with water if needed.
I’ve found this works particularly well on bathroom mirrors that get covered in toothpaste splatters and hairspray. It leaves them looking brand new!
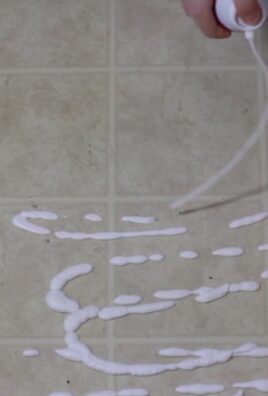
Hack 2: Stain Remover for Carpets and Upholstery
Spilled coffee? Muddy paw prints? Don’t panic! Shaving foam can often lift those pesky stains from carpets and upholstery.
What you’ll need:
* Shaving foam (again, the foamy kind)
* A clean, damp cloth
* A vacuum cleaner
Step-by-step instructions:
1. Act fast: The sooner you treat the stain, the better. Blot up any excess liquid with a clean cloth or paper towel.
2. Apply the foam: Cover the stain generously with shaving foam.
3. Work it in: Gently massage the foam into the stain using a clean, damp cloth. Use circular motions.
4. Let it sit: Allow the foam to sit for 10-15 minutes. This gives it time to break down the stain.
5. Wipe it away: Wipe away the foam with a clean, damp cloth. Rinse the cloth frequently.
6. Dry it: Blot the area with a dry cloth to remove excess moisture.
7. Vacuum: Once the area is completely dry, vacuum it to restore the pile.
Important note: Always test the shaving foam on an inconspicuous area of the carpet or upholstery first to ensure it doesn’t damage the fabric or cause discoloration. I learned this the hard way once with a brightly colored rug!
Hack 3: Cleaning Stainless Steel
Stainless steel appliances looking dull? Shaving foam can bring back their shine! This works great on refrigerators, dishwashers, and even stainless steel sinks.
What you’ll need:
* Shaving foam
* A clean, soft cloth
* Water
Step-by-step instructions:
1. Apply the foam: Apply a small amount of shaving foam to a clean, soft cloth.
2. Wipe the surface: Gently wipe the stainless steel surface with the cloth, following the grain of the metal.
3. Rinse: Rinse the surface with water to remove any residue.
4. Dry: Dry the surface with a clean, soft cloth.
This hack is particularly good for removing fingerprints and water spots from stainless steel. It leaves a streak-free shine!
Hack 4: Polishing Chrome Fixtures
Chrome fixtures in your bathroom or kitchen looking a little lackluster? Shaving foam can restore their shine and remove water spots.
What you’ll need:
* Shaving foam
* A clean, soft cloth
Step-by-step instructions:
1. Apply the foam: Apply a small amount of shaving foam directly to the chrome fixture.
2. Rub it in: Rub the foam into the fixture using a clean, soft cloth.
3. Wipe it clean: Wipe away the foam with a clean, soft cloth.
4. Buff to a shine: Buff the fixture with a dry, clean cloth until it’s sparkling.
I use this hack on my showerhead and faucets, and it makes a huge difference! They look like new again.
Hack 5: Preventing Foggy Mirrors in the Bathroom
This is a game-changer! Tired of your bathroom mirror fogging up after a shower? Shaving foam can prevent that.
What you’ll need:
* Shaving foam
* A clean, lint-free cloth or microfiber towel
Step-by-step instructions:
1. Apply the foam: Apply a thin layer of shaving foam to the dry mirror.
2. Spread it around: Spread the foam evenly over the entire surface.
3. Wipe it clean: Wipe away the foam with a clean, lint-free cloth or microfiber towel until the mirror is clear.
This creates a protective barrier that prevents the mirror from fogging up. I usually reapply it every few weeks.
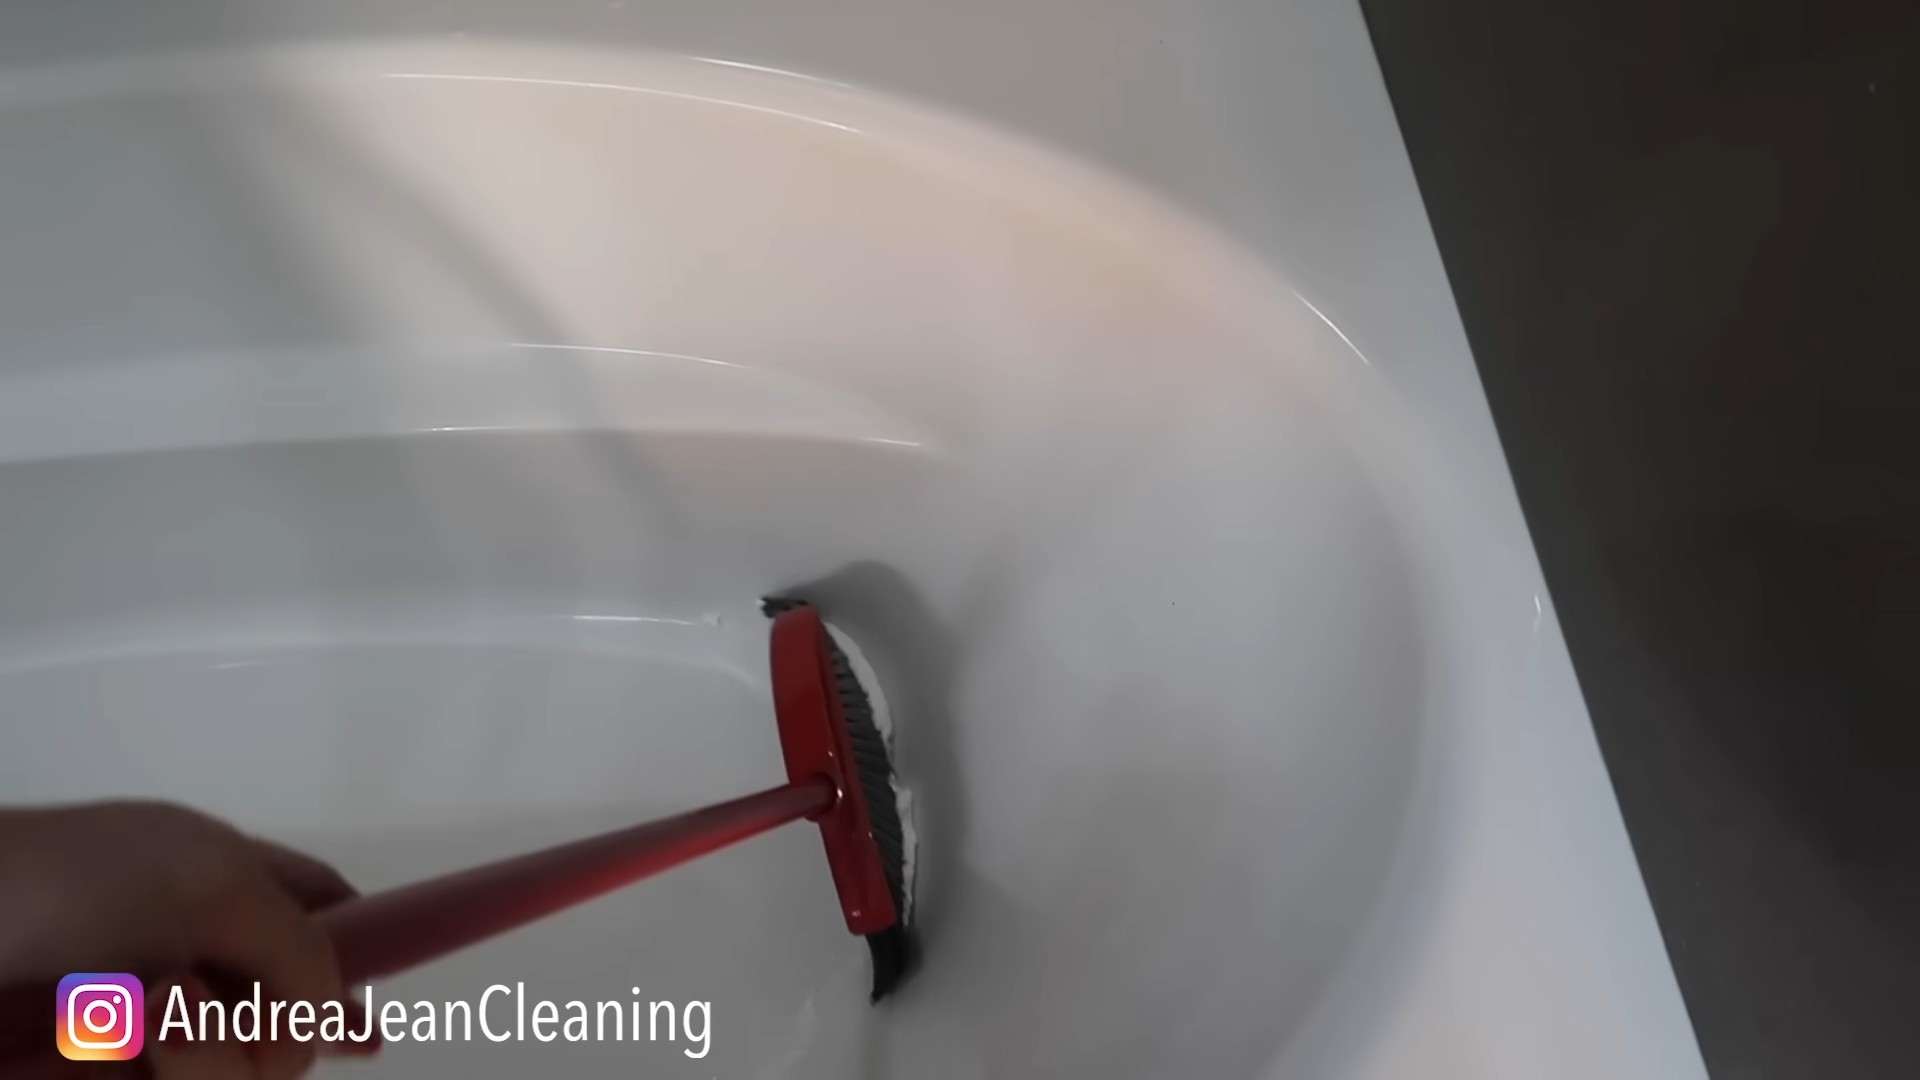
Hack 6: Cleaning the Toilet Bowl
Yes, you read that right! Shaving foam can even help clean your toilet bowl.
What you’ll need:
* Shaving foam
* A toilet brush
Step-by-step instructions:
1. Apply the foam: Squirt a generous amount of shaving foam into the toilet bowl.
2. Let it sit: Allow the foam to sit for 15-20 minutes.
3. Scrub: Scrub the bowl with a toilet brush.
4. Flush: Flush the toilet.
The shaving foam helps to loosen dirt and grime, making it easier to clean the bowl. It also leaves a fresh scent!
Hack 7: Cleaning Leather Furniture
This one requires a little more caution, but it can work wonders on leather furniture. Always test in an inconspicuous area first!
What you’ll need:
* Shaving foam (fragrance-free is best)
* A clean, soft cloth
* Leather conditioner (optional)
Step-by-step instructions:
1. Test it: Apply a small amount of shaving foam to an inconspicuous area of the leather furniture (like the back or underneath). Wait a few minutes and then wipe it away. Check for any discoloration or damage.
2. Apply the foam: If the test is successful, apply a small amount of shaving foam to a clean, soft cloth.
3. Wipe the surface: Gently wipe the leather surface with the cloth, using circular motions.
4. Wipe it clean: Wipe away the foam with a clean, damp cloth.
5. Dry: Dry the surface with a clean, soft cloth.
6. Condition (optional): Apply a leather conditioner to help moisturize the leather.
Shaving foam can help remove dirt and grime from leather furniture, but it’s important to be gentle and to condition the leather afterward to prevent it from drying out.
Hack 8: Removing Sticky Residue
Got sticky residue from stickers or tape? Shaving foam can help!
What you’ll need:
* Shaving foam
* A clean cloth
Step-by-step instructions:
1. Apply the foam: Cover the sticky residue with shaving foam.
2. Let it sit: Allow the foam to sit for 5-10 minutes.
3. Wipe it away: Wipe away the foam with a clean cloth. The sticky residue should come off with it.
This works great on glass, plastic, and even some painted surfaces.
Hack 9: Cleaning Jewelry
Want to give your jewelry a quick shine? Shaving foam can help!
What you’ll need:
* Shaving foam
* A soft toothbrush
* Water
*
Conclusion
So, there you have it! Shaving foam, that humble bathroom staple, is secretly a cleaning powerhouse just waiting to be unleashed. We’ve explored a range of surprising and effective cleaning hacks that prove its versatility extends far beyond just softening whiskers. From banishing stubborn carpet stains to restoring the sparkle to your stainless steel appliances, and even giving your mirrors a fog-free finish, shaving foam offers a gentle yet powerful cleaning solution for a multitude of household challenges.
Why is this DIY trick a must-try? Because it’s simple, affordable, and readily available. You likely already have a can of shaving foam tucked away in your bathroom, making it an incredibly convenient cleaning agent. Plus, its gentle formula is generally safe for a variety of surfaces, reducing the risk of damage compared to harsh chemical cleaners. The ease of application – simply spray, let sit, and wipe away – makes these hacks incredibly time-saving, perfect for busy individuals looking for efficient cleaning solutions.
But the magic doesn’t stop there! Feel free to experiment with variations to suit your specific needs. For tougher stains, consider letting the shaving foam sit for a longer period before wiping it away. For delicate surfaces, test a small, inconspicuous area first to ensure compatibility. You can even add a few drops of your favorite essential oil to the shaving foam for a pleasant, fresh scent while you clean. Lavender, lemon, and tea tree oil are all excellent choices that offer both fragrance and added cleaning benefits. Think about using a microfiber cloth for wiping surfaces after applying the shaving foam; they are great at picking up dirt and leaving a streak-free finish.
We’ve shown you how to unlock the cleaning potential of shaving foam, now it’s your turn to put these hacks to the test! We’re confident that you’ll be amazed by the results. Don’t just take our word for it – grab a can of shaving foam and experience the cleaning magic for yourself.
We encourage you to try these DIY cleaning tricks and share your experiences with us! Let us know in the comments below which hack worked best for you, any variations you tried, and any other creative uses you discover for shaving foam. Your feedback will not only help other readers but also contribute to our growing community of DIY cleaning enthusiasts. Share your before-and-after photos on social media using #ShavingFoamCleaningHacks – we can’t wait to see your sparkling results! Let’s revolutionize the way we clean, one can of shaving foam at a time!
Frequently Asked Questions (FAQ)
Is all shaving foam the same for cleaning purposes?
Not necessarily. While most types of shaving foam will work for these cleaning hacks, it’s best to use a plain, non-gel shaving foam. Gel formulas can sometimes leave a sticky residue, which defeats the purpose of cleaning. Look for a basic shaving foam that creates a rich, creamy lather. Avoid those with added moisturizers or fragrances if you’re concerned about potential residue or allergic reactions, especially when cleaning surfaces that come into contact with food.
Can I use shaving cream instead of shaving foam?
Shaving cream can be used in some instances, but shaving foam is generally preferred. Shaving cream tends to be thicker and more concentrated, which can make it harder to spread evenly and rinse off completely. This can leave behind a residue, especially on porous surfaces. Shaving foam, with its lighter consistency, is easier to work with and less likely to cause build-up.
Will shaving foam damage my surfaces?
Shaving foam is generally considered a gentle cleaning agent, but it’s always a good idea to test it on a small, inconspicuous area first, especially on delicate or sensitive surfaces like painted walls, wood furniture, or certain types of fabrics. Observe the area for any discoloration, staining, or damage before applying it to a larger area. If you’re unsure, consult the manufacturer’s instructions for the surface you’re cleaning.
How long should I leave the shaving foam on a stain before wiping it off?
The amount of time you leave the shaving foam on a stain will depend on the severity of the stain and the type of surface you’re cleaning. For light stains, a few minutes may be sufficient. For tougher stains, you may need to let it sit for 15-30 minutes, or even longer. Check the area periodically to ensure that the shaving foam is not drying out completely. If it starts to dry, lightly dampen it with a spray bottle of water.
Can I use shaving foam to clean leather?
While some people have reported success using shaving foam to clean leather, it’s generally not recommended. Leather is a delicate material that can be easily damaged by harsh chemicals or excessive moisture. If you choose to try it, use a very small amount of plain shaving foam and test it on a hidden area first. Gently rub the foam into the leather with a soft cloth, then immediately wipe it off with a clean, damp cloth. Follow up with a leather conditioner to restore moisture and prevent cracking. A dedicated leather cleaner is always the safest option.
Is shaving foam safe to use around children and pets?
While shaving foam is generally considered non-toxic, it’s still important to keep it out of reach of children and pets. Avoid allowing them to ingest it or come into direct contact with it, especially if they have sensitive skin or allergies. Always supervise children when they are helping with cleaning tasks. Ensure the area is well-ventilated when using shaving foam.
Can I use shaving foam to clean my car interior?
Yes, shaving foam can be used to clean certain parts of your car interior, such as fabric seats and carpets. However, avoid using it on leather or vinyl surfaces, as it can damage them. Test a small, inconspicuous area first to ensure compatibility. Apply the shaving foam to the stained area, let it sit for a few minutes, then blot it with a clean cloth. Repeat as needed until the stain is removed.
Does shaving foam work on all types of carpet stains?
Shaving foam is most effective on fresh, water-based stains like coffee, juice, or mud. It may not be as effective on oil-based stains or stains that have been set for a long time. For stubborn stains, you may need to use a dedicated carpet cleaner or consult a professional cleaning service.
How do I prevent streaks when cleaning mirrors with shaving foam?
To prevent streaks when cleaning mirrors with shaving foam, use a clean, lint-free microfiber cloth to wipe away the foam. Avoid using paper towels, as they can leave behind lint. You can also lightly dampen the cloth with water to help remove any remaining residue. Ensure the mirror is completely dry after cleaning.
Can I add essential oils to shaving foam for cleaning?
Yes, adding a few drops of essential oil to shaving foam can enhance its cleaning power and add a pleasant scent. Lemon, tea tree, and lavender oils are all excellent choices. However, be sure to use pure essential oils and avoid adding too much, as some oils can be irritating to the skin or damage certain surfaces. Start with just a few drops and adjust as needed.
Leave a Comment