
Grow Pineapple at Home? Absolutely! Imagine the look on your friends’ faces when you tell them you harvested that juicy, tropical fruit right from your own backyard (or even your balcony!). It sounds like something out of a dream, right? But trust me, with a little patience and a few simple tricks, you can be enjoying homegrown pineapple sooner than you think.
Pineapples, originally native to South America, have a rich history, traveling the globe and becoming a symbol of hospitality and luxury. In the 17th and 18th centuries, displaying a pineapple was a sign of wealth and status. While we might not be using them to impress royalty anymore, the joy of growing your own food, especially something as exotic as a pineapple, is a reward in itself!
Why should you learn this DIY trick? Well, for starters, store-bought pineapples can be expensive, and let’s be honest, sometimes they just don’t have that fresh, vibrant flavor you crave. Plus, knowing exactly where your food comes from and how it was grown is becoming increasingly important to many of us. By learning how to grow pineapple at home, you’re not only saving money and enjoying fresher fruit, but you’re also taking a step towards a more sustainable and self-sufficient lifestyle. I’m excited to share these simple steps with you so you can start your pineapple-growing adventure today!
Grow Your Own Pineapple: A Tropical Treat in Your Backyard (or Balcony!)
Okay, let’s be honest, who doesn’t love pineapple? That sweet, tangy flavor just screams sunshine and good times. And while you might think growing your own pineapple is some kind of exotic, tropical dream, I’m here to tell you it’s totally doable, even if you don’t live in Hawaii! I’ve successfully grown pineapples in my own (not-so-tropical) backyard, and I’m going to walk you through every step so you can too.
Choosing Your Pineapple and Preparing the Crown
The most important part of this whole process is starting with a good pineapple. You can’t just grab any old pineapple and expect it to sprout. Here’s what to look for:
* Ripeness: Choose a pineapple that’s ripe but not overripe. You want it to be fragrant and have a slightly yielding feel when you gently squeeze it. Avoid pineapples with soft spots or a fermented smell.
* Healthy Crown: The crown (the leafy top) is what we’ll be using to grow our new pineapple plant. Make sure the leaves are green, healthy-looking, and firmly attached. Avoid crowns with brown, wilted, or damaged leaves.
* Variety: While most pineapples will work, some varieties are easier to grow than others. Smooth Cayenne is a popular and readily available choice.
Once you’ve got your pineapple, it’s time to prepare the crown. This is where the magic begins!
1. Twist or Cut: There are two ways to remove the crown. The first is to firmly grasp the leaves and twist the crown off the fruit. You might need to use a bit of force, but be careful not to damage the leaves. Alternatively, you can use a sharp knife to cut the crown off, leaving about an inch of fruit attached.
2. Remove Excess Fruit: If you cut the crown off, carefully remove any remaining fruit flesh. This is crucial because the fruit will rot and can attract pests or diseases that will kill your new plant. I usually use a small knife to carefully pare away the fruit, being careful not to damage the base of the crown where the roots will eventually emerge.
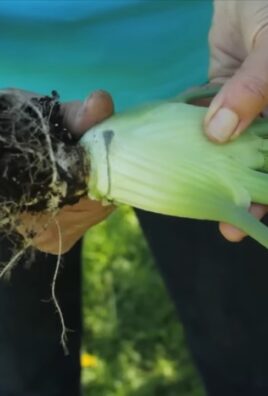
3. Peel Back Lower Leaves: Gently peel back the bottom few layers of leaves from the base of the crown. This will expose the small root buds that are waiting to sprout. Don’t be afraid to remove a good inch or two of leaves. You’ll see little brown bumps – those are the root initials!
4. Let it Dry: This is a really important step! Allow the crown to dry out for a few days (3-7 days is ideal). This helps to prevent rot. I usually place it upside down on a paper towel in a well-ventilated area. You’ll know it’s ready when the cut end has formed a callus.
Rooting Your Pineapple Crown
Now that you’ve prepped your pineapple crown, it’s time to get those roots growing! There are two main methods you can use: rooting in water or planting directly in soil. I’ve had success with both, but I personally prefer rooting in water because you can actually see the roots developing.
Rooting in Water
1. Choose a Container: Find a clear glass or jar that’s wide enough to support the crown but narrow enough so that only the base of the crown is submerged in water.
2. Add Water: Fill the container with fresh, clean water. I usually use tap water that’s been left out for a day to allow the chlorine to dissipate.
3. Submerge the Base: Place the pineapple crown in the water, making sure only the base (where you peeled back the leaves) is submerged. The leaves should be above the water line.
4. Find a Sunny Spot: Place the container in a warm, sunny location. A windowsill that gets plenty of indirect sunlight is perfect.
5. Change the Water Regularly: Change the water every few days (every 2-3 days is ideal) to prevent algae growth and keep the water fresh.
6. Be Patient: Rooting can take several weeks, so don’t get discouraged if you don’t see roots right away. Just keep changing the water and providing plenty of sunlight. You should start to see small roots emerging from the base of the crown within 2-3 weeks.
7. Wait for Root Development: Let the roots grow to be at least 2-3 inches long before planting in soil. This will give your pineapple plant a good head start.
Planting Directly in Soil
If you’re feeling impatient, you can skip the water rooting and plant the crown directly into soil. However, this method requires a bit more attention to prevent rot.
1. Prepare the Pot: Choose a pot that’s at least 6 inches in diameter and has good drainage holes.
2. Use Well-Draining Soil: Pineapples need well-draining soil to prevent root rot. A mixture of potting soil, perlite, and sand works well. I usually use a mix of equal parts potting soil and perlite.
3. Plant the Crown: Dig a hole in the center of the pot and plant the pineapple crown, burying the base (where you peeled back the leaves) in the soil. Make sure the leaves are above the soil line.
4. Water Sparingly: Water the soil lightly after planting, but be careful not to overwater. The soil should be moist but not soggy.
5. Provide Warmth and Sunlight: Place the pot in a warm, sunny location.
6. Monitor for Rot: Keep a close eye on the crown for any signs of rot. If you see any brown or mushy spots, remove them immediately.
7. Be Patient: It can take several weeks for the crown to root in soil. Avoid overwatering and provide plenty of sunlight.
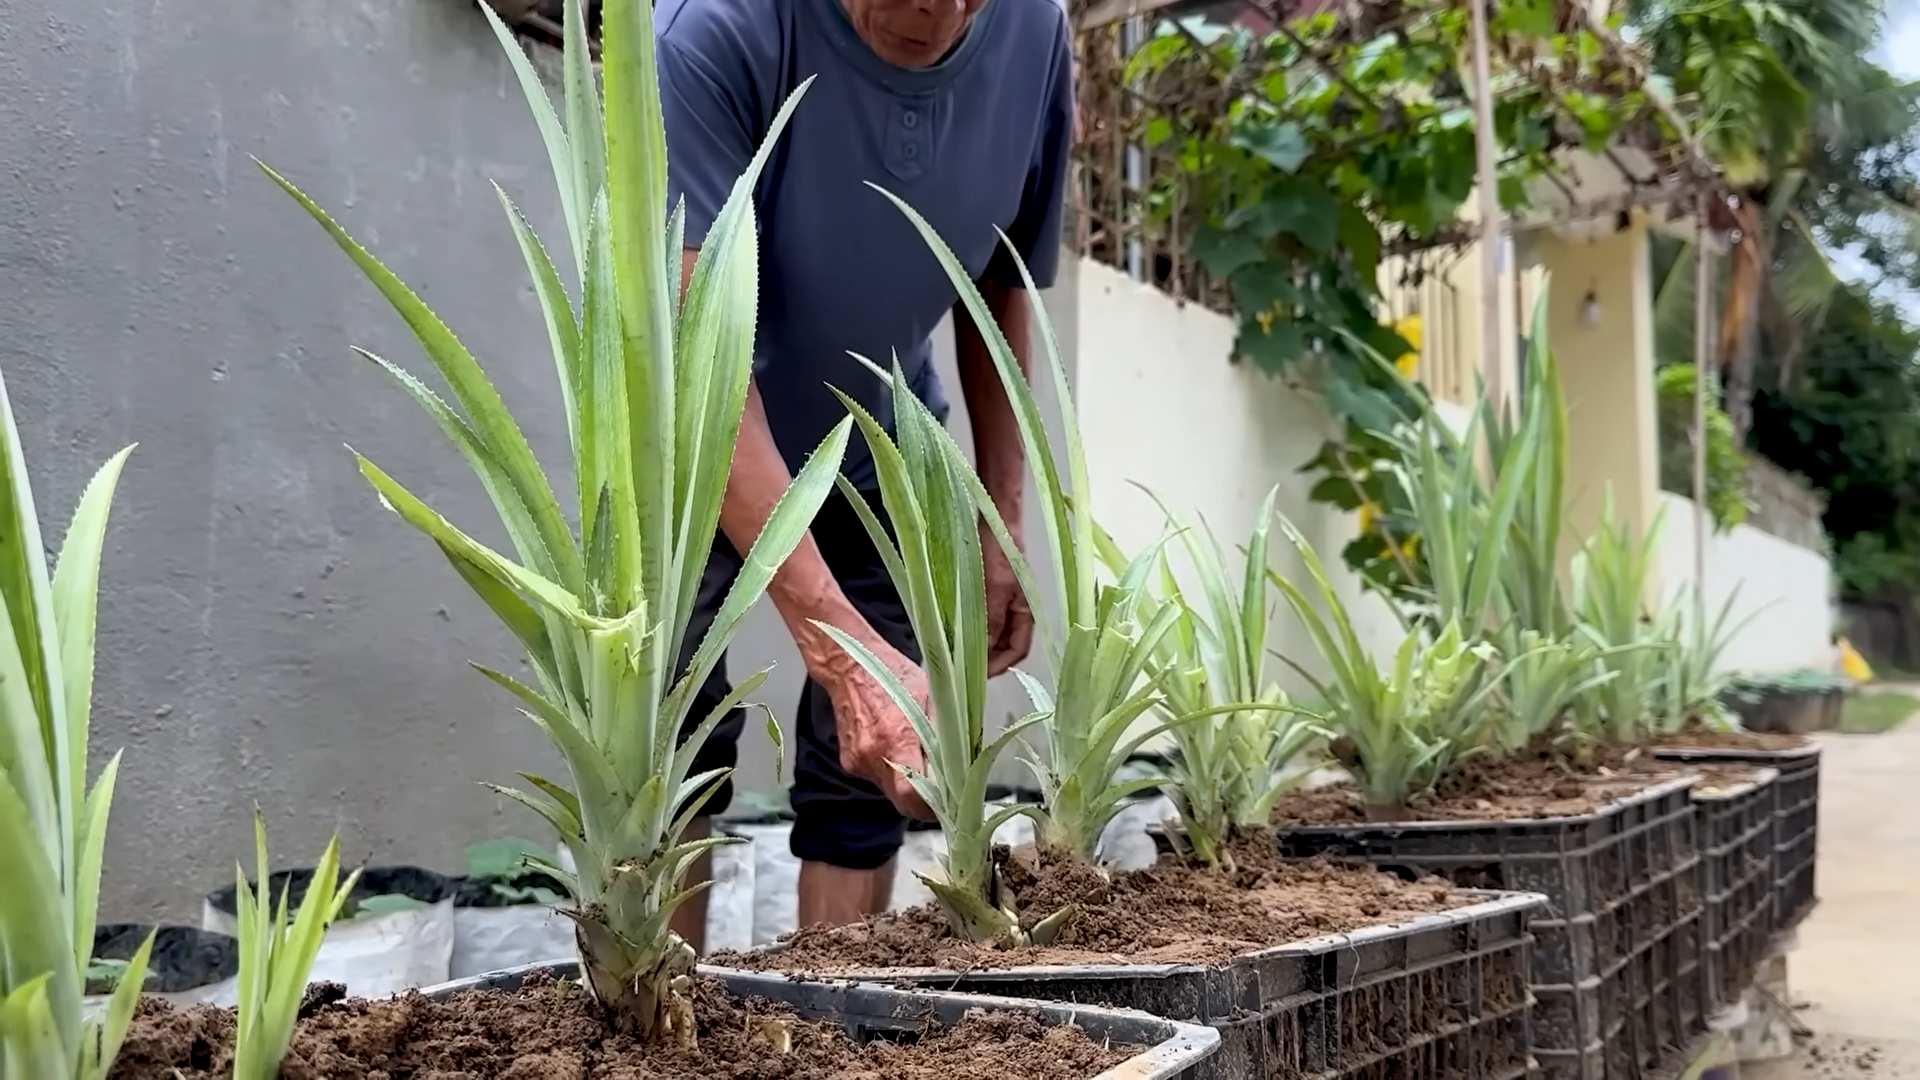
Planting Your Rooted Pineapple Crown
Once your pineapple crown has developed a good root system (whether you rooted it in water or planted it directly in soil), it’s time to transplant it into a larger pot or directly into the ground (if you live in a warm climate).
1. Choose a Pot (or Location): If you’re growing your pineapple in a pot, choose one that’s at least 10-12 inches in diameter. If you’re planting it in the ground, choose a sunny location with well-draining soil. Pineapples thrive in warm climates (USDA zones 9-11), but they can also be grown in containers in cooler climates and brought indoors during the winter.
2. Prepare the Soil: Use a well-draining potting mix or amend your garden soil with perlite and sand to improve drainage. Pineapples prefer slightly acidic soil, so you can also add a bit of peat moss to the mix.
3. Plant the Pineapple: Dig a hole that’s slightly larger than the root ball of your pineapple plant. Gently remove the plant from its container and place it in the hole. Backfill with soil and gently pat it down.
4. Water Thoroughly: Water the pineapple plant thoroughly after planting.
5. Mulch (Optional): You can add a layer of mulch around the base of the plant to help retain moisture and suppress weeds.
Caring for Your Pineapple Plant
Now that your pineapple plant is in its permanent home, it’s time to provide it with the care it needs to thrive.
* Sunlight: Pineapples need at least 6 hours of direct sunlight per day. If you’re growing your pineapple indoors, place it near a sunny window or use a grow light.
* Watering: Water your pineapple plant regularly, especially during the growing season (spring and summer). Allow the soil to dry out slightly between waterings. Avoid overwatering, as this can lead to root rot. I usually water mine deeply once a week, and then check the soil moisture every few days.
* Fertilizing: Feed your pineapple plant with a balanced fertilizer every 2-3 months during the growing season. I use a liquid fertilizer diluted to half strength.
* Temperature: Pineapples thrive in warm temperatures (between 65°F and 85°F). Protect your plant from frost and freezing temperatures. If you live in a cooler climate, bring your pineapple plant indoors during the winter.
* Humidity: Pineapples prefer high humidity. If you live in a dry climate, you can increase the humidity around your plant by misting it regularly or placing it on a pebble tray filled with water.
* Pest Control: Keep an eye out for pests such as mealybugs and scale. If you find any pests, treat them with insecticidal soap or neem oil.
* Patience: This is the most important part! It can take 2-3 years for a pineapple plant to produce fruit. Don’t get discouraged if you don’t see a pineapple right away. Just keep providing your plant with the care it needs, and eventually, you
Conclusion
So, there you have it! Growing your own pineapple at home isn’t just a fun project; it’s a rewarding experience that brings a touch of the tropics right to your kitchen. Forget those expensive, often bland, store-bought pineapples. Imagine the satisfaction of slicing into a juicy, sweet pineapple that you nurtured from start to finish. This DIY trick is a must-try for anyone who loves fresh produce, enjoys gardening, or simply wants to add a unique and impressive element to their home.
Why is this a must-try? Because it’s surprisingly simple, cost-effective, and incredibly gratifying. You’re essentially recycling the top of a pineapple that would otherwise be discarded, turning waste into a delicious treat. Plus, it’s a fantastic conversation starter! Imagine serving a homemade pineapple dessert to guests and telling them you grew the pineapple yourself.
But the fun doesn’t stop there. Once you’ve mastered the basic technique, you can experiment with different varieties of pineapple. Look for different cultivars at your local grocery store or online. Each variety has its own unique flavor profile, from the tangy ‘Smooth Cayenne’ to the extra-sweet ‘Sugarloaf’. You can also try growing your pineapple in different types of containers, from traditional pots to raised garden beds. Just remember to ensure proper drainage and adequate sunlight.
Another variation to consider is the use of rooting hormone. While not strictly necessary, dipping the base of the pineapple top in rooting hormone before planting can help to speed up the rooting process and increase your chances of success. You can find rooting hormone at most garden centers.
Don’t be discouraged if your first attempt isn’t perfect. Growing a pineapple takes time and patience. It can take several months for the pineapple top to root and even longer for it to produce fruit. But the journey is just as rewarding as the destination. Watching your pineapple plant grow and develop is a fascinating process, and the anticipation of that first homegrown pineapple will keep you motivated.
We wholeheartedly encourage you to try this DIY trick and experience the joy of growing your own pineapple at home. It’s a fantastic way to connect with nature, learn about plant life, and enjoy the freshest, most delicious pineapple you’ve ever tasted.
And most importantly, we want to hear about your experience! Share your photos, tips, and stories with us in the comments below. Let us know what worked for you, what challenges you faced, and any variations you tried. Together, we can create a community of pineapple growers and share the knowledge and enthusiasm for this amazing project. So go ahead, give it a try, and let the tropical vibes begin! Embrace the challenge and enjoy the sweet reward of your very own homegrown pineapple.
Frequently Asked Questions (FAQ)
How long does it take to grow a pineapple from a top?
Growing a pineapple from a top is a patience game! It typically takes anywhere from 2 to 3 years for a pineapple plant to mature and produce fruit. The rooting process itself can take several weeks to a few months. Factors like climate, sunlight, and soil quality can all influence the growth rate. Don’t be discouraged if it seems like nothing is happening at first. Just keep providing the plant with the right conditions, and eventually, you’ll see progress.
What kind of soil is best for growing pineapples?
Pineapples thrive in well-draining, slightly acidic soil. A mixture of potting soil, perlite, and peat moss is a good option. The perlite helps with drainage, while the peat moss adds acidity. Avoid heavy clay soils, as they can retain too much water and lead to root rot. You can also purchase specialized pineapple potting mixes online or at garden centers.
How much sunlight does a pineapple plant need?
Pineapples are sun-loving plants and need at least 6 hours of direct sunlight per day. If you’re growing your pineapple indoors, place it near a sunny window or supplement with a grow light. Insufficient sunlight can result in slow growth and reduced fruit production. If you live in a particularly hot climate, you may need to provide some afternoon shade to prevent the leaves from scorching.
How often should I water my pineapple plant?
Water your pineapple plant regularly, but avoid overwatering. Allow the soil to dry out slightly between waterings. During the growing season (spring and summer), you may need to water more frequently than during the dormant season (fall and winter). A good rule of thumb is to water when the top inch of soil feels dry to the touch. Ensure that the pot has drainage holes to prevent water from accumulating at the bottom.
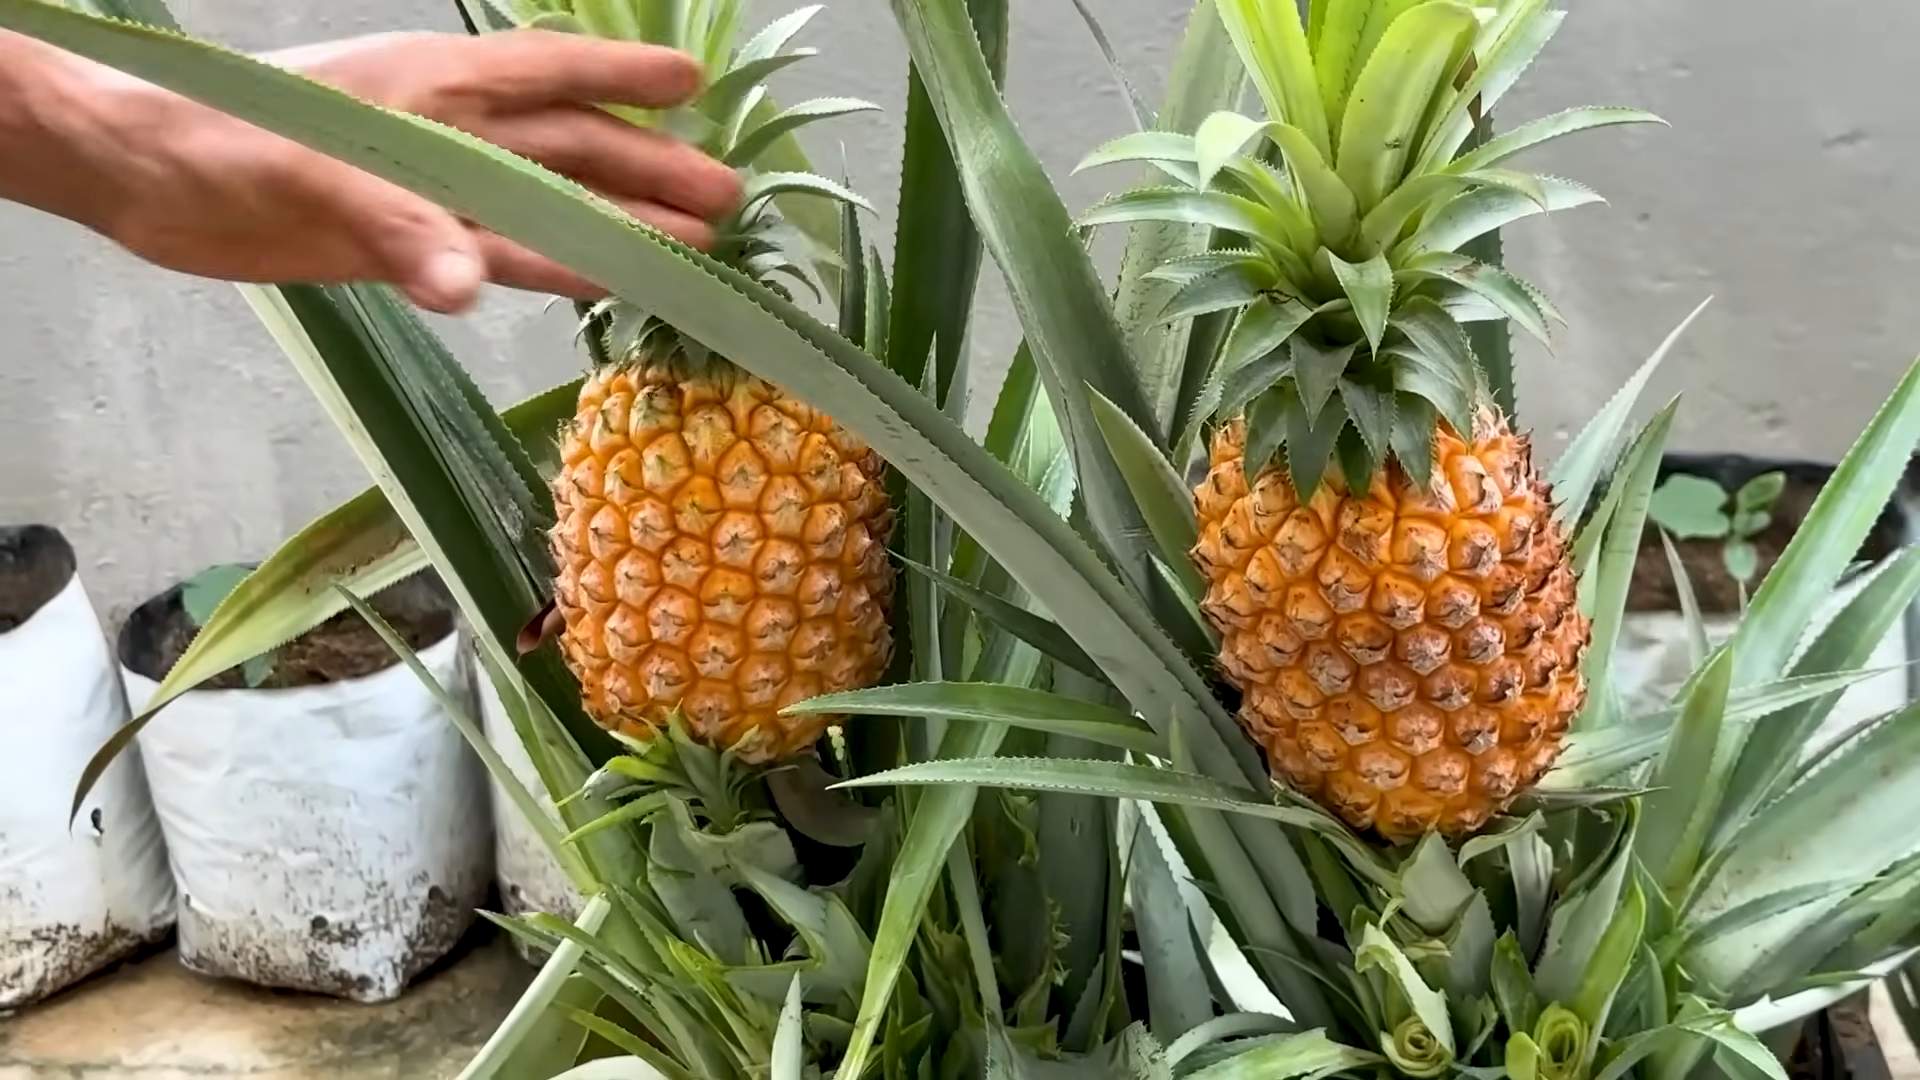
How do I know when my pineapple is ripe?
Determining when a pineapple is ripe can be tricky, but there are a few telltale signs. The pineapple should have a vibrant golden-yellow color, and the eyes (the individual segments of the fruit) should be relatively flat. The pineapple should also have a sweet, fragrant aroma. You can also try gently tugging on one of the leaves near the top of the fruit. If it comes off easily, the pineapple is likely ripe. Finally, a ripe pineapple will have a slightly softer feel than an unripe one.
Can I grow a pineapple indoors?
Yes, you can absolutely grow a pineapple indoors! In fact, it’s a great way to bring a touch of the tropics into your home. Just make sure to provide the plant with plenty of sunlight, well-draining soil, and adequate watering. You may also need to supplement with a grow light, especially during the winter months. Indoor-grown pineapples may take longer to fruit than those grown outdoors, but the experience is still incredibly rewarding.
What are some common problems when growing pineapples?
Some common problems when growing pineapples include root rot, mealybugs, and scale insects. Root rot is caused by overwatering and can be prevented by ensuring proper drainage. Mealybugs and scale insects are sap-sucking pests that can weaken the plant. They can be controlled with insecticidal soap or neem oil. Regularly inspect your pineapple plant for signs of pests or disease and take action promptly to prevent them from spreading.
Do I need to fertilize my pineapple plant?
Yes, fertilizing your pineapple plant can help to promote healthy growth and fruit production. Use a balanced fertilizer that is specifically formulated for tropical plants. Fertilize every 2-3 months during the growing season. Avoid over-fertilizing, as this can damage the plant.
How do I encourage my pineapple plant to fruit?
Getting your pineapple plant to fruit can sometimes be a challenge. One trick is to expose the plant to ethylene gas. You can do this by placing a ripe apple or banana near the plant and covering it with a plastic bag for a few days. The ethylene gas released by the fruit can help to trigger flowering. You can also purchase ethylene-releasing products online or at garden centers.
What do I do after harvesting my pineapple?
After harvesting your pineapple, you can replant the top to start the process all over again! Simply follow the same steps as before: remove the fruit from the top, let the top dry out for a few days, and then plant it in well-draining soil. With proper care, you can continue to grow pineapples from the same plant for many years to come. The original plant will not produce another pineapple, but it may produce “pups” or offshoots that can be separated and planted to grow new pineapple plants.

Leave a Comment