
Grow Swiss Chard: Your Guide to a Bountiful Harvest
Growing Swiss chard might seem daunting, but I’m here to tell you it’s surprisingly easy! This article is packed with Grow Swiss Chard tips and tricks, transforming your backyard into a vibrant, productive garden. Forget expensive grocery store produce – let’s unlock the secrets to cultivating your own delicious, nutritious Swiss chard.
For centuries, Swiss chard has been a staple in Mediterranean and Middle Eastern cuisines, prized for its versatility and nutritional value. From ancient Roman times to modern-day kitchens, its hearty leaves have graced tables worldwide. But you don’t need centuries of experience to enjoy a bountiful harvest; with a few simple Grow Swiss Chard techniques, you can achieve impressive results in your own garden, no matter how small.
Why Grow Your Own Swiss Chard?
There’s something incredibly satisfying about harvesting your own food. Beyond the delicious taste, homegrown Swiss chard is packed with vitamins and minerals, offering a healthier alternative to store-bought options. Plus, you control the growing process, ensuring your chard is free from pesticides and other harmful chemicals. This DIY approach not only saves you money but also connects you more deeply with nature and the food you eat. This guide will help you master the art of growing Swiss chard, from seed to plate!
So, let’s get started on your journey to a thriving Swiss chard patch. I’ll share my favorite tips, tricks, and DIY solutions to help you overcome common challenges and enjoy a plentiful harvest of this nutritious and flavorful vegetable. Get ready to experience the joy of growing your own Swiss chard!
Growing Your Own Swiss Chard: A Step-by-Step Guide
I love Swiss chard! It’s so versatile and packed with nutrients. Growing it yourself is incredibly rewarding, and easier than you might think. Follow these steps, and you’ll be enjoying your homegrown harvest in no time.
Phase 1: Planning and Preparation
- Choose your location: Swiss chard needs at least six hours of sunlight per day. Select a sunny spot in your garden with well-drained soil. Avoid areas prone to flooding.
- Prepare the soil: Good soil is key! Amend your soil with compost or other organic matter to improve drainage and fertility. This will give your chard the best possible start. Aim for a soil pH between 6.0 and 7.0. You can test your soil’s pH using a home testing kit, readily available at most garden centers.
- Decide on your method: You can start your Swiss chard from seeds or transplants. Starting from seed gives you more control over varieties, but transplants offer a head start. I’ve had success with both methods!
- Choose your variety: There are many varieties of Swiss chard, each with different colors and flavors. Consider your preferences and the space you have available. Some popular varieties include Bright Lights (colorful stems), Fordhook Giant (large leaves), and Lucullus (robust and productive).
Phase 2: Starting from Seed (Direct Sowing)
- Timing is everything: Direct sow seeds outdoors after the last frost. The soil should be warm (at least 50°F or 10°C). In colder climates, you might consider starting seeds indoors 4-6 weeks before the last frost and transplanting later.
- Prepare the seedbed: Loosen the soil to a depth of about 1 inch. Make shallow furrows, about ½ inch deep, spaced about 12-18 inches apart. This spacing allows for adequate growth.
- Sow the seeds: Plant seeds about ½ inch apart in the furrows. Cover them lightly with soil. Gently firm the soil around the seeds.
- Water gently: Water the seeds thoroughly but gently, avoiding dislodging them. Use a watering can with a rose head to avoid washing away the seeds.
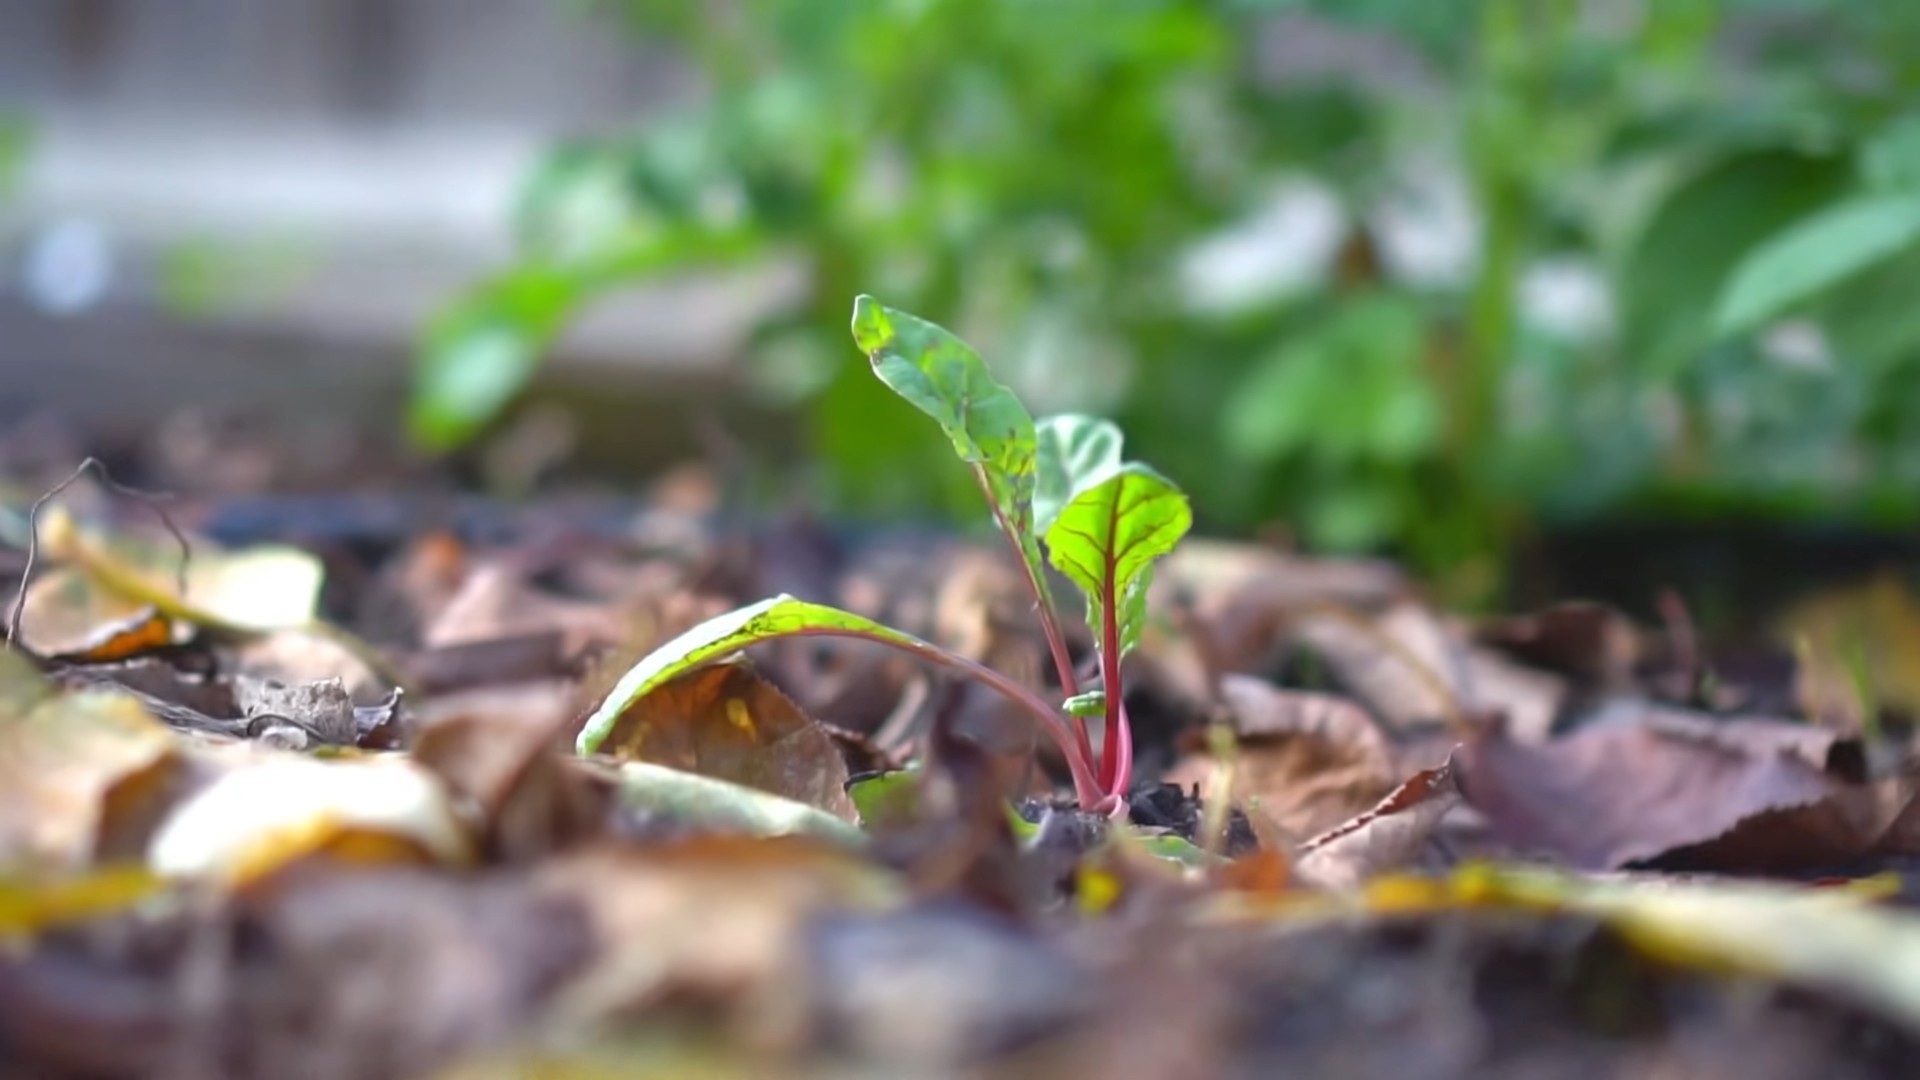
- Thinning: Once seedlings have a few true leaves (not the seed leaves), thin them to about 6-8 inches apart. This gives each plant enough space to grow. You can use the thinned seedlings for salads or as a side dish.
- Weed regularly: Keep the area around your chard free of weeds, which compete for water and nutrients. Regular weeding is crucial for healthy growth.
Phase 3: Starting from Seed (Indoor Starting)
- Start indoors 4-6 weeks before the last frost: Use seed-starting mix, not garden soil, as it’s lighter and drains better. Fill small pots or seed trays.
- Sow the seeds: Plant seeds about ½ inch deep and cover lightly with soil. Water gently.
- Provide light: Seedlings need plenty of light. Place them in a sunny location or under grow lights. Rotate the containers regularly to ensure even growth.
- Water consistently: Keep the soil moist but not soggy. Allow the top inch of soil to dry slightly between waterings.
- Harden off: Before transplanting outdoors, gradually acclimate the seedlings to outdoor conditions over a week or two. Start by placing them outside for a few hours each day, gradually increasing the time.
- Transplant: Once the danger of frost has passed, transplant the seedlings into your prepared garden bed, spacing them 6-8 inches apart.
Phase 4: Transplanting (If Applicable)
- Timing: Transplant seedlings outdoors after the last frost, when the soil is warm and workable.
- Dig holes: Dig holes slightly larger than the root ball of your seedlings.
- Plant carefully: Gently remove the seedlings from their containers, being careful not to damage the roots. Plant them at the same depth they were growing in their containers.
- Water thoroughly: Water the newly transplanted seedlings thoroughly to help them settle in.
- Mulch: Applying a layer of mulch around the plants helps retain moisture and suppress weeds.
Phase 5: Ongoing Care
- Watering: Water regularly, especially during dry periods. Aim to keep the soil consistently moist but not waterlogged.
- Fertilizing: Feed your chard every 2-3 weeks with a balanced fertilizer. A liquid fertilizer is easy to apply. Avoid over-fertilizing, which can lead to leafy growth at the expense of flavor.
- Pest and disease control: Monitor your plants for pests and diseases. Common pests include aphids and slugs. Use organic pest control methods if necessary.
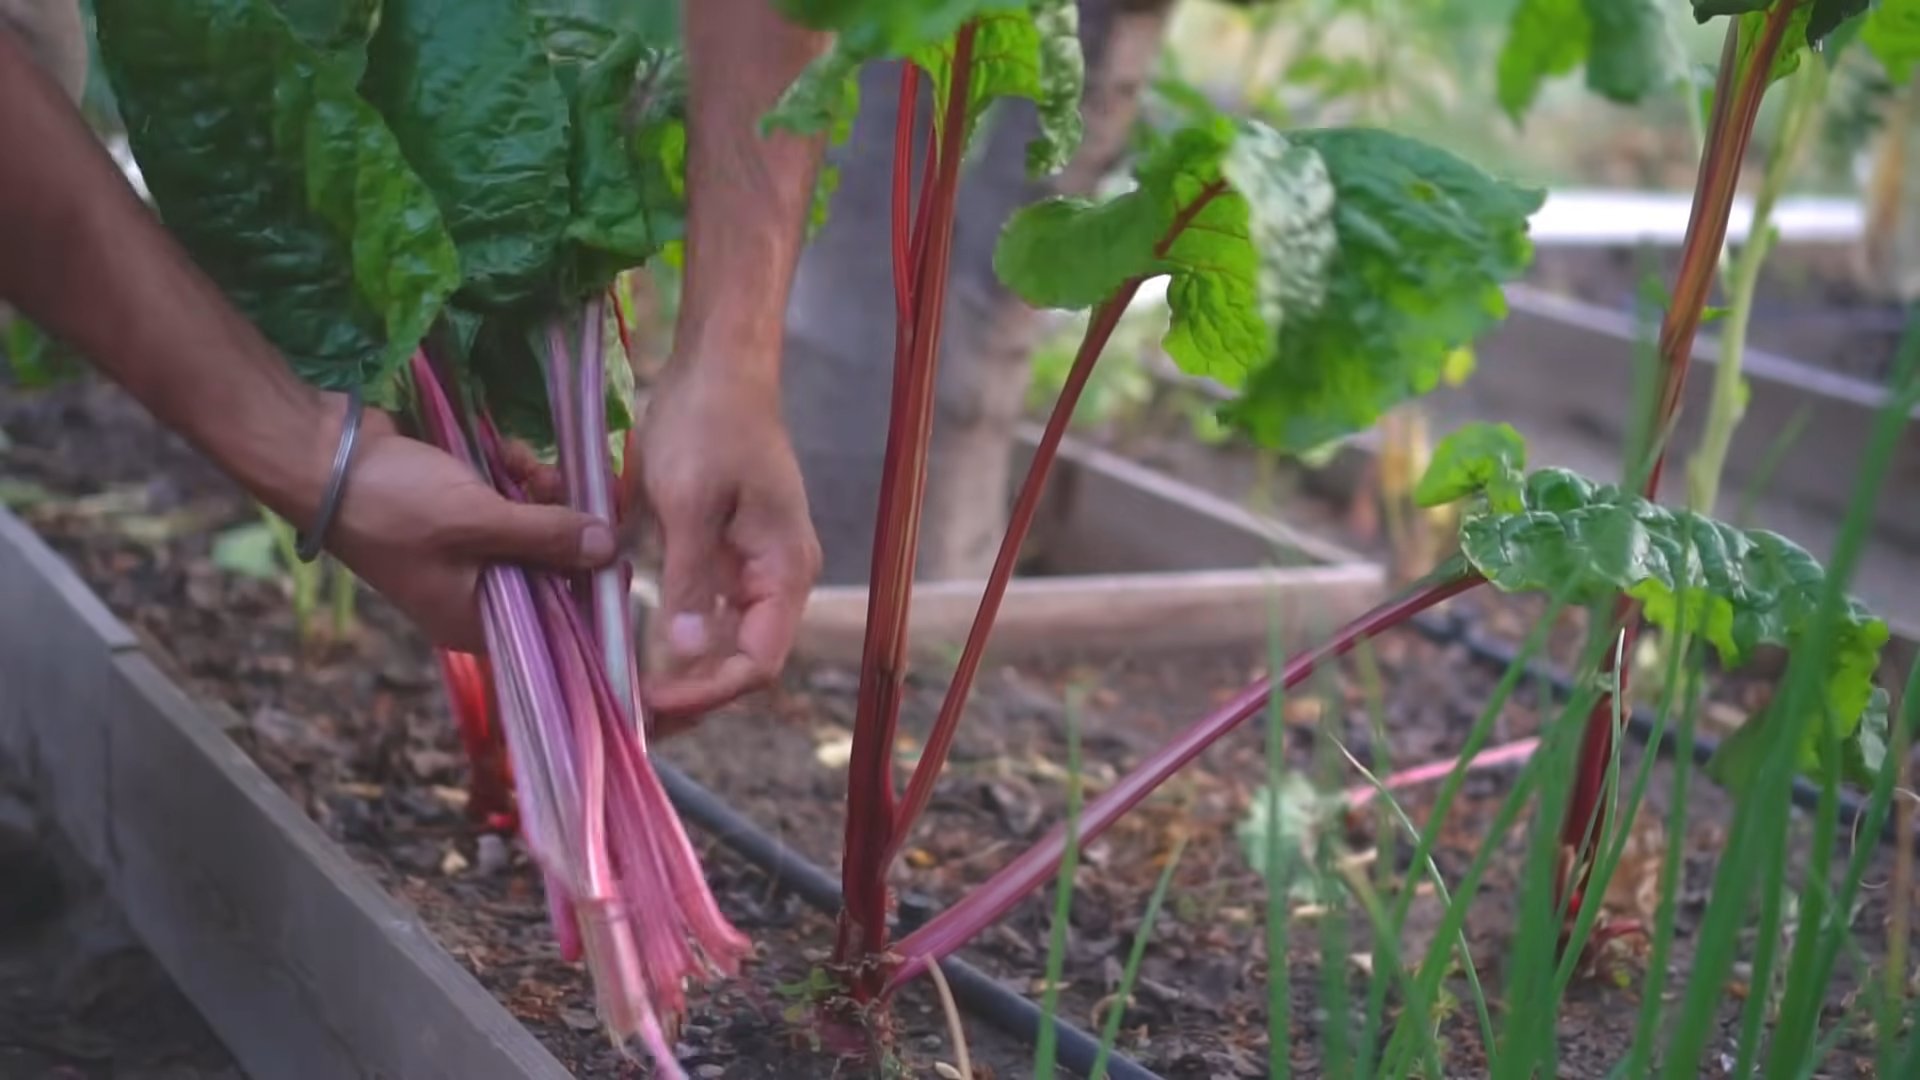
- Harvesting: You can begin harvesting outer leaves when they are about 6-8 inches long. Harvesting regularly encourages new leaf growth. Simply cut or snap off the outer leaves, leaving the inner leaves to continue growing.
- Succession planting: For a continuous harvest, sow or transplant new seeds every few weeks. This will ensure a steady supply of fresh chard throughout the growing season.
Phase 6: Dealing with Common Problems
Bolting:
Bolting (going to seed) can occur if the plants are stressed by heat or drought. Ensure consistent watering and provide some shade during the hottest part of the day to prevent this.
Pests:
Aphids and slugs are common pests. Handpick slugs or use organic pest control methods like insecticidal soap or neem oil to control aphids.
Diseases:
Good air circulation and proper watering practices can help prevent fungal diseases. If diseases occur, remove affected leaves and consider using an organic fungicide.
Remember to enjoy the process!
Growing your own Swiss chard is a rewarding experience. Don’t be discouraged if you encounter some challenges along the way. With a little patience and care, you’ll be enjoying delicious, homegrown chard in no time.
Conclusion
So there you have it – a comprehensive guide to successfully growing your own Swiss chard! This DIY approach to cultivating this nutritious leafy green is a must-try for several reasons. First, it’s incredibly rewarding to nurture a plant from seed to harvest, witnessing its growth and enjoying the fruits (or rather, leaves!) of your labor. Second, homegrown Swiss chard boasts unparalleled freshness and flavor, surpassing anything you’ll find in the supermarket. The vibrant taste and crisp texture are simply unmatched. Finally, growing your own Swiss chard allows you to control the growing process, ensuring you’re using organic methods and avoiding potentially harmful pesticides. This means healthier food for you and a smaller environmental footprint.
This DIY method of growing Swiss chard is truly transformative. It empowers you to take control of your food source, fostering a deeper connection with nature and your food. It’s a fantastic project for beginners and experienced gardeners alike, offering a rewarding experience and delicious results.
Beyond the basic method outlined, there are numerous exciting variations you can explore. Experiment with different Swiss chard varieties – from the vibrant red stems of ‘Bright Lights’ to the deeply green leaves of ‘Fordhook Giant’. Consider companion planting, incorporating herbs like basil or rosemary to enhance the flavor and deter pests. You can also try different growing methods, such as vertical gardening or container gardening, to maximize space in your garden or even grow Swiss chard on your balcony or patio. The possibilities are endless!
Don’t be afraid to get your hands dirty and embark on this fulfilling journey of growing your own Swiss chard. The process is simpler than you might think, and the rewards are immeasurable. Share your experiences with us! We’d love to hear about your successes, challenges, and any innovative techniques you discover along the way. Post pictures of your thriving Swiss chard plants on social media using #GrowSwissChard and tag us – we can’t wait to see your bountiful harvests!
Frequently Asked Questions
What type of soil is best for growing Swiss chard?
Swiss chard thrives in loose, well-draining soil rich in organic matter. Amend heavy clay soils with compost or other organic materials to improve drainage and aeration. A slightly acidic to neutral pH (6.0-7.0) is ideal.
How much sunlight does Swiss chard need?
Swiss chard needs at least six hours of direct sunlight per day to grow optimally. However, some afternoon shade in hot climates can be beneficial, preventing scorching of the leaves.
When is the best time to plant Swiss chard?
The best time to plant Swiss chard depends on your climate. In cooler climates, you can sow seeds directly outdoors in spring after the last frost. In warmer climates, you can sow seeds in the fall or winter for a spring harvest, or plant in late summer for a fall harvest. You can also start seeds indoors 4-6 weeks before the last expected frost for an earlier harvest.
How often should I water my Swiss chard?
Water your Swiss chard regularly, keeping the soil consistently moist but not waterlogged. Aim for about 1 inch of water per week, adjusting based on rainfall and weather conditions. Consistent moisture is crucial for healthy growth.
How do I harvest Swiss chard?
You can begin harvesting Swiss chard leaves when they are about 6-8 inches tall. Harvest outer leaves first, leaving the inner leaves to continue growing. Cut the leaves with a sharp knife or scissors, leaving about an inch of stem attached to the plant. This encourages continuous growth and a longer harvest period.
What are some common pests and diseases that affect Swiss chard?
Common pests include aphids, flea beetles, and slugs. Diseases include downy mildew and leaf spot. Regularly inspect your plants for signs of pests or diseases and take appropriate action, such as using insecticidal soap or neem oil for pests, or improving air circulation to prevent fungal diseases. Maintaining good garden hygiene also helps prevent problems.
Can I grow Swiss chard in containers?
Yes! Swiss chard grows well in containers, making it a great option for those with limited garden space. Choose a container at least 12 inches deep and wide to allow for adequate root development. Ensure the container has drainage holes to prevent waterlogging.
What are the nutritional benefits of homegrown Swiss chard?
Homegrown Swiss chard is packed with essential nutrients, including vitamins A, K, and C, as well as minerals like potassium and magnesium. It’s a low-calorie, high-nutrient food that contributes to overall health and well-being. The freshness of homegrown Swiss chard ensures maximum nutrient retention.
My Swiss chard leaves are bolting. What should I do?
Bolting, where the plant sends up a flower stalk, often occurs when Swiss chard is exposed to stress, such as heat or drought. While bolting doesn’t necessarily ruin the plant, the leaves can become bitter. To prevent bolting, ensure consistent watering and avoid planting in excessively hot conditions. Harvest frequently to encourage leaf production.
How long does it take to grow Swiss chard from seed to harvest?
The time it takes to harvest Swiss chard from seed depends on the variety and growing conditions. Generally, you can expect to harvest your first leaves about 45-60 days after sowing seeds. However, you can continue harvesting leaves for several months, depending on the variety and your climate.

Leave a Comment