
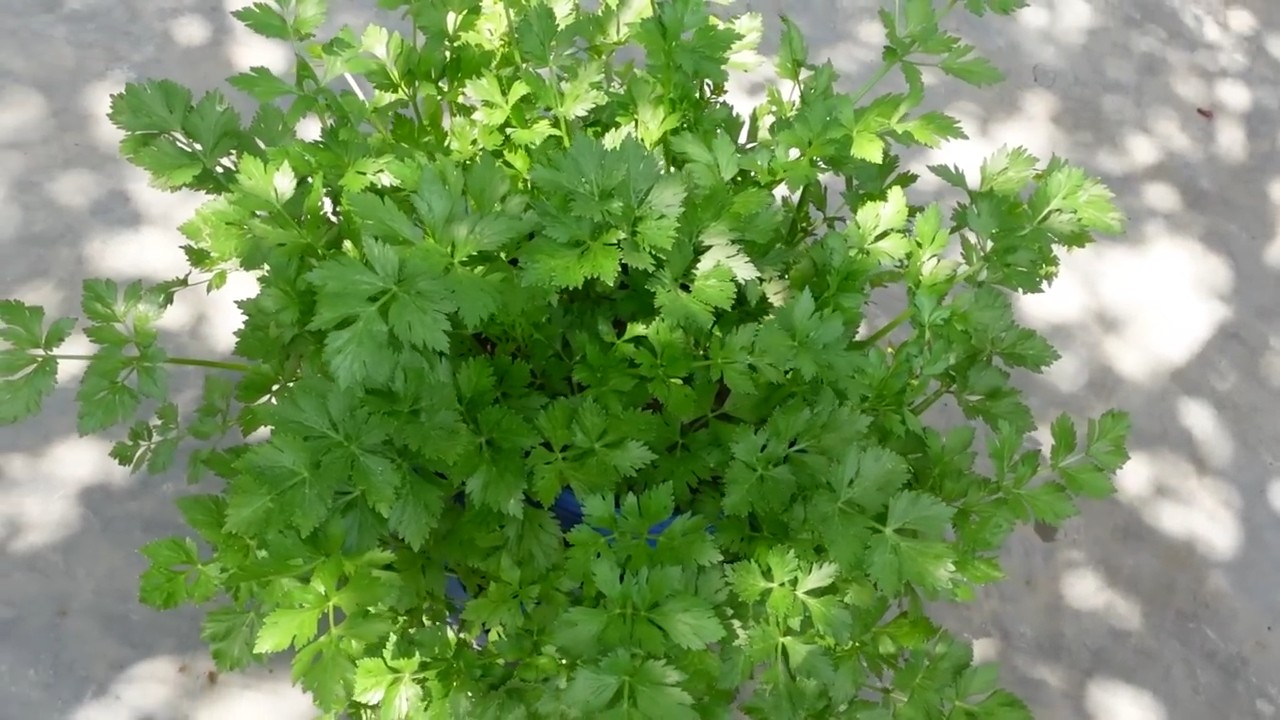
Grow Crisp Celery Easily, right in your own backyard! Imagine the satisfaction of harvesting stalks so crisp and flavorful, they put the grocery store variety to shame. Forget limp, bitter celery – we’re talking about the kind that snaps with every bite, perfect for snacking, salads, or adding a vibrant crunch to your favorite dishes.
For centuries, celery has been more than just a vegetable; it’s been a symbol of good health and even status. From its humble beginnings as a medicinal plant in ancient times to its current role as a staple in cuisines worldwide, celery has a rich history. But let’s be honest, growing it can sometimes feel like a challenge. That’s where our DIY tricks come in!
Why do you need these hacks? Because let’s face it, store-bought celery can be disappointing. It’s often expensive, lacks flavor, and wilts quickly. But with a few simple techniques, you can grow crisp celery easily at home, saving money, reducing waste, and enjoying the freshest, most delicious celery you’ve ever tasted. I’m excited to share these simple, effective methods that will transform your home garden and your celery game!
Crunchy Celery from Your Own Garden: It’s That Easy!
I love fresh celery! The crunchy bite, the slightly savory taste – simply wonderful. And the best part is, you don’t always have to buy it at the supermarket. With a little patience and the right tricks, you can easily grow it yourself in the garden or even on the balcony. I’ll show you how!
What you need:
- Celery seeds: Organic seeds are best to ensure that no harmful pesticides were used.
- Seed starting mix: Special seed starting mix is low in nutrients and loose, ideal for germination.
- Seed trays or pots: Small containers in which you can start the seeds.
- Spray bottle: For moistening the soil.
- Cling film or mini-greenhouse: To ensure high humidity.
- Patience: Celery takes some time to grow.
- Garden trowel or small shovel: For transplanting.
- Compost or organic fertilizer: For a good supply of nutrients.
- Watering can: For regular watering.
- Mulch material (e.g., straw or grass clippings): To retain moisture in the soil and suppress weeds.
Sowing and Starting Seeds: The Foundation for Your Celery Success
Celery has a long growing season, so it’s important to start it early. I usually begin this in February or March.
- Preparation of the seed trays: Fill the seed trays or pots with seed starting mix. Lightly press the soil down.
- Sowing the seeds: Celery seeds are light germinators, meaning they need light to sprout. Therefore, sprinkle the seeds very thinly on the soil and do not press them down.
- Moistening: Gently moisten the soil with a spray bottle. Be careful not to make the soil too wet, as the seeds could rot.
- Creating a good climate: Cover the seed trays with cling film or a mini-greenhouse. This creates high humidity, which is important for germination.
- The right location: Place the seed trays in a bright and warm spot. A temperature of 20-25°C (68-77°F) is ideal. Avoid direct sunlight, as the young seedlings could get burned.
- Regular checks: Check the soil regularly and moisten it with the spray bottle if necessary. Ventilate the seed trays daily to prevent mold.
- Patience is required: Germination can take up to three weeks. Be patient and don’t give up!
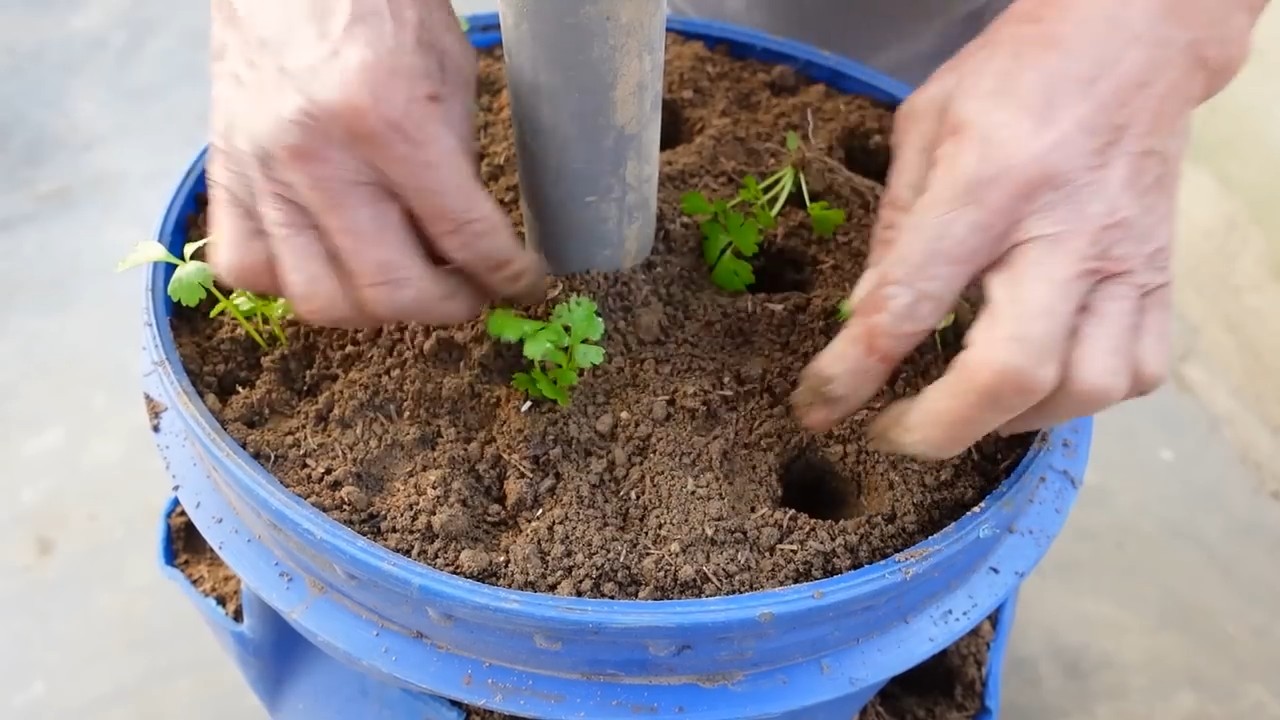
Pricking Out: Giving the Little Plants More Space
As soon as the small celery seedlings have developed their first true leaves (after about 4-6 weeks), it’s time to prick them out. This means you transplant them into larger pots so they have more room to grow.
- Preparation of the pots: Fill small pots (approx. 8-10 cm / 3-4 inches in diameter) with seed starting mix or a mixture of seed starting mix and compost.
- Careful lifting: Carefully lift the small celery seedlings out of the seed tray with a dibber or a fork. Be careful not to damage the roots.
- Planting: Place the seedlings in the prepared pots and fill the pots with soil. Lightly press the soil down.
- Watering in: Water the seedlings gently.
- The right location: Place the pricked-out seedlings in a bright and cool place (approx. 15-18°C / 59-64°F). Avoid direct sunlight.
Transplanting: Off to the Garden Bed!
After the last frost (mid-May), when there is no more danger of frost, the celery seedlings can be transplanted into the garden bed.
- Preparation of the bed: Celery prefers a sunny to semi-shady location with humus-rich and nutrient-rich soil. Loosen the soil thoroughly and work in compost or organic fertilizer.
- Hardening off: Before you plant the seedlings in the bed, you should harden them off for a few days. To do this, place them outside during the day and bring them back in at night. This way, they slowly get used to the outdoor conditions.
- Planting distance: Plant the celery seedlings about 30-40 cm (12-16 inches) apart in the bed.
- Planting: Dig small holes and place the seedlings in them. Fill the holes with soil and press the soil down lightly.
- Watering in: Water the seedlings thoroughly.
- Mulching: Cover the soil around the seedlings with mulch material (e.g., straw or grass clippings). This keeps the moisture in the soil and suppresses weeds.
Care: So Your Celery Thrives
Celery needs regular care to grow well and develop crunchy stalks.
- Watering: Celery needs a lot of water. Water it regularly, especially during dry periods. Make sure the soil is always moist, but not too wet.
- Fertilizing: Fertilize the celery regularly with compost or organic fertilizer. Fertilizing every 2-3 weeks is sufficient.
- Weed removal: Remove weeds regularly so that the celery is not overgrown by them.
- Hilling: Hill up the celery plants regularly as soon as the stalks are a bit larger. This promotes the formation of white, tender stalks.
- Pest protection: Celery can be attacked by various pests, such as slugs or celery flies. Check the plants regularly and combat pests with natural means if necessary.
Harvest: Finally, Crunchy Celery from Your Own Garden!
Depending on the variety and weather, you can harvest the celery about 3-4 months after transplanting.
- Harvest time: The celery is ripe when the stalks have reached a good size and feel firm.
- Harvesting: Cut the stalks with a sharp knife just above the ground.
- Storage: The celery will stay fresh in the refrigerator for a few days. You can also freeze it to make it last longer.
Additional Tips for the Perfect Celery:
- Variety selection: There are different celery varieties that differ in taste and size. Choose a variety that you like and that is suitable for your climate.
- Blanching: To get particularly tender and light-colored stalks, you can blanch the celery before harvesting. To do this, wrap the stalks with paper or cardboard.
- Preventing diseases: Ensure good ventilation and avoid waterlogging to prevent diseases.
- Practice crop rotation: Do not plant celery in the same location every year to prevent diseases and pests.
Common Problems and Solutions:
Slug infestation: Protect the celery from slugs by scattering slug pellets or setting up slug fences.
Yellow leaves: Yellow leaves can be a sign of a nutrient deficiency. Fertilize the celery with compost or organic fertilizer.
Conclusion
So, there you have it! Growing crisp celery at home, even if you don’t have a sprawling garden, is entirely within your reach. This simple DIY trick, focusing on proper hydration and blanching techniques, transforms ordinary celery stalks into crunchy, flavorful additions to your meals. Forget the often limp and bitter celery from the grocery store; imagine the satisfaction of harvesting your own, bursting with freshness and a subtle sweetness that only homegrown produce can offer.
This isn’t just about saving a few dollars; it’s about connecting with your food, understanding the growing process, and enjoying the unparalleled taste of truly fresh ingredients. Plus, it’s a fantastic way to reduce your environmental impact by minimizing transportation and packaging waste.
But the beauty of this method lies in its adaptability. Feel free to experiment with different celery varieties. ‘Utah Tall’ is a classic choice known for its crispness, but consider trying ‘Golden Self-Blanching’ for a milder flavor and naturally pale stalks. You can also adjust the blanching period to suit your taste. A shorter blanching time will result in a slightly greener and more intensely flavored celery, while a longer period will yield a paler, sweeter, and more tender stalk.
Don’t be afraid to get creative with your growing medium, too. While soil is the traditional choice, hydroponics can also be used to grow celery indoors, providing a controlled environment and potentially faster growth rates. Just remember to provide adequate support for the stalks as they mature.
And speaking of support, consider companion planting to further enhance your celery’s growth. Onions, garlic, and marigolds are excellent companions, helping to deter pests and improve soil health.
Ultimately, the key to success with this DIY trick is consistent watering and careful monitoring. Celery thrives in moist conditions, so ensure the soil remains consistently damp but not waterlogged. Regularly check for pests and diseases, and take prompt action if any problems arise.
We wholeheartedly encourage you to give this method a try. It’s a rewarding experience that will not only provide you with delicious, homegrown celery but also deepen your appreciation for the wonders of nature. Once you’ve harvested your first batch of crisp, homegrown celery, we’d love to hear about your experience! Share your photos, tips, and variations in the comments below. Let’s build a community of celery-growing enthusiasts and inspire others to embrace the joys of homegrown produce. What are you waiting for? Get planting and enjoy the taste of success!
Frequently Asked Questions (FAQ)
What is the best time of year to start growing celery using this DIY trick?
The best time to start growing celery depends on your climate. In regions with mild winters, you can start seeds indoors in late winter or early spring for transplanting outdoors after the last frost. In colder climates, it’s best to start seeds indoors 8-10 weeks before the last expected frost. Celery requires a long growing season, so starting indoors is generally recommended to give it a head start. You can also purchase celery starts from a local nursery if you prefer.
How much sunlight does celery need?
Celery thrives in full sun, meaning at least 6-8 hours of direct sunlight per day. However, in hotter climates, some afternoon shade can be beneficial to prevent the leaves from scorching. If you’re growing celery indoors, use grow lights to supplement natural sunlight and ensure adequate light exposure.
What kind of soil is best for growing celery?
Celery prefers rich, well-drained soil with plenty of organic matter. Amend your soil with compost or well-rotted manure before planting to improve its fertility and drainage. The ideal soil pH for celery is between 6.0 and 6.8. You can test your soil pH using a home testing kit and adjust it accordingly with lime or sulfur.
How often should I water my celery plants?
Celery requires consistent moisture to thrive. Water deeply and regularly, ensuring the soil remains consistently damp but not waterlogged. Check the soil moisture daily, especially during hot, dry weather. Mulching around the plants can help retain moisture and suppress weeds.
What is blanching, and why is it important for growing crisp celery?
Blanching is the process of excluding light from the celery stalks to make them paler, sweeter, and more tender. It’s essential for achieving the desired flavor and texture of commercially grown celery. You can blanch celery by mounding soil around the stalks, wrapping them with newspaper or cardboard, or using specialized blanching collars. Start blanching about 2-3 weeks before harvest.
How do I know when my celery is ready to harvest?
Celery is typically ready to harvest when the stalks are about 6-8 inches long and have reached the desired color and thickness. The exact time will depend on the variety and growing conditions. You can harvest individual stalks as needed or harvest the entire plant at once. To harvest, simply cut the stalks at the base of the plant with a sharp knife.
What are some common pests and diseases that affect celery?
Celery can be susceptible to several pests and diseases, including aphids, celery leaf tiers, celery mosaic virus, and early blight. Regularly inspect your plants for signs of infestation or disease. Use organic pest control methods, such as insecticidal soap or neem oil, to control pests. Ensure good air circulation and avoid overhead watering to prevent fungal diseases.
Can I grow celery in containers?
Yes, you can grow celery in containers, but you’ll need to choose a large container (at least 12 inches in diameter) to accommodate the plant’s root system. Use a high-quality potting mix and ensure the container has good drainage. Water regularly and fertilize every few weeks with a balanced fertilizer.
How can I store harvested celery?
To store harvested celery, wrap the stalks tightly in plastic wrap and store them in the refrigerator. Celery can last for several weeks when stored properly. You can also freeze celery for longer storage, but it will lose some of its crispness. To freeze celery, blanch it for 2-3 minutes, then cool it in ice water before packaging it in freezer bags or containers.
What are some creative ways to use my homegrown celery?
Besides eating it raw in salads or with dips, homegrown celery can be used in a variety of dishes. Add it to soups, stews, and stir-fries for flavor and texture. Use it to make celery juice or smoothies. Pickle it for a tangy snack. Or, use the leaves to make celery salt or add flavor to stocks and broths. The possibilities are endless!

Leave a Comment