
Grow Sweet Honeydew Melons right in your own backyard! Imagine biting into a juicy, perfectly ripe honeydew melon, bursting with sweetness, knowing you nurtured it from seed to fruit. Forget those bland, store-bought melons – this year, you can cultivate your own little slice of paradise.
For centuries, melons have been cherished across cultures, from ancient Egypt where they were buried with pharaohs, to the sun-drenched fields of the Mediterranean. Their refreshing taste and hydrating properties have made them a symbol of summer and abundance. But you don’t need royal lineage or a sprawling estate to enjoy this delicious fruit.
Many gardeners shy away from growing honeydew melons, believing they require specialized knowledge or a greenhouse. But I’m here to tell you that with a few simple tricks and DIY hacks, you can successfully grow sweet honeydew melons, even in a small space. This article will demystify the process, providing you with easy-to-follow steps and insider tips to ensure a bountiful harvest. Why settle for less when you can have the satisfaction of growing your own delicious, healthy, and homegrown honeydew melons? Let’s get started!
How to Grow Sweet Honeydew Melons in Your Own Garden
I love honeydew melons! Their sweet, juicy taste is simply unbeatable, especially on hot summer days. And the best part? You can easily grow them yourself! I’ll show you how to achieve a bountiful harvest with a little patience and the right tricks.
Preparation is Everything: The Right Location and Soil
Before we get started, it’s important to find the ideal location and soil for your honeydew melons. These sun-loving plants need a lot of warmth and well-draining soil.
- Sunshine: Honeydew melons need at least 6-8 hours of direct sunlight per day. So, choose a spot in your garden that is sunny all day long.
- Soil: The soil should be well-draining and rich in organic matter. Honeydew melons don’t like “wet feet,” so avoid heavy, clay soils that drain poorly.
- pH Level: The ideal pH for honeydew melons is between 6.0 and 6.8. You can check your soil’s pH with a soil test kit, which you can get at any garden center.
- Wind Protection: Honeydew melon plants can be sensitive to strong winds. A location sheltered from the wind will help protect the plants from damage.
Step-by-Step Guide: Sowing and Planting Honeydew Melons
Now let’s get down to business! Here is a detailed guide on how to sow and plant your honeydew melons:
- Starting Indoors (optional): I recommend starting honeydew melons indoors, especially if you live in a region with short summers. Begin about 4-6 weeks before the last expected frost date.
- Fill small pots (about 8-10 cm / 3-4 inches in diameter) with seed starting mix.
- Place 2-3 seeds per pot about 2 cm (0.8 inches) deep into the soil.
- Water the soil gently and place the pots in a warm, bright place (e.g., on a windowsill or under a grow light).
- Keep the soil moist, but not wet.
- Once the seedlings have germinated and have 2-3 true leaves, you can remove the weakest seedling from each pot.
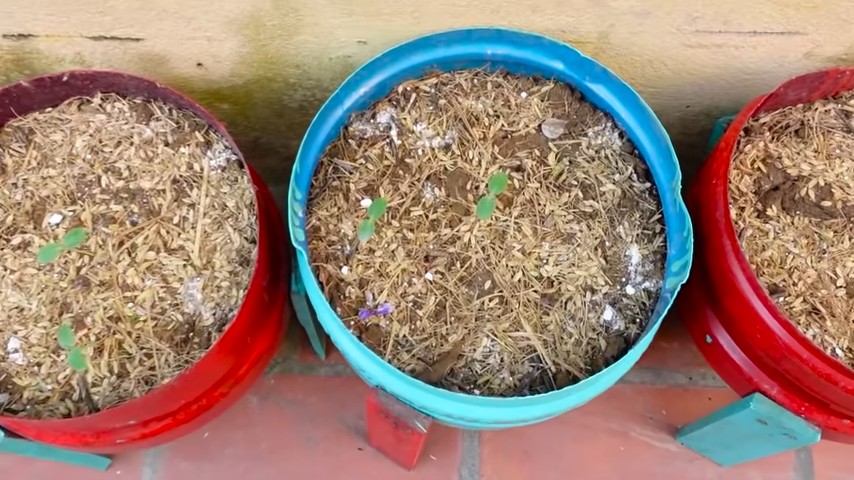
- Direct Sowing (Alternative): If you live in a region with long, warm summers, you can also sow honeydew melons directly outdoors. Wait until the soil temperature has reached at least 18°C (65°F).
- Prepare the soil by loosening it and enriching it with compost or other organic material.
- Sow the seeds about 2 cm (0.8 inches) deep into the soil, in groups of 2-3 seeds per planting spot.
- Maintain a distance of about 90-120 cm (3-4 feet) between planting spots.
- Water the soil gently.
- Transplanting: Once the danger of frost has passed and the soil temperature has reached at least 18°C (65°F), you can transplant the indoor-started honeydew melons outdoors.
- Harden off the seedlings before transplanting by placing them outside for a few hours during the day and then bringing them back inside. Repeat this for about a week.
- Dig holes that are slightly larger than the root balls of the seedlings.
- Carefully place the seedlings in the holes and fill them with soil.
- Water the plants thoroughly.
- Mulch the soil around the plants with straw or other organic material to retain moisture and suppress weeds.
The Care: Watering, Fertilizing, and Pruning
Proper care is crucial for a bountiful harvest. Here are some tips on how to best care for your honeydew melons:
- Watering: Honeydew melons need regular water, especially during fruit development. It’s best to water the plants early in the morning so the leaves have time to dry before the sun comes up. Avoid watering the leaves directly, as this can promote fungal diseases. Drip irrigation is ideal.
- Fertilizing: Honeydew melons are heavy feeders and require regular applications of fertilizer. Fertilize the plants about every 2-3 weeks with a balanced fertilizer. You can also use organic fertilizers like compost tea or diluted nettle tea.
- Pruning (optional): Pruning honeydew melons can encourage fruit production. Remove side shoots that do not have flowers or fruits. You can also pinch off the tip of the main vine to encourage the growth of side shoots. I personally don’t always prune my plants, but it can help improve the harvest.
- Weed Control: Keep the area around the honeydew melons free of weeds, as weeds rob them of nutrients and water.
- Protection from Pests and Diseases: Honeydew melons can be affected by various pests and diseases. Watch for signs of infestation and take action if necessary. Common pests include aphids, cucumber beetles, and spider mites. Common diseases include powdery mildew and Fusarium wilt. I like to use natural pesticides like neem oil or insecticidal soap.
The Harvest: When are Honeydew Melons Ripe?
The harvest is the most exciting part! But how do you know when your honeydew melons are ripe?
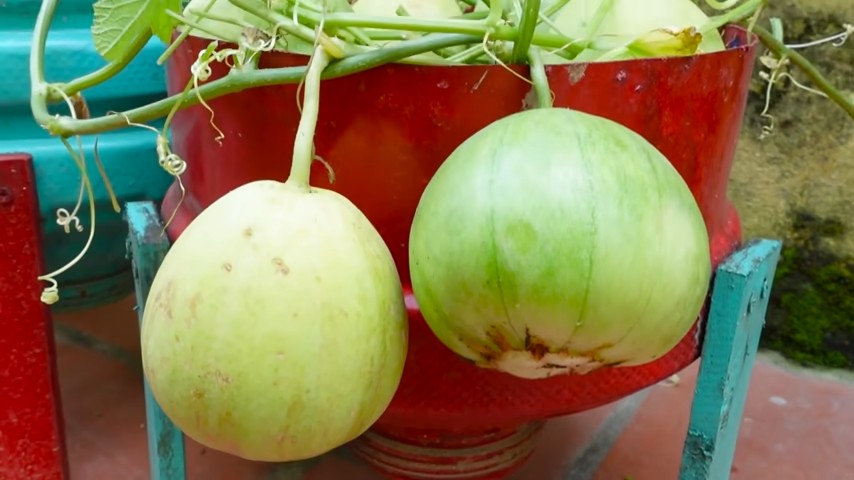
- Color: The rind of the honeydew melon should change from green to a yellowish-white.
- Scent: A ripe honeydew melon will emit a sweet, melony fragrance.
- Stem: The stem connecting the melon to the plant should dry slightly and detach easily from the melon.
- Sound: If you tap the melon, it should sound hollow.
Once the melon is ripe, you can carefully cut it from the stem. Enjoy your homegrown honeydew melon! It’s guaranteed to taste better than any store-bought melon.
Common Problems and Solutions
Problems can also arise when growing honeydew melons. Here are some common issues and how you can solve them:
- No fruit: If your honeydew plants are flowering but not producing fruit, it could be due to a lack of pollination. Honeydew melons rely on insect pollination. You can assist pollination by planting bee-friendly plants near your honeydew melons or by hand-pollinating the flowers.
- Yellow leaves: Yellow leaves can be a sign of various problems, such as nutrient deficiency, overwatering, or diseases. Check your soil’s pH and fertilize the plants if necessary. Make sure the soil is well-draining and the plants are not getting too much water.
- Diseases: Honeydew melons can be affected by various diseases, such as powdery mildew and Fusarium wilt. Choose disease-resistant varieties and ensure good air circulation around the plants. Remove affected leaves and use fungicides if necessary.
- Pests: Honeydew melons can be attacked by various pests, such as aphids, cucumber beetles, and spider mites. Check the plants regularly for pests and take action if necessary. I like to use natural pesticides like neem oil or insecticidal soap.
Variety Recommendations
There are many different honeydew melon varieties, which differ in taste, size, and ripening time.
Conclusion
So, there you have it! Growing sweet honeydew melons at home might seem like a daunting task reserved for seasoned gardeners, but with these simple yet effective DIY tricks, you can transform your backyard into a honeydew haven. We’ve demystified the process, breaking it down into manageable steps that even beginner gardeners can follow with confidence.
The beauty of this approach lies in its accessibility and adaptability. You don’t need fancy equipment or a sprawling farm to enjoy the unparalleled taste of homegrown honeydew. Imagine biting into a melon, bursting with sweetness, knowing that you nurtured it from seed to fruit. That satisfaction alone makes this DIY project worthwhile.
But why is this DIY trick a must-try? Beyond the obvious benefit of fresh, delicious honeydew, it’s about control. You control the quality of the soil, the amount of sunlight, and the absence of harmful pesticides. You’re providing your family with a healthier, more natural alternative to store-bought melons. Plus, gardening is a fantastic stress reliever and a rewarding hobby that connects you with nature.
Don’t be afraid to experiment! Consider these variations to personalize your honeydew growing experience:
* Vertical Gardening: If space is limited, try growing your honeydew vertically on a trellis. This not only saves space but also improves air circulation, reducing the risk of fungal diseases.
* Companion Planting: Plant basil or marigolds near your honeydew to deter pests naturally. These companion plants release scents that repel common melon pests, creating a healthier growing environment.
* Different Varieties: Explore different honeydew varieties to find your favorite. Some varieties are sweeter, while others are more resistant to certain diseases. Experiment and discover what grows best in your region.
* Hydroponics: For the more adventurous gardener, consider growing honeydew hydroponically. This soilless method can produce impressive results, especially in controlled environments.
Remember, patience is key. Growing honeydew melons takes time and dedication. Don’t get discouraged if your first attempt isn’t perfect. Learn from your mistakes, adjust your approach, and keep trying. The reward of a perfectly ripe, sweet honeydew melon is well worth the effort.
We’re confident that with these DIY tricks, you’ll be well on your way to harvesting your own delicious honeydew melons. So, grab your gardening gloves, gather your supplies, and get ready to embark on this exciting journey. We encourage you to try these DIY tricks and share your experiences with us! Let us know what worked for you, what challenges you faced, and any tips you discovered along the way. Your feedback will help other gardeners succeed and contribute to a thriving community of honeydew enthusiasts. Share your photos and stories on social media using #HomegrownHoneydew and let’s celebrate the joy of growing our own food!
Frequently Asked Questions (FAQ)
1. What is the best time of year to plant honeydew melons?
The best time to plant honeydew melons is in late spring or early summer, after the last frost has passed and the soil has warmed up to at least 60°F (15°C). Honeydew melons require a long growing season of about 80-100 days, so starting them early is crucial for a successful harvest. If you live in a region with a short growing season, consider starting the seeds indoors 4-6 weeks before the last expected frost. This will give your plants a head start and ensure they have enough time to mature before the weather turns cold.
2. How much sunlight do honeydew melons need?
Honeydew melons need at least 6-8 hours of direct sunlight per day to thrive. Sunlight is essential for photosynthesis, the process by which plants convert light energy into chemical energy for growth and fruit production. Choose a planting location that receives full sun throughout the day. If you’re growing honeydew melons indoors, use grow lights to supplement natural sunlight and ensure they receive adequate light exposure. Insufficient sunlight can lead to weak plants, poor fruit development, and a bland taste.
3. What type of soil is best for growing honeydew melons?
Honeydew melons prefer well-drained, fertile soil with a pH between 6.0 and 6.8. The soil should be rich in organic matter, such as compost or well-rotted manure, to provide essential nutrients and improve drainage. Avoid heavy clay soils, as they can retain too much water and lead to root rot. Before planting, amend the soil with organic matter to improve its structure and fertility. You can also add a slow-release fertilizer to provide a steady supply of nutrients throughout the growing season.
4. How often should I water honeydew melons?
Honeydew melons need consistent watering, especially during hot, dry weather. Water deeply and regularly, aiming to keep the soil consistently moist but not waterlogged. Avoid overhead watering, as it can promote fungal diseases. Instead, water at the base of the plant, using a soaker hose or drip irrigation system. During fruit development, increase watering to ensure the melons receive adequate moisture. However, reduce watering as the melons ripen to prevent them from cracking.
5. How do I know when a honeydew melon is ripe?
Determining when a honeydew melon is ripe can be tricky, but there are a few key indicators to look for. First, check the color of the melon. A ripe honeydew melon will have a creamy yellow or pale green color, depending on the variety. The skin should also feel slightly waxy to the touch. Second, smell the melon. A ripe honeydew melon will have a sweet, fragrant aroma, especially near the blossom end. Finally, check the stem. A ripe honeydew melon will easily slip from the vine with a gentle tug. If the stem is still firmly attached, the melon is not yet ripe.
6. What are some common pests and diseases that affect honeydew melons?
Honeydew melons are susceptible to several pests and diseases, including aphids, squash bugs, vine borers, powdery mildew, and fusarium wilt. To prevent pest and disease problems, practice good garden hygiene, such as removing weeds and debris, and rotate your crops regularly. Inspect your plants regularly for signs of pests or diseases and take action promptly. Use organic pest control methods, such as insecticidal soap or neem oil, to control aphids and squash bugs. Apply a fungicide to prevent or treat powdery mildew. Choose disease-resistant varieties to minimize the risk of fusarium wilt.
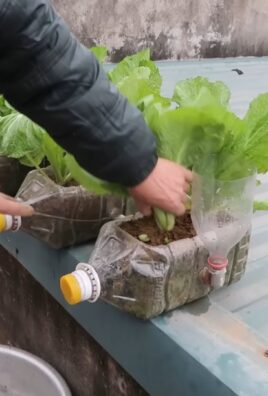
7. Can I grow honeydew melons in containers?
Yes, you can grow honeydew melons in containers, but you’ll need a large container with good drainage. Choose a container that is at least 24 inches in diameter and 12 inches deep. Fill the container with a well-draining potting mix and add a slow-release fertilizer. Provide a trellis or other support for the vines to climb. Water regularly and fertilize every 2-3 weeks. Place the container in a sunny location that receives at least 6-8 hours of direct sunlight per day. Growing honeydew melons in containers can be a great option for gardeners with limited space.
8. How do I store honeydew melons after harvesting?
After harvesting, store honeydew melons in a cool, dry place. Whole honeydew melons can be stored at room temperature for up to a week. To extend their shelf life, store them in the refrigerator. Cut honeydew melons should be stored in an airtight container in the refrigerator and consumed within a few days. Avoid storing honeydew melons near ethylene-producing fruits, such as bananas and apples, as this can cause them to ripen too quickly and spoil.

Leave a Comment