
Growing pineapples at home might sound like an exotic dream reserved for tropical climates, but I’m here to tell you it’s totally achievable, even if you’re miles away from Hawaii! Forget those expensive grocery store pineapples – imagine plucking a sweet, juicy pineapple straight from your own backyard (or even your windowsill!).
For centuries, the pineapple has been a symbol of hospitality and luxury. Originating in South America, it was once so rare and prized in Europe that it was often rented out as a centerpiece for lavish parties! Now, thanks to some clever DIY tricks, you can bring a touch of that tropical elegance into your own life.
Why bother with this DIY project? Well, besides the sheer satisfaction of nurturing your own fruit, growing pineapples at home is a fantastic way to reduce your carbon footprint, enjoy fresher produce, and impress your friends and family. Plus, it’s a surprisingly easy and rewarding project. In this article, I’ll share my favorite tips and tricks for successfully growing pineapples at home, from prepping the pineapple top to harvesting your delicious, homegrown fruit. Get ready to unleash your inner gardener and embark on this exciting tropical adventure with me!
Growing Your Own Pineapple: Your Tropical Dream for Home
Hey everyone! Have you ever wondered how to grow a pineapple at home? I’ve tried it, and it’s easier than you think! It does take some patience, but the result is absolutely worth it. Imagine harvesting your own juicy pineapple directly from your garden or balcony. Sounds good, right? Let’s get started!
What You Need: The Preparation
Before we begin with the actual planting, we need to make sure we have everything necessary on hand. Here is a list of the things you’ll need:
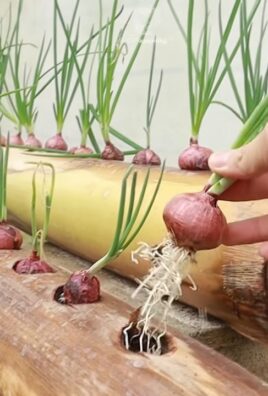
- A ripe pineapple: Choose a pineapple with healthy, green leaves. Make sure the leaves are firm and have no brown or wilted spots. The fruit itself should be ripe, but not overripe.
- A sharp knife: A sharp knife is important to cut the pineapple crown off cleanly.
- A glass or a vase: For rooting the pineapple crown.
- Toothpicks: To stabilize the crown in the glass.
- Potting soil: A well-draining potting soil is best.
- A pot: The pot should be large enough to give the pineapple plenty of room to grow. A diameter of at least 20 cm (8 inches) is ideal.
- Watering can: For watering the pineapple.
- Optional: Rooting hormone: Can help speed up root formation.
Step-by-Step Guide: How to Grow Your Own Pineapple
Okay, now let’s get down to it! Here is a detailed guide on how to grow your own pineapple:
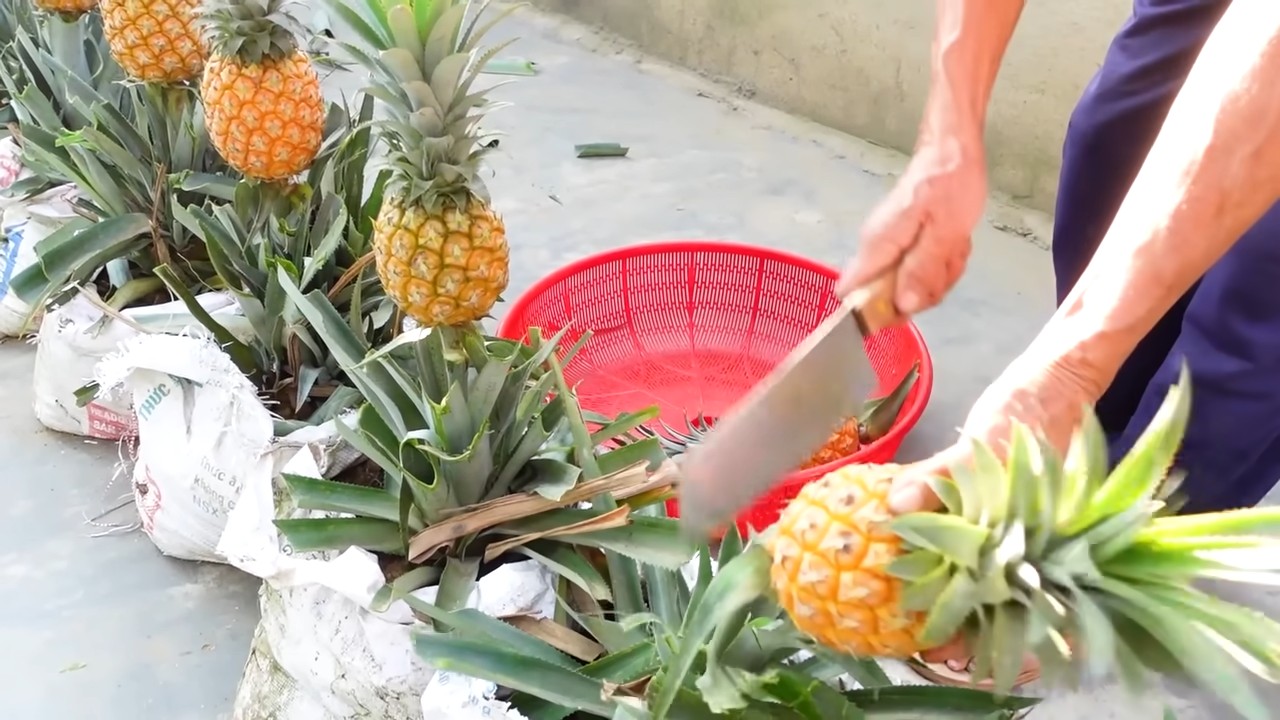
1. Preparing the Pineapple Crown
- Remove leaves: Hold the pineapple crown firmly and carefully twist off the bottom leaves. You can also cut off the lowest leaves to expose the stalk. The goal is to expose about 2-3 cm (about 1 inch) of the stalk.
- Cut the crown: With a sharp knife, cut the crown about 2-3 cm (about 1 inch) below the leaves. Make sure to make a clean cut.
- Remove fruit flesh: Remove any fruit flesh attached to the stalk. Fruit flesh can rot and hinder root formation.
- Let it dry: Let the crown dry for 2-3 days in a dry, well-ventilated place. This helps prevent rot.
2. Rooting the Pineapple Crown
- Insert toothpicks: Stick 3-4 toothpicks evenly into the stalk. The toothpicks will serve to stabilize the crown in the glass.
- Place in water: Fill a glass or vase with water. The water level should touch the bottom part of the stalk, but not the leaves.
- Place in a bright spot: Put the glass with the pineapple crown in a bright, warm place, but not in direct sunlight.
- Change the water: Change the water every 2-3 days to prevent rot.
- Be patient: It can take several weeks for roots to form. Be patient and don’t give up! You should see the first roots after about 4-8 weeks.
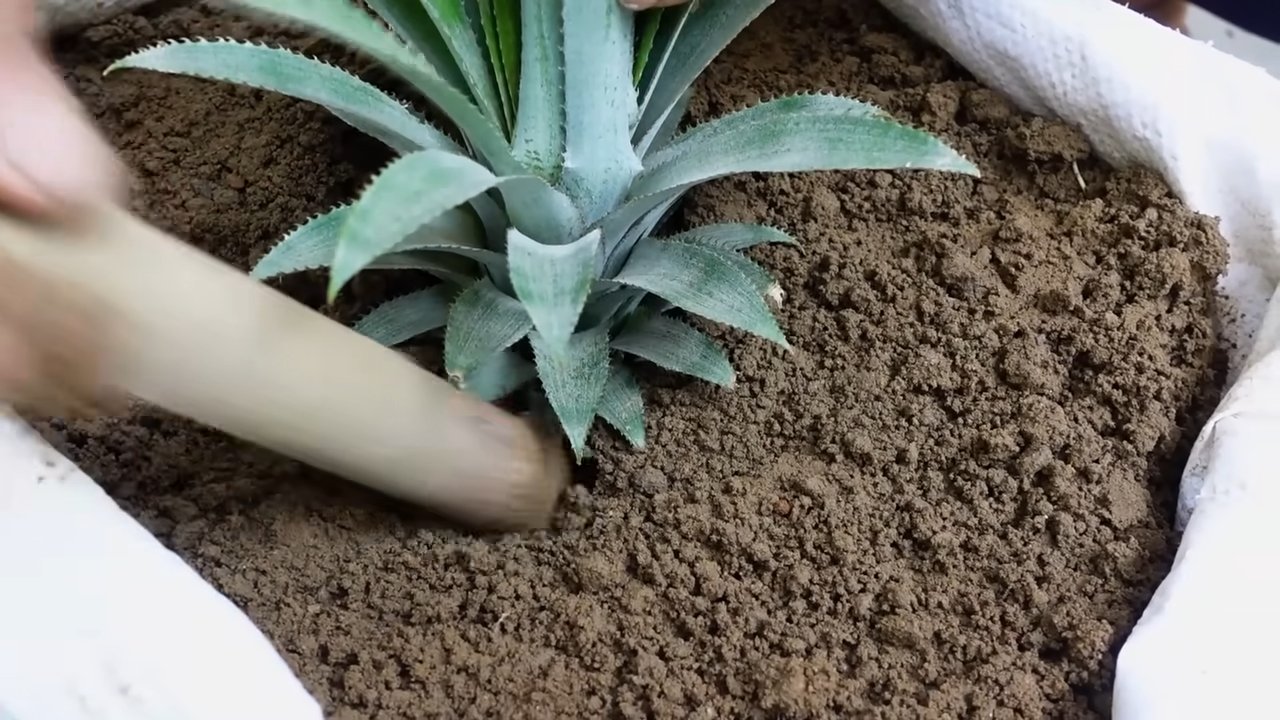
3. Planting the Pineapple
- Prepare the pot: Fill the pot with well-draining potting soil.
- Dig a planting hole: Dig a hole in the soil that is large enough to accommodate the pineapple crown.
- Plant the pineapple: Carefully place the pineapple crown in the hole and cover it with soil. Make sure the leaves are not covered with soil.
- Press down: Lightly press the soil to stabilize the pineapple crown.
- Water: Water the pineapple thoroughly until the soil is moist.
4. Caring for the Pineapple
- Location: Place the pot in a bright, warm location. Pineapples love sun, but direct midday sun can burn the leaves.
- Watering: Water the pineapple regularly, but avoid waterlogging. The soil should always be slightly moist. Water less in the winter.
- Fertilizing: Fertilize the pineapple every 2-3 months with a liquid fertilizer for houseplants.
- Temperature: Pineapples prefer temperatures between 20°C and 30°C (68°F and 86°F).
- Humidity: Pineapples like high humidity. You can increase humidity by placing the pot on a saucer with water and pebbles or by regularly spraying the leaves with water.
- Repotting: When the pineapple becomes too large for its pot, you will need to repot it into a larger one.
Common Problems and Solutions
Problems can also arise when growing pineapples. Here are some common problems and how you can solve them:
- Rot: If the crown rots, it’s a sign of too much moisture. Cut off the rotten parts and let the crown dry thoroughly before trying to root it again. Be sure to change the water regularly and avoid waterlogging.
- Brown leaves: Brown leaves can be a sign of too little water, too much sun, or a nutrient deficiency. Check your watering, location, and fertilization.
- No root formation: If no roots form after several weeks, it might be due to the quality of the pineapple. Try again with a different pineapple. You can also use rooting hormone to speed up root formation.
- Pests: Pineapples can be infested by pests like spider mites or mealybugs. Treat the plant with a suitable insecticide.
Patience is the Key: When Will My Pineapple Bear Fruit?
Now comes the hardest part: patience! It can take 2-3 years for your pineapple to bear fruit. The pineapple must first reach a certain size before it flowers and produces fruit. Be patient and take good care of your pineapple, and you will eventually be rewarded with your own juicy pineapple!
Extra Tips for Pineapple Success
- Choose the right pineapple: When buying, look for a healthy pineapple with fresh, green leaves.
- Use rooting hormone: Rooting hormone can speed up root formation and increase the chances of success.
- Provide enough light: Pineapples need a lot of light to grow. Place the pot in a bright spot or use a grow lamp.
- Be patient: It takes a long time for a pineapple to bear fruit. Be patient and don’t give up!
I hope this guide helps you grow your own pineapple. It’s an exciting project, and it’s fun to watch the plant grow and thrive. Good luck and have fun growing your pineapple!
Conclusion
So, there you have it! Growing pineapples at home might seem like a tropical dream reserved for professional farmers, but as we’ve shown, it’s an achievable and incredibly rewarding project for any home gardener, regardless of experience. This DIY trick isn’t just about saving money on store-bought pineapples; it’s about connecting with nature, understanding the life cycle of a plant, and experiencing the unparalleled satisfaction of harvesting something you nurtured from a simple pineapple top.
Why is this a must-try? Because it’s more than just growing fruit. It’s a lesson in patience, a testament to the power of propagation, and a conversation starter that will impress your friends and family. Imagine serving a pineapple you grew yourself at your next barbecue! The flavor is often sweeter and more intense than store-bought varieties, and the bragging rights are definitely a bonus.
But the benefits extend beyond the delicious fruit. The pineapple plant itself is a beautiful addition to any garden or indoor space. Its spiky, architectural leaves add a touch of the exotic, and it’s relatively low-maintenance once established. Plus, you’re reducing your carbon footprint by growing your own food locally, eliminating the need for long-distance transportation.
Looking for variations? Consider experimenting with different pineapple varieties. While the smooth cayenne is a popular choice, you might try growing a sugarloaf or a red Spanish pineapple for a unique flavor profile. You can also adjust the growing medium to suit your specific climate and soil conditions. Some gardeners prefer a well-draining potting mix, while others opt for a blend of compost, perlite, and vermiculite.
Another fun variation is to grow your pineapple in a container. This is perfect for those with limited space or who live in colder climates where the plant needs to be brought indoors during the winter. Just make sure the container is large enough to accommodate the plant’s root system and provides adequate drainage.
Don’t be discouraged if your first attempt isn’t a resounding success. Growing pineapples at home requires patience and attention to detail. But with a little perseverance, you’ll be enjoying your own homegrown pineapples in no time.
We wholeheartedly encourage you to give this DIY trick a try. It’s a fun, educational, and ultimately delicious experience. And most importantly, share your journey with us! We’d love to hear about your successes, your challenges, and any tips or tricks you discover along the way. Post pictures of your pineapple plants on social media using [Your Hashtag Here] and let’s create a community of home pineapple growers! Let’s all enjoy the fruits (literally!) of our labor and discover the joy of growing pineapples at home.
Frequently Asked Questions (FAQ)
How long does it take to grow a pineapple from a top?
This is one of the most common questions, and the answer is: patience is key! It typically takes between 2 to 3 years for a pineapple plant grown from a top to produce fruit. The exact timeframe depends on several factors, including the variety of pineapple, the climate, and the growing conditions. Don’t be discouraged by the wait; the anticipation makes the eventual harvest even more rewarding. Remember to provide consistent care, including adequate sunlight, water, and fertilization, to encourage healthy growth and fruiting.
What is the best type of pineapple to use for growing?
While you can technically grow any pineapple variety from its top, some are more readily available and easier to grow than others. The Smooth Cayenne pineapple is a popular choice due to its widespread availability in grocery stores and its relatively easy-to-grow nature. Other varieties, such as Sugarloaf or Red Spanish, can also be grown, but they may be harder to find. When selecting a pineapple, choose one that is ripe and healthy, with green, undamaged leaves. Avoid pineapples with brown or wilted leaves, as they may not root properly.
How much sunlight does a pineapple plant need?
Pineapple plants thrive in bright, sunny locations. They need at least 6 hours of direct sunlight per day to grow and produce fruit. If you’re growing your pineapple indoors, place it near a south-facing window where it will receive the most sunlight. You may also need to supplement with artificial light, especially during the winter months. Insufficient sunlight can lead to slow growth, weak stems, and a lack of fruit production.
What kind of soil is best for growing pineapples?
Pineapples prefer well-draining soil that is rich in organic matter. A slightly acidic soil pH of around 6.0 to 6.5 is ideal. You can use a commercial potting mix specifically formulated for tropical plants, or you can create your own mix by combining equal parts of compost, perlite, and vermiculite. Avoid heavy clay soils, as they can retain too much moisture and lead to root rot. Good drainage is essential for healthy pineapple growth.
How often should I water my pineapple plant?
Water your pineapple plant regularly, especially during the growing season (spring and summer). Allow the soil to dry out slightly between waterings, but avoid letting it dry out completely. Overwatering can lead to root rot, so it’s important to strike a balance. During the winter months, when the plant is dormant, you can reduce the frequency of watering. A good rule of thumb is to water thoroughly when the top inch of soil feels dry to the touch.
Do I need to fertilize my pineapple plant?
Yes, fertilizing your pineapple plant is important for healthy growth and fruit production. Use a balanced fertilizer (e.g., 10-10-10) diluted to half strength every 2-3 months during the growing season. You can also use a fertilizer specifically formulated for bromeliads, as pineapples are members of the bromeliad family. Avoid over-fertilizing, as this can damage the plant.
How do I know when my pineapple is ripe?
Determining when a pineapple is ripe can be tricky, but there are a few telltale signs to look for. The pineapple should have a vibrant color, ranging from green to golden yellow, depending on the variety. The fruit should also feel slightly soft to the touch, but not mushy. A ripe pineapple will also have a sweet, fragrant aroma. You can also try gently pulling on one of the leaves; if it comes off easily, the pineapple is likely ripe.
What if my pineapple plant doesn’t produce fruit?
There are several reasons why your pineapple plant might not be producing fruit. The most common reason is that the plant is not mature enough. Remember, it can take 2-3 years for a pineapple plant grown from a top to produce fruit. Other factors that can affect fruit production include insufficient sunlight, inadequate watering, and lack of fertilization. You can also try forcing the plant to fruit by exposing it to ethylene gas. This can be done by placing a ripe apple or banana near the plant, as these fruits release ethylene gas as they ripen. Cover the plant and fruit with a plastic bag for a few days to trap the gas.
Can I grow a pineapple indoors?
Yes, you can definitely grow a pineapple indoors, especially if you live in a climate with cold winters. Choose a large pot with good drainage and use a well-draining potting mix. Place the plant near a south-facing window where it will receive plenty of sunlight. You may also need to supplement with artificial light. Water the plant regularly, but avoid overwatering. Indoor-grown pineapples may take longer to fruit than those grown outdoors, but with proper care, you can still enjoy homegrown pineapples even if you don’t have a garden.
My pineapple plant has developed brown spots on its leaves. What should I do?
Brown spots on pineapple leaves can be caused by several factors, including fungal infections, sunburn, or nutrient deficiencies. If the spots are small and isolated, they may not be a cause for concern. However, if the spots are spreading rapidly, it’s important to take action. Remove any affected leaves and treat the plant with a fungicide. Make sure the plant is receiving adequate sunlight and water, and consider fertilizing it with a balanced fertilizer. If the spots are caused by sunburn, move the plant to a location with partial shade.
Leave a Comment