
Growing Dragon Beans Indoors might sound like something out of a fantasy novel, but trust me, it’s a very real and rewarding experience! Have you ever dreamed of harvesting vibrant, exotic beans right from the comfort of your own home? Imagine the look on your friends’ faces when you serve them a dish featuring dragon beans you cultivated yourself. This isn’t just about gardening; it’s about bringing a touch of the extraordinary into your everyday life.
While dragon beans aren’t steeped in ancient history like some other heirloom vegetables, their striking appearance and delicious flavor have quickly made them a favorite among gardeners seeking something unique. Their vibrant colors and impressive length make them a conversation starter and a beautiful addition to any indoor garden. Plus, the satisfaction of nurturing a plant from seed to harvest is simply unmatched.
Why should you learn this DIY trick? Well, for starters, growing dragon beans indoors allows you to enjoy fresh, organic produce year-round, regardless of the weather outside. It’s also a fantastic way to add a splash of color and life to your living space. More importantly, it’s incredibly therapeutic! Tending to plants can reduce stress, boost your mood, and connect you with nature, even when you’re stuck inside. So, let’s dive in and discover the secrets to successfully growing these amazing beans in your own home!
Growing Dragon Beans Indoors: Your Ultimate DIY Guide
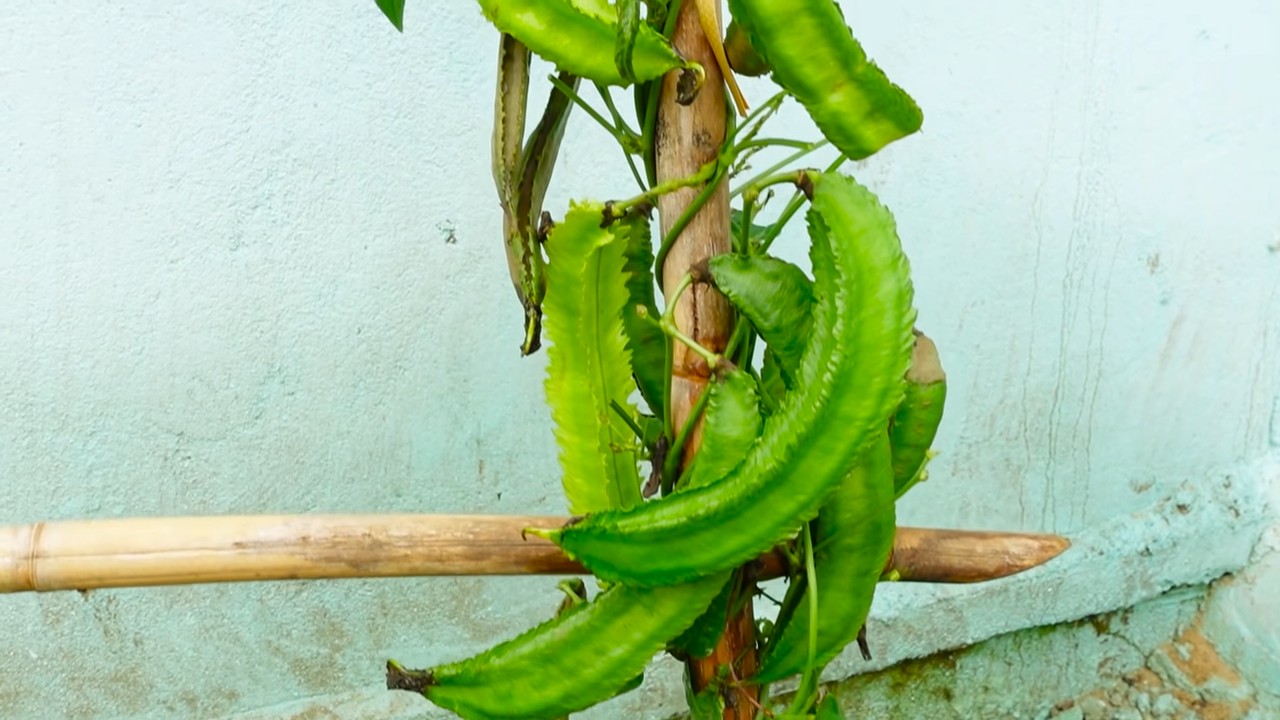
Hey plant friends! Have you ever heard of dragon beans? These fascinating climbing plants with their long, striking pods are not only an eye-catcher but also super delicious. And the best part: You can easily grow them indoors! I’ll show you how – step by step.
What you need: The Material List
Before we get started, here is a list of everything you’ll need for your indoor dragon bean adventure:
- Dragon bean seeds: Preferably organic quality, so you can be sure they haven’t been treated. You can find them online or in well-stocked garden centers.
- Seed starting pots: Small pots (approx. 8-10 cm / 3-4 inches in diameter) made of peat or coconut fiber are great because you can simply repot the seedlings later without damaging the roots.
- Seed starting mix: Special seed starting mix is low in nutrients and loose, which is ideal for seed germination.
- Larger pot: A pot with at least a 20-liter (about 5-gallon) capacity is ideal so the dragon bean has enough space to grow.
- All-purpose potting soil: High-quality all-purpose soil with good drainage is important for the healthy growth of the plant.
- Trellis/Support: Dragon beans are climbing plants and absolutely need a support to climb on. A bamboo stick, a trellis, or a lattice are good options.
- Spray bottle: For moistening the soil.
- Watering can: For watering the plants.
- Grow light (optional): If you don’t have enough sunlight, a grow light can help.
- Scissors or knife: For cutting the support to size, if necessary.
Phase 1: Sowing – The Start of Your Dragon Bean Paradise
Sowing is the first and most important step. Here’s how to do it right:
- Prepare the seeds: To speed up germination, you can soak the seeds in lukewarm water for 12-24 hours. This softens the seed coat and makes germination easier.
- Fill the seed pots: Fill the seed starting pots with seed starting mix. Lightly press the soil down.
- Sow the seeds: Place 1-2 seeds in each pot. Cover the seeds with about 1-2 cm (0.4-0.8 inches) of soil.
- Watering: Moisten the soil gently with a spray bottle. The soil should be damp, but not wet.
- Choose a location: Place the seed pots in a warm and bright place. A temperature of 20-25°C (68-77°F) is ideal.
- Maintain moisture: Keep the soil evenly moist by regularly spraying it with the spray bottle. Avoid waterlogging.
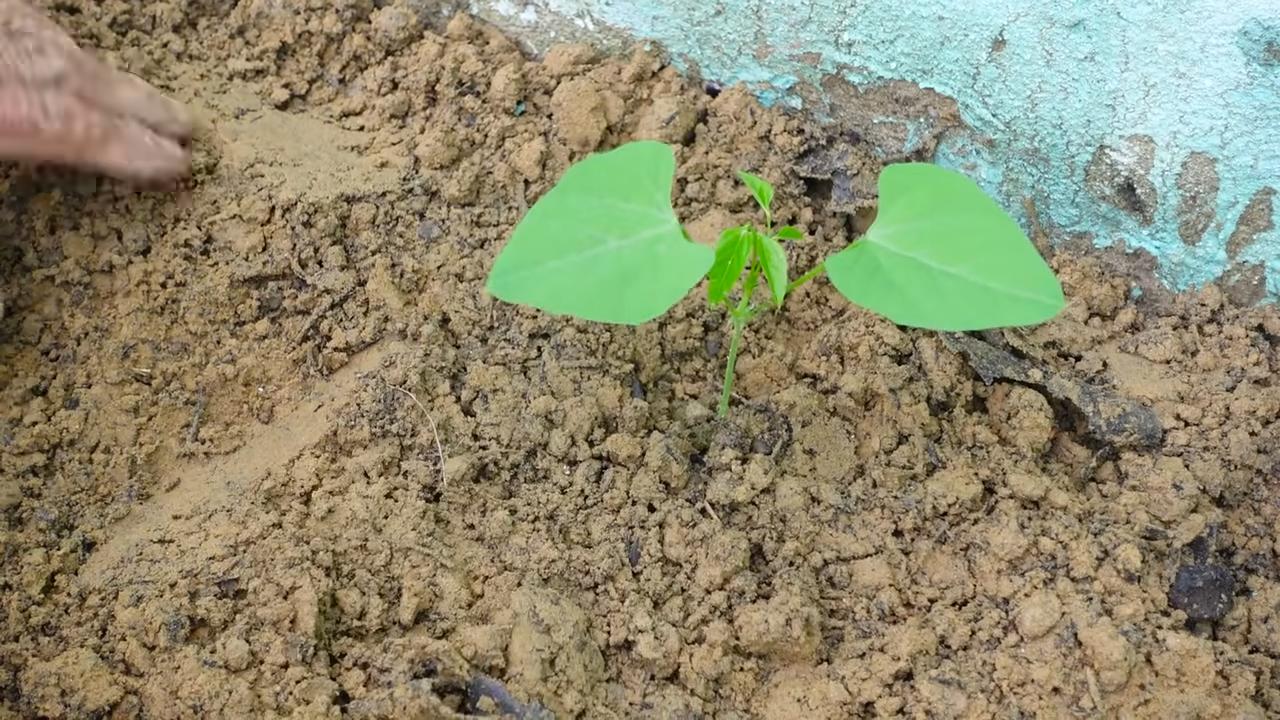
- Be patient: Germination usually takes 7-14 days. As soon as the first seedlings appear, you can remove the weaker plant if you sowed two seeds per pot.
Phase 2: Transplanting – More Room to Grow
Once the seedlings are strong enough (about 10-15 cm / 4-6 inches tall with several leaves), it’s time to transplant them into larger pots.
- Prepare the pot: Fill the larger pot with all-purpose soil. Leave about 2-3 cm (about 1 inch) of space at the top.
- Carefully remove the seedling: Gently squeeze the seed starting pot to loosen the seedling. Be careful not to damage the roots. If you used peat or coconut fiber pots, you can place the plant directly into the larger pot with its original pot.
- Planting: Place the seedling in the larger pot. The top of the root ball should be level with the soil surface.
- Fill in: Fill the pot with soil and press it down lightly.
- Watering: Water the plant thoroughly.
- Choose a location: Place the pot in a bright and sunny spot. Dragon beans love the sun!
Phase 3: The Support – Climbing Allowed!
Dragon beans are climbing plants and need a support to develop optimally.
- Select a support: Choose a support that fits your pot and your available space. A bamboo stick, a trellis, or a lattice are good options.
- Secure the support: Insert the support into the pot, as close to the plant as possible. Make sure it is stable.
- Guide the plant: Gently guide the shoots of the dragon bean along the support. You can secure them with plant ties or soft string.
- Check regularly: Regularly check if the plant is still growing correctly on the support and guide it if necessary.
Phase 4: Care – So Your Dragon Beans Thrive
Proper care is crucial for the growth and harvest of your dragon beans.
- Watering: Water the plants regularly, but avoid waterlogging. The soil should always be slightly moist. On hot days, you may need to water daily.
- Fertilizing: Fertilize the plants every 2-3 weeks with an organic liquid fertilizer. This promotes growth and flowering.
- Sunlight: Dragon beans need a lot of sunlight. Place them in the sunniest spot possible. If you don’t have enough sunlight, you can use a grow light.
- Temperature: Dragon beans like it warm. A temperature of 20-25°C (68-77°F) is ideal.
- Humidity: Dragon beans prefer high humidity. You can increase humidity by regularly spraying the plants with water or setting up a humidifier.
- Pests and diseases: Regularly check the plants for pests and diseases. In case of an infestation, you can use natural pesticides.
- Pruning: Regularly remove side shoots to encourage flower formation.
Phase 5: The Harvest – Finally Enjoying Dragon Beans!
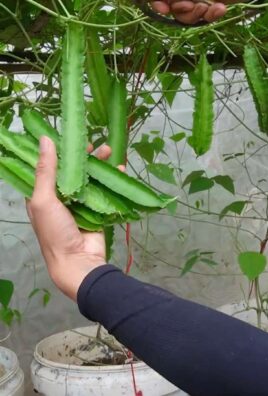
After about 2-3 months, you can harvest the first dragon beans.
- Harvest time: The dragon beans are ripe when they are plump, firm, and have a vibrant color.
- Harvesting: Cut the beans off with scissors or a knife.
- Enjoying: You can eat the dragon beans raw, cooked, fried, or grilled. They are versatile and taste simply delicious!
Additional Tips for Dragon Bean Success
- Pollination: Dragon beans are self-pollinating, but you can assist pollination by gently shaking the flowers or pollinating them with a brush.
- Pruning: After harvesting, you can cut the plants back to encourage the growth of new shoots.
- Overwintering: Dragon beans are not frost-hardy. However, you can overwinter them indoors. Place them in a bright, cool spot and water them only sparingly.
- Variety selection: There are different varieties of dragon beans. Research before buying to find the variety that best suits your needs.
I hope this guide helps you grow your own dragon beans indoors. Have fun and enjoy a bountiful harvest! If you have any questions, feel free to write me a comment. I’m happy to help.
Conclusion
So, there you have it! Growing dragon beans indoors is not only achievable but also incredibly rewarding. This DIY project transforms your living space into a vibrant, edible garden, offering a unique connection to your food source. Forget relying solely on grocery stores; imagine the satisfaction of harvesting your own fresh, flavorful dragon beans right from your windowsill or balcony.
This isn’t just about convenience; it’s about control. You dictate the growing conditions, ensuring your dragon beans are free from harmful pesticides and herbicides. You choose the soil, the nutrients, and the environment, resulting in a healthier, tastier crop. Plus, the process itself is incredibly therapeutic. Tending to your plants, watching them sprout and flourish, provides a sense of calm and accomplishment that’s hard to replicate.
But the benefits don’t stop there. Growing dragon beans indoors is a fantastic way to introduce children to the wonders of gardening and healthy eating. It’s a hands-on learning experience that teaches them about plant life cycles, responsibility, and the importance of sustainable practices. They’ll be more likely to try new vegetables when they’ve had a hand in growing them!
Ready to take your indoor gardening to the next level? Consider experimenting with different varieties of dragon beans. Some are bush types, perfect for smaller spaces, while others are climbing varieties that will add a dramatic vertical element to your indoor garden. You can also try companion planting, growing herbs like basil or rosemary alongside your dragon beans to deter pests and enhance flavor.
Don’t be afraid to get creative with your support structures. While bamboo stakes are a classic choice, you can also use trellises, netting, or even repurposed materials like old ladders or branches. The possibilities are endless!
And remember, growing dragon beans indoors is a journey, not a destination. There will be challenges along the way, but don’t let them discourage you. Embrace the learning process, experiment with different techniques, and most importantly, have fun!
We’re confident that you’ll find growing dragon beans indoors to be a deeply satisfying and rewarding experience. So, grab your seeds, prepare your pots, and get ready to embark on this exciting gardening adventure.
We’d love to hear about your experiences! Share your tips, tricks, and photos in the comments below. Let’s create a community of indoor dragon bean growers and inspire others to join the fun. What are you waiting for? Start growing your own delicious and nutritious dragon beans today!
Frequently Asked Questions (FAQ)
What are the best dragon bean varieties to grow indoors?
The best dragon bean varieties for indoor growing are typically bush types, as they require less space and support. Consider varieties like ‘Provider,’ ‘Blue Lake Bush,’ or ‘Contender.’ These varieties are known for their compact growth habit and high yields. However, if you have ample vertical space, you can also grow climbing varieties like ‘Kentucky Wonder’ or ‘Romano,’ but you’ll need to provide a sturdy trellis or support system. Research the specific needs of each variety before planting to ensure optimal growth.
How much sunlight do dragon beans need when grown indoors?
Dragon beans require at least 6-8 hours of direct sunlight per day to thrive. If you don’t have a south-facing window that provides sufficient sunlight, you’ll need to supplement with artificial grow lights. Fluorescent or LED grow lights are excellent options. Position the lights about 6-12 inches above the plants and keep them on for 12-16 hours per day. Monitor your plants closely and adjust the light levels as needed. Signs of insufficient light include leggy growth, pale leaves, and reduced flowering.
What type of soil is best for growing dragon beans indoors?
Dragon beans prefer well-draining, fertile soil with a slightly acidic to neutral pH (6.0-7.0). A good potting mix for dragon beans should consist of a combination of peat moss, perlite, and vermiculite. You can also add compost or aged manure to enrich the soil and provide essential nutrients. Avoid using garden soil, as it can be too heavy and may contain pests or diseases. Ensure that your pots have drainage holes to prevent waterlogging, which can lead to root rot.
How often should I water my indoor dragon bean plants?
Water your dragon bean plants regularly, keeping the soil consistently moist but not waterlogged. Water deeply when the top inch of soil feels dry to the touch. Avoid overhead watering, as this can promote fungal diseases. Instead, water at the base of the plants. The frequency of watering will depend on factors such as temperature, humidity, and pot size. Check the soil moisture regularly and adjust your watering schedule accordingly. During hot, dry weather, you may need to water more frequently.
How do I fertilize my indoor dragon bean plants?
Dragon beans are heavy feeders and require regular fertilization to produce a bountiful harvest. Start fertilizing your plants about two weeks after they emerge, using a balanced liquid fertilizer diluted to half strength. Fertilize every 2-3 weeks throughout the growing season. Look for a fertilizer with a higher phosphorus content (the middle number) to promote flowering and pod development. Avoid over-fertilizing, as this can lead to excessive foliage growth and reduced pod production. You can also supplement with organic fertilizers like compost tea or fish emulsion.
How do I support my dragon bean plants indoors?
Climbing varieties of dragon beans require a sturdy support system to grow properly. You can use bamboo stakes, trellises, netting, or even repurposed materials like old ladders or branches. Install the support system when the plants are young to avoid damaging the roots. Train the vines to climb the support by gently wrapping them around the structure. Prune any excessive growth to encourage branching and pod production. Bush varieties typically don’t require support, but you may need to provide some support if the plants become top-heavy with pods.
What are common pests and diseases that affect indoor dragon bean plants?
Common pests that can affect indoor dragon bean plants include aphids, spider mites, and whiteflies. Regularly inspect your plants for signs of infestation, such as yellowing leaves, webbing, or sticky residue. Treat infestations promptly with insecticidal soap, neem oil, or horticultural oil. Common diseases that can affect dragon bean plants include powdery mildew, root rot, and bean rust. Prevent these diseases by providing good air circulation, avoiding overhead watering, and using well-draining soil. If you notice signs of disease, remove affected leaves and treat with a fungicide.
How long does it take for dragon beans to mature and produce pods?
The time it takes for dragon beans to mature and produce pods depends on the variety and growing conditions. Generally, bush varieties mature in 50-60 days, while climbing varieties may take 60-75 days. You can start harvesting the pods when they are firm, plump, and easily snap off the plant. Harvest regularly to encourage continued pod production. Overripe pods will become tough and stringy.
Can I save seeds from my indoor dragon bean plants?
Yes, you can save seeds from your indoor dragon bean plants, but it’s important to note that the seeds may not be true to type if the plants were cross-pollinated with other varieties. To save seeds, allow the pods to dry completely on the plant. Once the pods are dry and brittle, shell the beans and store them in an airtight container in a cool, dry place. Label the container with the variety and date.
What are some creative ways to use my homegrown dragon beans?
Your homegrown dragon beans can be used in a variety of delicious dishes. They can be steamed, boiled, stir-fried, or added to soups and stews. They’re also great in salads or as a side dish. Get creative and experiment with different recipes to find your favorites. You can also blanch and freeze your dragon beans for later use.
Leave a Comment