
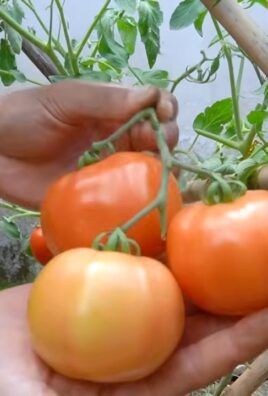
Year Round Tomato Fruiting – imagine plucking juicy, sun-ripened tomatoes from your own garden, even in the dead of winter! Sounds like a gardener’s dream, right? Well, it doesn’t have to be just a dream. For centuries, humans have strived to extend the growing season, employing clever techniques to coax life from the earth even when nature seems to be hibernating. From ancient Roman greenhouses to modern-day hydroponics, the desire for fresh produce year-round has driven innovation and ingenuity.
But let’s be honest, who has the space or budget for a full-blown greenhouse? That’s where these DIY tricks come in! I’m going to share some simple, effective, and budget-friendly methods to achieve year round tomato fruiting. Forget bland, store-bought tomatoes that taste like cardboard. With a little know-how and some elbow grease, you can enjoy the vibrant flavor of homegrown tomatoes all year long. Whether you’re a seasoned gardener or just starting out, these hacks will empower you to extend your harvest and savor the taste of summer, no matter the season.
Why is this so important? Because fresh, homegrown tomatoes are not only delicious, but they’re also packed with nutrients and free from harmful pesticides. Plus, there’s nothing quite like the satisfaction of nurturing a plant from seed to fruit. So, let’s dive in and unlock the secrets to a continuous supply of these garden gems!
Tomatoes All Year Round: My DIY Greenhouse for the Windowsill
Hello, dear garden friends! Are you also tired of tasteless tomatoes from the supermarket, especially in winter? Me too! That’s why I built a small but mighty DIY greenhouse for my windowsill, which allows me to harvest delicious tomatoes all year round. And the best part: it’s not as difficult as you might think! I’ll show you how it’s done.
What you need: The Material List
Before we get started, here is a list of all the materials you will need for your mini-greenhouse:
- Clear plastic box or container: Choose a size that fits well on your windowsill. I used a box measuring 60x40x30 cm (24x16x12 inches). Make sure it is transparent so that enough light reaches the plants.
- LED grow light: A grow light is essential, especially in winter when sunlight is scarce. I recommend a full-spectrum LED lamp that emits both red and blue light.
- Timer: A timer is ideal to prevent the grow light from being on 24/7. I have mine set to run the lamp for 14 hours a day.
- Seed starting mix: Use a special seed starting mix that is low in nutrients and offers good drainage.
- Tomato seeds: Choose a variety that is suitable for growing in pots. Bush tomatoes or dwarf tomatoes are a good choice.
- Small pots or seed trays: For starting the seeds.
- Spray bottle: For moistening the soil.
- Thermometer with hygrometer: To monitor the temperature and humidity in the greenhouse.
- Optional: Heating mat: If your windowsill is very cold, a heating mat can help to speed up germination.
- Optional: Ventilation system: For better air circulation, especially with high humidity. A small PC fan can work wonders here.
- Drill or utility knife: For attaching the grow light and, if applicable, the ventilation system.
- Zip ties or tape: For securing the lamp.
Step-by-Step Guide: How to Build Your Mini-Greenhouse
Now let’s get down to business! Follow these steps to build your own mini-greenhouse:
- Prepare the clear box: First, I thoroughly clean the clear box with warm water and dish soap. This ensures that there are no dirt particles or residues that could hinder the germination of the seeds. Then, dry the box well.
- Attach the grow light: This is where the drill or utility knife comes in. I carefully drill or cut holes in the lid of the clear box through which I can attach the grow light. Make sure the holes are large enough to pass the lamp’s cables through, but not so large that the heat escapes from the greenhouse. I then fasten the lamp to the lid with zip ties or strong tape. It is important that the lamp hangs securely and cannot fall.
- Optional: Install a ventilation system: If you want to install a ventilation system, drill or cut holes for the fan in the side wall of the box. Make sure the fan is positioned so that it circulates the air well inside the greenhouse. I attached my fan so that it draws in fresh air from the outside and expels the used air upwards.
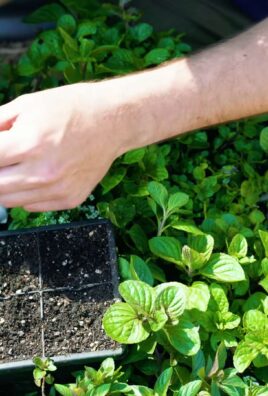
- Prepare for sowing: Fill the small pots or seed trays with seed starting mix. I make sure the soil is loose and moist. Then I sow the tomato seeds according to the instructions on the seed packet. Usually, the seeds are placed about 0.5 to 1 cm (0.2 to 0.4 inches) deep in the soil.
- Place the pots in the greenhouse: Carefully place the pots or seed trays inside the clear box. Make sure they have enough space and do not obstruct each other.
- Ensure the right temperature and humidity: Place the thermometer with a hygrometer in the greenhouse to monitor temperature and humidity. The ideal temperature for tomato seed germination is between 20 and 25 degrees Celsius (68-77°F). The humidity should be around 70-80%. If the temperature is too low, you can place a heating mat under the pots. If the humidity is too high, open the lid of the box for a short time or turn on the ventilation system.
- Turn on the grow light: Connect the grow light to the timer and set the desired lighting duration. I have my lamp set to be on for 14 hours a day.
- Keep the soil moist: Regularly spray the soil with a spray bottle to keep it moist. Be careful not to make the soil too wet, as this can lead to mold.
Caring for Your Tomato Plants in the Mini-Greenhouse
After you’ve built your mini-greenhouse, it’s important to care for your tomato plants properly so they grow well and produce lots of fruit. Here are some tips:
- Regular watering: Water your tomato plants regularly, but avoid waterlogging. The soil should always be slightly moist.
- Fertilizing: Once the plants are a bit larger, you can fertilize them with a special tomato fertilizer. Follow the instructions on the fertilizer package.
- Pruning (suckering): Regularly remove the side shoots (suckers) of the tomato plants to promote the growth of the main stems and fruit production.
- Pollination: Since there are no insects for pollination in a closed greenhouse, you have to pollinate the flowers yourself. You can do this easily with a small brush by transferring the pollen from one flower to the next.
- Transplanting: When the plants become too large for the small pots, you need to transplant them into larger pots. Use a good quality tomato soil for this.
- Ventilation: Ensure good ventilation in the greenhouse to prevent mold. Open the lid of the box regularly or turn on the ventilation system.
- Pest protection: Regularly check your plants for pests like aphids or spider mites. If necessary, you can use organic pesticides.
Common Problems and Solutions
Problems can also arise when growing tomatoes in a mini-greenhouse. Here are some common problems and how to solve them:
No fruit: If your tomato plants are not producing fruit, it could be due to a lack of pollination. Pollinate the flowers yourself with a small brush.
Mold growth: If the humidity is too high, mold can develop. Ensure better ventilation and reduce watering.
Yellow leaves: Yellow leaves can be a sign of a nutrient deficiency. Fertilize your plants with a tomato fertilizer.
Aphids: Aphids can weaken the plants and affect their growth. Combat them with organic pesticides or rinse them off with a strong jet of water.
Spider mites: Spider mites are small pests that settle on the underside of the leaves and suck them dry. Combat them with special products against spider mites.
Conclusion
So, there you have it! The secret to achieving year-round tomato fruiting, right in your own home or greenhouse. This isn’t just about extending your harvest; it’s about taking control of your food supply, enjoying the unparalleled flavor of homegrown tomatoes whenever you crave them, and experiencing the sheer joy of nurturing life through the colder months.
Why is this DIY trick a must-try? Because it empowers you to bypass the limitations of seasonal weather. No longer are you beholden to the fleeting warmth of summer. With a little planning, some readily available materials, and the techniques we’ve discussed, you can cultivate a thriving tomato garden that defies the calendar. Imagine the satisfaction of serving a vibrant Caprese salad in December, made with tomatoes you nurtured from seed to fruit, while your neighbors are stuck with bland, store-bought alternatives.
But the benefits extend beyond just fresh tomatoes. This project is a fantastic learning experience, connecting you more deeply to the natural world and fostering a greater appreciation for the food you eat. It’s also a sustainable practice, reducing your reliance on commercially grown produce and minimizing your carbon footprint. Plus, it’s incredibly rewarding to witness the entire life cycle of a plant, from tiny seedling to bountiful harvest, all within the controlled environment you’ve created.
Don’t be afraid to experiment with variations! Try different tomato varieties known for their cold tolerance or shorter growing seasons. Cherry tomatoes and other smaller varieties often perform exceptionally well indoors. Consider using hydroponic systems for even greater control over nutrient delivery and water usage. Explore different lighting options, from traditional grow lights to more energy-efficient LED setups. The possibilities are endless!
We encourage you to embark on this exciting journey of year-round tomato fruiting. Start small, learn as you go, and don’t be discouraged by initial setbacks. Every gardener faces challenges, but the rewards of perseverance are well worth the effort. We are confident that with a little dedication, you’ll be enjoying fresh, delicious tomatoes all year long.
Most importantly, we want to hear about your experiences! Share your successes, your challenges, and your tips with us in the comments below. Let’s build a community of year-round tomato growers, supporting each other and learning from each other’s expertise. Together, we can unlock the full potential of this amazing DIY trick and enjoy the taste of summer, no matter the season. So, grab your seeds, gather your supplies, and get ready to experience the magic of year-round tomato fruiting! Let us know how it goes!
Frequently Asked Questions (FAQ)
What are the best tomato varieties for year-round indoor growing?
Choosing the right tomato variety is crucial for success with year-round tomato fruiting. Determinate varieties, which grow to a specific size and produce all their fruit at once, are often a good choice for indoor growing because they tend to be more compact and manageable. Indeterminate varieties, which continue to grow and produce fruit throughout the season, can also be grown indoors, but they require more pruning and support.
Some popular varieties known for their suitability for indoor growing include:
* **Cherry Tomatoes:** These are generally easy to grow and produce abundant fruit. ‘Tiny Tim’, ‘Sweet Million’, and ‘Sungold’ are excellent choices.
* **Patio Tomatoes:** Bred specifically for container gardening, these varieties are compact and productive. ‘Roma’ and ‘Celebrity’ are good options.
* **Dwarf Tomatoes:** These varieties are even smaller than patio tomatoes, making them ideal for small spaces. ‘Micro Tom’ is one of the smallest tomato varieties available.
* **Cold-Tolerant Varieties:** Some varieties are naturally more tolerant of cooler temperatures, which can be beneficial for winter growing. ‘Siberian’ and ‘Glacier’ are two examples.
Experiment with different varieties to see which ones perform best in your specific indoor environment.
How much light do my tomato plants need for year-round fruiting?
Light is arguably the most critical factor for successful year-round tomato fruiting. Tomatoes require at least 6-8 hours of direct sunlight per day to thrive and produce fruit. If you don’t have a sunny window that provides enough light, you’ll need to supplement with artificial grow lights.
There are several types of grow lights available, each with its own advantages and disadvantages:
* **Fluorescent Grow Lights:** These are relatively inexpensive and energy-efficient, but they may not provide enough light intensity for optimal tomato growth.
* **LED Grow Lights:** LEDs are more energy-efficient than fluorescent lights and can provide a wider spectrum of light, which is beneficial for plant growth. They are also more durable and have a longer lifespan.
* **High-Intensity Discharge (HID) Grow Lights:** These lights, such as metal halide (MH) and high-pressure sodium (HPS) lights, are very powerful and can provide the intense light that tomatoes need to fruit. However, they are also more expensive and generate more heat.
When choosing grow lights, consider the size of your growing area and the specific needs of your tomato plants. Aim for a light intensity of at least 2000-3000 lumens per square foot.
What is the ideal temperature for year-round tomato fruiting?
Tomatoes thrive in warm temperatures, ideally between 70-85°F (21-29°C) during the day and 60-70°F (16-21°C) at night. Maintaining these temperatures can be challenging during the winter months, especially if you live in a cold climate.
Here are some tips for maintaining the ideal temperature for your tomato plants:
* **Choose a warm location:** Place your plants in a room that is naturally warmer, such as a south-facing room.
* **Use a space heater:** A small space heater can help to warm the air around your plants. Be careful not to place the heater too close to the plants, as this can scorch them.
* **Insulate your growing area:** Insulating your growing area can help to retain heat. You can use plastic sheeting, bubble wrap, or other insulating materials.
* **Use a heat mat:** A heat mat placed under your seed trays or pots can help to warm the soil and promote root growth.
How often should I water my tomato plants for year-round fruiting?
The frequency of watering will depend on several factors, including the size of your pots, the type of soil you’re using, and the temperature and humidity of your growing environment. As a general rule, water your tomato plants when the top inch of soil feels dry to the touch.
When you water, water deeply, until the water drains out of the bottom of the pot. Avoid overwatering, as this can lead to root rot.
Do I need to pollinate my tomato plants indoors?
Yes, you will likely need to hand-pollinate your tomato plants indoors, as there are no bees or other pollinators to do the job for you.
Here are a few methods for hand-pollinating tomato plants:
* **Shake the plants:** Gently shake the plants a few times a day to release pollen.
* **Use a paintbrush:** Use a small, soft paintbrush to collect pollen from the anthers (the pollen-bearing parts of the flower) and transfer it to the stigma (the receptive part of the flower).
* **Use an electric toothbrush:** Gently vibrate the back of the flower with an electric toothbrush to release pollen.
Pollinate your tomato plants every day or two, especially when they are flowering.
What kind of fertilizer should I use for year-round tomato fruiting?
Tomatoes are heavy feeders and require a consistent supply of nutrients to thrive and produce fruit. Use a balanced fertilizer that is specifically formulated for tomatoes. Look for a fertilizer with an NPK ratio (nitrogen, phosphorus, potassium) of around 5-10-5 or 10-10-10.
Fertilize your tomato plants every 2-3 weeks, following the instructions on the fertilizer package. You can also supplement with compost tea or other organic fertilizers.
How do I deal with pests and diseases when growing tomatoes indoors?
Growing tomatoes indoors can help to reduce the risk of pests and diseases, but it’s still important to be vigilant.
Here are some common pests and diseases that can affect tomato plants:
* **Aphids:** These small, sap-sucking insects can cause stunted growth and distorted leaves.
* **Whiteflies:** These tiny, white insects can also cause stunted growth and transmit viruses.
* **Spider mites:** These tiny mites can cause yellowing and stippling of the leaves.
* **Fungal diseases:** These diseases can cause leaf spots, wilting, and fruit rot.
To prevent pests and diseases, keep your growing area clean and well-ventilated. Inspect your plants regularly for signs of infestation or disease. If you find any problems, treat them promptly with appropriate insecticides or fungicides. Organic options like neem oil and insecticidal soap can be effective for controlling many pests.
How long does it take for tomatoes to fruit indoors?
The time it takes for tomatoes to fruit indoors will depend on the variety of tomato you’re growing, the growing conditions, and your level of experience. Generally, it takes about 60-85 days from transplanting seedlings to harvesting the first
Leave a Comment