
Malabar spinach growing tips are what you need to unlock a world of vibrant, nutritious greens right in your own backyard! Have you ever dreamed of snipping fresh, leafy vegetables just steps from your kitchen? Imagine adding a unique, slightly peppery flavor to your salads and stir-fries, all while knowing exactly where your food comes from. That’s the magic of growing your own Malabar spinach.
This climbing vine, also known as Ceylon spinach or vine spinach, isn’t actually a true spinach, but its succulent leaves offer a similar taste and texture, making it a fantastic alternative, especially in warmer climates where traditional spinach struggles. Historically, Malabar spinach has been cultivated in Asia and Africa for centuries, prized for its nutritional value and adaptability. It’s a staple in many cuisines, adding a healthy and delicious touch to countless dishes.
But why should you bother with Malabar spinach growing tips? Well, for starters, it’s incredibly easy to grow! It’s a vigorous grower, providing a bountiful harvest with minimal effort. Plus, it’s packed with vitamins and minerals, making it a superfood addition to your diet. In this DIY guide, I’ll share my tried-and-true secrets to successfully cultivating this amazing plant, even if you’re a complete beginner. Get ready to transform your garden and your plate with these simple, effective techniques!
Growing Malabar Spinach Yourself: A Comprehensive DIY Guide
Hello garden friends! I love harvesting fresh, unusual ingredients directly from my garden. One of my favorite vegetables is Malabar spinach, also known as Ceylon spinach or Indian spinach. Not only is it super easy to grow, but it’s also incredibly versatile in the kitchen. In this article, I’ll show you how to grow this delicious and healthy spinach yourself – step by step!
What is Malabar Spinach and Why Should You Grow It?
Malabar spinach (Basella alba or Basella rubra) is a fast-growing, climbing leafy green. Unlike true spinach, it tolerates heat and humidity excellently, making it ideal for gardens where conventional spinach quickly wilts. The leaves are thick, fleshy, and have a mild, slightly lemony taste. You can use them raw in salads, cook them like spinach, or add them to soups and curries. Plus, Malabar spinach is rich in vitamins and minerals!
The Advantages of Growing Malabar Spinach
- Heat-resistant: Perfect for warm climates.
- Fast-growing: You can start harvesting after just a few weeks.
- Versatile: Can be used raw or cooked.
- Decorative: The climbing plant also looks beautiful.
- Low-maintenance: Requires little attention.
What You Need for Growing Malabar Spinach
Before we start, here is a list of the things you will need:
- Malabar spinach seeds or cuttings: Seeds are available online or in well-stocked garden centers. You can take cuttings from an existing plant.
- Seed starter pots or trays: For starting the seeds indoors.
- Seed starting mix: Special soil for starting seedlings.
- Garden soil: For planting out in the garden or in larger pots.
- Compost or organic fertilizer: To enrich the soil.
- Planters (optional): If you want to grow the spinach in pots.
- Trellis/Support: A trellis, fence, or similar structure for the spinach to climb on.
- Watering can or garden hose: For watering the plants.
- Pruning shears: For harvesting and pruning.
Step-by-Step Guide: Growing Malabar Spinach
Here is a detailed guide on how to successfully grow Malabar spinach:
1. Prepare the Seeds (Optional)
Malabar spinach seeds have a hard shell that can delay germination. To speed up the process, you can soak the seeds in lukewarm water for 24 hours before sowing. This helps to soften the shell and encourage germination.
2. Sow Seeds or Prepare Cuttings
- Sowing:
- Fill seed starter pots or trays with seed starting mix.
- Sow the seeds about 1 cm (0.4 inches) deep into the soil.
- Lightly cover the seeds with soil and water them gently.
- Place the pots in a warm, bright location. A temperature of 20-25°C (68-77°F) is ideal.
- Keep the soil moist, but not wet.
- Germination usually takes 10-21 days.
- Cuttings:
- Cut a healthy shoot from an existing Malabar spinach plant. The shoot should be about 10-15 cm (4-6 inches) long.
- Remove the lower leaves of the shoot, leaving only the top leaves.
- Place the shoot in a glass of water.
- Change the water every few days.
- Roots should form after about a week.
- Once the roots are about 2-3 cm (about 1 inch) long, you can plant the cutting in a pot with seed starting mix.
3. Prick Out Seedlings or Transplant Cuttings
Once the seedlings have developed a few true leaves (after about 4-6 weeks), you can transplant them into larger pots or directly into the garden. Cuttings that have rooted in water can also be transplanted now.
- Pricking Out:
- Fill larger pots with garden soil enriched with compost or organic fertilizer.
- Dig a small hole in the soil.
- Carefully lift the seedling out of the starter pot, being careful not to damage the roots.
- Place the seedling in the hole and cover the roots with soil.
- Water the seedling gently.
- Transplanting Cuttings:
- Fill a pot with garden soil enriched with compost or organic fertilizer.
- Dig a small hole in the soil.
- Place the rooted cutting in the hole and cover the roots with soil.
- Water the cutting gently.
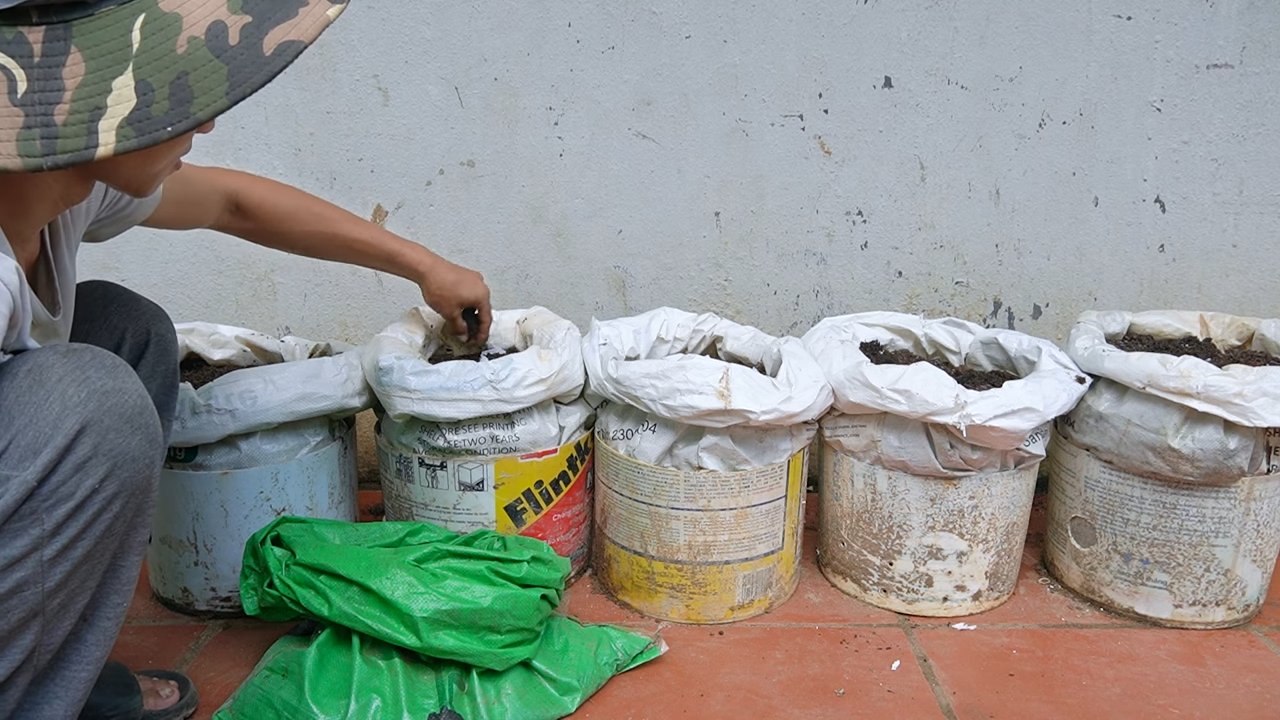
4. Choose and Prepare the Location
Malabar spinach prefers a sunny to partially shaded location. The soil should be well-draining and rich in organic matter.
- Prepare the soil:
- Loosen the soil thoroughly.
- Remove weeds and stones.
- Enrich the soil with compost or organic fertilizer.
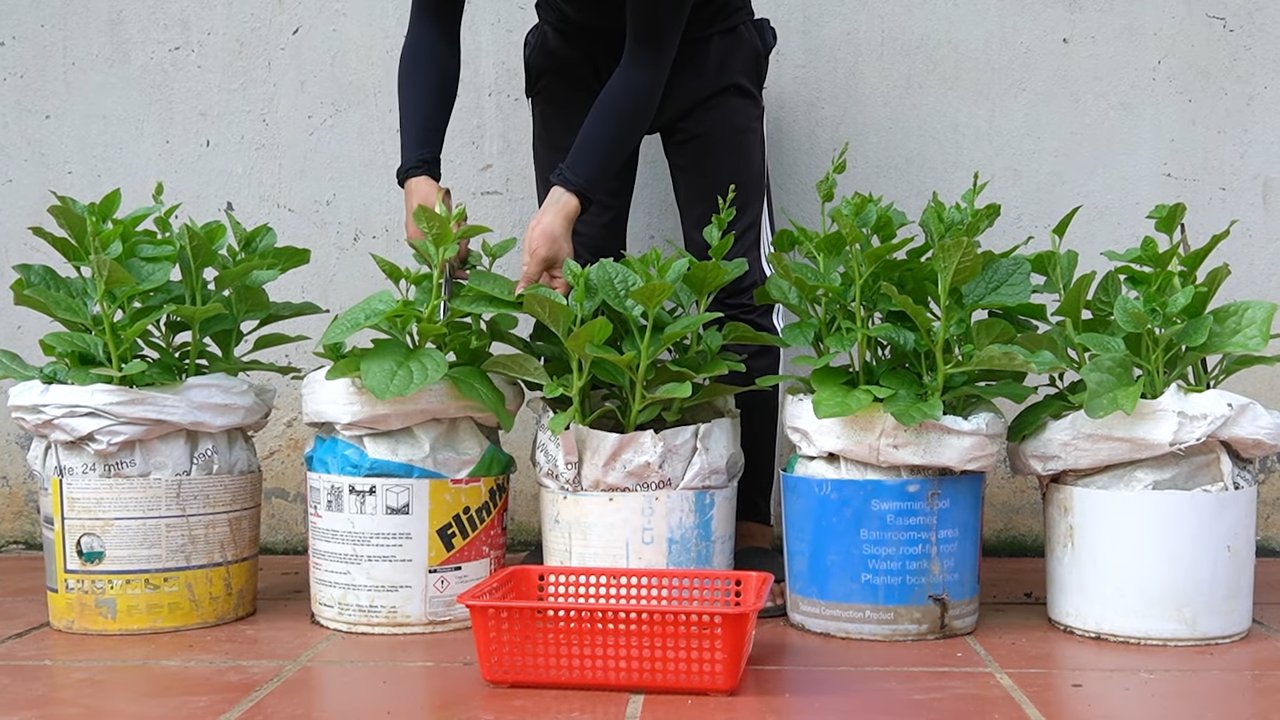
5. Planting Out
Plant the seedlings or cuttings about 30-45 cm (12-18 inches) apart. Make sure the roots are well covered with soil. Water the plants thoroughly after planting.
6. Install a Trellis/Support
Malabar spinach is a climbing plant and needs support to develop optimally. You can use a trellis, a fence, or another sturdy frame. Guide the shoots of the plant along the support so it can cling to it.
7. Watering and Fertilizing
Malabar spinach needs regular watering, especially during dry periods. Make sure the soil is always slightly moist, but not wet. Fertilize the plants every 2-3 weeks with an organic fertilizer to promote growth.
8. Care and Pruning
Regularly remove weeds growing around the plants. Prune the shoots of the Malabar spinach to encourage growth and keep the plant in shape. You can use the trimmed shoots as cuttings to grow new plants.
9. Harvest
You can start harvesting as soon as the leaves are large enough (about 10-15 cm / 4-6 inches long). Pick the leaves as needed. The more you harvest, the more new leaves will grow back. The harvest period typically extends over several months.
Common Problems and Solutions
- Pests: Malabar spinach is relatively resistant to pests. Occasionally, aphids or slugs may appear. Combat them with natural methods like neem oil or slug pellets.
- Diseases: Diseases are also rare. Ensure good air circulation and avoid waterlogging to prevent fungal diseases.
- Yellow leaves: Yellow leaves can be a sign of a nutrient deficiency or overwatering. Check the soil moisture and fertilize the plants if necessary.
Conclusion
So, there you have it! Mastering the art of growing your own Malabar spinach is not only achievable but also incredibly rewarding. We’ve walked you through the essential steps, from selecting the right location and preparing the soil to providing the necessary support and care. But why should you embark on this leafy green adventure?
Firstly, the taste! Freshly harvested Malabar spinach boasts a unique, slightly citrusy flavor that elevates any dish. Forget the bland, store-bought alternatives; homegrown Malabar spinach offers a superior taste experience that you simply can’t replicate. Secondly, the health benefits are undeniable. Packed with vitamins, minerals, and antioxidants, Malabar spinach is a nutritional powerhouse that contributes to overall well-being. You’ll be adding a healthy and delicious ingredient to your diet, knowing exactly where it came from and what went into growing it.
But perhaps the most compelling reason to try this DIY trick is the sheer satisfaction of nurturing a plant from seed to harvest. There’s something deeply fulfilling about watching your efforts blossom into a thriving, edible crop. It’s a connection to nature, a lesson in patience, and a source of pride all rolled into one.
Don’t be afraid to experiment with variations! Try growing Malabar spinach in containers if you have limited space. Explore different trellising methods to find what works best for your garden. Consider companion planting with herbs like basil or marigolds to deter pests and enhance growth. You can even try different varieties of Malabar spinach, such as the red-stemmed version, for a touch of visual appeal.
Growing Malabar spinach is a journey of discovery, and we encourage you to embrace the process. Don’t be discouraged by initial setbacks; every gardener faces challenges. The key is to learn from your mistakes, adapt your approach, and keep experimenting.
We’re confident that with a little effort and the tips we’ve shared, you’ll be enjoying a bountiful harvest of delicious, homegrown Malabar spinach in no time. So, grab your seeds, prepare your soil, and get ready to experience the joy of growing your own food.
Now, we want to hear from you! Have you tried growing Malabar spinach before? What challenges did you face? What successes did you celebrate? Share your experiences, tips, and photos in the comments below. Let’s create a community of Malabar spinach enthusiasts and learn from each other. Your insights could be invaluable to other aspiring gardeners. Happy growing!
Frequently Asked Questions (FAQ)
What is the best time of year to plant Malabar spinach?
Malabar spinach thrives in warm weather, so the best time to plant it is in late spring or early summer, after the last frost. The soil temperature should be at least 65°F (18°C) for optimal germination. If you live in a region with a short growing season, you can start the seeds indoors 4-6 weeks before the last expected frost. This will give your plants a head start and ensure a longer harvest period. Remember that Malabar spinach is sensitive to cold temperatures, so avoid planting it too early in the season.
How much sunlight does Malabar spinach need?
Malabar spinach requires at least 6 hours of direct sunlight per day to thrive. While it can tolerate some partial shade, especially during the hottest part of the day, insufficient sunlight will result in leggy growth and reduced yields. Choose a location in your garden that receives ample sunlight throughout the day. If you’re growing it in containers, make sure to place them in a sunny spot. Observe your plants regularly and adjust their position if necessary to ensure they’re getting enough sunlight.
What kind of soil is best for Malabar spinach?
Malabar spinach prefers well-draining, fertile soil that is rich in organic matter. The ideal soil pH is between 6.0 and 7.5. Before planting, amend your soil with compost, aged manure, or other organic materials to improve its fertility and drainage. Avoid heavy clay soils that retain too much water, as this can lead to root rot. If you have clay soil, consider adding sand or perlite to improve drainage. A soil test can help you determine the pH and nutrient levels of your soil and guide you in making necessary amendments.
How often should I water Malabar spinach?
Malabar spinach needs consistent moisture to thrive, especially during hot, dry weather. Water deeply and regularly, ensuring that the soil remains consistently moist but not waterlogged. Avoid overhead watering, as this can promote fungal diseases. Instead, water at the base of the plant, using a soaker hose or drip irrigation system. Check the soil moisture regularly by inserting your finger into the soil. If the top inch feels dry, it’s time to water. Adjust your watering schedule based on the weather conditions and the needs of your plants.
Does Malabar spinach need fertilizer?
Malabar spinach benefits from regular fertilization, especially during its active growing season. Use a balanced fertilizer, such as a 10-10-10 or 20-20-20, according to the package instructions. You can also use organic fertilizers, such as compost tea or fish emulsion. Apply fertilizer every 2-3 weeks, or as needed, to promote healthy growth and abundant yields. Avoid over-fertilizing, as this can lead to excessive foliage growth at the expense of flower and fruit production.
How do I harvest Malabar spinach?
You can start harvesting Malabar spinach leaves as soon as the plants are large enough to handle, typically when they are about 6-8 inches tall. Harvest the leaves by snipping them off at the base of the stem, leaving the growing tip intact. This will encourage the plant to produce more leaves. You can also harvest the tender stems and shoots. Regular harvesting will promote bushier growth and a longer harvest period. Avoid harvesting more than one-third of the plant at a time, as this can stress the plant and reduce its productivity.
What are some common pests and diseases that affect Malabar spinach?
Malabar spinach is generally resistant to pests and diseases, but it can be susceptible to certain problems, such as aphids, spider mites, and fungal diseases. Monitor your plants regularly for signs of infestation or disease. If you notice any problems, take action promptly to prevent them from spreading. You can control aphids and spider mites with insecticidal soap or neem oil. Prevent fungal diseases by providing good air circulation, avoiding overhead watering, and removing any infected leaves.
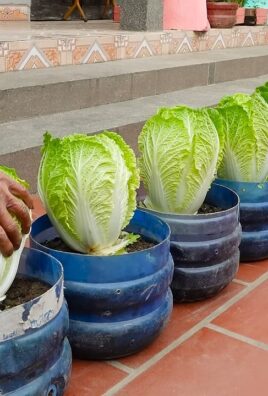
Can I grow Malabar spinach in containers?
Yes, Malabar spinach can be successfully grown in containers, making it a great option for gardeners with limited space. Choose a large container, at least 12 inches in diameter, with good drainage holes. Use a well-draining potting mix that is rich in organic matter. Provide a trellis or other support for the vines to climb. Water regularly and fertilize as needed. Place the container in a sunny location that receives at least 6 hours of direct sunlight per day.
How do I save Malabar spinach seeds?
To save Malabar spinach seeds, allow some of the flowers to mature and form berries. The berries will turn from green to dark purple or black when they are ripe. Harvest the berries and remove the seeds from the pulp. Wash the seeds thoroughly and allow them to dry completely before storing them in an airtight container in a cool, dry place. The seeds should remain viable for several years.
Is Malabar spinach the same as regular spinach?
No, Malabar spinach is not the same as regular spinach. While both are leafy green vegetables, they belong to different plant families and have different characteristics. Malabar spinach is a vine that thrives in warm weather, while regular spinach is a cool-season crop. Malabar spinach has thicker, more succulent leaves and a slightly citrusy flavor, while regular spinach has thinner, more delicate leaves and a milder flavor. Despite their differences, both Malabar spinach and regular spinach are nutritious and versatile vegetables that can be used in a variety of dishes.
Leave a Comment