
Balcony Cabbage Growing Tips: Unlock the secrets to a bountiful harvest, even without a sprawling garden! Have you ever dreamed of snipping fresh, crisp cabbage leaves right from your own balcony? It sounds idyllic, doesn’t it? Well, it’s more achievable than you might think! For centuries, resourceful gardeners have adapted their techniques to make the most of limited spaces, and now, it’s your turn to join the ranks of urban farmers.
Growing your own food, even something as humble as cabbage, connects us to a rich history of self-sufficiency and sustainable living. Think back to victory gardens during wartime, or the kitchen gardens of medieval monasteries – people have always found ways to cultivate food close to home. But why should *you* bother with balcony cabbage growing tips? In today’s world, where fresh produce can be expensive and its origins uncertain, having control over your food source is incredibly empowering. Plus, there’s nothing quite like the satisfaction of nurturing a plant from seed to harvest.
This DIY guide is packed with simple, effective tricks and hacks to help you succeed, no matter how small your balcony may be. We’ll cover everything from choosing the right cabbage varieties to optimizing sunlight and preventing pests. Get ready to transform your balcony into a thriving edible oasis!

Balcony Cabbage: Your Own Little Vegetable Garden on the Balcony
Hey garden friends! Do you also feel like harvesting fresh, crisp vegetables right outside your door? Then you’ve come to the right place! I’ll show you how you can easily grow cabbage on your balcony. Don’t be afraid, it’s easier than you think and a lot of fun!
Why Cabbage on the Balcony?
Cabbage is not only super healthy but also incredibly versatile in the kitchen. Whether as a salad, steamed, fried, or fermented – the possibilities are endless. And the best part: even a small balcony has space for a few cabbage plants.
Advantages of Balcony Cabbage:
- Fresh Harvest: Always have fresh vegetables at your fingertips.
- Space-Saving: Possible even on small balconies.
- Sustainable: Reduces the need for transport routes and packaging waste.
- Healthy: Cabbage is rich in vitamins and minerals.
- Satisfying: It’s just fun to grow your own vegetables!
Which Cabbage Varieties are Suitable for the Balcony?
Not every type of cabbage feels at home on a balcony. Some varieties simply grow too large. But don’t worry, there are plenty of alternatives that are perfect for growing in pots.
Recommended Cabbage Varieties for the Balcony:
- Cauliflower (dwarf varieties): ‘Minuteman’ or ‘Snow Crown’ are good options.
- Broccoli (dwarf varieties): ‘De Cicco’ or ‘Waltham 29’ are ideal.
- Brussels Sprouts (dwarf varieties): ‘Brigitte’ or ‘Rubine’ are more compact.
- Kale: ‘Red Russian’ or ‘Lacinato’ are not only tasty but also decorative.
- White Cabbage (dwarf varieties): ‘Filderkraut’ or ‘Brunswick’ are good choices.
- Red Cabbage (dwarf varieties): ‘Red Drumhead’ or ‘Langedijker Dauerrood’ are suitable.
- Napa Cabbage: ‘Kasumi’ or ‘Blues’ are fast-growing and space-saving.
- Kohlrabi: ‘Delikatess Weißer’ or ‘Superschmelz’ are uncomplicated.
What You Need for Balcony Cabbage: The Material List
Before we get started, here is a list of all the things you will need for your balcony cabbage:
- Cabbage plants: Young plants from a garden center or self-started ones are best.
- Containers: Pots or tubs with sufficient volume (at least 10 liters per plant, depending on the variety).
- Potting soil: High-quality vegetable soil or a mixture of garden soil, compost, and sand.
- Fertilizer: Organic vegetable fertilizer or compost.
- Watering can or garden hose: For regular watering.
- Scissors or knife: For harvesting.
- Possibly: A snail fence or snail pellets to protect the plants from snails.
- Possibly: A trellis for kale if it gets too tall.
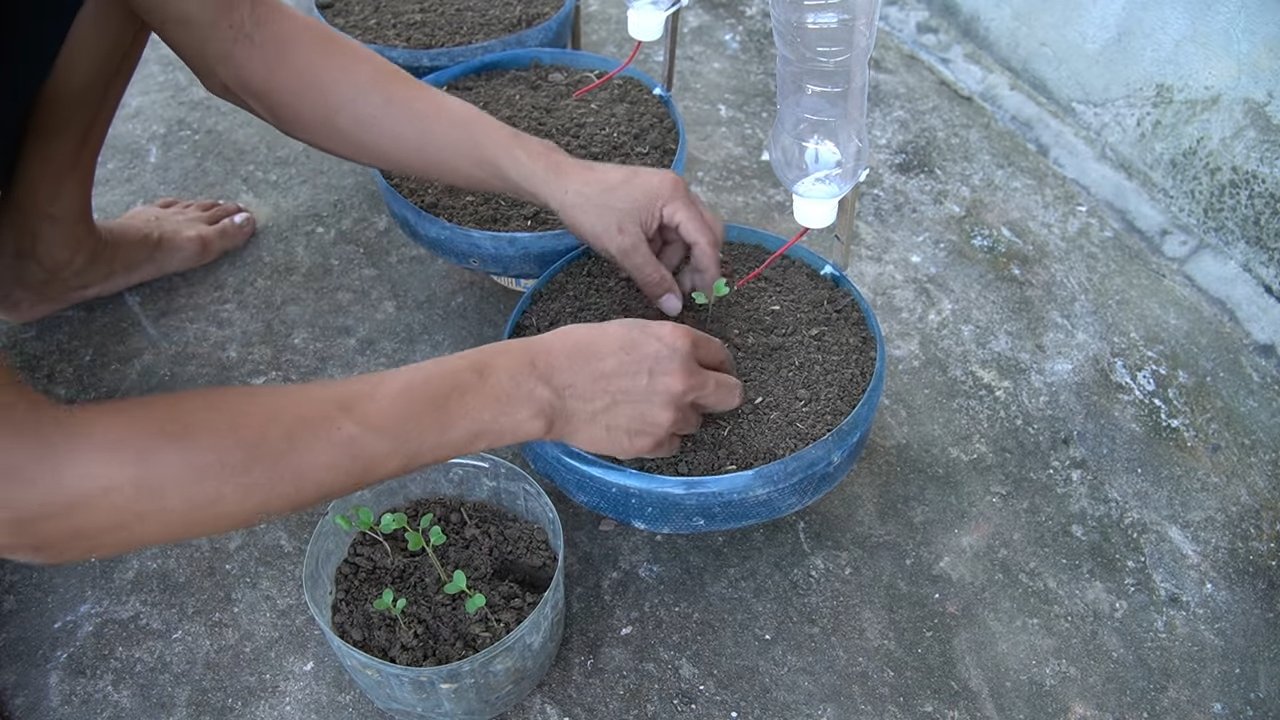
Step-by-Step Guide: How to Plant Your Balcony Cabbage
Now let’s get down to it! Here is a detailed guide on how to successfully plant your balcony cabbage:
1. Preparation: Containers and Soil
- Choose the right containers: Make sure the pots or tubs are large enough. The larger the plant gets, the more space it needs for its roots. A diameter of 30-40 cm (12-16 inches) and a depth of 25-30 cm (10-12 inches) are a good guideline.
- Ensure good drainage: Cabbage does not like waterlogging. Place a layer of clay shards or gravel at the bottom of the pots to ensure good drainage.
- Fill the pots with soil: Use high-quality vegetable soil or mix garden soil with compost and sand. The soil should be loose and permeable.
2. Planting: Putting in the Cabbage
- Loosen the root balls: Carefully remove the cabbage plants from their nursery pots and loosen the root balls slightly. This promotes new growth.
- Insert the plants: Dig a hole in the soil large enough for the root ball. Place the plant inside and fill the hole with soil. Make sure that the root collar (the transition between the root and the stem) is not covered with soil.
- Water the plants: Water the freshly planted cabbage plants thoroughly. This helps them to establish themselves in their new home.
3. Care: Watering, Fertilizing, and Protecting
- Regular watering: Cabbage needs a lot of water, especially during the growing phase. Water regularly, but avoid waterlogging. The soil should always be slightly moist.
- Proper fertilizing: Cabbage is a heavy feeder and needs sufficient nutrients. Fertilize the plants regularly with organic vegetable fertilizer or compost. Start about two weeks after planting and repeat the fertilization every two to three weeks.
- Protection from pests: Unfortunately, cabbage is susceptible to various pests, such as cabbage white butterflies, flea beetles, or snails. Check the plants regularly and combat pests with biological means if necessary. A snail fence or snail pellets can help protect the plants from snails. Cardboard collars around the stems can protect against the cabbage root fly.
- Sun protection: On very hot days, it can be useful to protect the cabbage plants from direct sunlight, especially when they are still young. A sun sail or a shady spot can help.
4. The Harvest: Finally, Harvest!
- The right time: The time of harvest depends on the cabbage variety. Cauliflower and broccoli are ready to harvest when the heads are firm and closed. Brussels sprouts can be harvested when the sprouts are firm and have reached a certain size. Kale can be harvested as needed by picking the outer leaves. White and red cabbage are ready to harvest when the heads are firm and plump.
- The harvesting technique: Cut the cabbage heads with a sharp knife or scissors. For Brussels sprouts, you can simply break off the sprouts. You harvest kale by picking off the outer leaves.
Additional Tips for Balcony Cabbage
- Observe crop rotation: Do not plant cabbage in the same spot every year. Rotate the plants to prevent diseases and pests.
- Companion planting: Plant cabbage together with other plants that support each other. Good neighbors are, for example, marigolds, nasturtiums, or sage. They keep pests away and promote growth.
- Regular checks: Check your cabbage plants regularly for pests and diseases. The sooner you identify problems, the better you can combat them.
- Mulching: Cover the soil around the cabbage plants with a layer of mulch (e.g., straw or grass clippings). This keeps the moisture in the soil and suppresses weeds.
- Variety selection: When choosing cabbage varieties, pay attention to the maturation time. This allows you to harvest over a longer period.
Common Problems and Solutions
Cabbage White Butterfly: The caterpillars of the cabbage white butterfly eat holes in the leaves. Pick off the caterpillars or use biological insecticides.
Conclusion
So, there you have it! Growing cabbage on your balcony isn’t just a whimsical dream; it’s a tangible reality within your reach. We’ve walked through the essential steps, from selecting the right varieties to warding off common pests, all tailored for the unique environment of a balcony garden. But why should you actually take the plunge and dedicate a portion of your precious balcony space to this leafy green?
The answer is multifaceted. First and foremost, the taste of homegrown cabbage is simply unparalleled. Forget the bland, mass-produced heads from the supermarket; balcony-grown cabbage boasts a freshness and vibrancy that will elevate your culinary creations. Imagine crisp, tender leaves in your salads, stir-fries, or even fermented into your own homemade sauerkraut. The possibilities are endless!
Beyond the superior flavor, growing your own cabbage offers a sense of accomplishment and connection to nature. Nurturing a plant from seedling to harvest is a deeply rewarding experience, providing a welcome respite from the stresses of modern life. Plus, you’ll have the satisfaction of knowing exactly where your food comes from and how it was grown, free from harmful pesticides and chemicals.
And let’s not forget the aesthetic appeal. A thriving cabbage plant, with its broad, textured leaves, adds a touch of rustic charm to any balcony. It’s a conversation starter, a visual delight, and a testament to your green thumb.
But the real magic lies in the adaptability of this method. Feel free to experiment with different cabbage varieties to find your personal favorites. Red cabbage adds a splash of color to your balcony and your plate, while savoy cabbage offers a more delicate flavor and texture. Consider companion planting with herbs like dill or rosemary to deter pests and enhance the flavor of your cabbage. You can even try succession planting, staggering your planting dates to ensure a continuous harvest throughout the growing season.
Don’t be afraid to get creative with your container choices, either. While we’ve recommended specific sizes, you can repurpose old buckets, baskets, or even grow bags to create a unique and sustainable growing environment. Just ensure that your chosen container has adequate drainage to prevent waterlogging.
Balcony cabbage growing is more than just a gardening project; it’s an investment in your health, your well-being, and your connection to the natural world. It’s a chance to learn, to experiment, and to reap the delicious rewards of your labor.
So, what are you waiting for? Grab your seeds, prepare your soil, and embark on this exciting journey. We encourage you to share your experiences with us and the wider gardening community. Post photos of your balcony cabbage on social media, tag us in your posts, and let us know what varieties you’re growing and what challenges you’ve overcome. Your insights and experiences can inspire others to embrace the joys of balcony gardening.
We’re confident that you’ll be amazed by the results. With a little care and attention, you’ll be harvesting your own delicious, homegrown cabbage in no time. Happy gardening!
Frequently Asked Questions (FAQ)
What is the best time of year to start growing cabbage on my balcony?
The ideal time to start growing cabbage depends on your local climate. Cabbage is a cool-season crop, meaning it thrives in temperatures between 60°F and 70°F (15°C and 21°C). In most regions, this means planting in early spring or late summer for a fall harvest. If you live in a warmer climate, you can grow cabbage throughout the winter. Check your local frost dates to determine the best planting time for your area. Starting seeds indoors 6-8 weeks before the last expected frost can give you a head start.
What kind of soil is best for growing cabbage in containers?
Cabbage prefers well-draining, fertile soil that is rich in organic matter. A good potting mix for balcony cabbage should consist of equal parts compost, peat moss (or coconut coir), and perlite or vermiculite. Compost provides essential nutrients, peat moss (or coconut coir) helps retain moisture, and perlite or vermiculite improves drainage. You can also add a slow-release fertilizer to the soil at planting time to provide a steady supply of nutrients throughout the growing season. Avoid using garden soil in containers, as it can become compacted and poorly drained.
How much sunlight does cabbage need when grown on a balcony?
Cabbage requires at least 6 hours of direct sunlight per day to thrive. Choose a location on your balcony that receives ample sunlight throughout the day. If your balcony is shaded for part of the day, try to position your cabbage plants so that they receive morning sun, which is less intense than afternoon sun. If you don’t have enough natural sunlight, you can supplement with grow lights.
How often should I water my balcony cabbage plants?
Water your cabbage plants regularly, especially during hot, dry weather. The soil should be consistently moist but not waterlogged. Check the soil moisture by sticking your finger about an inch into the soil. If the soil feels dry, it’s time to water. Water deeply, allowing the water to drain out of the bottom of the container. Avoid overhead watering, as this can promote fungal diseases.
What are some common pests and diseases that affect cabbage, and how can I prevent them?
Cabbage is susceptible to several pests and diseases, including cabbage worms, aphids, flea beetles, and clubroot. To prevent pest problems, inspect your plants regularly for signs of infestation. Handpick any pests you find, or use insecticidal soap or neem oil to control them. To prevent diseases, ensure good air circulation around your plants and avoid overhead watering. Rotate your crops each year to prevent soilborne diseases from building up. Consider using row covers to protect your plants from pests.
How do I know when my cabbage is ready to harvest?
Cabbage is ready to harvest when the head is firm and solid. The size of the head will vary depending on the variety, but generally, a mature cabbage head will be about 6-8 inches in diameter. To harvest, use a sharp knife to cut the head from the stem, leaving a few outer leaves intact.
Can I grow different varieties of cabbage on my balcony?
Absolutely! Experimenting with different varieties is part of the fun. Consider factors like size, flavor, and disease resistance when choosing your varieties. Some popular varieties for container gardening include ‘Dwarf Blue Vates’, ‘Golden Acre’, and ‘Red Acre’.
What if I don’t have a sunny balcony? Can I still grow cabbage?
While cabbage prefers full sun, you can still try growing it on a partially shaded balcony. Choose varieties that are more tolerant of shade, such as ‘Early Jersey Wakefield’. You may also need to supplement with grow lights to provide your plants with enough light. Be aware that your cabbage may not grow as large or as quickly as it would in full sun.
How can I improve the flavor of my balcony-grown cabbage?
The flavor of your cabbage can be influenced by several factors, including soil fertility, watering practices, and sunlight exposure. Ensure that your soil is rich in organic matter and that you are watering your plants regularly. Adequate sunlight is also crucial for developing the best flavor. You can also try adding a small amount of Epsom salts to the soil to improve the flavor and sweetness of your cabbage.
Is it possible to grow organic cabbage on my balcony?
Yes, it is definitely possible to grow organic cabbage on your balcony. Use organic potting mix, organic fertilizers, and organic pest control methods. Avoid using synthetic pesticides and herbicides. Compost tea is a great organic fertilizer that you can easily make at home.


Leave a Comment