
Spinach Growing in Plastic Bottles: Sounds a little unconventional, right? But trust me, this DIY trick is about to revolutionize your small-space gardening game! Forget sprawling gardens and endless weeding; we’re taking spinach cultivation vertical and eco-friendly.
For centuries, humans have cultivated spinach, tracing its origins back to ancient Persia. It gradually spread across the globe, becoming a staple in cuisines worldwide. But let’s face it, traditional gardening can be a challenge, especially if you’re short on space or time. That’s where this ingenious hack comes in!
Imagine fresh, vibrant spinach leaves just steps from your kitchen, ready to be tossed into salads, smoothies, or your favorite dishes. No more trips to the grocery store for wilted greens! Spinach Growing in Plastic Bottles is not only a sustainable way to recycle those pesky plastic containers, but it also offers a compact and efficient solution for urban gardeners and anyone looking to maximize their yield in a limited area. I’m excited to share this easy-to-follow guide that will have you harvesting your own delicious spinach in no time. Let’s get started!
Growing Spinach in Plastic Bottles: A DIY Project for Everyone
Hello dear garden friends! Do you fancy fresh spinach but have little space? Or do you just want to find a creative and sustainable way to grow your own vegetables? Then you’ve come to the right place! I’ll show you how you can easily grow spinach in plastic bottles. This is not only super space-saving but also a great way to recycle plastic waste and prove your green thumb at the same time. Let’s get started!
What You’ll Need:
- Plastic bottles: 1.5-liter or 2-liter bottles are best. The more you have, the more spinach you get!
- Knife or scissors: For cutting the bottles.
- Drill or nail: For the drainage holes.
- Soil: High-quality potting soil or vegetable soil is ideal.
- Spinach seeds: Look for a variety that is suitable for growing in pots.
- Watering can or spray bottle: For watering.
- Optional: Small stones or clay shards for drainage.
- Optional: Labels and a pen for labeling the bottles.
Preparation of the Plastic Bottles
This step is crucial for your spinach plants to grow well later on. We are turning the plastic bottles into small but effective growing containers.
1. Cleaning the Bottles: First, you need to clean the plastic bottles thoroughly. Remove all labels and rinse them with warm water and a little dish soap. Make sure no soap residue remains. Then let the bottles dry completely.
2. Cutting the Bottles: Now comes the fun part! You have two options for cutting the bottles:
- Horizontal Cut: Cut the bottle horizontally in the middle. The top part is later turned upside down and inserted into the bottom part, creating a small pot.
- Vertical Cut: Cut the bottle vertically on one side. Leave a small part at the bottom uncut, so the bottle looks like a kind of “boat.” This method is well-suited if you want to grow several plants next to each other.
I personally prefer the horizontal method as it is more stable and requires less space. But just try out what you like better!
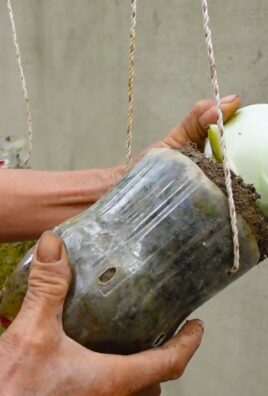
3. Drilling Drainage Holes: To allow water to drain well and prevent waterlogging, you must drill drainage holes in the bottom of the bottles. Use a drill or a nail and carefully make a few holes. Make sure the holes are not too big, so the soil doesn’t fall out.
Filling the Bottles and Sowing
Now we’re getting down to it! We will fill the prepared bottles with soil and sow the spinach seeds.
1. Prepare Drainage (optional): If you wish, you can place a layer of small stones or clay shards at the bottom of the bottles. This improves drainage and prevents waterlogging.
2. Filling with Soil: Fill the bottles with soil, leaving about 2-3 cm (about 1 inch) of space to the rim. Lightly press the soil down.
3. Sowing the Spinach Seeds: Distribute the spinach seeds evenly on the soil. Make sure the seeds are not too close together, as the plants will not have enough space to grow. A rule of thumb is to leave about 1-2 cm (0.4-0.8 inches) of space between the seeds.
4. Covering with Soil: Cover the seeds with a thin layer of soil (about 0.5 cm or 0.2 inches). Lightly press the soil down.
5. Watering: Gently water the soil with a watering can or spray bottle. The soil should be well-moistened, but not too wet.
Care of the Spinach
For your spinach to thrive, it needs the right care. Here are a few tips you should follow:
1. Location: Spinach needs a bright spot, but not direct sunlight. A semi-shady place is ideal.
2. Watering: Keep the soil moist, but not too wet. Water regularly, especially on hot days. Make sure the water can drain well.
3. Fertilizing: Spinach is a heavy feeder and needs regular fertilizer. You can use an organic liquid fertilizer or compost tea. Fertilize about every two weeks.
4. Protection from Pests: Spinach can be infested by aphids or snails. Check your plants regularly and remove pests by hand if necessary, or use a biological pesticide.
5. Harvesting: You can harvest the spinach as soon as the leaves are large enough. Cut off the outer leaves and let the inner leaves continue to grow. This allows you to harvest over a longer period.
Additional Tips and Tricks
- Variety Selection: Choose a spinach variety that is suitable for growing in a pot. There are special varieties that grow more compactly and require less space.
- Labeling: Label the bottles with the name of the spinach variety and the sowing date. This helps you keep track.
- Multiple Sowings: Sow new spinach seeds every few weeks to ensure a continuous harvest.
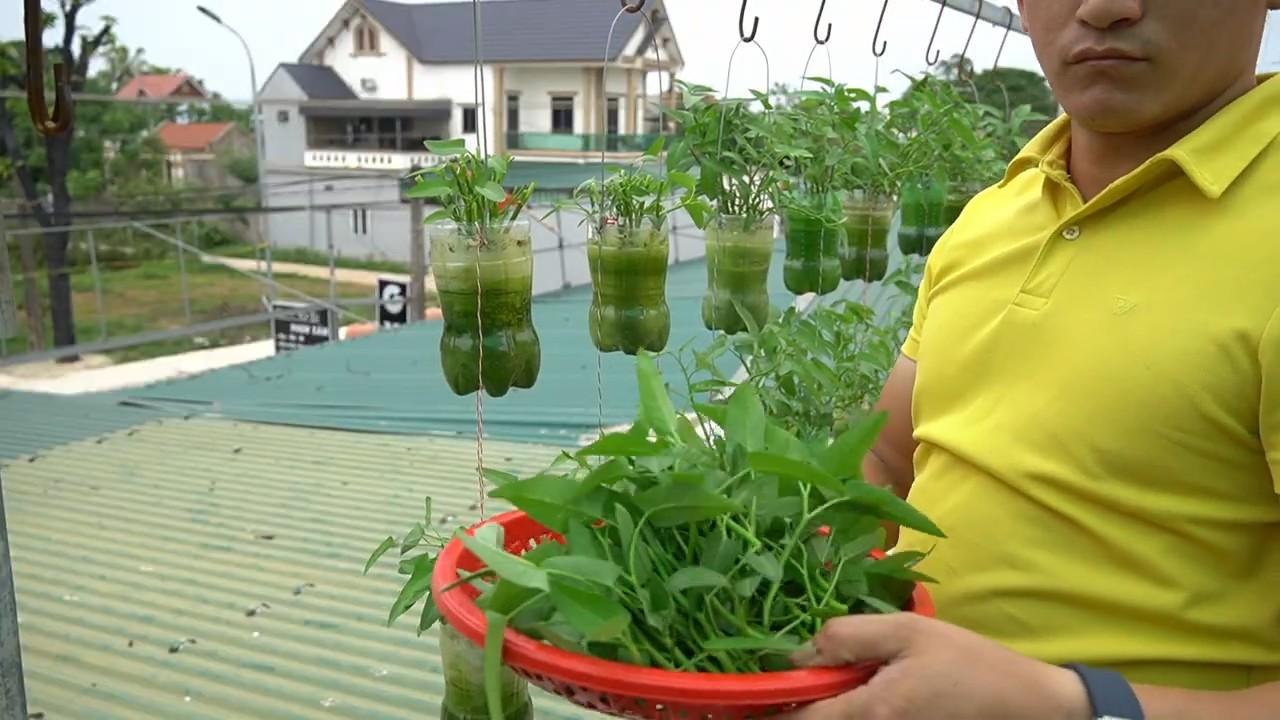
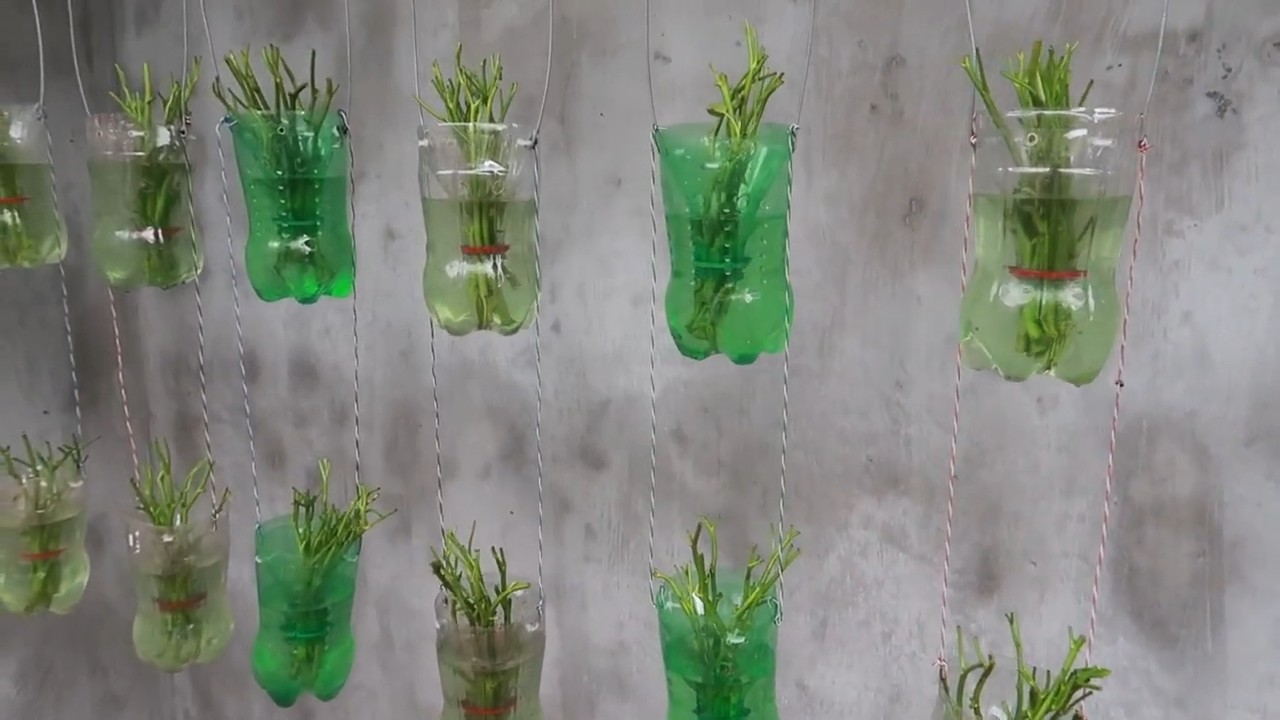
- Vertical Garden: If you have several bottles, you can create a vertical garden. Attach the bottles to a wall or a fence. This saves space and looks great.
- Combination with Other Plants: Spinach combines well with other plants, e.g., radishes or lettuce.
- Winter Cultivation: In mild winters, you can also grow spinach outdoors. Protect the plants from frost with a fleece cover.
- Regular Checks: Check your plants regularly for diseases and pests. The sooner you identify problems, the better you can combat them.
- Refresh the Soil: After harvesting, you should replace the soil or enrich it with compost before sowing new plants.
- Creative Design: Paint the plastic bottles with bright colors or patterns. This will turn your spinach garden into a real eye-catcher.
Common Problems and Solutions
- Yellow Leaves: Yellow leaves can be a sign of a nutrient deficiency. Fertilize the plants with a suitable fertilizer.
- Mold: Mold can be caused by excessive humidity. Ensure good ventilation and water less.
- Aphids: Aphids can be rinsed off with a jet of water or controlled with a biological pesticide.
- Snails: Snails can be controlled with snail bait or snail fences.
Conclusion
Growing spinach in plastic bottles is a simple and rewarding DIY project. It’s a great way to recycle plastic waste, save space, and harvest fresh spinach. With a little patience and care, you can soon look forward to a bountiful harvest. So, what are you waiting for? Get your plastic bottles and get started! I wish you lots of fun gardening and a great harvest!
Conclusion
So, there you have it! Growing spinach in plastic bottles isn’t just a quirky gardening experiment; it’s a genuinely effective and rewarding way to cultivate fresh, nutritious greens, even if you’re short on space or resources. We’ve walked through the simple steps, highlighting the benefits of this upcycling method, and hopefully, dispelled any doubts you might have had.
This DIY trick is a must-try for several compelling reasons. First and foremost, it’s incredibly space-efficient. Apartment dwellers, balcony gardeners, and anyone with limited yard space can enjoy a continuous supply of fresh spinach without sacrificing precious square footage. The vertical nature of the bottle gardens allows you to maximize your yield in a minimal footprint.
Secondly, it’s an eco-conscious choice. By repurposing plastic bottles, you’re actively reducing waste and contributing to a more sustainable lifestyle. Instead of these bottles ending up in landfills, they’re given a new lease on life as miniature spinach farms. It’s a small act with a significant impact.
Thirdly, it’s surprisingly easy and cost-effective. The materials are readily available, and the process is straightforward, even for beginner gardeners. You don’t need expensive equipment or specialized knowledge to get started. A few plastic bottles, some soil, spinach seeds, and a little bit of patience are all you need to embark on this green adventure.
But the benefits don’t stop there. Growing spinach in plastic bottles also offers better control over the growing environment. You can easily move the bottles to optimize sunlight exposure, protect them from harsh weather conditions, and monitor the soil moisture levels. This level of control can lead to healthier, more productive plants.
Looking for variations? Absolutely! Consider these ideas to personalize your plastic bottle spinach garden:
* Herb Garden Hybrid: Interplant your spinach with other compatible herbs like basil, parsley, or chives. This not only adds variety to your harvest but also helps to deter pests.
* Vertical Wall Garden: Create a stunning vertical wall garden by hanging multiple bottle planters on a fence or wall. This adds a decorative element to your outdoor space while maximizing your growing area.
* Hydroponic Adaptation: Experiment with a hydroponic setup by using nutrient-rich water instead of soil. This can accelerate growth and reduce the risk of soilborne diseases.
* Different Bottle Sizes: Use different sizes of plastic bottles to accommodate varying spinach varieties or to create a visually appealing tiered effect.
* Painted Bottles: Paint the bottles with bright colors or decorative patterns to add a touch of personality to your garden. Just be sure to use non-toxic paint.
We wholeheartedly encourage you to give this DIY trick a try. It’s a fun, rewarding, and sustainable way to enjoy fresh, homegrown spinach. Once you’ve set up your plastic bottle spinach garden, we’d love to hear about your experience! Share your photos, tips, and challenges in the comments section below. Let’s build a community of bottle-gardening enthusiasts and inspire others to embrace this innovative approach to urban farming. Remember, even the smallest space can yield a bountiful harvest with a little creativity and a few repurposed plastic bottles. Happy growing!
Frequently Asked Questions (FAQ)
What type of plastic bottles are best for growing spinach?
Ideally, you should use food-grade plastic bottles, such as those that previously contained water, juice, or soda. Avoid using bottles that held harsh chemicals or cleaning products, as these could contaminate the soil and affect the spinach. PET (polyethylene terephthalate) bottles, commonly used for water and soda, are a good choice. Make sure to thoroughly clean the bottles before using them to remove any residue.
How much sunlight does spinach grown in plastic bottles need?
Spinach thrives in partial to full sunlight, requiring at least 4-6 hours of direct sunlight per day. However, in hotter climates, providing some afternoon shade can prevent the leaves from wilting or burning. Monitor your spinach plants closely and adjust their position as needed to ensure they receive adequate sunlight without being scorched. If you are growing indoors, consider using grow lights to supplement natural sunlight.
What type of soil should I use for growing spinach in plastic bottles?
A well-draining potting mix is essential for growing healthy spinach in plastic bottles. Avoid using garden soil, as it can be too heavy and compact, hindering drainage and root growth. A good potting mix should contain a blend of peat moss, perlite, and vermiculite. You can also add compost or other organic matter to enrich the soil and provide essential nutrients. Ensure the soil is slightly acidic to neutral, with a pH between 6.0 and 7.0.
How often should I water spinach grown in plastic bottles?
Water your spinach plants regularly, keeping the soil consistently moist but not waterlogged. The frequency of watering will depend on factors such as the weather, the size of the bottles, and the type of soil you’re using. Check the soil moisture level daily by inserting your finger into the soil. If the top inch feels dry, it’s time to water. When watering, make sure to saturate the soil thoroughly, allowing excess water to drain out of the drainage holes. Avoid overhead watering, as this can promote fungal diseases.
How do I fertilize spinach grown in plastic bottles?
Spinach is a relatively heavy feeder, so regular fertilization is important to ensure healthy growth and abundant yields. Use a balanced, water-soluble fertilizer diluted to half strength. Apply the fertilizer every 2-3 weeks, following the instructions on the product label. You can also supplement with organic fertilizers such as compost tea or fish emulsion. Avoid over-fertilizing, as this can lead to excessive leaf growth and reduced flavor.
How long does it take for spinach to grow in plastic bottles?
Spinach is a fast-growing crop, typically reaching maturity in 4-6 weeks from planting. However, the exact time will depend on factors such as the variety of spinach, the growing conditions, and the climate. You can start harvesting spinach leaves as soon as they are large enough to eat, typically when they are about 4-6 inches long. Harvest the outer leaves first, allowing the inner leaves to continue growing.
What are some common pests and diseases that affect spinach grown in plastic bottles?
Spinach can be susceptible to various pests and diseases, including aphids, spider mites, leaf miners, and downy mildew. Regularly inspect your plants for signs of infestation or disease. If you spot any problems, take action immediately to prevent them from spreading. You can use organic pest control methods such as insecticidal soap, neem oil, or diatomaceous earth to control pests. To prevent diseases, ensure good air circulation, avoid overhead watering, and remove any infected leaves promptly.
Can I grow spinach in plastic bottles indoors?
Yes, you can successfully grow spinach in plastic bottles indoors, provided you provide adequate light and ventilation. Place the bottles near a sunny window that receives at least 4-6 hours of direct sunlight per day. If natural light is insufficient, supplement with grow lights. Ensure good air circulation by opening windows or using a fan. Monitor the soil moisture levels and water as needed.
How do I harvest spinach from plastic bottles?
Harvest spinach leaves by snipping them off at the base of the stem with scissors or pruning shears. Start with the outer leaves, allowing the inner leaves to continue growing. Avoid pulling the entire plant out of the soil, as this will prevent further harvests. You can harvest spinach multiple times from the same plant, extending your harvest season.
How do I prevent my spinach from bolting (going to seed)?
Bolting is a common problem with spinach, especially in hot weather. To prevent bolting, choose heat-tolerant spinach varieties, provide shade during the hottest part of the day, and water regularly to keep the soil cool and moist. You can also mulch around the plants to help retain moisture and regulate soil temperature. Harvest the leaves frequently to encourage continued vegetative growth.
Leave a Comment