
Lazy Gardener Cabbage Growing: Sounds like a dream, right? Imagine plump, juicy cabbages gracing your garden without endless hours of weeding and fussing. Well, stop dreaming and start doing! This DIY guide is your secret weapon to effortless cabbage cultivation, perfect for those of us who love fresh produce but prefer to spend our weekends relaxing, not toiling.
Cabbage, a staple in cuisines worldwide, boasts a rich history. From its humble beginnings as a wild leafy green to its cultivation by the ancient Romans and Greeks, cabbage has nourished civilizations for centuries. It’s a symbol of resilience and resourcefulness, qualities we’re channeling in this lazy gardener approach!
But why do you need this particular DIY trick? Let’s face it, traditional gardening can be time-consuming and demanding. Many people are put off by the perceived effort involved, missing out on the joy of harvesting their own food. This is where lazy gardener cabbage growing comes in. I’m going to show you simple, effective techniques that minimize effort while maximizing your cabbage yield. Think less weeding, less watering, and more delicious cabbage on your table. Get ready to unlock the secrets to a thriving cabbage patch with minimal effort – your taste buds (and your back) will thank you!
The Lazy Gardener: Growing Cabbage – Super Easy!
Hey folks! Are you also excited about fresh, crisp cabbage, but don’t feel like slaving away in the garden for hours? Then you’ve come to the right place! I’ll show you how to bring in a rich cabbage harvest with a few clever tricks and minimal effort. Don’t worry, you don’t need a green thumb, just a little patience and my simple instructions. Let’s get started!
What you need for lazy cabbage cultivation
Before we begin, here’s a list of everything you’ll need. Don’t panic, you probably already have most of it at home or can get it cheaply:
- Cabbage plants: Young plants from the garden center or a farmers’ market are best. Saves time and effort! Look for healthy, strong plants with rich green leaves.
- Garden soil: Cabbage is a heavy feeder, so it needs nutrient-rich soil. If your soil isn’t great, mix in compost or well-rotted manure.
- Compost or manure: As mentioned, for that extra portion of nutrients.
- Mulch material: Straw, grass clippings, wood chips – anything that covers the soil and suppresses weeds.
- Planting tools: Spade, shovel, trowel.
- Watering can or garden hose: For regular watering.
- Pest protection: Cabbage white butterflies and other pests love cabbage just as much as we do. More on that later.
- Patience: Cabbage needs its time to grow.
Preparation: The Key to Success
Even if we’re lazy, a little preparation is necessary. This will save us a lot of work later!
- Prepare the soil: Loosen the soil thoroughly and remove weeds. Mix in compost or manure to enrich the soil with nutrients. Cabbage needs a pH between 6.0 and 7.5. If your soil is too acidic, you can add lime.
- Choose a location: Cabbage needs a lot of sun, at least 6 hours per day. Make sure the location is well-drained, because cabbage does not like waterlogged soil at all.
- Note the planting distance: Depending on the cabbage variety, you will need different spacing. Find out when you buy the young plants or check the packaging. As a rule of thumb: head cabbage needs about 50-60 cm of space, Brussels sprouts about 60-70 cm.
Planting: Into the Ground!
Now comes the fun part: planting!
- Dig planting holes: Dig holes that are slightly larger than the root balls of the young plants.
- Insert the plants: Carefully place the plants in the holes and fill them with soil. Make sure the root collar (the transition between the root and the stem) is not covered with soil.
- Water in: Water the plants thoroughly so that the soil settles around the roots.
- Mulch: Spread a thick layer of mulch material around the plants. This keeps the soil moist, suppresses weeds, and protects the plants from splashing water.
Care: Less is More!
Now comes the part that we lazy gardeners like best: the care. The rule here is: Less is more!
- Watering: Cabbage needs regular water, especially in dry periods. It’s best to water in the morning so the leaves can dry by evening. Avoid waterlogging!
- Fertilizing: Cabbage is a heavy feeder, so it regularly needs a new supply of nutrients. Fertilize every few weeks with an organic fertilizer, e.g., nettle tea or compost tea.
- Weeding: Keep the area around the cabbage plants weed-free. Weeds compete with the cabbage for nutrients and water.
- Pest control: Unfortunately, cabbage is very susceptible to pests. Here are a few tips on how you can protect your plants:
- Cabbage whites: These butterflies lay their eggs on the cabbage leaves, and the caterpillars then eat the leaves bare. You can keep the butterflies away with a vegetable protection net or pick off the caterpillars.
- Flea beetles: These small beetles eat holes in the leaves. You can combat them with an insecticide or dust the plants with diatomaceous earth.
- Cabbage root flies: The larvae of these flies feed on the roots of the cabbage plants. You can combat them with nematodes or protect the plants with a cabbage collar.
- Slugs: Slugs love cabbage! You can combat them with slug pellets or set up traps.
Special Tips for Lazy Gardeners
Here are a few extra tips to make your life as a lazy gardener easier:
- Companion planting: Plant cabbage together with other plants that repel pests or improve the soil. Good partners are, for example, marigolds, nasturtiums, sage, and thyme.
- Mulching: As already mentioned, mulching is the be-all and end-all for lazy gardeners. It saves time on watering and weeding.
- Automatic irrigation: If you’re really lazy, you can install an automatic irrigation system. This saves you from daily watering.
- Choose resistant varieties: There are cabbage varieties that are more resistant to certain diseases and pests. Inquire when you buy the young plants.
The Harvest: Reward for the Effort (or lack thereof!)
After all the (non-)work, the reward finally comes: the harvest!
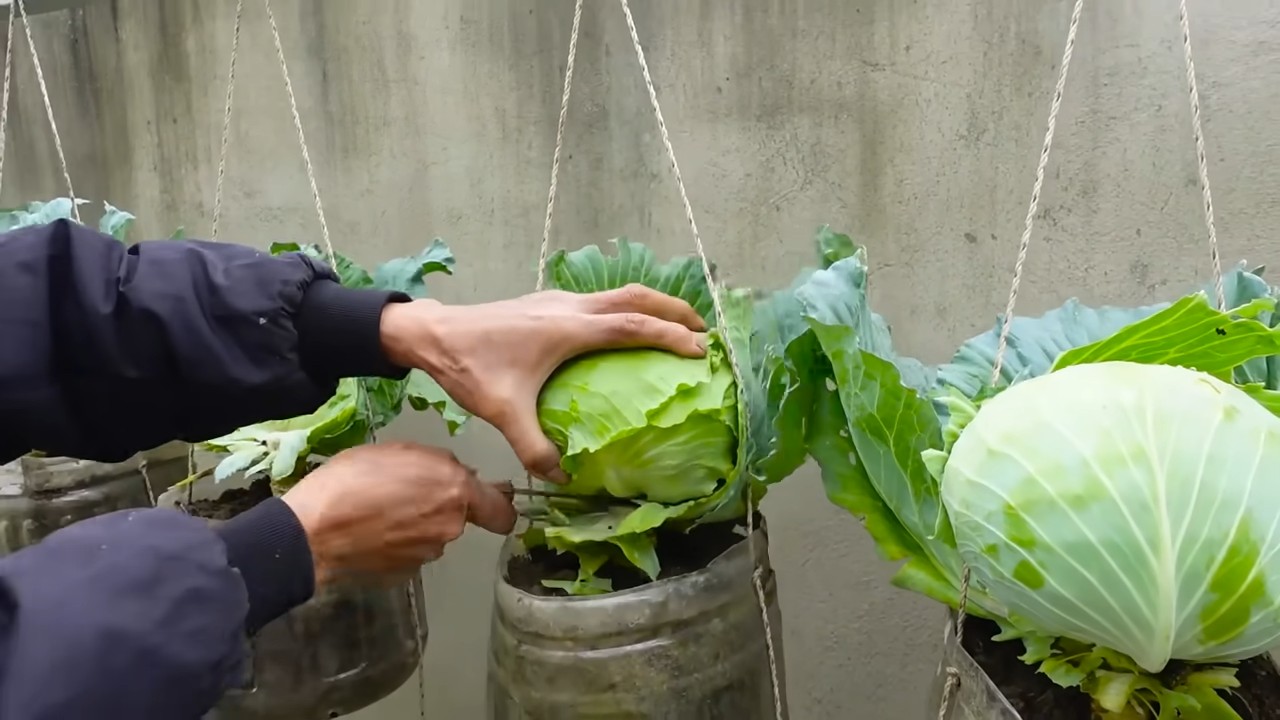
- Harvest time: The harvest time depends on the cabbage variety. Head cabbage is ready to harvest when the head is firm and closed. Brussels sprouts are ready to harvest when the sprouts are firm and closed.
- Harvesting method: Cut the head cabbage with a sharp knife. Break off the Brussels sprouts from the bottom up.
- Storage: Cabbage keeps in the refrigerator for a few weeks. You can also freeze or ferment it.
Additional Tips for Different Cabbage Varieties
Here are a few specific tips for growing different types of cabbage:
- Head cabbage (White cabbage, red cabbage, savoy cabbage): Head cabbage needs a lot of space and nutrients. Ensure good spacing and fertilize regularly.
- Brussels sprouts: Brussels sprouts take a long time to mature. Harvest the sprouts from the bottom up when they are firm and closed.
- Cauliflower: Cauliflower is a bit more demanding than other cabbage varieties. Ensure even watering and protect the head from direct sunlight to prevent it from turning yellow.
- Broccoli: Broccoli is relatively easy to grow. Harvest the main head while it is still closed. The side shoots can be harvested later.
- Kale: Kale is very robust and hardy. It can still be harvested even after the first frost.
Conclusion: Laziness Pays Off!
See, growing cabbage doesn’t have to be complicated! With a few simple tricks and minimal effort, you can bring in a rich harvest. So, what are you waiting for? Get into the garden and get started! And remember: laziness pays off! Happy gardening!

Conclusion
So, there you have it – the Lazy Gardener’s method for growing cabbage! This isn’t just about taking shortcuts; it’s about working smarter, not harder, and maximizing your yield with minimal effort. We’ve stripped away the unnecessary complexities often associated with cabbage cultivation, focusing on the core elements that truly matter: soil preparation, strategic planting, and consistent watering.
Why is this DIY trick a must-try? Because it empowers even the most time-strapped gardener to enjoy the satisfaction of harvesting their own fresh, crisp cabbage. Imagine the vibrant green heads gracing your dinner table, knowing you nurtured them from seed to plate with a fraction of the usual work. This method is particularly beneficial for beginners who might be intimidated by traditional gardening techniques. It simplifies the process, making it accessible and enjoyable.
But the beauty of this lazy gardener approach lies in its adaptability. Feel free to experiment with variations to suit your specific needs and preferences. For instance, if you’re dealing with particularly poor soil, consider incorporating more compost or well-rotted manure during the initial soil preparation. You could also try companion planting, interspersing your cabbage with herbs like rosemary or thyme to deter pests naturally. Another variation is to use different types of mulch. Straw mulch is excellent for retaining moisture, while wood chips can help suppress weeds.
Furthermore, consider succession planting to extend your harvest season. Plant a new batch of cabbage seedlings every few weeks to ensure a continuous supply of fresh cabbage throughout the growing season. You can also experiment with different varieties of cabbage, from the classic green varieties to the more colorful red and savoy types. Each variety offers a unique flavor and texture, adding diversity to your culinary creations.
The key takeaway is that gardening should be a joyful experience, not a chore. This lazy gardener method allows you to embrace the process without feeling overwhelmed. It’s about finding a balance between effort and reward, and ultimately, enjoying the fruits (or vegetables!) of your labor.
We wholeheartedly encourage you to give this DIY trick a try. You might be surprised at how easy and rewarding it is to grow your own cabbage, even with minimal effort. And once you’ve experienced the satisfaction of harvesting your own homegrown cabbage, we’d love to hear about it! Share your experiences, tips, and variations in the comments below. Let’s build a community of lazy gardeners who are passionate about growing their own food, one cabbage at a time. Your insights could inspire others to embark on their own gardening journey, proving that anyone can grow delicious, healthy food, regardless of their time constraints or experience level. So, get out there, get your hands dirty (or not, if you’re truly lazy!), and start growing your own cabbage today! Don’t forget to share your success stories and any challenges you encounter along the way. Happy gardening!
FAQ
What exactly does “lazy gardening” mean in this context?
Lazy gardening, in this context, refers to a set of techniques and strategies designed to minimize the amount of time and effort required to grow cabbage successfully. It doesn’t mean neglecting your plants; rather, it’s about optimizing your approach to achieve maximum results with minimal input. This includes things like focusing on soil health to reduce the need for frequent fertilization, using mulch to suppress weeds and retain moisture, and choosing cabbage varieties that are relatively low-maintenance. The goal is to create a self-sustaining system that requires less intervention from the gardener.
What are the best cabbage varieties for lazy gardeners?
Certain cabbage varieties are naturally more resilient and require less attention than others. Look for varieties that are known for their disease resistance and tolerance to varying weather conditions. Some good options include:
* **’Early Jersey Wakefield’:** A fast-maturing variety that’s relatively resistant to bolting (going to seed prematurely).
* **’Golden Acre’:** Another early variety that’s known for its compact size and good flavor.
* **’Savoy Ace’:** A savoy cabbage with crinkled leaves that’s relatively easy to grow and has good disease resistance.
* **’Red Acre’:** A red cabbage variety that’s known for its good storage qualities and tolerance to cold weather.
* **’January King’:** A hardy variety that can withstand cold temperatures and is suitable for late-season harvests.
When selecting varieties, consider your local climate and growing conditions. Choose varieties that are well-suited to your region to minimize the risk of problems.
How important is soil preparation for the lazy gardener method?
Soil preparation is absolutely crucial for the lazy gardener method. A well-prepared soil provides the foundation for healthy cabbage growth, reducing the need for frequent watering, fertilization, and pest control. Before planting, amend your soil with plenty of organic matter, such as compost or well-rotted manure. This will improve drainage, aeration, and nutrient content, creating an ideal environment for cabbage roots to thrive. If your soil is particularly poor, consider adding some slow-release fertilizer to provide a steady supply of nutrients throughout the growing season. Remember, investing time in soil preparation upfront will save you time and effort in the long run.
What kind of mulch is best for cabbage, and how much should I use?
Mulch is an essential component of the lazy gardener method, as it helps to suppress weeds, retain moisture, and regulate soil temperature. Several types of mulch are suitable for cabbage, including:
* **Straw:** An excellent choice for retaining moisture and suppressing weeds.
* **Wood chips:** A long-lasting mulch that can help to improve soil structure over time.
* **Compost:** A nutrient-rich mulch that can also help to fertilize your cabbage plants.
* **Shredded leaves:** A readily available and inexpensive mulch that can help to improve soil health.
Apply a layer of mulch that is 2-3 inches thick around your cabbage plants, being careful not to pile it up against the stems. Replenish the mulch as needed throughout the growing season to maintain its effectiveness.
How often should I water my cabbage plants using this method?
Watering frequency will depend on your local climate and soil conditions. However, the goal is to water deeply and infrequently, rather than shallowly and frequently. Water your cabbage plants when the top inch of soil feels dry to the touch. When you do water, soak the soil thoroughly, allowing the water to penetrate deep into the root zone. Avoid overhead watering, as this can increase the risk of fungal diseases. Using a soaker hose or drip irrigation system can help to deliver water directly to the roots, minimizing water waste and reducing the risk of disease. The mulch will also help to retain moisture, reducing the need for frequent watering.
What about pests and diseases? How do I manage them with minimal effort?
Pest and disease management is an important aspect of cabbage growing, even for lazy gardeners. The key is to focus on preventative measures to minimize the risk of problems. Some strategies include:
* **Choosing disease-resistant varieties:** As mentioned earlier, selecting varieties that are known for their disease resistance can significantly reduce the risk of problems.
* **Practicing crop rotation:** Avoid planting cabbage in the same location year after year, as this can increase the buildup of pests and diseases in the soil.
* **Companion planting:** Planting certain herbs and flowers alongside your cabbage can help to deter pests naturally. For example, rosemary and thyme can repel cabbage moths, while marigolds can deter nematodes.
* **Regularly inspecting your plants:** Check your cabbage plants regularly for signs of pests or diseases. Early detection is key to preventing problems from escalating.
* **Using organic pest control methods:** If you do encounter pests, consider using organic pest control methods, such as insecticidal soap or neem oil.
By taking these preventative measures, you can minimize the need for more intensive pest and disease management strategies.
Can I grow cabbage in containers using the lazy gardener method?
Yes, you can absolutely grow cabbage in containers using the lazy gardener method. Choose a large container with good drainage and fill it with a well-draining potting mix amended with compost. Follow the same principles of soil preparation, mulching, and watering as you would for growing cabbage in the ground. Container-grown cabbage may require more frequent watering than cabbage grown in the ground, as the soil in containers tends to dry out more quickly. Also, consider using a slow-release fertilizer to provide a steady supply of nutrients to your container-grown cabbage plants.
How do I know when my cabbage is ready to harvest?
Cabbage is typically ready to harvest when the head is firm and solid to the touch. The size of the head will vary depending on the variety, but generally, you can harvest cabbage when the head reaches its mature size. To harvest, simply cut the head off the plant at the base, using a sharp knife. Leave the outer leaves intact, as they can help to protect the head during storage.
What if I encounter problems despite using the lazy gardener method?
Even with the best planning, problems can sometimes arise. Don’t be discouraged! Research the specific issue you’re facing and try to address it with the least amount of intervention possible. Sometimes, simply adjusting your watering schedule or adding more mulch can resolve the problem. Remember, gardening is a learning process, and every challenge is an opportunity to gain experience and improve your skills. And don’t hesitate to reach out to other gardeners for advice and support. The gardening community is a wealth of knowledge and experience, and
Leave a Comment