
Growing Hibiscus in Backyard can transform your outdoor space into a vibrant, tropical paradise! Imagine stepping outside to be greeted by the bold, beautiful blooms of hibiscus flowers, adding a splash of color and a touch of exotic charm to your everyday life. But did you know that the hibiscus, with its origins tracing back to Asia and the Pacific Islands, has been revered for centuries, not just for its beauty, but also for its medicinal properties and cultural significance? In some cultures, it symbolizes delicate beauty and fleeting glory, while in others, it’s a symbol of hospitality and good fortune.
I know what you’re thinking: “Hibiscus? Sounds complicated!” But trust me, it doesn’t have to be. Many people shy away from the idea of growing hibiscus, fearing it’s too difficult or requires too much specialized care. That’s where this DIY guide comes in! I’m here to share some simple, effective tricks and hacks that will empower you to successfully cultivate these stunning flowers right in your own backyard. Whether you’re a seasoned gardener or just starting out, these tips will help you overcome common challenges and unlock the secrets to thriving hibiscus plants.
Why do you need these DIY tricks? Because a little know-how can make all the difference between a struggling plant and a flourishing one. I’ll show you how to choose the right variety for your climate, prepare the perfect soil, provide optimal sunlight, and even tackle common pests and diseases. Get ready to unleash your inner gardener and enjoy the satisfaction of growing hibiscus in backyard, creating a breathtaking oasis that you can be proud of!
Hibiskus im eigenen Garten ziehen: Eine Schritt-für-Schritt-Anleitung
Hallo Gartenfreunde! Ich liebe Hibiskus. Diese tropischen Schönheiten mit ihren leuchtenden Blüten können jeden Garten in ein kleines Paradies verwandeln. Und das Beste daran? Es ist gar nicht so schwer, sie selbst zu ziehen! Ich zeige euch, wie ihr mit ein bisschen Geduld und den richtigen Handgriffen eure eigenen Hibiskussträucher im Garten zum Blühen bringt. Los geht’s!
Die richtige Hibiskusart wählen
Bevor wir loslegen, ist es wichtig, die richtige Hibiskusart für euren Garten auszuwählen. Es gibt nämlich verschiedene Arten, die unterschiedliche Ansprüche haben.
* **Garten-Hibiskus (Hibiscus syriacus):** Dieser Hibiskus ist winterhart und eignet sich perfekt für Gärten in gemäßigten Klimazonen. Er blüht im Spätsommer und Herbst und ist in vielen verschiedenen Farben erhältlich.
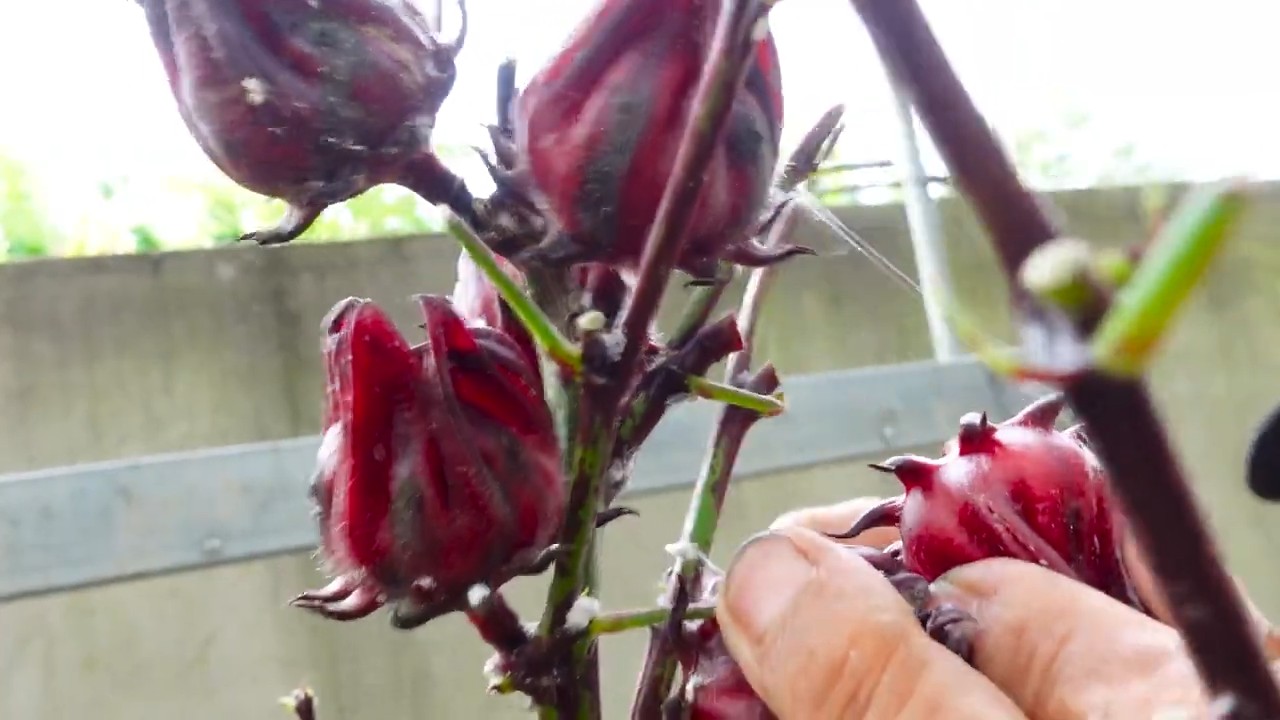
* **Roseneibisch (Hibiscus rosa-sinensis):** Dieser Hibiskus ist nicht winterhart und muss im Winter ins Haus geholt werden. Er blüht den ganzen Sommer über und ist besonders beliebt für seine großen, auffälligen Blüten.
* **Sumpf-Hibiskus (Hibiscus moscheutos):** Dieser Hibiskus ist winterhart und liebt feuchte Standorte. Er blüht im Sommer und ist in verschiedenen Farben erhältlich, darunter Rot, Rosa und Weiß.
Überlegt euch also gut, welche Art am besten zu eurem Klima und euren Vorlieben passt. Ich persönlich habe mit dem Garten-Hibiskus die besten Erfahrungen gemacht, da er pflegeleicht und winterhart ist.
Der perfekte Standort für deinen Hibiskus
Der Standort ist entscheidend für das Wohlbefinden eures Hibiskus. Hier sind die wichtigsten Punkte:
* **Sonne:** Hibiskus liebt die Sonne! Je mehr Sonne er bekommt, desto üppiger wird er blühen. Wählt also einen Standort, der mindestens sechs Stunden Sonne pro Tag bekommt.
* **Windschutz:** Hibiskus ist empfindlich gegen starken Wind. Ein geschützter Standort, beispielsweise in der Nähe einer Mauer oder eines Zauns, ist ideal.
* **Boden:** Der Boden sollte gut durchlässig und nährstoffreich sein. Staunässe verträgt Hibiskus gar nicht.
Ich habe meinen Hibiskus an einem sonnigen Platz in der Nähe meiner Terrasse gepflanzt. Dort ist er vor Wind geschützt und bekommt den ganzen Tag Sonne.
Hibiskus pflanzen: So geht’s richtig
Jetzt geht es ans Eingemachte: das Pflanzen! Hier ist eine detaillierte Anleitung:
1. **Den Boden vorbereiten:** Grabt ein Loch, das doppelt so breit und tief ist wie der Wurzelballen eures Hibiskus. Lockert den Boden am Boden des Lochs auf, um die Drainage zu verbessern. Mischt Kompost oder andere organische Materialien unter die ausgehobene Erde, um den Boden anzureichern.
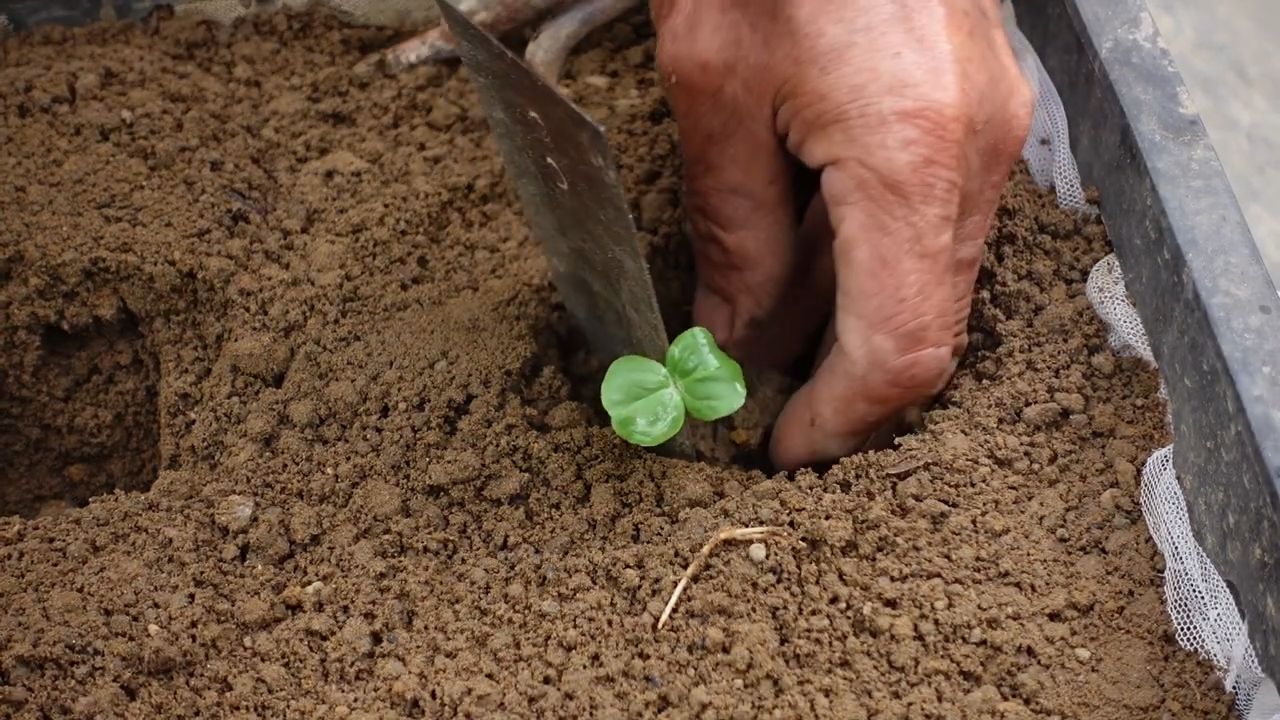
2. **Den Hibiskus einsetzen:** Nehmt den Hibiskus vorsichtig aus dem Topf und lockert den Wurzelballen etwas auf. Setzt den Hibiskus in das Loch und achtet darauf, dass der obere Rand des Wurzelballens mit der Bodenoberfläche abschließt.
3. **Das Loch füllen:** Füllt das Loch mit der vorbereiteten Erde und drückt sie leicht an.
4. **Gießen:** Gießt den Hibiskus gründlich an. Das hilft, die Erde zu setzen und die Wurzeln zu befeuchten.
5. **Mulchen:** Tragt eine Schicht Mulch um den Hibiskus auf. Das hilft, die Feuchtigkeit im Boden zu halten und Unkraut zu unterdrücken. Ich verwende gerne Rindenmulch, aber auch andere organische Materialien wie Stroh oder Laub sind geeignet.
Hibiskus pflegen: Tipps und Tricks für eine üppige Blüte
Die Pflege ist das A und O für einen gesunden und blühfreudigen Hibiskus. Hier sind meine besten Tipps:
* **Gießen:** Hibiskus braucht regelmäßig Wasser, besonders während der Blütezeit. Gießt ihn, wenn die oberste Erdschicht trocken ist. Vermeidet Staunässe, da dies zu Wurzelfäule führen kann.
* **Düngen:** Hibiskus ist ein Starkzehrer und braucht regelmäßig Dünger. Düngt ihn während der Wachstums- und Blütezeit alle zwei Wochen mit einem speziellen Hibiskusdünger oder einem Flüssigdünger für Blühpflanzen. Ich verwende gerne einen organischen Dünger, da er schonender für die Umwelt ist.
* **Schneiden:** Hibiskus sollte regelmäßig geschnitten werden, um seine Form zu erhalten und die Blüte zu fördern. Schneidet ihn im Frühjahr, bevor er austreibt. Entfernt dabei abgestorbene oder kranke Äste und kürzt die übrigen Äste um etwa ein Drittel. Ihr könnt auch während der Blütezeit verwelkte Blüten entfernen, um die Bildung neuer Blüten zu fördern.
* **Überwintern (bei nicht winterharten Arten):** Wenn ihr einen nicht winterharten Hibiskus habt, müsst ihr ihn im Winter ins Haus holen. Stellt ihn an einen hellen, kühlen Ort und gießt ihn nur sparsam. Im Frühjahr, wenn die Temperaturen wieder steigen, könnt ihr ihn wieder ins Freie stellen.
Schädlinge und Krankheiten: So schützt du deinen Hibiskus
Auch Hibiskus ist nicht vor Schädlingen und Krankheiten gefeit. Hier sind die häufigsten Probleme und wie ihr sie bekämpfen könnt:
* **Blattläuse:** Blattläuse sind kleine, saugende Insekten, die sich an den Blättern und Trieben des Hibiskus ansiedeln. Sie können mit einem Wasserstrahl abgespült oder mit einem Insektizid bekämpft werden. Ich verwende gerne eine natürliche Lösung aus Wasser und Schmierseife.
* **Spinnmilben:** Spinnmilben sind winzige, spinnende Milben, die sich an den Blättern des Hibiskus ansiedeln. Sie verursachen gelbe Flecken und können die Blätter zum Abfallen bringen. Sie können mit einem Wasserstrahl abgespült oder mit einem Akarizid bekämpft werden. Eine hohe Luftfeuchtigkeit hilft, Spinnmilben vorzubeugen.
* **Wurzelfäule:** Wurzelfäule wird durch Staunässe verursacht und führt dazu, dass die Wurzeln des Hibiskus verrotten. Um Wurzelfäule vorzubeugen, solltet ihr darauf achten, dass der Boden gut durchlässig ist und den Hibiskus nicht zu viel gießen. Wenn euer Hibiskus Wurzelfäule hat, müsst ihr ihn aus dem Topf nehmen, die verfaulten Wurzeln abschneiden und ihn in frische Erde umtopfen.
* **Chlorose:** Chlorose ist ein Nährstoffmangel, der sich durch gelbe Blätter mit grünen Adern äußert. Sie wird meist durch Eisenmangel verursacht. Um Chlorose zu beheben, könnt ihr dem Hibiskus einen Eisendünger geben.
Hibiskus vermehren: So bekommst du noch mehr Pflanzen
Wenn ihr von eurem Hibiskus begeistert seid, könnt ihr ihn ganz einfach vermehren. Hier sind zwei Möglichkeiten:
* **Stecklinge:** Schneidet im Frühjahr oder Sommer einen etwa 10 cm langen Steckling von einem gesunden Trieb ab. Entfernt die unteren Blätter und steckt den Steckling in einen Topf mit Anzuchterde. Haltet die Erde feucht und stellt den Topf an einen hellen, warmen Ort. Nach einigen Wochen sollten sich Wurzeln bilden.
* **Samen:** Hibiskussamen können im Frühjahr ausgesät werden. Weicht die Samen vor der Aussaat für einige Stunden in Wasser ein. Säät die Samen in Töpfe mit Anzuchterde und haltet die Erde feucht. Stellt die Töpfe an einen hellen, warmen Ort. Nach einigen Wochen sollten die Samen keimen.
Hibiskus im Kübel: Eine Alternative für Balkon und Terrasse
Wenn ihr keinen Garten habt, könnt ihr Hibiskus auch im Kübel auf dem Balkon oder der Terrasse ziehen. Wählt einen ausreichend großen Kübel mit guter Drainage. Verwendet eine hochwertige Kübelpflanzenerde und düngt den Hibiskus regelmäßig. Achtet darauf, dass der Kübel an einem sonnigen und windgeschützten Standort steht. Nicht winterharte Arten müssen im Winter ins Haus geholt werden.
Fazit: Hibiskus im eigenen Garten ist machbar!
Mit ein bisschen Liebe und Pflege könnt ihr euch schon bald an euren eigenen, blühenden Hibiskussträuchern erfreuen. Es ist wirklich nicht schwer, und die leuchtenden Blüten sind einfach wunderschön anzusehen. Also, worauf wartet ihr noch? Ran an die Schaufel und los geht’s! Ich wünsche euch
Conclusion
So, there you have it! Transforming your backyard into a vibrant hibiscus haven is not only achievable but also incredibly rewarding. We’ve explored the essential steps, from selecting the perfect varieties to providing the ideal growing conditions, and even touched upon troubleshooting common issues. But the real magic lies in the *DIY trick* we discussed: creating your own custom hibiscus fertilizer blend.
Why is this DIY approach a must-try? Simply put, it allows you to tailor the nutrient profile precisely to your hibiscus plants’ needs. Commercial fertilizers, while convenient, often contain a generic blend that may not address the specific requirements of these tropical beauties. By crafting your own fertilizer, you can ensure your hibiscus receives the perfect balance of nitrogen, phosphorus, and potassium, along with essential micronutrients, leading to more abundant blooms, richer colors, and healthier, more resilient plants.
Think of it as giving your hibiscus a personalized spa treatment, designed to unlock their full potential. The difference can be truly remarkable. You’ll witness a noticeable improvement in leaf health, stem strength, and, most importantly, the sheer number and vibrancy of your hibiscus flowers. Imagine your backyard bursting with these exotic blooms, a testament to your dedication and the power of this simple yet effective DIY trick.
But the beauty of this approach is its adaptability. Feel free to experiment with variations to suit your specific needs and preferences. For instance, if you’re growing hibiscus in containers, you might consider adding a slow-release fertilizer component to your DIY blend for sustained nutrient delivery. Or, if you notice signs of iron deficiency (yellowing leaves with green veins), you can supplement your fertilizer with chelated iron. The possibilities are endless!
We encourage you to embrace the DIY spirit and give this hibiscus fertilizer trick a try. It’s a cost-effective, environmentally friendly, and incredibly satisfying way to nurture your hibiscus plants and create a stunning backyard oasis. Don’t be afraid to get your hands dirty and experiment with different ingredients to find the perfect formula for your plants.
And most importantly, we want to hear about your experiences! Share your results, your variations, and any tips or tricks you discover along the way. Let’s create a community of hibiscus enthusiasts, sharing our knowledge and inspiring each other to grow the most beautiful and vibrant hibiscus plants imaginable. Post pictures of your blooming beauties and tell us about your DIY fertilizer journey. Together, we can unlock the secrets to growing truly spectacular hibiscus in our backyards. Let the hibiscus bloom!
Frequently Asked Questions (FAQ)
What exactly makes this DIY hibiscus fertilizer better than store-bought options?
The key advantage of a DIY hibiscus fertilizer lies in its customizability. Commercial fertilizers are formulated for a broad range of plants, meaning they might not provide the precise nutrient ratios that hibiscus thrive on. Hibiscus are heavy feeders, particularly when it comes to potassium, which is crucial for flower production. A DIY blend allows you to increase the potassium content and fine-tune the other nutrients to match your hibiscus’s specific needs, leading to healthier plants and more abundant blooms. Furthermore, you have complete control over the ingredients, avoiding potentially harmful chemicals or fillers found in some commercial products. You can also source organic ingredients, making it a more environmentally friendly option.
How often should I apply this DIY hibiscus fertilizer?
The frequency of application depends on several factors, including the age and size of your hibiscus plants, the growing conditions, and the specific ingredients you use in your fertilizer blend. As a general guideline, fertilize your hibiscus every 2-4 weeks during the active growing season (spring and summer). Reduce the frequency to once every 6-8 weeks during the dormant season (fall and winter). Always follow the instructions for the specific ingredients you’re using and adjust the frequency based on your plants’ response. Look for signs of nutrient deficiency (yellowing leaves, stunted growth) or over-fertilization (burnt leaf tips) and adjust accordingly.
Can I use this DIY fertilizer on other flowering plants besides hibiscus?
While this DIY fertilizer is specifically formulated for hibiscus, it can potentially benefit other flowering plants that prefer slightly acidic soil and require high levels of potassium. Roses, bougainvillea, and gardenias are a few examples. However, it’s crucial to research the specific nutrient requirements of each plant before applying the fertilizer. Some plants may have different needs and could be negatively affected by the high potassium content. Always start with a diluted solution and monitor your plants closely for any signs of distress.
What are some common signs of nutrient deficiency in hibiscus, and how can I adjust my DIY fertilizer accordingly?
Common signs of nutrient deficiency in hibiscus include:
* **Yellowing leaves (chlorosis):** This can indicate a deficiency in nitrogen, iron, or magnesium. If the yellowing is uniform across the leaf, it’s likely a nitrogen deficiency. If the veins remain green while the leaf turns yellow, it could be an iron deficiency.
* **Stunted growth:** This can be a sign of a general nutrient deficiency or a lack of phosphorus.
* **Poor flowering:** A lack of potassium is a common cause of poor flowering in hibiscus.
* **Small, pale leaves:** This can indicate a lack of nitrogen or other essential nutrients.
To adjust your DIY fertilizer, consider the following:
* For nitrogen deficiency, add more blood meal or fish emulsion to your blend.
* For iron deficiency, supplement with chelated iron.
* For phosphorus deficiency, add bone meal or rock phosphate.
* For potassium deficiency, add more potassium sulfate or wood ash.
Is it possible to over-fertilize hibiscus, and what are the signs?
Yes, it is definitely possible to over-fertilize hibiscus, and it can be just as harmful as under-fertilizing. Signs of over-fertilization include:
* **Burnt leaf tips:** This is a classic sign of fertilizer burn, caused by excessive salt buildup in the soil.
* **White crust on the soil surface:** This indicates a buildup of fertilizer salts.
* **Wilting, even when the soil is moist:** This can be a sign that the roots are damaged by excessive fertilizer.
* **Slow or stunted growth:** Ironically, over-fertilization can sometimes lead to stunted growth.
If you suspect over-fertilization, flush the soil thoroughly with water to remove excess salts. Reduce the frequency and concentration of your fertilizer applications in the future.
Can I use compost tea as part of my hibiscus fertilizer regimen?
Absolutely! Compost tea is a fantastic addition to your hibiscus fertilizer regimen. It’s a natural and gentle way to provide essential nutrients and beneficial microbes to your plants. Compost tea can improve soil health, enhance nutrient uptake, and boost the overall health and vigor of your hibiscus. You can use it as a foliar spray or as a soil drench. Just be sure to use a well-aerated compost tea and avoid applying it during the hottest part of the day.
What are some sustainable or organic alternatives for the ingredients in the DIY fertilizer?
There are many sustainable and organic alternatives you can use in your DIY hibiscus fertilizer:
* **Nitrogen:** Instead of synthetic nitrogen fertilizers, use blood meal, fish emulsion, or composted manure.
* **Phosphorus:** Opt for bone meal, rock phosphate, or bat guano.
* **Potassium:** Use potassium sulfate derived from natural sources, wood ash (use sparingly as it can raise soil pH), or banana peels.
* **Micronutrients:** Seaweed extract is a great source of micronutrients and trace minerals.
By choosing organic and sustainable ingredients, you can create a fertilizer that is not only beneficial for your hibiscus but also good for the environment.
Leave a Comment