
Chili Pepper Propagation: Unlock the secrets to growing your own fiery harvest! Have you ever dreamed of having an endless supply of your favorite chili peppers, ready to spice up any meal? Imagine walking into your garden and plucking the perfect pepper, knowing you nurtured it from the very beginning. This isn’t just a dream; it’s an achievable reality with a little know-how and some simple DIY techniques.
For centuries, chili peppers have held a significant place in cultures around the world, not only as a culinary staple but also for their medicinal properties and even symbolic meanings. From the ancient Aztecs using them in rituals to the vibrant street food of Southeast Asia, chili peppers have a rich and diverse history. Now, you can be a part of that story by cultivating your own chili pepper plants.
Why should you learn chili pepper propagation? Because buying peppers from the store can be expensive, and you’re often limited to a few common varieties. By propagating your own, you gain access to a world of unique and flavorful peppers, control over the growing process (ensuring they’re organic and pesticide-free!), and the sheer satisfaction of watching your plants thrive. Plus, it’s a fantastic way to reduce waste by using seeds from peppers you already enjoy. I’m excited to share some easy-to-follow DIY tricks and hacks that will have you propagating chili peppers like a pro in no time!
Propagating Chili Plants: Your DIY Guide for a Bountiful Harvest!
Hey Chili Lovers! Do you have a favorite chili variety that you absolutely want to propagate, or are you just curious how you can grow a whole chili plantation from a single chili pepper? Then you’ve come to the right place! I’ll show you how you can easily propagate chili plants yourself – and with minimal effort. Don’t worry, it’s easier than you think!
Why Propagate Chili Plants Yourself?
- Cost-effective: Instead of buying expensive young plants, you can grow your own chili plants from seed.
- Variety: You can propagate rare or hard-to-find chili varieties that you might not find in stores.
- Independence: You are no longer dependent on the selection at nurseries and can grow your favorite chilis again and again.
- Satisfaction: It’s just a great feeling to see a magnificent chili plant grow from a small seed!
- Adaptation: Through propagation, you can adapt your plants to your local climate.
Methods of Chili Propagation
There are two main methods to propagate chili plants:
- Sowing from seed: The most common method, where you harvest seeds from ripe chili pods and sow them.
- Propagation by cuttings: A faster method where you cut shoots from an existing chili plant and root them.
In this article, we will focus mainly on sowing from seed, as this is the easiest and most common method. Propagation by cuttings is a bit more demanding, but I will briefly touch on it at the end.
Sowing from Seed: Step-by-Step Guide
Sowing from seed is the classic method and it works great. Here’s how I do it:
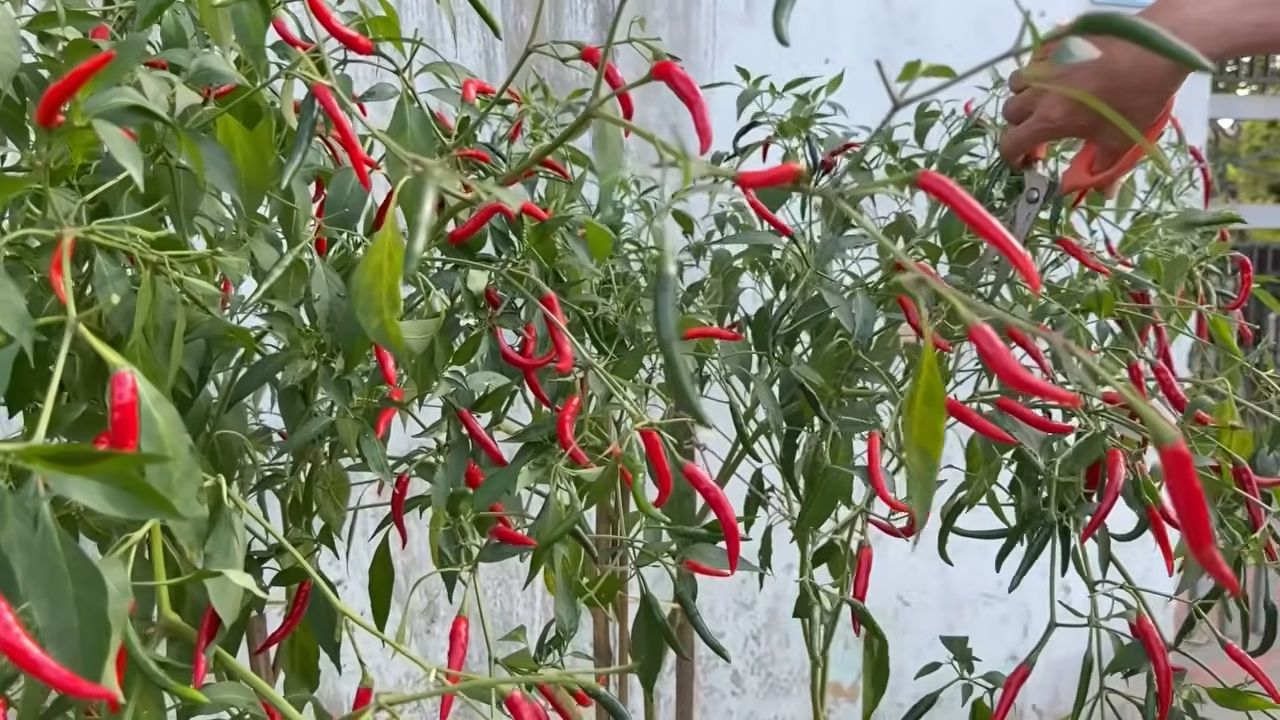
1. Harvesting Seeds: The Foundation for Your Chili Cultivation
- Select ripe chili pods: Choose fully ripe chili pods. They should have reached their final color (red, yellow, orange, brown, etc.) and feel slightly soft.
- Remove the seeds: Carefully cut open the chili pod and scrape out the seeds with a knife or spoon.
- Dry the seeds: Place the seeds on a piece of paper towel or a plate and let them dry in a warm, dry place for a few days. Make sure they don’t get moldy!
- Store the seeds: Keep the dried seeds in an airtight container (e.g., a jar or a film canister) in a cool, dark, and dry place. This way, they will remain viable for up to several years. I always label my containers with the chili variety and the harvest year.
2. Preparing for Sowing: The Cornerstone of Success
- Choose the sowing time: The best time to sow chili seeds is usually from January to March. This gives the plants enough time to grow big and strong by summer. If you have a greenhouse, you can start even earlier.
- Prepare sowing containers: You can use seed trays, small pots, or even egg cartons. It’s important that the containers have holes in the bottom so that excess water can drain away.
- Prepare the sowing soil: Use special seed starting mix that is low in nutrients and loose. You can also use coconut coir substrate or a mixture of potting soil and sand. I like to mix my own seed starting soil to ensure it has the right consistency.
- Moisten the soil: Lightly moisten the seed starting mix before sowing. It should be damp, but not wet.
3. Sowing: The Start of a Chili’s Life
- Sow the seeds: Distribute the chili seeds evenly on the seed starting mix. Make sure they are not too close together so the seedlings have enough space.
- Cover the seeds: Cover the seeds with a thin layer of seed starting mix (approx. 0.5 cm).
- Water: Gently water the soil with a spray bottle. Avoid washing the seeds away.
- Cover: Cover the sowing containers with a transparent film or a lid to increase humidity. This helps the seeds to germinate.
4. Germination: Waiting for the Miracle
- Choose a location: Place the sowing containers in a warm and bright place. The ideal germination temperature is between 25 and 30 degrees Celsius. A heating mat can help maintain the temperature.
- Control moisture: Ventilate the sowing containers regularly to prevent mold. The soil should always be slightly moist.
- Be patient: The germination of chili seeds can take between one and three weeks, depending on the variety and temperature. Be patient and don’t be discouraged if it takes a little longer.
5. Pricking Out: Giving the Seedlings More Space
- Choose the right time: As soon as the seedlings have developed their first true leaves (after the cotyledons), it’s time to prick them out.
- Preparation: Fill small pots (approx. 8-10 cm in diameter) with potting soil.
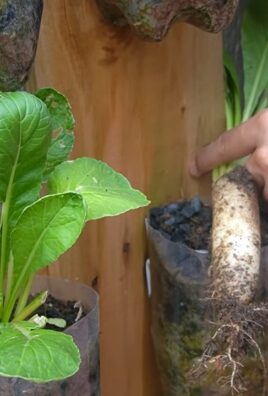
- Carefully lift the seedlings: Gently loosen the seedlings from the seed tray with a dibber or a spoon. Be careful not to damage the roots.
- Planting: Place each seedling in its own pot and press the soil down lightly.
- Watering: Gently water the seedlings.
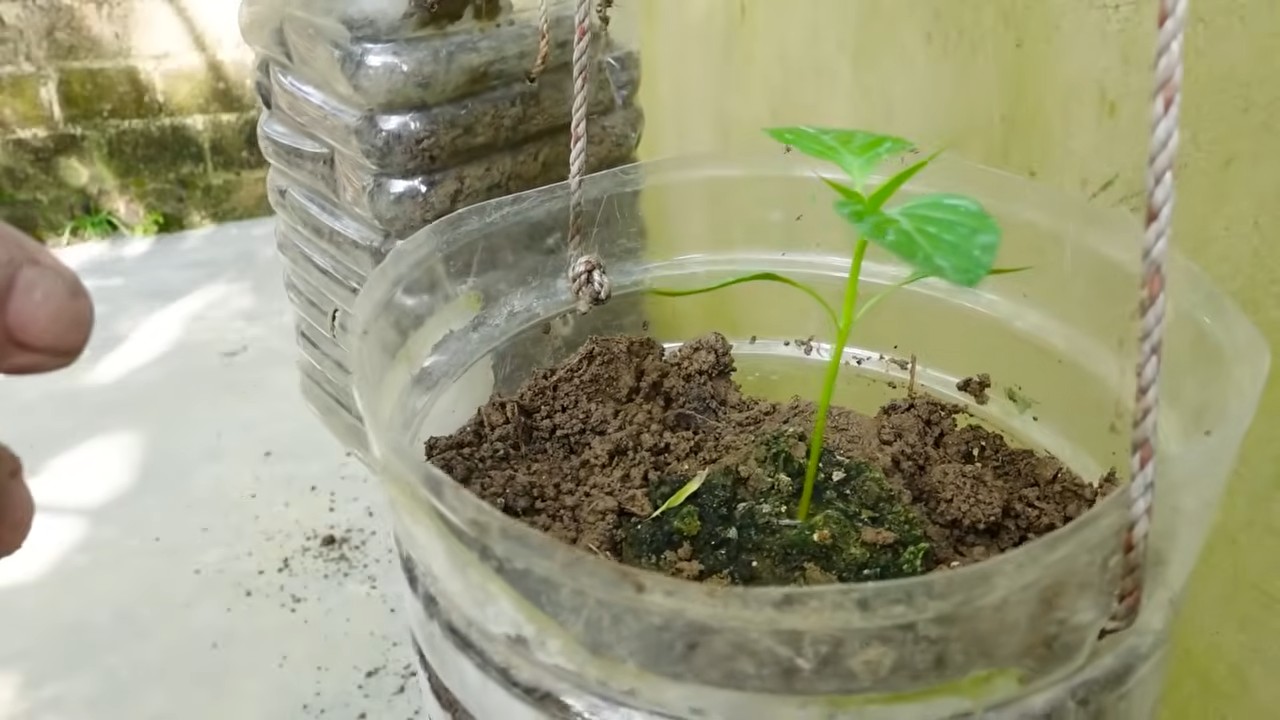
6. Caring for the Young Plants: On the Way to Chili Splendor
- Location: Place the young plants in a bright and warm place. Avoid direct sunlight, as this can burn the leaves.
- Watering: Water the plants regularly, but avoid waterlogging. The soil should always be slightly moist.
- Fertilizing: Start fertilizing after a few weeks. Use a special chili fertilizer or a tomato fertilizer.
- Repotting: When the plants have become too large for their pots, repot them into larger ones.
- Hardening off: Before you plant the plants outdoors, you should slowly acclimate them to the sun and outdoor temperatures. To do this, place them outdoors for a few hours during the day and bring them back in at night.
7. Planting Out: The Move Outdoors
- Choose the right time: Plant the chili plants outdoors only after the last frost (mid-May in many regions), when there is no longer a risk of frost.
- Choose a location: Choose a sunny and sheltered location.
- Prepare the soil: Loosen the soil and enrich it with compost or fertilizer.
- Planting: Place the chili plants in the soil and press the earth down lightly.
- Watering: Water the plants thoroughly.
Propagation by Cuttings: A Faster Alternative
Propagation by cuttings is a faster method to multiply chili plants, but it requires a bit more experience.
Cut the cuttings: In spring or summer, cut about 10-15 cm long shoots from a healthy.
Conclusion
So, there you have it! Mastering chili pepper propagation from cuttings is not just a fun gardening experiment; it’s a game-changer for chili lovers. Imagine having a constant supply of your favorite fiery peppers, all grown from a single, cherished plant. No more relying solely on seeds, which can sometimes be unreliable or produce variations you didn’t expect. This method allows you to clone your best-performing chili plants, ensuring consistent flavor, heat level, and yield year after year.
This DIY trick is a must-try for several compelling reasons. First, it’s incredibly cost-effective. Instead of buying new seedlings every season, you can simply take cuttings from your existing plants. Second, it’s a fantastic way to preserve rare or heirloom varieties. If you have a chili pepper that’s hard to find or particularly special to you, propagation ensures its survival. Third, it’s a rewarding experience that connects you more deeply to the growing process. There’s something truly satisfying about nurturing a new plant from a simple cutting.
But the benefits don’t stop there. Propagating chili peppers from cuttings also allows for faster maturity. Cuttings often root and begin producing peppers sooner than plants grown from seed, meaning you’ll be enjoying your harvest that much quicker. Plus, it’s a great way to extend your growing season. You can take cuttings from your outdoor plants in the fall and overwinter them indoors, giving them a head start for the following spring.
Ready to take your chili pepper game to the next level?
Don’t be afraid to experiment with different techniques and variations. Try using different rooting hormones, adjusting the humidity levels, or even experimenting with different types of growing media. Some gardeners have success with water propagation, while others prefer using soil or coco coir. The key is to find what works best for you and your specific chili pepper variety.
Consider these variations to tailor the process to your needs:
* Hydroponic Propagation: For a more controlled environment, try propagating your chili pepper cuttings in a hydroponic system. This can lead to faster rooting and healthier plants.
* Air Layering: For larger, more established plants, air layering can be a great option. This involves encouraging roots to grow on a stem while it’s still attached to the parent plant.
* Grafting: While not technically propagation from cuttings, grafting is another advanced technique that allows you to combine the desirable traits of two different chili pepper plants.
We’re confident that you’ll find this DIY trick to be a valuable addition to your gardening arsenal. So, grab your clippers, gather your supplies, and get ready to multiply your chili pepper plants!
We encourage you to try this method and share your experiences with us. Let us know what chili pepper varieties you’ve propagated, what techniques you’ve found to be most successful, and any challenges you’ve encountered along the way. Your feedback will help other gardeners learn and improve their own chili pepper propagation skills. Share your photos and stories on social media using #ChiliPepperPropagation and let’s build a community of passionate chili growers! Happy growing!
FAQ
What are the best chili pepper varieties to propagate from cuttings?
While most chili pepper varieties can be propagated from cuttings, some tend to be more successful than others. Varieties known for their vigorous growth and easy rooting include Jalapeños, Serranos, Thai chilies, and some of the milder Anaheim types. However, don’t let this discourage you from experimenting with other varieties. Even some of the more challenging chili peppers, like Habaneros or Scotch Bonnets, can be successfully propagated with a little extra care and attention. The key is to choose healthy, disease-free plants and provide them with the optimal conditions for rooting. Remember that the success rate can also depend on the age and health of the parent plant, so choose cuttings from vigorous, actively growing stems.
How long does it take for chili pepper cuttings to root?
The rooting time for chili pepper cuttings can vary depending on several factors, including the variety of chili pepper, the environmental conditions, and the rooting method used. Generally, you can expect to see roots forming within 2 to 4 weeks. However, some cuttings may root faster, while others may take longer. It’s important to be patient and monitor the cuttings regularly for signs of root development. Look for small, white roots emerging from the cut end of the stem. Once the roots are about an inch long, the cuttings are ready to be transplanted into individual pots. Maintaining consistent moisture and warmth is crucial during this period.
What is the best rooting hormone to use for chili pepper cuttings?
While rooting hormones are not always necessary, they can significantly increase the success rate of chili pepper propagation, especially for varieties that are more difficult to root. There are several types of rooting hormones available, both in powder and liquid form. Look for a rooting hormone that contains indole-3-butyric acid (IBA) or naphthaleneacetic acid (NAA), as these are the most effective for promoting root growth in chili peppers. Follow the instructions on the product label carefully, as using too much rooting hormone can actually inhibit root development. Some gardeners also prefer to use natural rooting alternatives, such as honey or willow water, although their effectiveness may vary.
What type of growing medium is best for rooting chili pepper cuttings?
The ideal growing medium for rooting chili pepper cuttings should be well-draining, sterile, and able to retain moisture. A common choice is a mixture of perlite and vermiculite, which provides excellent aeration and drainage while still holding enough moisture to support root growth. Another option is to use a seed starting mix or a coco coir-based mix. Avoid using garden soil, as it may contain pathogens or pests that can harm the cuttings. Before inserting the cuttings into the growing medium, make sure to moisten it thoroughly.
How much light do chili pepper cuttings need while rooting?
Chili pepper cuttings need bright, indirect light while they are rooting. Avoid placing them in direct sunlight, as this can scorch the leaves and dry out the cuttings. A location near a window with filtered sunlight is ideal. You can also use artificial grow lights to provide consistent light. If using grow lights, position them about 12 to 18 inches above the cuttings and provide 14 to 16 hours of light per day. Once the cuttings have rooted and been transplanted into individual pots, you can gradually increase the amount of light they receive.
How do I prevent chili pepper cuttings from rotting?
Rotting is a common problem when propagating chili pepper cuttings, but it can be prevented by taking a few simple precautions. First, use clean, sterile tools when taking the cuttings. This will help to prevent the introduction of pathogens. Second, avoid overwatering the cuttings, as this can create a favorable environment for fungal growth. Make sure the growing medium is well-draining and allow the surface to dry slightly between waterings. Third, provide good air circulation around the cuttings. This will help to reduce humidity and prevent the buildup of moisture. Finally, if you notice any signs of rotting, such as brown or black spots on the stems or leaves, remove the affected cuttings immediately to prevent the spread of the disease. Using a fungicide can also help to control fungal growth.
When should I transplant my rooted chili pepper cuttings?
Once your chili pepper cuttings have developed a healthy root system, typically after 2-4 weeks, they are ready to be transplanted into individual pots. Look for roots that are at least an inch long and well-branched. When transplanting, handle the cuttings carefully to avoid damaging the delicate roots. Use a well-draining potting mix and choose a pot that is appropriately sized for the plant. Water the newly transplanted cuttings thoroughly and place them in a location with bright, indirect light. Gradually acclimate them to more direct sunlight over the course of a week or two.
Can I propagate chili peppers from cuttings in water?
Yes, you can propagate chili peppers from cuttings in water. This method is simple and requires minimal supplies. Simply place the cuttings in a glass or jar of water, making sure that the leaves are not submerged. Change the water every few days to prevent the growth of algae and bacteria. Once the roots have developed, you can transplant the cuttings into a pot with soil. However, cuttings rooted in water may be more susceptible to transplant shock, so it’s important to handle them carefully and provide them with optimal growing conditions after transplanting.
What are some common problems when propagating chili peppers from cuttings and how can I fix them?
Some common problems when propagating chili peppers from cuttings include:
* Rotting: Prevent this by using sterile tools, avoiding overwatering, and providing good air circulation.
* Lack of Rooting: Try using a rooting hormone, providing consistent warmth and humidity, and ensuring adequate light.
* Yellowing Leaves: This can be caused by overwatering, underwatering, or nutrient deficiencies. Adjust your watering schedule and consider using a diluted fertilizer.
* Pest Infestations: Inspect the cuttings regularly for pests and treat them with an appropriate insecticide if necessary.
By addressing these problems promptly and providing your chili pepper cuttings with the care they need, you can increase your chances of success and enjoy a bountiful harvest of homegrown chili peppers.
Leave a Comment