
Grow pineapples at home? Absolutely! Imagine plucking a juicy, sun-ripened pineapple straight from your own backyard. It sounds like a tropical dream, right? Well, it’s more attainable than you might think, and this DIY guide is your passport to pineapple paradise!
For centuries, pineapples have been a symbol of hospitality and luxury. Originating in South America, they were once so prized that owning one was a status symbol. Thankfully, you don’t need a royal treasury to enjoy these spiky delights anymore. With a little know-how, you can cultivate your own pineapple plant and experience the satisfaction of harvesting your own tropical fruit.
But why bother with the effort? Because store-bought pineapples, while delicious, often lack the intense flavor and sweetness of a homegrown variety. Plus, let’s be honest, there’s something incredibly rewarding about nurturing a plant from start to finish and enjoying the fruits (literally!) of your labor. This DIY trick isn’t just about saving money; it’s about connecting with nature, learning a new skill, and impressing your friends with your green thumb. So, are you ready to grow pineapples at home and add a touch of the tropics to your life? Let’s get started!
Grow Your Own Pineapple: Here’s How You Can Do It Too!
Hey everyone! Are you tired of expensive pineapples from the supermarket? I’ll show you how you can easily grow your own pineapple at home! It’s easier than you think and a lot of fun. Believe me, there’s nothing better than a homegrown pineapple!
What you need:
- A ripe pineapple (preferably one with green, healthy leaves)
- A sharp knife
- A pot (approx. 15-20 cm / 6-8 inches in diameter)
- Seed starting mix or potting soil
- Water
- Optional: Rooting hormone powder
- Optional: A plastic bag or glass cloche
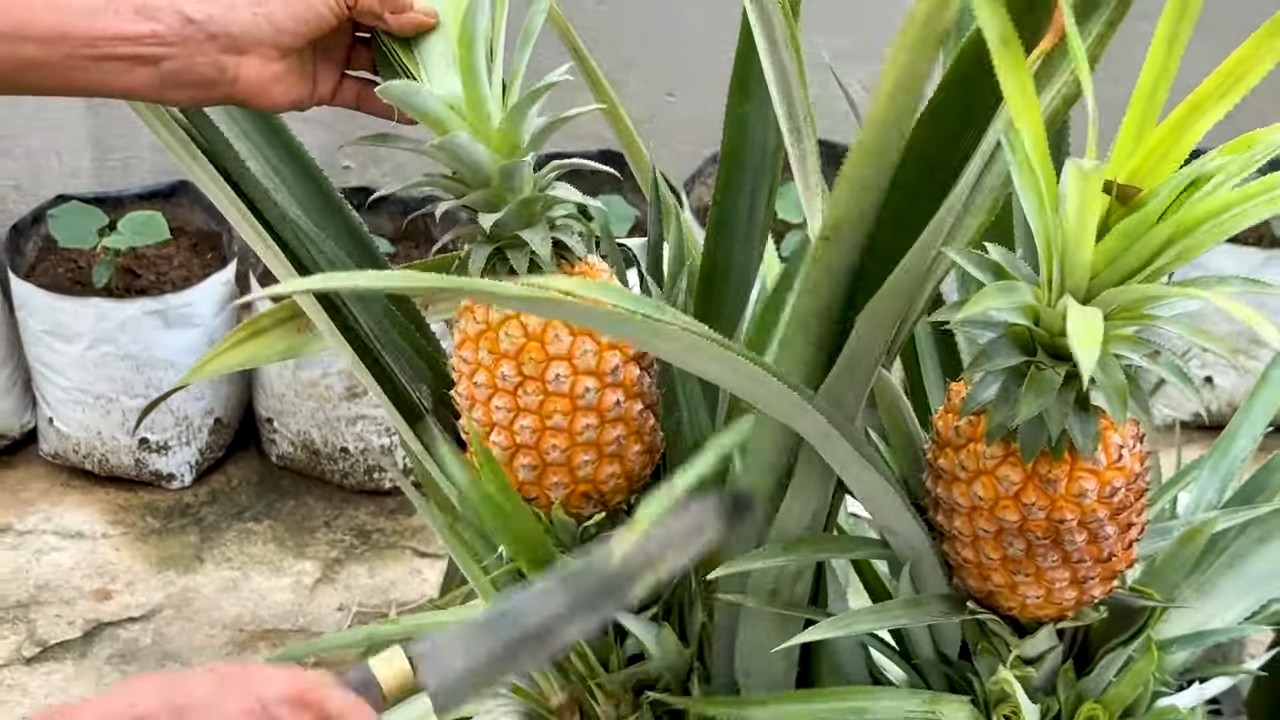
Choosing the Right Pineapple:
The key to successfully growing a pineapple is choosing the right fruit. Pay attention to the following points:
- Ripeness: The pineapple should be ripe, but not overripe. It should have a pleasant, sweet scent and give slightly when you press it.
- Leaves: The leaves should look green, firm, and healthy. Avoid pineapples with brown, wilted, or damaged leaves.
- Shape: Choose a pineapple with a uniform, undamaged shape.
Instructions: Step-by-Step to Your Own Pineapple
Here comes the detailed guide, so nothing can go wrong for you:
1. Preparing the Pineapple Top
- Cut off the leafy top: Take your sharp knife and cut off the leafy top (the crown) of the pineapple. Make sure to leave about 2-3 cm (about an inch) of fruit flesh on the crown.
- Remove the fruit flesh: Carefully remove the remaining fruit flesh from the crown. This is important because the flesh can otherwise rot and hinder root formation. You can either cut the flesh off or carefully peel it away.
- Remove the bottom leaves: Remove the lowest leaves from the crown (about 2-3 cm / 1 inch worth). This exposes the root nubs and encourages root formation.
- Let it dry: Now, let the leafy top dry in a dry, airy place for 1-2 days. This allows the cut surfaces to heal and minimizes the risk of rot.
2. Rooting (Optional)
- Rooting hormone powder: If you wish, you can sprinkle the cut surface of the crown with rooting hormone powder. This promotes root formation.
- Water glass method: Alternatively, you can place the crown in a glass of water. Make sure that only the lower half of the crown is in the water. Change the water every 1-2 days. After a few weeks, roots should begin to form.
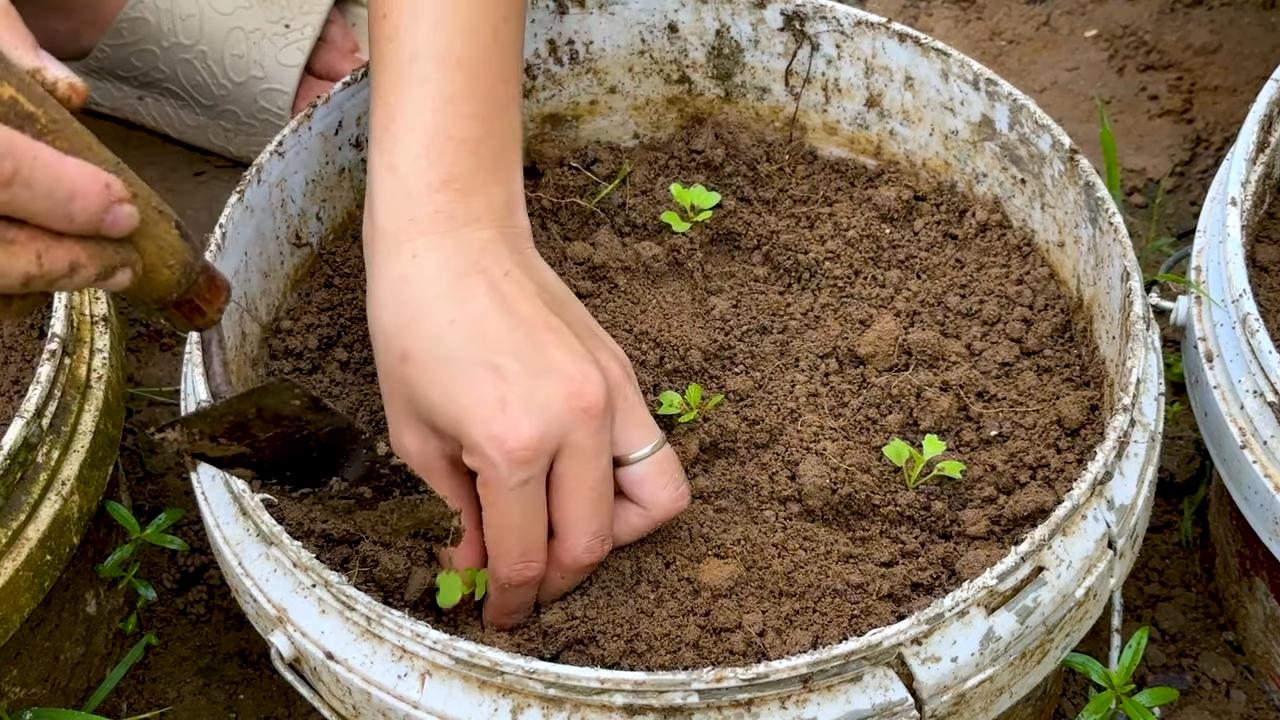
3. Planting the Pineapple Top
- Prepare the pot: Fill your pot with seed starting mix or potting soil. The soil should be loose and well-draining.
- Dig a planting hole: Dig a small planting hole in the soil.
- Insert the crown: Place the pineapple crown in the planting hole and lightly press the soil around it.
- Watering: Gently water the soil so that it is moist, but not wet.
4. The Right Care
- Location: Place the pot in a warm, bright location. Pineapples love the sun!
- Watering: Water the pineapple regularly, but not too much. The soil should always be slightly moist, but not wet. Avoid waterlogging, as this can lead to rot.
- Humidity: Pineapples like high humidity. You can increase the humidity by placing the pot on a saucer with water and pebbles or by regularly spraying the leaves with water.
- Fertilizing: Fertilize the pineapple every 2-3 weeks during the growing season (spring and summer) with a liquid fertilizer for houseplants.
- Protection from cold: Pineapples are sensitive to frost. In winter, place the pot in a cool, but frost-free location.
5. Patience is Required!
The pineapple needs time to grow and bear fruit. It can take up to 2-3 years before you can harvest your first own pineapple. But believe me, the wait is worth it!
Tips and Tricks for Successful Pineapple Cultivation
- Plastic bag or glass cloche: To increase humidity, you can place a plastic bag or a glass cloche over the pot. However, be sure to ventilate the bag or cloche regularly to prevent mold.
- Rainwater: It’s best to use rainwater for watering. Tap water can be too high in lime.
- Rotating: Rotate the pot regularly so that the pineapple grows evenly.
- Encouraging flowering: To encourage flowering, you can place an apple in a plastic bag with the pineapple plant. The apple releases ethylene, a gas that can promote flowering.
- Patience: Be patient! The pineapple needs time to grow and bear fruit. Don’t be discouraged if it doesn’t work out right away.
Common Problems and Solutions
- Yellow leaves: Yellow leaves can be a sign of too much or too little water. Check the soil moisture and adjust your watering accordingly.
- Brown leaves: Brown leaves can be a sign of air that is too dry. Increase the humidity by regularly spraying the leaves with water.
- Rot: Rot can be caused by waterlogging or too much fruit flesh left on the crown. Make sure the soil is well-draining and carefully remove all remaining fruit flesh.
- No roots: If no roots form, it could be due to too little light or too low temperatures. Move the pot to a brighter, warmer location.
Why You Should Grow Your Own Pineapple
There are many good reasons why you should grow your own pineapple:
- It’s sustainable: You save on transportation and packaging.
- It’s cost-effective: You save money since you no longer have to buy pineapples at the supermarket.
- It’s satisfying: It’s a great feeling to harvest your own pineapple.
- It’s an eye-catcher: A pineapple plant is a real eye-catcher in your home.
- It’s a great gift: A homegrown pineapple is an original and personal gift.
I hope this guide helps you to grow your own pineapple. Good luck and have fun with it! Let me know if you have any questions or want to share your experiences!
Conclusion
So, there you have it! Growing pineapples at home isn’t just a fun project; it’s a rewarding experience that brings a touch of the tropics right to your doorstep. Forget those expensive, often bland, store-bought pineapples. Imagine the satisfaction of slicing into a juicy, sweet pineapple that you nurtured from start to finish. The taste difference alone is enough to convince anyone to give this a try.
This DIY trick is a must-try for several reasons. First, it’s incredibly cost-effective. Instead of tossing the top of a pineapple, you’re essentially getting a free plant! Second, it’s a fantastic way to reduce food waste and embrace a more sustainable lifestyle. Third, it’s a captivating educational experience, especially for children, teaching them about plant life cycles and the origins of their food. Finally, and perhaps most importantly, the resulting pineapple is bursting with flavor that surpasses anything you can find in a supermarket.
But the fun doesn’t stop there! Consider experimenting with different pineapple varieties. While the Smooth Cayenne is a popular choice, you might want to try growing a Sugarloaf or a Red Spanish pineapple for a unique flavor profile. You can also explore different potting mixes to see what works best in your climate. Some gardeners swear by a mix of peat moss, perlite, and vermiculite, while others prefer a more organic approach with compost and coconut coir.
Don’t be afraid to get creative with your pineapple growing setup. If you live in a colder climate, you can easily grow your pineapple in a pot and bring it indoors during the winter months. You can even create a mini-greenhouse to provide extra warmth and humidity.
We understand that growing a pineapple from a top might seem daunting at first, but trust us, it’s easier than you think. With a little patience and the right care, you’ll be enjoying your own homegrown pineapple in no time. The key is to provide consistent warmth, adequate sunlight, and well-draining soil.
We are confident that you will find success in your pineapple growing journey. Remember, the most important ingredient is patience. It takes time for a pineapple to mature, but the reward is well worth the wait.
So, what are you waiting for? Grab a pineapple, follow our simple steps, and embark on this exciting gardening adventure. We encourage you to try this DIY trick and share your experiences with us! Post photos of your pineapple plants on social media using #HomegrownPineapple and let us know how it goes. We can’t wait to see your success stories and learn from your experiences. Happy growing!
Frequently Asked Questions (FAQ)
How long does it take to grow a pineapple from a top?
Growing a pineapple from a top requires patience. It typically takes anywhere from 2 to 3 years for a pineapple plant to mature and produce fruit. The exact timeframe depends on several factors, including the climate, the variety of pineapple, and the care provided. Don’t get discouraged if you don’t see fruit right away. The plant needs time to establish a strong root system and accumulate enough energy to produce a pineapple. Consistent watering, fertilization, and plenty of sunlight will help speed up the process.
What is the best type of pineapple to use for growing?
The Smooth Cayenne pineapple is a popular and readily available variety that works well for growing from a top. However, you can experiment with other varieties, such as Sugarloaf or Red Spanish, if you can find them. The key is to choose a healthy, ripe pineapple with a vibrant green top. Avoid pineapples with brown or wilted leaves, as these may not root properly.
How do I prepare the pineapple top for planting?
Preparing the pineapple top correctly is crucial for successful rooting. First, carefully twist or cut off the top of the pineapple, leaving about an inch of fruit attached. Remove the lower leaves from the base of the top, exposing about 1-2 inches of the stem. This will encourage root growth. Allow the top to dry for a few days to callous over the cut end. This helps prevent rot.
What kind of soil should I use for growing pineapples?
Pineapples thrive in well-draining soil that is slightly acidic. A good potting mix for pineapples consists of equal parts peat moss, perlite, and vermiculite. You can also use a mix of compost, coconut coir, and sand. Avoid heavy clay soils, as they can retain too much moisture and lead to root rot.
How often should I water my pineapple plant?
Water your pineapple plant regularly, especially during the growing season (spring and summer). Keep the soil consistently moist but not waterlogged. Allow the top inch of soil to dry out between waterings. Reduce watering during the dormant season (fall and winter).
How much sunlight does a pineapple plant need?
Pineapples need plenty of sunlight to thrive. Aim for at least 6-8 hours of direct sunlight per day. If you are growing your pineapple indoors, place it near a sunny window or supplement with a grow light.
Do I need to fertilize my pineapple plant?
Yes, fertilizing your pineapple plant is essential for healthy growth and fruit production. Use a balanced fertilizer (e.g., 10-10-10) every 2-3 months during the growing season. You can also use a liquid fertilizer diluted to half strength every 2 weeks.
How do I know when my pineapple is ripe?
A ripe pineapple will have a fragrant aroma and a slightly golden color. The eyes (the individual segments of the pineapple) will be flatter and more prominent. You can also gently tug on one of the leaves. If it comes out easily, the pineapple is likely ripe.
Can I grow a pineapple indoors?
Yes, you can grow a pineapple indoors, especially if you live in a colder climate. Choose a large pot with drainage holes and use a well-draining potting mix. Place the pot near a sunny window or supplement with a grow light. Maintain a warm temperature and provide adequate humidity.
What are some common problems when growing pineapples?
Some common problems when growing pineapples include root rot, mealybugs, and scale. Root rot can be prevented by using well-draining soil and avoiding overwatering. Mealybugs and scale can be treated with insecticidal soap or neem oil.
How can I encourage my pineapple plant to fruit?
To encourage your pineapple plant to fruit, ensure it receives plenty of sunlight, water, and fertilizer. You can also try a trick called “ethylene induction.” Place a ripe apple or banana near the plant, as these fruits release ethylene gas, which can stimulate flowering. Cover the plant and fruit with a plastic bag for a few days to concentrate the ethylene gas.
What if my pineapple plant doesn’t produce fruit after 3 years?
If your pineapple plant hasn’t produced fruit after 3 years, don’t give up hope! It may simply need more time or better growing conditions. Ensure it’s receiving enough sunlight, water, and fertilizer. You can also try the ethylene induction method mentioned above. Sometimes, a little patience and extra care are all it takes.
Is growing a pineapple from a top worth the effort?
Absolutely! While it requires patience, growing a pineapple from a top is a rewarding experience that allows you to enjoy fresh, homegrown pineapple. It’s also a sustainable and cost-effective way to add a touch of the tropics to your garden or home. The taste of a homegrown pineapple is simply unmatched!
Leave a Comment