
Spicy Chili Pepper Growing Tips are what you need to transform your garden into a fiery fiesta! Have you ever dreamed of harvesting baskets overflowing with vibrant, scorching chilies, ready to spice up your culinary creations? I know I have! For centuries, chili peppers have been more than just a food source; they’ve been woven into the cultural fabric of societies worldwide, from ancient Mesoamerica where they were first cultivated, to the bustling markets of Asia where they add a kick to countless dishes.
But let’s be honest, growing these little firecrackers can sometimes feel like a daunting task. Maybe your seedlings are struggling, or your peppers lack that intense heat you crave. That’s where these DIY tricks and hacks come in! I’m here to share my tried-and-true secrets to help you cultivate a thriving chili pepper patch, even if you’re a beginner gardener.
Why do you need these spicy chili pepper growing tips? Because store-bought chilies simply can’t compare to the flavor and satisfaction of harvesting your own. Plus, knowing exactly how your peppers were grown gives you peace of mind. Get ready to unleash your inner gardener and embark on a journey to grow the hottest, most flavorful chili peppers you’ve ever tasted! Let’s get started!
Growing Fiery Chili Peppers: A DIY Guide to a Bountiful Harvest
Okay, chili pepper enthusiasts, gather ’round! I’m going to share my secrets to growing the hottest, most flavorful chili peppers you’ve ever tasted. Whether you’re a seasoned gardener or just starting out, this guide will walk you through every step, from seed to sizzling harvest. Get ready to turn up the heat!
Choosing Your Chili Pepper Variety
First things first, let’s talk peppers! The world of chili peppers is vast and exciting. Before you even think about planting, you need to decide what kind of heat you’re craving. Here are a few popular choices, ranging from mild to scorching:
* Bell Peppers: Okay, these aren’t spicy, but they’re a great starting point for beginners and add a lovely sweetness to dishes.
* Jalapeños: A classic! These offer a manageable kick and are perfect for salsas, poppers, and pickling.
* Serranos: Stepping up the heat level, serranos are thinner and pack a punch. Use them sparingly!
* Cayenne Peppers: These slender red peppers are commonly dried and ground into powder. They’re great for adding a fiery touch to sauces and rubs.
* Habaneros: Now we’re talking serious heat! Habaneros have a fruity flavor but are intensely spicy. Handle with care!
* Scotch Bonnets: Similar to habaneros in heat and flavor, Scotch bonnets are a staple in Caribbean cuisine.
* Ghost Peppers (Bhut Jolokia): Prepare for an inferno! Ghost peppers are notoriously hot and should be used with extreme caution.
* Carolina Reapers: The reigning champion of heat! These peppers are not for the faint of heart.
Once you’ve chosen your pepper, make sure you source your seeds from a reputable supplier. Look for seeds that are specifically labeled for the variety you want and have a good germination rate.
Starting Your Chili Pepper Seeds Indoors
In most climates, starting your chili pepper seeds indoors is essential for a successful harvest. Chili peppers need a long growing season, and starting them indoors gives them a head start.
1. Gather Your Supplies:
* Seed starting trays or small pots
* Seed starting mix (a light, well-draining mix is crucial)
* Heat mat (optional, but highly recommended)
* Grow lights (essential if you don’t have a sunny windowsill)
* Spray bottle
* Labels
2. Sow Your Seeds:
* Moisten the seed starting mix thoroughly. It should be damp but not soggy.
* Fill your seed starting trays or pots with the moistened mix.
* Make a small indentation (about 1/4 inch deep) in the center of each cell or pot.
* Place 1-2 seeds in each indentation.
* Gently cover the seeds with the seed starting mix.
* Lightly mist the surface with water.
3. Provide Warmth and Light:
* Place the seed starting trays or pots on a heat mat. Chili pepper seeds germinate best at temperatures between 80-90°F (27-32°C).
* Position your grow lights about 2-4 inches above the seed starting trays or pots. If using a windowsill, choose the sunniest spot you have.
* Keep the lights on for 14-16 hours per day.
4. Maintain Moisture:
* Keep the seed starting mix consistently moist, but not waterlogged. Use a spray bottle to mist the surface as needed.
* Avoid overwatering, as this can lead to damping off, a fungal disease that can kill seedlings.
5. Be Patient:
* Chili pepper seeds can take anywhere from 7 to 21 days to germinate, depending on the variety and growing conditions.
* Once the seedlings emerge, remove the heat mat and adjust the grow lights as needed to prevent them from becoming leggy.
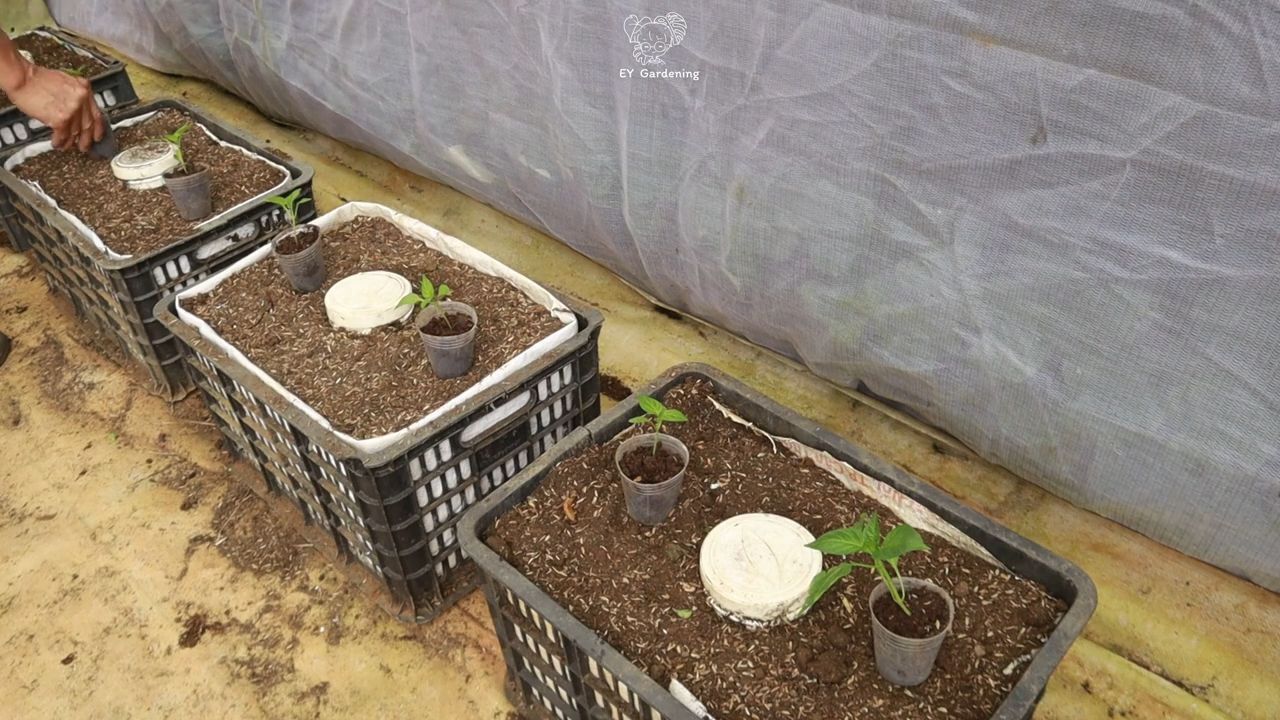
Transplanting Your Chili Pepper Seedlings
Once your chili pepper seedlings have developed a few sets of true leaves (the leaves that look like miniature versions of the adult leaves), it’s time to transplant them into larger pots.
1. Harden Off Your Seedlings:
* Before transplanting your seedlings outdoors, you need to “harden them off.” This process gradually acclimates them to the outdoor environment.
* Start by placing the seedlings outdoors in a sheltered location for 1-2 hours per day.
* Gradually increase the amount of time they spend outdoors each day, over the course of a week or two.
* Protect them from direct sunlight and strong winds during this process.
2. Choose the Right Location:
* Chili peppers need at least 6-8 hours of direct sunlight per day.
* Choose a location with well-draining soil.
* Avoid planting in areas that are prone to frost or cold drafts.
3. Prepare the Soil:
* Amend the soil with compost or other organic matter to improve drainage and fertility.
* Chili peppers prefer slightly acidic soil with a pH of 6.0-6.8.
4. Transplant Your Seedlings:
* Dig a hole that is slightly larger than the root ball of the seedling.
* Gently remove the seedling from its pot, being careful not to damage the roots.
* Place the seedling in the hole and backfill with soil.
* Water thoroughly.
5. Space Your Plants:
* Space your chili pepper plants 18-24 inches apart, depending on the variety.
* Taller varieties may need staking or caging to prevent them from falling over.
Caring for Your Chili Pepper Plants
Now that your chili pepper plants are in the ground, it’s time to provide them with the care they need to thrive.
1. Watering:
* Water your chili pepper plants regularly, especially during hot, dry weather.
* Allow the soil to dry out slightly between waterings.
* Avoid overwatering, as this can lead to root rot.
* Water deeply and thoroughly, rather than shallowly and frequently.
2. Fertilizing:
* Fertilize your chili pepper plants every 2-3 weeks with a balanced fertilizer.
* Look for a fertilizer that is specifically formulated for vegetables or tomatoes.
* Avoid over-fertilizing, as this can lead to excessive foliage growth and fewer peppers.
3. Pruning:
* Pruning your chili pepper plants can help to improve air circulation and promote fruit production.
* Remove any dead or diseased leaves or branches.
* Pinch off the tips of the branches to encourage bushier growth.
4. Pest and Disease Control:
* Keep an eye out for pests such as aphids, spider mites, and whiteflies.
* Treat infestations with insecticidal soap or neem oil.
* Prevent fungal diseases by providing good air circulation and avoiding overwatering.
* Remove any infected leaves or branches immediately.
5. Support:
* As your chili pepper plants grow, they may need support to prevent them from falling over.
* Use stakes, cages, or trellises to provide support.
Harvesting Your Chili Peppers
The moment you’ve been waiting for! Harvesting your chili peppers is the most rewarding part of the process.
1. When to Harvest:
* The best time to harvest chili peppers depends on the variety and your personal preference.
* Most chili peppers will change color as they ripen, from green to red, yellow, or orange.
* You can harvest chili peppers at any stage of ripeness, but they will be hotter and more flavorful when they are fully ripe.
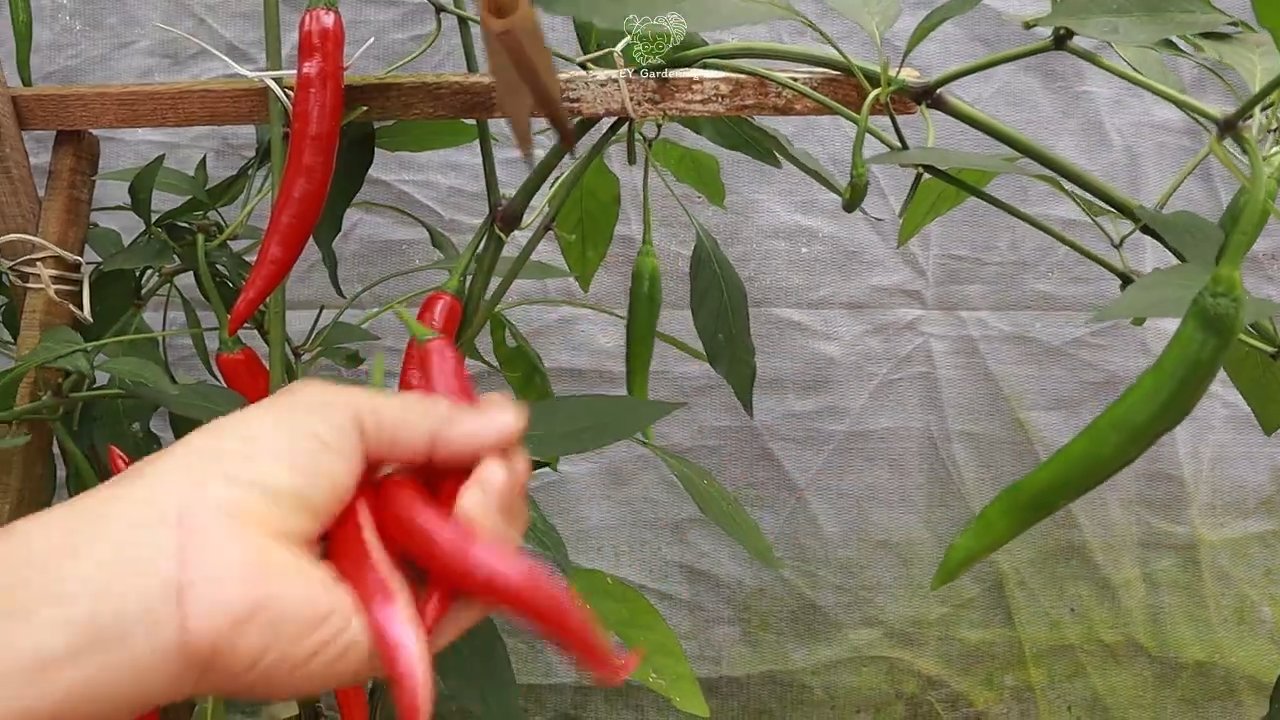
2. How to Harvest:
* Use a sharp knife or scissors to cut the chili peppers from the plant.
* Leave a small stem attached to the pepper.
* Handle hot peppers with gloves to avoid skin irritation.
3. Storing Your Chili Peppers:
* Fresh chili peppers can be stored in the refrigerator for up to a week.
* You can also dry, freeze, or pickle chili peppers for longer storage.
Troubleshooting Common Chili Pepper Problems
Even with the best care, you may encounter some problems while growing chili peppers. Here are a few common issues and how to address them:
* Blossom End Rot: This is caused by a calcium deficiency and results in a dark, sunken spot on the bottom of the pepper. To prevent blossom end rot, ensure your soil is rich in calcium and water your plants consistently.
* Sunscald: This
Conclusion
So, there you have it! Mastering the art of growing your own spicy chili peppers doesn’t have to be a daunting task. By implementing these simple yet effective DIY tricks, you’re not just growing peppers; you’re cultivating a vibrant, flavorful experience right in your backyard or even on your windowsill. The satisfaction of harvesting your own fiery bounty, knowing you nurtured it from seed to table, is truly unparalleled.
Why is this a must-try? Because store-bought chili peppers, while convenient, often lack the intense flavor and freshness that homegrown varieties possess. Plus, you have complete control over the growing process, ensuring your peppers are free from unwanted chemicals and pesticides. Imagine the burst of flavor in your homemade salsas, the added zing to your stir-fries, or the perfect kick in your chili – all thanks to your own homegrown spicy chili peppers.
But the journey doesn’t end here! Feel free to experiment with different varieties of chili peppers. From the mild jalapeño to the scorching habanero, each pepper offers a unique flavor profile and heat level. Try different soil mixtures to see what works best for your specific climate and growing conditions. Consider companion planting with herbs like basil or oregano, which can help deter pests and enhance the flavor of your peppers. You can even explore different methods of drying or preserving your peppers to enjoy their fiery goodness year-round.
Don’t be afraid to get your hands dirty and embrace the learning process. Gardening is all about experimentation and discovery. And remember, even experienced gardeners encounter challenges along the way. The key is to learn from your mistakes and keep growing!
We wholeheartedly encourage you to give these DIY tricks a try. Start small, be patient, and most importantly, have fun! We’re confident that you’ll be amazed by the results. And once you’ve harvested your first batch of homegrown spicy chili peppers, we’d love to hear about your experience. Share your tips, tricks, and photos with us in the comments below. Let’s create a community of passionate chili pepper growers and inspire others to embark on this rewarding journey. Your success story could be the inspiration someone else needs to start their own chili pepper adventure! So, get planting and get ready to spice up your life!
Frequently Asked Questions (FAQ)
What is the best time to start growing spicy chili peppers?
The ideal time to start growing spicy chili peppers depends on your climate. In warmer regions with long growing seasons, you can start seeds directly outdoors after the last frost. However, in cooler climates, it’s best to start seeds indoors 6-8 weeks before the last expected frost. This gives the seedlings a head start and ensures they have enough time to mature and produce peppers before the end of the growing season. Consider using a heat mat to help with germination, as chili peppers prefer warmer soil temperatures.
What type of soil is best for growing spicy chili peppers?
Spicy chili peppers thrive in well-draining, fertile soil with a slightly acidic to neutral pH (around 6.0-7.0). A good soil mix should consist of equal parts of potting soil, compost, and perlite or vermiculite. Compost provides essential nutrients, while perlite or vermiculite improves drainage and aeration. Avoid using heavy clay soil, as it can retain too much moisture and lead to root rot. You can also amend your soil with organic matter like aged manure or leaf mold to improve its fertility and structure.
How much sunlight do spicy chili peppers need?
Spicy chili peppers require at least 6-8 hours of direct sunlight per day to thrive. Choose a location in your garden that receives ample sunlight throughout the day. If you’re growing peppers indoors, place them near a sunny window or use grow lights to supplement natural light. Insufficient sunlight can result in leggy plants with poor fruit production. Rotate your plants regularly to ensure all sides receive adequate sunlight.
How often should I water my spicy chili peppers?
Water your spicy chili peppers regularly, especially during hot and dry weather. The soil should be consistently moist but not waterlogged. Water deeply whenever the top inch of soil feels dry to the touch. Avoid overhead watering, as it can promote fungal diseases. Instead, water at the base of the plant to keep the foliage dry. Mulching around the plants can help retain moisture and suppress weeds.
What are some common pests and diseases that affect spicy chili peppers?
Common pests that affect spicy chili peppers include aphids, spider mites, whiteflies, and pepper weevils. These pests can damage the foliage and fruits, reducing yield and quality. To control pests, you can use insecticidal soap, neem oil, or introduce beneficial insects like ladybugs. Common diseases that affect spicy chili peppers include blossom end rot, fungal leaf spots, and viral diseases. To prevent diseases, ensure good air circulation, avoid overhead watering, and use disease-resistant varieties.
How do I fertilize my spicy chili peppers?
Fertilize your spicy chili peppers regularly with a balanced fertilizer that is specifically formulated for vegetables. Apply fertilizer according to the package instructions, typically every 2-3 weeks during the growing season. Avoid over-fertilizing, as it can lead to excessive foliage growth and reduced fruit production. You can also use organic fertilizers like compost tea or fish emulsion to provide essential nutrients.
How do I know when my spicy chili peppers are ripe?
The ripeness of spicy chili peppers depends on the variety. Generally, peppers are ripe when they have reached their mature color and size. For example, jalapeños are typically ripe when they are dark green and firm, while habaneros are ripe when they are bright orange or red. You can also gently squeeze the pepper to check for firmness. Ripe peppers should be firm but not hard.
Can I grow spicy chili peppers in containers?
Yes, you can successfully grow spicy chili peppers in containers. Choose a container that is at least 12 inches in diameter and has drainage holes. Use a well-draining potting mix and provide adequate sunlight and water. Container-grown peppers may require more frequent watering and fertilization than those grown in the ground. Consider using a self-watering container to simplify watering.
How do I save seeds from my spicy chili peppers?
To save seeds from your spicy chili peppers, allow the peppers to fully ripen on the plant. Once they are ripe, carefully remove the seeds from the pepper and spread them out on a paper towel to dry. Allow the seeds to dry completely for several days before storing them in an airtight container in a cool, dark, and dry place. Label the container with the variety and date.
What are some tips for increasing the heat of my spicy chili peppers?
Several factors can influence the heat level of spicy chili peppers, including genetics, growing conditions, and stress. To increase the heat of your peppers, ensure they receive plenty of sunlight and water. Avoid over-fertilizing, as it can reduce the heat. You can also stress the plants slightly by withholding water for a few days before harvesting. Some gardeners believe that adding Epsom salts to the soil can also increase the heat of peppers. Remember that the heat level of peppers can vary depending on the specific variety and growing conditions.

Leave a Comment