
Soil Free Coriander Growing: Imagine fresh, fragrant coriander readily available, not from a grocery store shelf, but thriving right in your home, completely independent of soil! Sounds like a dream, right? Well, it’s a dream you can easily turn into reality with this simple and effective DIY guide. For centuries, humans have cultivated herbs and vegetables, initially out of necessity, but now increasingly for the joy of fresh, homegrown flavors and sustainable living.
But let’s face it, not everyone has the space or the ideal soil conditions for a traditional garden. That’s where this amazing trick comes in! This method of soil free coriander growing is perfect for apartment dwellers, busy individuals, or anyone looking for a low-maintenance way to enjoy this popular herb. We’ll walk you through each step, ensuring you have a flourishing coriander crop in no time.
Why is this DIY trick so essential? Because fresh coriander elevates countless dishes, from zesty salsas to flavorful curries. Plus, growing your own reduces your reliance on store-bought herbs, which can be expensive and often lack the vibrant flavor of freshly harvested ones. Get ready to unlock the secrets to effortless, soil-free coriander cultivation and bring a burst of freshness to your kitchen!
Growing Coriander Without Soil: A DIY Hydroponic Adventure!
Hey there, fellow plant enthusiasts! Ever dreamt of having fresh coriander (cilantro for my American friends!) right at your fingertips, without the mess of soil? Well, you’re in the right place! I’m going to walk you through a super fun and surprisingly easy DIY hydroponic setup specifically for growing coriander. Trust me, it’s a game-changer.
This project is perfect for anyone with limited space, a desire to experiment, or just a general dislike of getting their hands dirty (though, let’s be honest, a little dirt never hurt anyone!). We’ll be using a simple Kratky method, which is a passive hydroponic system – meaning no pumps or electricity needed after the initial setup. How cool is that?
What You’ll Need: The Supply List
Before we dive in, let’s gather our supplies. Don’t worry, most of these are readily available and won’t break the bank.
* A Container: This will be our reservoir. I recommend a dark-colored, opaque container (like a black bucket or a dark storage bin) to prevent algae growth. The size depends on how much coriander you want to grow. A 5-gallon bucket is a good starting point.
* Net Cups: These will hold our coriander seedlings. You can find these online or at most hydroponics stores. 2-inch net cups are a good size.
* Hydroponic Growing Medium: We need something to support the seedlings in the net cups. Coco coir, rockwool cubes, or even clay pebbles (LECA) work great. I personally prefer coco coir for coriander.
* Hydroponic Nutrients: This is crucial! Coriander needs specific nutrients to thrive. Look for a balanced hydroponic nutrient solution formulated for leafy greens. Follow the instructions on the bottle carefully.
* Coriander Seeds: Obviously! Choose a variety that you like.
* Rockwool Starter Plugs (Optional but Recommended): These are fantastic for starting seeds. They provide a sterile and consistent environment for germination.
* pH Testing Kit (Optional but Recommended): Maintaining the correct pH is important for nutrient absorption. A simple pH testing kit will help you keep things in check.
* Measuring Cups and Spoons: For accurately measuring water and nutrients.
* Drill with Hole Saw Attachment (Sized to fit your net cups): To create holes in the lid of your container.
* Lid for your Container: This will hold the net cups.
* Water: Tap water is usually fine, but let it sit out for 24 hours to allow chlorine to evaporate.
* Spray Bottle: For misting seedlings.
* Grow Light (Optional): If you don’t have a sunny spot, a grow light will be essential.
Phase 1: Seed Starting – Getting Those Little Guys Going
This is where the magic begins! We need to germinate our coriander seeds before we can move them to the hydroponic system.
1. Soaking the Seeds (Optional but Recommended): Some people find that soaking coriander seeds in water for 24 hours before planting helps with germination. I’ve had success both with and without soaking, so it’s up to you.
2. Preparing the Rockwool Plugs (If Using): If you’re using rockwool plugs, soak them in water for a few minutes until they’re fully saturated. Gently squeeze out any excess water.
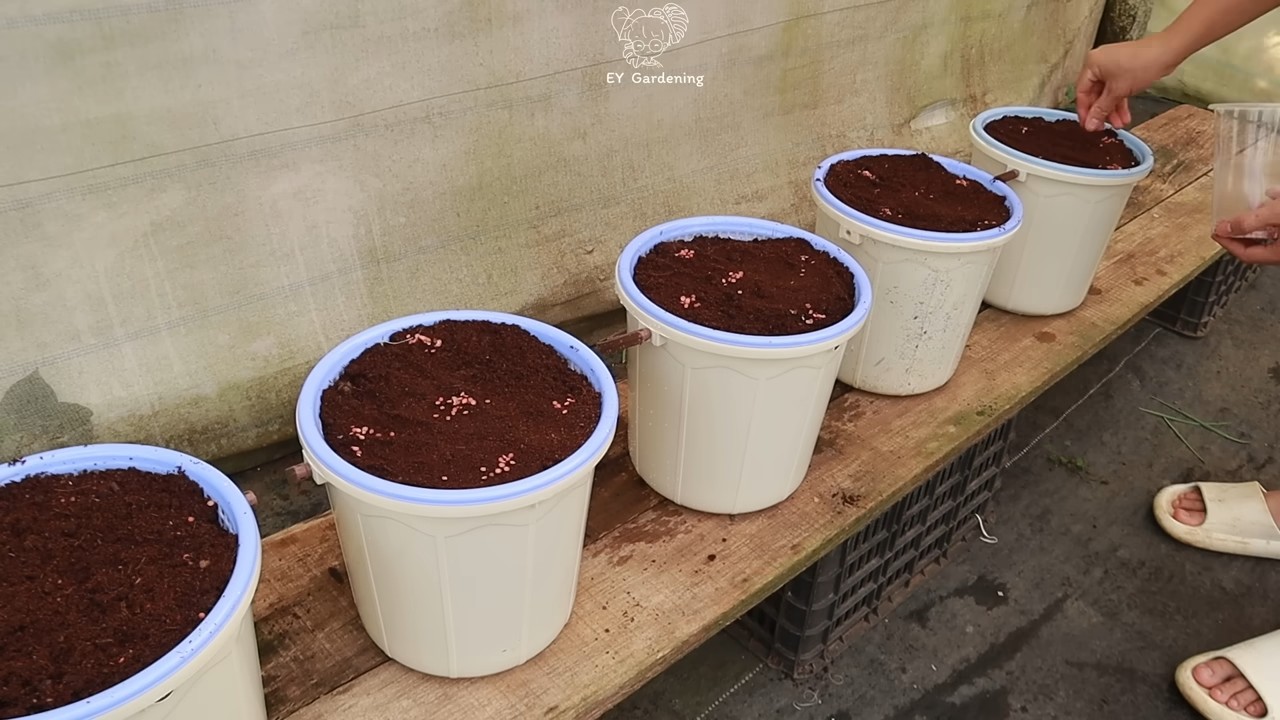
3. Planting the Seeds: Place 2-3 coriander seeds in each rockwool plug (or directly into your chosen growing medium if you’re skipping the rockwool). Gently cover the seeds with a thin layer of the growing medium.
4. Creating a Humid Environment: Place the rockwool plugs (or your seed-filled growing medium) in a tray or container with a lid. This will help maintain humidity and encourage germination. You can also use a plastic bag to cover the tray.
5. Misting Regularly: Keep the growing medium moist by misting it with water 1-2 times a day.
6. Providing Light: Place the tray in a warm, bright location. If you don’t have a sunny spot, use a grow light.
7. Waiting for Germination: Coriander seeds typically germinate in 7-14 days. Be patient!
Phase 2: Preparing the Hydroponic System – Building Our Soil-Free Oasis
While the seeds are germinating, let’s get our hydroponic system ready.
1. Drilling the Holes: Take the lid of your container and use the hole saw attachment to drill holes that are slightly smaller than the diameter of your net cups. You want the net cups to fit snugly in the holes. Space the holes evenly across the lid, allowing enough room for the coriander plants to grow.
2. Cleaning the Container and Lid: Thoroughly clean the container and lid with soap and water to remove any dirt or debris. Rinse well.
3. Mixing the Nutrient Solution: Fill the container with water, leaving a few inches of space at the top. Add the hydroponic nutrient solution according to the instructions on the bottle. This is important: Don’t overdo it! Too much nutrient solution can harm your plants.
4. Checking the pH (Optional but Recommended): Use your pH testing kit to check the pH of the nutrient solution. Coriander prefers a pH between 6.0 and 6.5. If the pH is too high, add a pH-down solution. If it’s too low, add a pH-up solution. You can find these solutions at most hydroponics stores.
5. Placing the Lid on the Container: Carefully place the lid on the container.
Phase 3: Transplanting and Growing – Watching the Magic Happen
Once your coriander seedlings have developed a few true leaves (the leaves that look like miniature versions of adult coriander leaves), it’s time to transplant them to the hydroponic system.
1. Gently Removing the Seedlings: Carefully remove the seedlings from the rockwool plugs (or your chosen growing medium). If the roots are tangled, gently tease them apart.
2. Placing the Seedlings in the Net Cups: Place each seedling in a net cup, surrounding the roots with your chosen hydroponic growing medium (coco coir, rockwool, or clay pebbles). Make sure the roots are well-supported.
3. Inserting the Net Cups into the Lid: Insert the net cups into the holes in the lid of the container. The bottom of the net cups should be submerged in the nutrient solution.
4. Providing Light: Place the hydroponic system in a sunny location or under a grow light. Coriander needs at least 6 hours of light per day.
5. Monitoring the Water Level: Check the water level in the container regularly. As the plants grow, they will absorb water. Add more nutrient solution as needed, maintaining the correct concentration.
6. Maintaining the pH (Optional but Recommended): Check the pH of the nutrient solution every few days and adjust as needed.
7. Providing Air Circulation: Good air circulation is important to prevent fungal diseases. If you’re growing indoors, consider using a small fan to circulate the air.
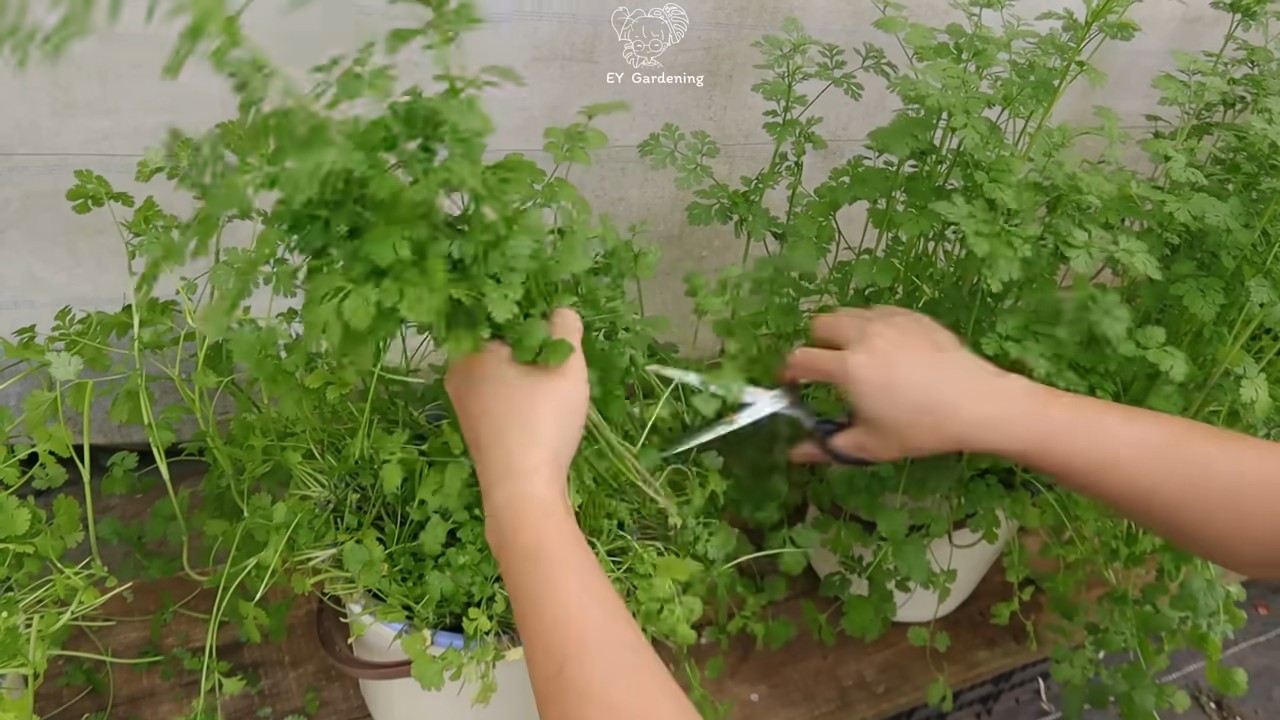
8. Harvesting: You can start harvesting coriander leaves when the plants are about 4-6 inches tall. Simply snip off the leaves as needed. The more you harvest, the more the plants will produce!
Troubleshooting Tips: Keeping Your Coriander Happy
Even with the best setup, you might encounter a few challenges along the way. Here are some common problems and how to fix them:
* Yellowing Leaves: This could be a sign of nutrient deficiency. Make sure you’re using a balanced hydroponic nutrient solution and following the instructions on the bottle. It could also be a sign of overwatering, although that’s less likely in a Kratky system.
* Slow Growth: This could be due to insufficient light, incorrect pH, or nutrient deficiency. Make sure your plants are getting enough light, the pH is within the correct range, and you’re using a balanced nutrient solution.
* Algae Growth: Algae can grow in the nutrient solution if it’s exposed to light. Use a dark-colored, opaque container to prevent algae growth. You can also add a small amount of hydrogen peroxide to the nutrient solution to kill algae.
* Root Rot: This is a fungal disease that can cause the roots to rot. It’s usually caused by poor air circulation or overwatering. Make sure your plants have good air circulation and avoid overwatering. If you suspect root rot, remove the affected plants and replace the nutrient solution.
Extra Tips for Coriander Success: Going the Extra Mile
* Successive Planting: To ensure a continuous supply of coriander, start new seeds every few weeks.
* Bolting: Coriander is prone to bolting (going to seed) in hot weather. If you live in a hot
Conclusion
So, there you have it! Growing coriander without soil might sound like a futuristic gardening experiment, but it’s surprisingly simple, incredibly rewarding, and a fantastic way to ensure you always have fresh herbs on hand. This method bypasses many of the common pitfalls associated with traditional coriander cultivation, such as soilborne diseases, inconsistent watering, and nutrient deficiencies. You’re essentially creating a controlled environment where the coriander can thrive, focusing its energy on producing those flavorful leaves we all crave.
Why is this DIY trick a must-try? Because it’s a game-changer for anyone who’s struggled to grow coriander successfully in the past. It’s also perfect for urban dwellers with limited space, as it requires minimal equipment and can be easily adapted to fit any windowsill or countertop. Imagine the satisfaction of snipping fresh coriander leaves right before adding them to your favorite dishes – the aroma alone is worth the effort!
But the benefits extend beyond convenience and ease. Soil-free growing, particularly hydroponics, often results in faster growth rates and higher yields compared to traditional soil-based methods. This is because the plants have direct access to the nutrients they need, eliminating the need to search for them in the soil. Plus, you’re reducing your environmental impact by minimizing water usage and eliminating the need for pesticides and herbicides.
Ready to take your coriander game to the next level? Here are a few suggestions and variations to consider:
* Experiment with different nutrient solutions: While a basic hydroponic nutrient solution will work wonders, you can explore different formulations to see which one yields the best results for your specific growing conditions. Look for solutions specifically designed for leafy greens or herbs.
* Try different growing mediums: While the instructions focus on water, you can experiment with other inert growing mediums like perlite, vermiculite, or coco coir. These mediums provide additional support for the roots and can improve aeration.
* Consider adding an air pump and air stone: This will oxygenate the water, further promoting root growth and preventing algae buildup.
* Vary the lighting: While natural sunlight is ideal, you can supplement with grow lights, especially during the winter months or in areas with limited sunlight. LED grow lights are energy-efficient and provide the full spectrum of light that plants need to thrive.
* Successive Planting: Plant new seeds every few weeks to ensure a continuous supply of fresh coriander. This way, you’ll always have a batch ready to harvest.
Don’t be afraid to get creative and adapt this method to suit your own needs and preferences. The beauty of DIY is that you can customize it to your heart’s content.
We’re confident that you’ll be amazed by the results of growing coriander without soil. It’s a simple, effective, and rewarding way to enjoy fresh herbs year-round. So, gather your supplies, follow the steps, and prepare to be amazed.
We encourage you to try this DIY trick and share your experience with us! Let us know how it goes, what variations you tried, and any tips or tricks you discovered along the way. Your feedback will help us improve this guide and inspire others to give soil-free coriander growing a try. Share your photos and stories on social media using #SoilFreeCoriander and let’s create a community of happy, herb-loving gardeners! Happy growing!
Frequently Asked Questions (FAQ)
What exactly is soil-free coriander growing, and why should I try it?
Soil-free coriander growing, often referred to as hydroponics, is a method of cultivating coriander plants without using traditional soil. Instead, the roots are suspended in water or an inert medium and provided with a nutrient-rich solution. You should try it because it offers several advantages: faster growth, higher yields, reduced risk of soilborne diseases, less water usage, and the convenience of growing herbs indoors, regardless of space constraints. It’s a fantastic way to have fresh coriander readily available, even if you have a “brown thumb” when it comes to traditional gardening.
What kind of nutrient solution do I need for growing coriander without soil?
You’ll need a hydroponic nutrient solution specifically formulated for leafy greens or herbs. These solutions contain the essential macronutrients (nitrogen, phosphorus, potassium) and micronutrients (iron, manganese, zinc, etc.) that coriander plants need to thrive. You can find these solutions at most garden centers or online retailers. Follow the instructions on the nutrient solution label carefully, as the concentration needs to be precise to avoid nutrient deficiencies or toxicities. Start with a diluted solution and gradually increase the concentration as the plants grow.
How often should I change the nutrient solution?
The frequency of changing the nutrient solution depends on several factors, including the size of your container, the number of plants, and the temperature. As a general rule, you should change the solution every 1-2 weeks. However, it’s important to monitor the solution regularly and change it more frequently if it becomes cloudy, discolored, or develops an unpleasant odor. Algae growth can also indicate that it’s time for a change. Regularly topping off the water level with fresh water is also important.
What kind of lighting is best for soil-free coriander growing?
Coriander needs adequate light to grow properly. Natural sunlight is ideal, but if you don’t have access to a sunny windowsill, you can use grow lights. LED grow lights are a great option because they are energy-efficient and provide the full spectrum of light that plants need. Aim for at least 6-8 hours of light per day. If you’re using grow lights, position them about 6-12 inches above the plants.
How long does it take for coriander to grow using this method?
One of the biggest advantages of soil-free growing is the faster growth rate. You can typically expect to harvest your first coriander leaves within 3-4 weeks of planting the seeds. This is significantly faster than traditional soil-based methods, which can take 6-8 weeks. The exact time will depend on factors such as temperature, lighting, and nutrient availability.
Can I use seeds from store-bought coriander for this method?
While you can technically try using seeds from store-bought coriander, the germination rate may be lower compared to using seeds specifically intended for planting. Store-bought coriander seeds may have been treated or processed in a way that reduces their viability. For best results, purchase seeds from a reputable seed supplier.
What are some common problems I might encounter, and how can I fix them?
Some common problems you might encounter include:
* Nutrient deficiencies: Yellowing leaves can indicate a nutrient deficiency. Make sure you’re using a balanced hydroponic nutrient solution and following the instructions carefully.
* Algae growth: Algae can compete with the coriander plants for nutrients and oxygen. To prevent algae growth, keep the container clean, use an opaque container to block out light, and consider adding an air pump and air stone to oxygenate the water.
* Root rot: Root rot is caused by anaerobic conditions (lack of oxygen) in the water. To prevent root rot, ensure that the water is well-oxygenated by using an air pump and air stone.
* Pests: While soil-free growing reduces the risk of soilborne pests, you may still encounter pests like aphids or spider mites. Inspect your plants regularly and treat any infestations promptly with insecticidal soap or neem oil.
Is it possible to grow other herbs using this soil-free method?
Absolutely! This method is well-suited for growing a variety of herbs, including basil, mint, parsley, chives, and lettuce. The principles are the same – provide the plants with a nutrient-rich solution and adequate light. You may need to adjust the nutrient solution and lighting based on the specific needs of each herb.
How do I harvest the coriander leaves?
Harvesting coriander leaves is simple. Just snip off the outer leaves with scissors or pruning shears, leaving the inner leaves to continue growing. Avoid cutting off more than one-third of the plant at a time, as this can stress the plant and slow down growth. Harvest regularly to encourage bushier growth.
Can I reuse the nutrient solution?
While you can technically reuse the nutrient solution, it’s generally recommended to change it regularly to prevent the buildup of salts and other impurities. If you choose to reuse the solution, monitor it closely and adjust the pH and nutrient levels as needed. It’s also important to filter the solution to remove any debris. However, for best results, it’s generally better to start with a fresh solution each time.
Leave a Comment