
Grow Cantaloupe at Home and savor the sweet taste of summer right from your own backyard! Imagine biting into a juicy, perfectly ripe cantaloupe that you nurtured from seed to fruit. Sounds amazing, right? This isn’t just a pipe dream; it’s an achievable reality with a few simple tricks and DIY techniques. For centuries, cultivating melons has been a cherished practice, dating back to ancient Egypt and finding its way into royal gardens across the globe. Today, you don’t need to be royalty to enjoy this delicious fruit.
But why bother with the effort when you can just buy one at the store? Well, store-bought cantaloupes often lack the intense flavor and sweetness of homegrown varieties. Plus, there’s immense satisfaction in knowing exactly where your food comes from and that it’s free from harmful pesticides. Many people struggle with successfully grow cantaloupe at home because they don’t know the specific needs of this sun-loving fruit. That’s where this DIY guide comes in! I’m going to share my tried-and-true methods for creating the perfect growing environment, preventing common problems, and harvesting the sweetest, most flavorful cantaloupes you’ve ever tasted. Get ready to roll up your sleeves and transform your garden into a cantaloupe paradise!
Grow Delicious Cantaloupe at Home: A DIY Guide
Hey there, fellow gardening enthusiasts! I’m so excited to share my tried-and-true method for growing juicy, sweet cantaloupe right in your own backyard. Forget those bland, store-bought melons – nothing beats the flavor of a homegrown cantaloupe, ripened to perfection under the sun. This guide will walk you through every step, from seed to harvest, ensuring you have a bountiful cantaloupe crop. Let’s get started!
Choosing the Right Cantaloupe Variety
Before we dive into the nitty-gritty, let’s talk about choosing the right cantaloupe variety for your garden. Different varieties have different characteristics, such as size, sweetness, disease resistance, and days to maturity. Consider your local climate and growing season when making your selection. Here are a few of my favorites:
* ‘Hales Best Jumbo’: A classic choice, known for its reliable yields and excellent flavor. It matures in about 85 days.
* ‘Athena’: A popular hybrid variety that’s resistant to powdery mildew and other common cantaloupe diseases. It matures in around 75 days.
* ‘Ambrosia’: This variety is prized for its exceptionally sweet and aromatic flesh. It matures in approximately 86 days.
* ‘Minnesota Midget’: If you have limited space, this compact variety is a great option. It produces small, personal-sized melons in about 60-70 days.
Preparing Your Garden for Cantaloupe
Cantaloupes are sun-loving, heat-loving plants, so choosing the right location and preparing the soil are crucial for success.
* Sunlight: Cantaloupes need at least 6-8 hours of direct sunlight per day. Choose a spot in your garden that gets plenty of sunshine throughout the growing season.
* Soil: Cantaloupes thrive in well-drained, fertile soil with a pH between 6.0 and 6.8. Amend your soil with compost or well-rotted manure to improve drainage and fertility.
* Space: Cantaloupe vines can spread quite a bit, so give them plenty of room to grow. Space plants at least 2-3 feet apart in rows that are 4-6 feet apart.
Starting Cantaloupe Seeds
You can either start cantaloupe seeds indoors or direct sow them in your garden. Starting seeds indoors gives you a head start on the growing season, especially in cooler climates.
Starting Seeds Indoors:
1. Timing: Start seeds indoors about 4-6 weeks before the last expected frost in your area.
2. Containers: Use seed starting trays or small pots filled with a seed starting mix.
3. Sowing: Sow seeds about ½ inch deep and gently water them.
4. Warmth: Keep the soil consistently moist and warm (around 70-80°F). Use a heat mat to speed up germination.
5. Light: Once the seedlings emerge, provide them with plenty of light. Place them under grow lights or in a sunny window.
6. Hardening Off: Before transplanting the seedlings outdoors, gradually acclimate them to outdoor conditions by hardening them off. This involves exposing them to increasing amounts of sunlight and wind over a period of 7-10 days.
Direct Sowing Seeds:
1. Timing: Direct sow seeds after the last expected frost, when the soil has warmed to at least 65°F.
2. Preparation: Prepare the soil by tilling or turning it over and amending it with compost or manure.
3. Sowing: Sow seeds about ½ inch deep and space them according to the recommended spacing for your chosen variety.
4. Watering: Water the seeds gently but thoroughly.
5. Thinning: Once the seedlings emerge, thin them to the strongest plant per hill.
Transplanting Cantaloupe Seedlings
If you started your cantaloupe seeds indoors, it’s time to transplant them into your garden.
1. Timing: Transplant seedlings after the last expected frost, when the soil has warmed to at least 65°F.
2. Preparation: Dig holes that are slightly larger than the root balls of the seedlings.
3. Planting: Gently remove the seedlings from their containers and place them in the holes.
4. Backfilling: Backfill the holes with soil and gently firm the soil around the base of the plants.
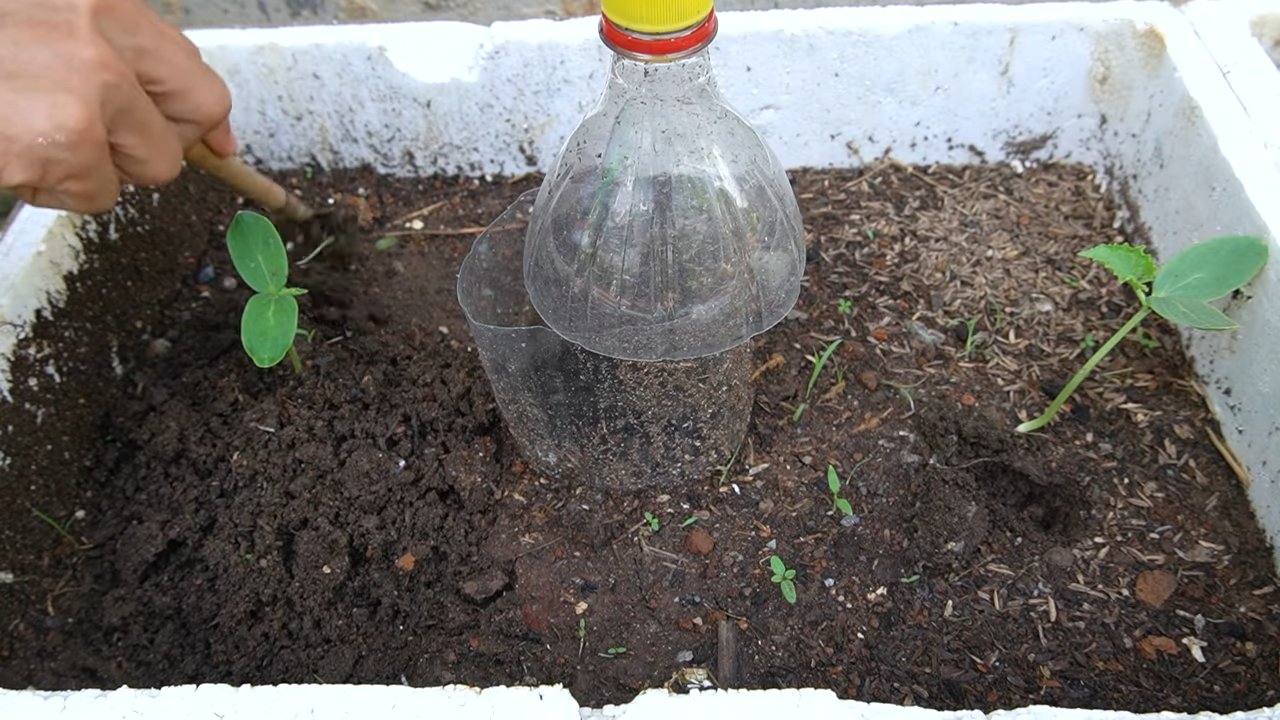
5. Watering: Water the seedlings thoroughly after transplanting.
6. Mulching: Apply a layer of mulch around the plants to help retain moisture, suppress weeds, and regulate soil temperature. I like to use straw or shredded leaves.
Caring for Your Cantaloupe Plants
Once your cantaloupe plants are established, it’s important to provide them with proper care to ensure a healthy and productive harvest.
* Watering: Cantaloupes need consistent moisture, especially during fruit development. Water deeply and regularly, especially during dry spells. Avoid overhead watering, which can lead to fungal diseases. Drip irrigation is an excellent option.
* Fertilizing: Fertilize cantaloupe plants with a balanced fertilizer every 2-3 weeks. You can also side-dress them with compost or manure.
* Weeding: Keep the area around your cantaloupe plants free of weeds. Weeds compete with cantaloupes for water and nutrients.
* Pest and Disease Control: Monitor your cantaloupe plants regularly for pests and diseases. Common pests include aphids, squash bugs, and cucumber beetles. Common diseases include powdery mildew and fusarium wilt. Use organic pest control methods whenever possible. I’ve had good luck with insecticidal soap for aphids and neem oil for fungal diseases.
* Pruning: While not strictly necessary, pruning cantaloupe vines can improve air circulation and fruit production. Remove any dead or diseased leaves and stems. You can also pinch off the tips of the
Hey there, fellow gardening enthusiasts! I’m so excited to share my tried-and-true method for growing juicy, sweet cantaloupe right in your own backyard. Forget those bland, store-bought melons – nothing beats the flavor of a homegrown cantaloupe, ripened to perfection under the sun. This guide will walk you through every step, from seed to harvest, ensuring you have a bountiful cantaloupe crop. Let’s get started!
Choosing the Right Cantaloupe Variety
Before we dive into the nitty-gritty, let’s talk about choosing the right cantaloupe variety for your garden. Different varieties have different characteristics, such as size, sweetness, disease resistance, and days to maturity. Consider your local climate and growing season when making your selection. Here are a few of my favorites:
* ‘Hales Best Jumbo’: A classic choice, known for its reliable yields and excellent flavor. It matures in about 85 days.
* ‘Athena’: A popular hybrid variety that’s resistant to powdery mildew and other common cantaloupe diseases. It matures in around 75 days.
* ‘Ambrosia’: This variety is prized for its exceptionally sweet and aromatic flesh. It matures in approximately 86 days.
* ‘Minnesota Midget’: If you have limited space, this compact variety is a great option. It produces small, personal-sized melons in about 60-70 days.
Preparing Your Garden for Cantaloupe
Cantaloupes are sun-loving, heat-loving plants, so choosing the right location and preparing the soil are crucial for success.
* Sunlight: Cantaloupes need at least 6-8 hours of direct sunlight per day. Choose a spot in your garden that gets plenty of sunshine throughout the growing season.
* Soil: Cantaloupes thrive in well-drained, fertile soil with a pH between 6.0 and 6.8. Amend your soil with compost or well-rotted manure to improve drainage and fertility.
* Space: Cantaloupe vines can spread quite a bit, so give them plenty of room to grow. Space plants at least 2-3 feet apart in rows that are 4-6 feet apart.
Starting Cantaloupe Seeds
You can either start cantaloupe seeds indoors or direct sow them in your garden. Starting seeds indoors gives you a head start on the growing season, especially in cooler climates.
Starting Seeds Indoors:
1. Timing: Start seeds indoors about 4-6 weeks before the last expected frost in your area.
2. Containers: Use seed starting trays or small pots filled with a seed starting mix.
3. Sowing: Sow seeds about ½ inch deep and gently water them.
4. Warmth: Keep the soil consistently moist and warm (around 70-80°F). Use a heat mat to speed up germination.
5. Light: Once the seedlings emerge, provide them with plenty of light. Place them under grow lights or in a sunny window.
6. Hardening Off: Before transplanting the seedlings outdoors, gradually acclimate them to outdoor conditions by hardening them off. This involves exposing them to increasing amounts of sunlight and wind over a period of 7-10 days.
Direct Sowing Seeds:
1. Timing: Direct sow seeds after the last expected frost, when the soil has warmed to at least 65°F.
2. Preparation: Prepare the soil by tilling or turning it over and amending it with compost or manure.
3. Sowing: Sow seeds about ½ inch deep and space them according to the recommended spacing for your chosen variety.
4. Watering: Water the seeds gently but thoroughly.
5. Thinning: Once the seedlings emerge, thin them to the strongest plant per hill.
Transplanting Cantaloupe Seedlings
If you started your cantaloupe seeds indoors, it’s time to transplant them into your garden.
1. Timing: Transplant seedlings after the last expected frost, when the soil has warmed to at least 65°F.
2. Preparation: Dig holes that are slightly larger than the root balls of the seedlings.
3. Planting: Gently remove the seedlings from their containers and place them in the holes.
4. Backfilling: Backfill the holes with soil and gently firm the soil around the base of the plants.
5. Watering: Water the seedlings thoroughly after transplanting.
6. Mulching: Apply a layer of mulch around the plants to help retain moisture, suppress weeds, and regulate soil temperature. I like to use straw or shredded leaves.
Caring for Your Cantaloupe Plants
Once your cantaloupe plants are established, it’s important to provide them with proper care to ensure a healthy and productive harvest.
* Watering: Cantaloupes need consistent moisture, especially during fruit development. Water deeply and regularly, especially during dry spells. Avoid overhead watering, which can lead to fungal diseases. Drip irrigation is an excellent option.
* Fertilizing: Fertilize cantaloupe plants with a balanced fertilizer every 2-3 weeks. You can also side-dress them with compost or manure.
* Weeding: Keep the area around your cantaloupe plants free of weeds. Weeds compete with cantaloupes for water and nutrients.
* Pest and Disease Control: Monitor your cantaloupe plants regularly for pests and diseases. Common pests include aphids, squash bugs, and cucumber beetles. Common diseases include powdery mildew and fusarium wilt. Use organic pest control methods whenever possible. I’ve had good luck with insecticidal soap for aphids and neem oil for fungal diseases.
* Pruning: While not strictly necessary, pruning cantaloupe vines can improve air circulation and fruit production. Remove any dead or diseased leaves and stems. You can also pinch off the tips of the vines to encourage branching.
Supporting Your Cantaloupe Plants
As the cantaloupes grow larger, they may need support to prevent them from rotting on the ground.
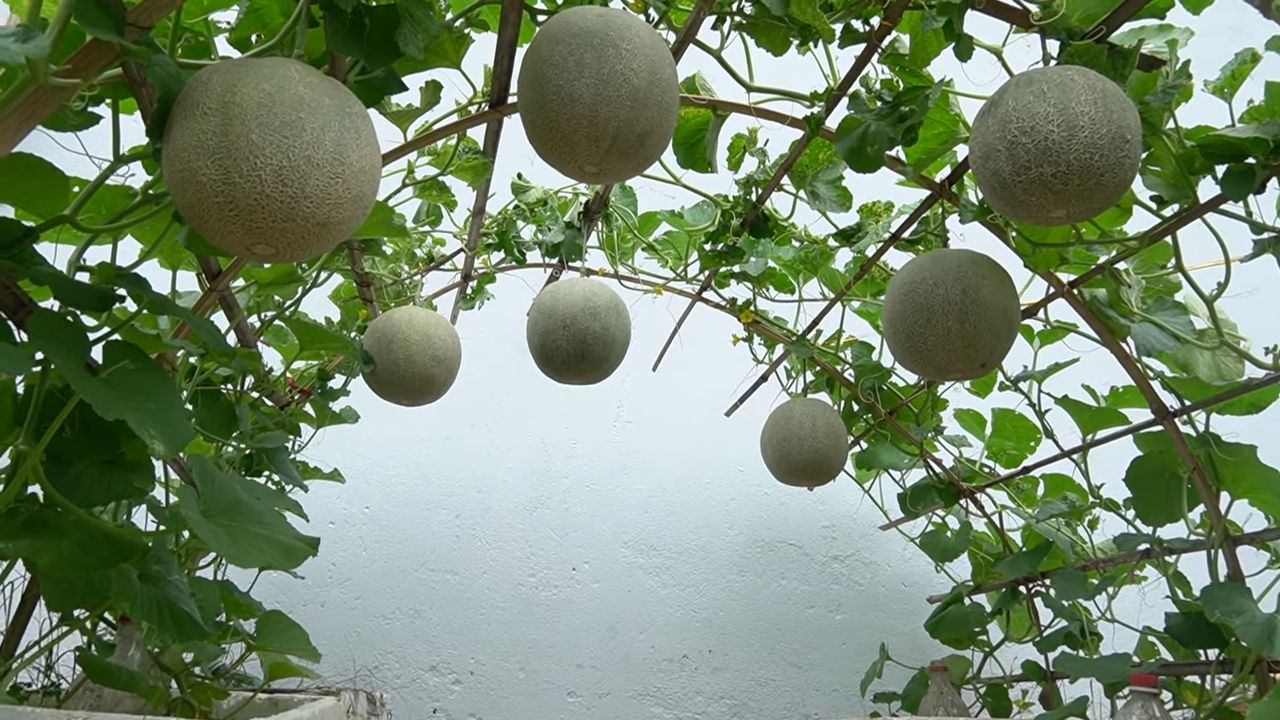
* Trellising: If you’re growing cantaloupes in a small space, you can train them to grow on a trellis. This will also improve air circulation and reduce the risk of disease.
* Cradling: For larger cantaloupes, you can place them on cradles made of straw, wood, or plastic. This will keep them off the ground and prevent them from rotting. I’ve even used old pantyhose to create slings for the melons!
Harvesting Your Cantaloupe
Knowing when to harvest your cantaloupe is key to enjoying its sweet, juicy flavor.
* Timing: Cantaloupes are typically ready to harvest 75-90 days after planting, depending on the variety.
* Indicators: Look for these signs of ripeness:
* The skin turns from green to tan or yellow.
* The netting on the skin becomes more prominent and raised.
* The stem begins to crack or slip away from the fruit.
* The melon has a sweet aroma.
* Harvesting: Gently twist the cantaloupe from the vine. If it’s ripe, it should easily detach.
Enjoying Your Homegrown Cantaloupe
Congratulations! You’ve successfully grown your own cantaloupe. Now it’s time to enjoy the fruits (or rather, melons) of your labor.
* Storage: Store ripe cantaloupes in the refrigerator for up to a week.
* Serving: Cantaloupe is delicious eaten fresh, sliced, or cubed. You can also add it to smoothies, salads, or desserts.
* Seed Saving: If you want to grow cantaloupe again next year, you can save the seeds from your best melons. Scoop out the seeds, rinse them thoroughly, and dry them on a paper towel. Store the dried seeds in an airtight container in a cool, dark place.
Troubleshooting Common Cantaloupe Problems
Even with the best care, you may encounter some problems when growing cantaloupe. Here are a few common issues and how to address them:
* Poor Germination: If your cantaloupe seeds aren’t germinating, make sure the soil is warm enough and consistently moist. You can also try scarifying the seeds by gently rubbing them with sandpaper before planting.
* Powdery Mildew: This fungal disease can cause a white, powdery coating on the leaves of your cantaloupe plants. Improve air circulation by pruning the vines and apply a fungicide if necessary.
* Squash Bugs: These pests can damage cantaloupe plants by sucking the sap from the leaves. Handpick the bugs off the plants or use insecticidal soap.
* Lack of Fruit Set: If your cantaloupe plants are producing flowers but not
Conclusion
So, there you have it! Growing cantaloupe at home, while it might seem daunting at first, is entirely achievable with a little planning, patience, and the right techniques. We’ve walked you through the entire process, from selecting the perfect seeds to harvesting your own sweet, juicy melons. But why should you even bother? Why not just grab one from the grocery store?
The answer is simple: flavor and satisfaction. Commercially grown cantaloupes are often picked before they’re fully ripe to withstand shipping and storage. This means they lack the intense sweetness and aroma of a vine-ripened melon. When you grow your own cantaloupe, you get to experience the true taste of summer, a flavor explosion that store-bought melons simply can’t match. Plus, there’s an undeniable sense of accomplishment that comes with nurturing a plant from seed to harvest.
Beyond the superior flavor, growing your own cantaloupe allows you to control the growing environment and ensure that your melons are free from harmful pesticides and chemicals. You know exactly what went into your food, and that peace of mind is priceless.
But don’t stop there! Experiment with different varieties of cantaloupe to find your favorite. Try growing Charentais melons for their intensely aromatic flesh, or honeydew melons alongside your cantaloupes for a diverse harvest. Consider using companion planting techniques to deter pests and attract beneficial insects. Marigolds, for example, are known to repel nematodes, while basil can help deter aphids.
For those with limited space, consider growing cantaloupe vertically on a trellis. This not only saves space but also improves air circulation, reducing the risk of fungal diseases. Just be sure to provide adequate support for the heavy melons as they develop. You can use slings made from pantyhose or netting to cradle the fruit and prevent them from breaking off the vine.
Another variation to explore is growing cantaloupe in containers. Choose a large container (at least 20 gallons) with good drainage and use a high-quality potting mix. Container-grown cantaloupes may require more frequent watering and fertilization, but they can be a great option for those with balconies or patios.
Ready to embark on your cantaloupe-growing adventure? We encourage you to give it a try! Don’t be afraid to experiment and learn from your mistakes. Gardening is a journey, and every season brings new challenges and rewards.
And most importantly, share your experiences with us! We’d love to hear about your successes, your failures, and any tips or tricks you’ve discovered along the way. Post photos of your cantaloupe plants, share your favorite recipes using homegrown cantaloupe, and let us know what varieties you’ve had the most success with. Together, we can create a community of cantaloupe enthusiasts and help each other grow the best melons possible. So, get out there, get your hands dirty, and start growing cantaloupe at home today! You won’t regret it.
Frequently Asked Questions (FAQ)
1. What is the best time to start growing cantaloupe from seed?
The ideal time to start growing cantaloupe from seed depends on your local climate. Cantaloupes are warm-weather crops and require a long growing season of at least 80-90 days. In general, you should start seeds indoors about 3-4 weeks before the last expected frost. This gives the seedlings a head start and allows them to establish a strong root system before being transplanted outdoors. If you live in a warmer climate with a longer growing season, you can direct sow seeds in the garden once the soil temperature reaches at least 65°F (18°C).
2. How much sunlight do cantaloupe plants need?
Cantaloupe plants need at least 6-8 hours of direct sunlight per day to thrive. Choose a sunny location in your garden where the plants will receive ample sunlight throughout the day. Insufficient sunlight can lead to weak growth, poor fruit production, and bland-tasting melons. If you’re growing cantaloupe in containers, make sure to place them in a sunny spot on your patio or balcony.
3. What type of soil is best for growing cantaloupe?
Cantaloupe plants prefer well-drained, fertile soil that is rich in organic matter. The ideal soil pH is between 6.0 and 6.8. Before planting, amend the soil with compost, aged manure, or other organic materials to improve drainage and fertility. Avoid heavy clay soils, as they can become waterlogged and inhibit root growth. If you have clay soil, consider growing cantaloupe in raised beds or containers.
4. How often should I water my cantaloupe plants?
Cantaloupe plants need consistent moisture, especially during fruit development. Water deeply and regularly, aiming to keep the soil consistently moist but not waterlogged. Water at the base of the plants to avoid wetting the foliage, which can increase the risk of fungal diseases. During hot, dry weather, you may need to water daily. As the fruits ripen, reduce watering slightly to concentrate the sugars and improve flavor.
5. What are some common pests and diseases that affect cantaloupe plants?
Cantaloupe plants can be susceptible to a variety of pests and diseases, including aphids, squash bugs, cucumber beetles, powdery mildew, and fusarium wilt. Regularly inspect your plants for signs of infestation or disease. Use organic pest control methods, such as insecticidal soap or neem oil, to control pests. To prevent diseases, ensure good air circulation, avoid overhead watering, and practice crop rotation. Choose disease-resistant varieties of cantaloupe whenever possible.
6. How do I know when my cantaloupe is ripe?
Knowing when to harvest your cantaloupe is crucial for enjoying the best flavor. There are several indicators of ripeness. First, the skin color will change from green to a tan or yellowish hue. Second, the stem will begin to crack and separate from the fruit. Third, the melon will develop a sweet aroma. Finally, the blossom end of the melon will soften slightly when pressed gently. Once these signs are present, your cantaloupe is ready to harvest.
7. Can I grow cantaloupe in containers?
Yes, you can successfully grow cantaloupe in containers, but it requires some extra attention. Choose a large container (at least 20 gallons) with good drainage. Use a high-quality potting mix and provide adequate support for the vines. Container-grown cantaloupes may require more frequent watering and fertilization than those grown in the ground. Select compact or bush varieties of cantaloupe that are better suited for container gardening.
8. How can I improve the sweetness of my cantaloupe?
Several factors can influence the sweetness of your cantaloupe. First, choose a variety known for its sweetness. Second, ensure that the plants receive plenty of sunlight. Third, provide adequate water and nutrients, but avoid over-fertilizing with nitrogen, which can promote leafy growth at the expense of fruit development. Finally, allow the melons to ripen fully on the vine before harvesting. Reducing watering slightly as the fruits ripen can also help concentrate the sugars.
9. What are some good companion plants for cantaloupe?
Companion planting can help deter pests, attract beneficial insects, and improve the overall health of your cantaloupe plants. Good companion plants for cantaloupe include marigolds (to repel nematodes), basil (to deter aphids), nasturtiums (to attract beneficial insects), and oregano (to repel squash bugs). Avoid planting cantaloupe near potatoes, as they can compete for nutrients.
10. My cantaloupe plants are producing flowers, but no fruit. What could be the problem?
There are several reasons why your cantaloupe plants might be producing flowers but no fruit. One possibility is that the plants are not being adequately pollinated. Cantaloupes require pollination by bees or other insects to set fruit. You can attract pollinators to your garden by planting flowering herbs and vegetables. Another possibility is that the plants are stressed due to lack of water, nutrients, or sunlight. Ensure that your plants are receiving adequate care and consider hand-pollinating the flowers if necessary.

Leave a Comment