
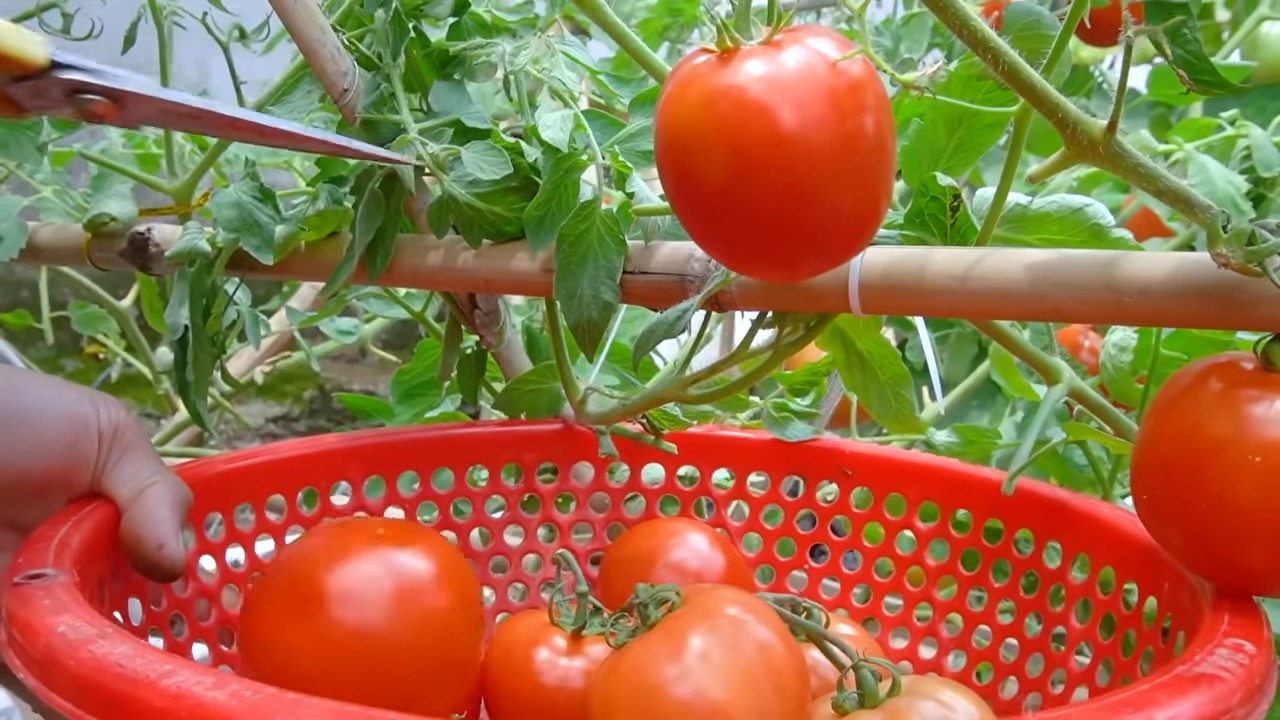
Best tomato growing system, huh? Let’s be honest, who doesn’t dream of plucking juicy, sun-ripened tomatoes straight from their own backyard? I know I do! There’s something incredibly satisfying about nurturing a plant from a tiny seed to a bountiful harvest, especially when that harvest ends up in a delicious Caprese salad or a homemade pasta sauce.
For centuries, cultivating tomatoes has been a cherished tradition, dating back to the Aztecs and Incas. These vibrant fruits have journeyed across continents, becoming a staple in cuisines worldwide. But let’s face it, sometimes growing tomatoes can feel like a battle against pests, diseases, and unpredictable weather. That’s where the magic of DIY comes in!
This article is your ultimate guide to unlocking the secrets of the best tomato growing system, tailored for the home gardener. We’ll explore simple, effective, and budget-friendly DIY tricks and hacks that will transform your tomato-growing experience. Whether you’re a seasoned gardener or just starting out, these tips will help you maximize your yield, minimize your frustrations, and enjoy the unparalleled taste of homegrown tomatoes. Get ready to roll up your sleeves and discover the joy of creating your own thriving tomato paradise!
DIY Self-Watering Tomato Planter: The Ultimate Guide to Bumper Crops!
Hey there, fellow gardening enthusiasts! I’m so excited to share my favorite DIY project that has completely revolutionized my tomato growing game: a self-watering planter! Forget constant watering and wilting plants – this system keeps your tomatoes happy, hydrated, and producing like crazy. Trust me, once you try this, you’ll never go back to traditional gardening.
This project is perfect for anyone, whether you’re a seasoned gardener or just starting out. It’s relatively inexpensive, uses readily available materials, and is incredibly effective. Let’s dive in!
What You’ll Need:
Before we get started, let’s gather all the necessary materials. Here’s a comprehensive list:
* Two Plastic Storage Bins: You’ll need two bins of the same shape but different sizes. The larger bin will act as the reservoir, and the smaller bin will sit inside it, holding the soil and your tomato plant. I recommend a larger bin around 20-30 gallons and a smaller bin that fits comfortably inside with at least 6-8 inches of space around the sides and bottom. Make sure they are food-grade plastic if possible, especially the inner bin.
* PVC Pipe (4-inch diameter, about 12-18 inches long): This will serve as our watering tube, allowing you to easily refill the reservoir.
* PVC Pipe Cap (4-inch): To cap the watering tube and prevent debris from falling in.
* Drill with Various Drill Bits: You’ll need drill bits to create drainage holes and holes for the PVC pipe.
* Landscape Fabric: This will prevent soil from falling into the reservoir while still allowing water to wick up.
* Potting Mix: Choose a high-quality potting mix specifically formulated for vegetables.
* Tomato Plant: Of course! Select a healthy tomato seedling from your local nursery or start your own from seed.
* Measuring Tape or Ruler: For accurate measurements.
* Utility Knife or Scissors: For cutting the landscape fabric.
* Gravel or Small Rocks: To create a drainage layer at the bottom of the inner bin.
* Optional: Fertilizer (Slow-Release): To provide your tomato plant with essential nutrients.
* Optional: Mulch: To help retain moisture and suppress weeds.
Step-by-Step Instructions: Building Your Self-Watering Planter
Now for the fun part! Follow these steps carefully to create your own self-watering tomato planter:
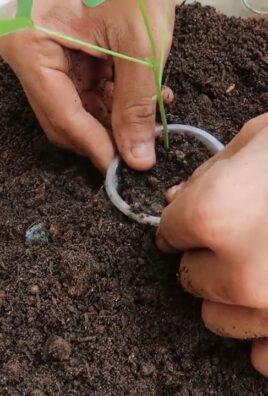
1. Prepare the Inner Bin (Planting Container):
* Drill Drainage Holes: Using a drill bit (around 1/4 inch), drill several drainage holes in the bottom of the smaller bin. Space them evenly apart, about 2-3 inches between each hole. This will allow excess water to drain out and prevent the soil from becoming waterlogged.
* Drill Wick Holes: Now, drill a few larger holes (around 1/2 inch) near the bottom of the sides of the smaller bin. These holes are crucial for wicking water from the reservoir up into the soil. Aim for 3-4 holes, spaced evenly around the bin.
2. Prepare the Outer Bin (Reservoir):
* Drill the PVC Pipe Hole: Decide where you want the watering tube to be located on the outer bin. I usually place it near a corner for easy access. Using a drill bit slightly larger than the diameter of your PVC pipe, drill a hole through the side of the outer bin. Make sure the hole is low enough so that the bottom of the inner bin will sit above it.
3. Assemble the Watering Tube:
* Insert the PVC Pipe: Insert the PVC pipe into the hole you drilled in the outer bin. You want it to fit snugly. You can use a sealant if you want to ensure a watertight seal, but it’s usually not necessary if the fit is tight.
* Cap the Pipe: Place the PVC pipe cap on top of the pipe to prevent debris from entering the reservoir.
4. Create the Drainage Layer:
* Add Gravel to the Inner Bin: Pour a layer of gravel or small rocks into the bottom of the inner bin. This layer will help with drainage and prevent the soil from clogging the wick holes. Aim for a layer that’s about 2-3 inches thick.
5. Line with Landscape Fabric:
* Cut the Fabric: Cut a piece of landscape fabric that’s large enough to line the entire inside of the inner bin, including the sides.
* Line the Bin: Carefully line the inner bin with the landscape fabric, making sure it covers the gravel layer and extends up the sides of the bin. This will prevent the potting mix from falling into the reservoir.
6. Add Potting Mix:
* Fill the Bin: Fill the inner bin with your chosen potting mix, leaving a few inches of space at the top.
* Optional: Add Fertilizer: If you’re using slow-release fertilizer, mix it into the potting mix according to the package instructions.
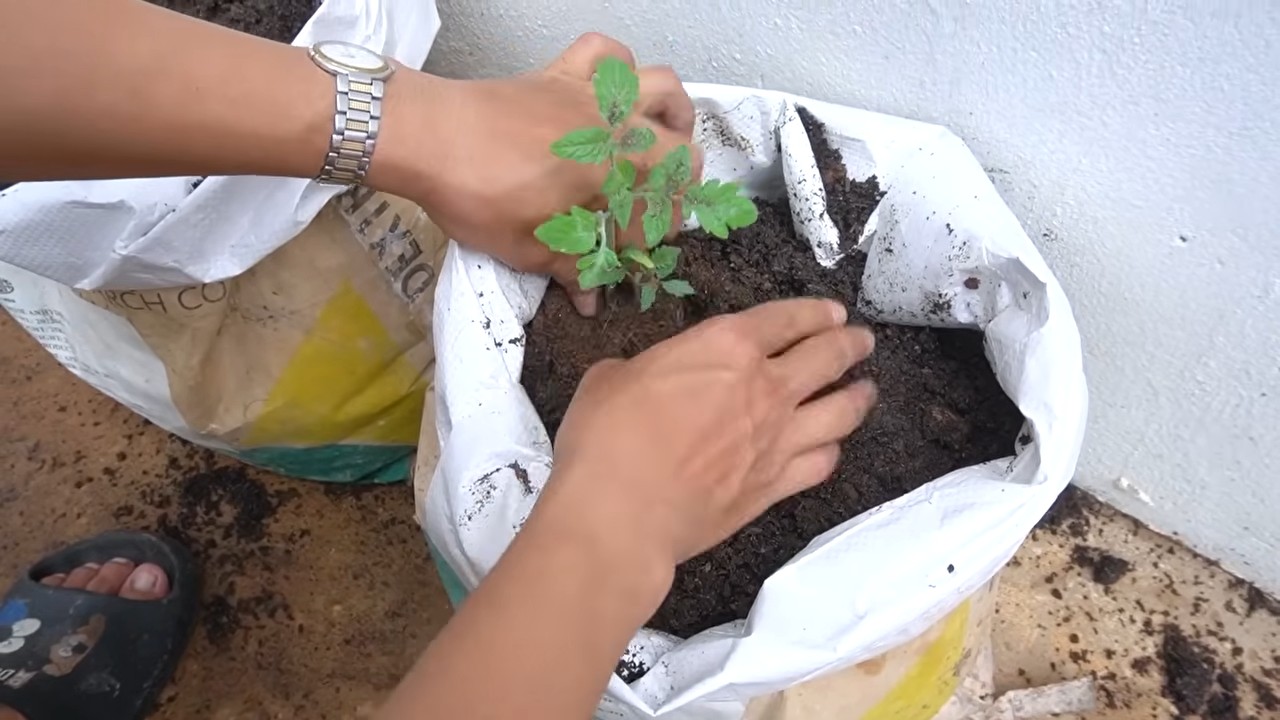
7. Plant Your Tomato Plant:
* Dig a Hole: Dig a hole in the center of the potting mix that’s large enough to accommodate the root ball of your tomato plant.
* Plant the Tomato: Gently remove the tomato plant from its container and place it in the hole. Backfill with potting mix and gently pat down the soil around the base of the plant.
8. Mulch (Optional):
* Add Mulch: Apply a layer of mulch around the base of the tomato plant. This will help retain moisture, suppress weeds, and regulate soil temperature.
9. Assemble the Planter:
* Place Inner Bin into Outer Bin: Carefully lower the inner bin into the outer bin, making sure it sits securely. The bottom of the inner bin should be elevated above the bottom of the outer bin, creating the reservoir.
10. Water and Monitor:
* Initial Watering: Water the tomato plant thoroughly from the top to help settle the soil and get the wicking process started.
* Fill the Reservoir: Pour water into the PVC pipe until the reservoir is full.
* Monitor Water Levels: Regularly check the water level in the reservoir by looking down the PVC pipe. Refill as needed. The frequency of refilling will depend on the weather, the size of your plant, and the type of potting mix you’re using.
Tips for Success:
* Choose the Right Tomato Variety: Some tomato varieties are better suited for container gardening than others. Look for determinate or bush varieties, which tend to be more compact and manageable. Indeterminate varieties can also be grown in containers, but they will require more support and pruning.
* Provide Adequate Sunlight: Tomatoes need at least 6-8 hours of sunlight per day to thrive. Place your self-watering planter in a sunny location.
* Support Your Plant: As your tomato plant grows, it will need support to prevent the branches from breaking under the weight of the fruit. Use a tomato cage or stakes to provide support.
* Prune Regularly: Pruning your tomato plant can help improve air circulation and encourage fruit production. Remove suckers (the small shoots that grow between the main stem and the branches) regularly.
* Fertilize Regularly: Tomatoes are heavy feeders and require regular fertilization. Use a balanced fertilizer specifically formulated for tomatoes, following the package instructions.
* Monitor for Pests and Diseases: Regularly inspect your tomato plant for pests and diseases. Take action promptly if you notice any problems.
* Water Quality: Use good quality water. Avoid using softened water as it contains salts that can harm your plants. Rainwater is ideal.
* Winter Storage: In colder climates, you’ll need to protect your self-watering planter from freezing temperatures. You can either move it indoors or insulate it to prevent the water in the reservoir from freezing.
Troubleshooting:
* Plant Wilting: If your tomato plant is wilting, even though the reservoir is full, it could be a sign that the wick holes are clogged or that the potting mix is too dry. Try gently poking the wick holes with a small stick to clear any blockages. You can also try watering the plant from the top to rehydrate the potting mix.
* Yellowing Leaves: Yellowing leaves can be a sign of nutrient deficiency. Make sure you’re fertilizing your tomato plant regularly with a balanced fertilizer.
* Slow Growth: Slow growth can be caused by a variety of factors, including insufficient sunlight, poor soil quality, or pest infestations. Make sure your tomato plant is getting enough sunlight, and consider amending the potting mix with compost or other organic matter.
Adapting the Design:
* Smaller Plants: You can easily adapt this design for smaller plants like herbs,
Conclusion
So, there you have it! This DIY tomato growing system isn’t just a project; it’s an investment in flavor, freshness, and a deeper connection to your food. Forget those bland, store-bought tomatoes that taste like cardboard. Imagine biting into a sun-ripened, juicy tomato bursting with flavor, grown right in your own backyard (or even on your balcony!). This system empowers you to control every aspect of your tomato’s life, from the soil composition to the amount of sunlight it receives, resulting in a superior product that will elevate your salads, sauces, and sandwiches to a whole new level.
But the benefits extend beyond just taste. This DIY approach is also incredibly cost-effective. Think about how much you spend on tomatoes each year. With a one-time investment in materials, you can produce a steady supply of delicious tomatoes throughout the growing season, saving you money and reducing your reliance on grocery stores. Plus, you’ll be contributing to a more sustainable lifestyle by reducing your carbon footprint and minimizing food waste.
What truly sets this DIY tomato growing system apart is its adaptability. Feel free to experiment with different container sizes, soil mixtures, and support structures to find what works best for your space and climate. Consider adding companion plants like basil or marigolds to deter pests and enhance the flavor of your tomatoes. You could even explore different tomato varieties, from classic beefsteaks to sweet cherry tomatoes, to create a diverse and flavorful harvest.
Don’t be afraid to get creative! You can customize the system to fit your aesthetic preferences. Paint your containers in vibrant colors, add decorative trellises, or even incorporate a small water feature to create a beautiful and functional garden space. The possibilities are endless!
We understand that embarking on a DIY project can sometimes feel daunting, but trust us, this one is well worth the effort. The satisfaction of harvesting your own homegrown tomatoes is unparalleled. It’s a rewarding experience that connects you to nature and provides you with a delicious and healthy food source.
So, what are you waiting for? Gather your materials, follow our simple instructions, and get ready to experience the joy of growing your own tomatoes. We’re confident that you’ll be amazed by the results.
We encourage you to try this DIY tomato growing system and share your experiences with us! Post photos of your setup, share your tips and tricks, and let us know what tomato varieties you’re growing. We’re excited to see your creations and learn from your experiences. Together, we can create a community of passionate tomato growers and spread the joy of homegrown goodness. Happy gardening!
Frequently Asked Questions (FAQ)
What are the best tomato varieties to grow in this DIY system?
The best tomato varieties for your DIY system will depend on your climate, space, and personal preferences. Determinate varieties, which grow to a fixed size and produce all their fruit at once, are often a good choice for smaller containers. Indeterminate varieties, which continue to grow and produce fruit throughout the season, may require larger containers and more support. Some popular and reliable choices include:
* **Early Girl:** A classic early-season variety that produces medium-sized, flavorful tomatoes.
* **Roma:** A determinate variety that’s perfect for making sauces and pastes.
* **Cherry Tomatoes (Sungold, Sweet 100):** These small, sweet tomatoes are great for snacking and salads.
* **Beefsteak:** A large, meaty tomato that’s ideal for slicing and sandwiches.
* **Brandywine:** An heirloom variety known for its exceptional flavor and large size.
Consider your local climate and growing conditions when selecting your tomato varieties. Consult with your local nursery or garden center for recommendations specific to your area.
How often should I water my tomatoes in this system?
Watering frequency will depend on several factors, including the size of your container, the type of soil you’re using, the weather conditions, and the stage of growth of your tomato plants. As a general rule, you should water your tomatoes deeply whenever the top inch of soil feels dry to the touch. Avoid overwatering, as this can lead to root rot.
During hot, dry weather, you may need to water your tomatoes daily. In cooler, wetter weather, you may only need to water them every few days. Check the soil moisture regularly and adjust your watering schedule accordingly.
A good way to tell if your tomatoes need water is to observe the leaves. If they are wilting or drooping, it’s a sign that the plants are thirsty.
What type of fertilizer should I use for my tomatoes?
Tomatoes are heavy feeders and require regular fertilization to thrive. Use a balanced fertilizer that’s specifically formulated for tomatoes. Look for a fertilizer with an NPK ratio (nitrogen, phosphorus, potassium) that’s appropriate for the stage of growth of your plants.
During the early stages of growth, a fertilizer with a higher nitrogen content will promote leafy growth. Once the plants start to flower and fruit, switch to a fertilizer with a higher phosphorus and potassium content to encourage fruit production.
Follow the instructions on the fertilizer package carefully. Avoid over-fertilizing, as this can damage your plants. You can also supplement your fertilizer with compost or other organic matter to improve soil health and provide additional nutrients.
How do I prevent pests and diseases from affecting my tomatoes?
Pests and diseases can be a common problem for tomato growers, but there are several steps you can take to prevent them.
* **Choose disease-resistant varieties:** Select tomato varieties that are known to be resistant to common diseases like early blight, late blight, and verticillium wilt.
* **Provide good air circulation:** Space your plants adequately to allow for good air circulation, which will help to prevent fungal diseases.
* **Water properly:** Avoid overhead watering, as this can create a humid environment that’s conducive to disease. Water at the base of the plants instead.
* **Remove diseased leaves:** If you notice any leaves that are showing signs of disease, remove them immediately to prevent the disease from spreading.
* **Use organic pest control methods:** If you encounter pests, try using organic pest control methods like insecticidal soap or neem oil.
* **Companion planting:** Plant companion plants like basil, marigolds, or garlic to deter pests.
How much sunlight do tomatoes need?
Tomatoes need at least 6-8 hours of direct sunlight per day to thrive. Choose a location for your DIY tomato growing system that receives plenty of sunlight. If you don’t have a sunny spot, you may need to supplement with artificial lighting.
Can I grow tomatoes indoors using this system?
Yes, you can grow tomatoes indoors using this system, but you’ll need to provide adequate lighting. Use grow lights that are specifically designed for plants. Place the lights close to the plants and keep them on for at least 12-16 hours per day. You’ll also need to ensure that your indoor environment is well-ventilated and that the temperature is warm enough for tomatoes to thrive.
What size container should I use for my tomato plants?
The size of the container you use will depend on the type of tomato you’re growing. Determinate varieties can be grown in smaller containers, while indeterminate varieties will require larger containers. As a general rule, use a container that’s at least 12 inches in diameter and 12 inches deep for determinate varieties, and a container that’s at least 18 inches in diameter and 18 inches deep for indeterminate varieties. Larger containers will provide more room for the roots to grow and will help to prevent the plants from drying out too quickly.
How do I support my tomato plants?
Tomato plants, especially indeterminate varieties, need support to prevent them from falling over. You can use stakes, cages, or trellises to support your plants. Insert the support structure into the container when you plant the tomatoes to avoid damaging the roots later. As the plants grow, tie them to the support structure with soft twine or plant ties.
What do I do if my tomato plants are not producing fruit?
There are several reasons why your tomato plants may not be producing fruit.
* **Lack of pollination:** Tomatoes are self-pollinating, but they may need some help from wind or insects to transfer pollen. You can gently shake the plants or use a small brush to transfer pollen from one flower to another.
* **Temperature:** Tomatoes need warm temperatures to set fruit. If the temperatures are too hot or too cold, the plants may not produce fruit.
* **Nutrient deficiencies:** A lack of nutrients can also prevent fruit production. Make sure you’re fertilizing your plants regularly with a balanced fertilizer.
* **Water stress:** Both overwatering and underwatering can affect fruit production. Make sure you’re watering your plants properly.
* **Too much nitrogen:** Too much nitrogen can promote leafy growth at the expense of fruit production. Use a fertilizer with a lower nitrogen content once the plants start to flower.
By addressing these potential issues, you can increase your chances of a successful tomato harvest.
Leave a Comment