
Bigger tomato harvests are within your reach, even if you think you don’t have a green thumb! Are you tired of those tiny, lackluster tomatoes from your garden? Imagine sinking your teeth into juicy, sun-ripened tomatoes bursting with flavor, enough to share with friends and family. This isn’t just a dream; it’s an achievable reality with a few simple DIY tricks and hacks.
For centuries, cultivating tomatoes has been a cherished tradition. Originating in South America, these vibrant fruits have become a staple in cuisines worldwide. From Italian pasta sauces to refreshing summer salads, tomatoes bring a unique zest to our tables. But let’s face it, getting a bountiful harvest can sometimes feel like a daunting task. That’s where these DIY secrets come in!
I know how frustrating it can be to put in the effort and not see the results you desire. That’s why I’ve compiled these easy-to-follow tips to help you unlock the secrets to bigger tomato harvests. Whether you’re a seasoned gardener or just starting out, these hacks will empower you to maximize your yield and enjoy the fruits (or vegetables!) of your labor. Get ready to transform your garden and impress your neighbors with your tomato-growing prowess!
Unlock a Bumper Crop: My Foolproof Guide to Bigger Tomato Harvests
Hey fellow gardeners! Are you dreaming of overflowing baskets of juicy, sun-ripened tomatoes? I know I always am! After years of experimenting, I’ve discovered some amazing DIY hacks that have seriously boosted my tomato yields. I’m talking about a noticeable difference – from a handful of tomatoes to enough to share with the whole neighborhood! So, ditch the store-bought stuff and get ready to grow the biggest, tastiest tomatoes you’ve ever seen. Let’s dive in!
Choosing the Right Tomato Variety
Before we even get our hands dirty, it’s crucial to pick the right tomato variety for your climate and growing conditions. Not all tomatoes are created equal! Some thrive in hot, humid weather, while others prefer cooler temperatures.
* Determinate vs. Indeterminate: This is key! Determinate tomatoes grow to a certain size and produce all their fruit at once, making them ideal for canning. Indeterminate tomatoes, on the other hand, keep growing and producing fruit throughout the season. I personally prefer indeterminate varieties for a continuous harvest.
* Disease Resistance: Look for varieties labeled with letters like V, F, N, T, and A. These indicate resistance to common tomato diseases like Verticillium wilt, Fusarium wilt, Nematodes, Tobacco Mosaic Virus, and Alternaria. Trust me, disease resistance is a lifesaver!
* Days to Maturity: Consider your growing season length. If you have a short summer, choose varieties with a shorter “days to maturity” (the time from planting to harvest).
I usually opt for a mix of varieties – a few early producers, some disease-resistant workhorses, and maybe a fun heirloom variety for unique flavor.
Supercharging Your Soil: The Foundation for Success
Tomatoes are heavy feeders, meaning they need a lot of nutrients to produce those delicious fruits. So, preparing your soil is absolutely essential.
* Soil Testing: This is the first step. A soil test will tell you the pH level and nutrient content of your soil. You can usually get a soil test kit at your local garden center or through your county extension office.
* Amending the Soil: Based on your soil test results, you’ll need to amend the soil. Tomatoes prefer slightly acidic soil (pH 6.0-6.8). If your soil is too alkaline, you can add sulfur. If it’s too acidic, add lime.
* Adding Organic Matter: This is where the magic happens! Organic matter improves soil drainage, aeration, and water retention. It also provides essential nutrients for your tomato plants. I swear by these amendments:
* Compost: The king of soil amendments! Compost is decomposed organic matter that’s packed with nutrients. I add a generous layer of compost to my tomato beds every year.
* Well-Rotted Manure: Another fantastic source of nutrients. Make sure it’s well-rotted to avoid burning your plants.
* Worm Castings: These are basically worm poop, and they’re incredibly beneficial for plant growth. They contain beneficial microbes and nutrients that tomatoes love.
* Bone Meal: A great source of phosphorus, which is essential for root development and fruit production.
* Epsom Salts: Magnesium sulfate, or Epsom salts, can help prevent blossom end rot, a common tomato problem caused by calcium deficiency. I add a tablespoon of Epsom salts to the planting hole when I transplant my tomatoes.
The DIY Planting Process: Giving Your Tomatoes the Best Start
Now that your soil is prepped, it’s time to plant your tomato seedlings. Here’s my step-by-step guide:
1. Harden Off Your Seedlings: If you started your tomatoes indoors, you need to gradually acclimate them to outdoor conditions before planting. This process is called “hardening off.” Start by placing your seedlings outdoors in a sheltered spot for a few hours each day, gradually increasing the amount of time they spend outside over a week or two.
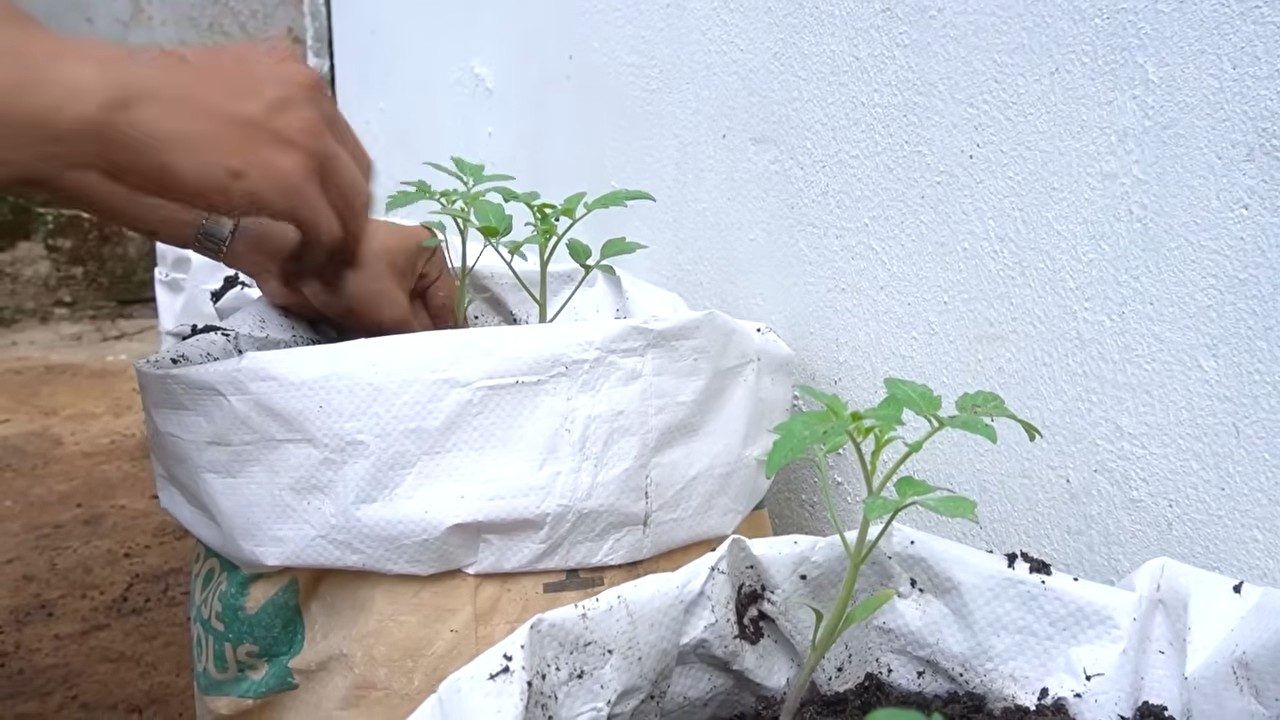
2. Dig a Deep Hole: Dig a hole that’s deep enough to bury about two-thirds of the tomato seedling’s stem. This encourages the plant to develop more roots along the buried stem, resulting in a stronger, more productive plant.
3. Remove the Lower Leaves: Before planting, remove the lower leaves from the stem that will be buried. This prevents them from rotting and attracting pests.
4. Add Amendments to the Hole: Mix a tablespoon of bone meal and a tablespoon of Epsom salts into the bottom of the planting hole.
5. Plant the Seedling: Gently place the seedling in the hole and backfill with soil.
6. Water Thoroughly: Water the newly planted seedling thoroughly to help settle the soil and encourage root growth.
7. Mulch Around the Plants: Apply a layer of mulch around the tomato plants to help retain moisture, suppress weeds, and regulate soil temperature. I like to use straw or shredded leaves.
Supporting Your Tomatoes: Staking, Caging, and Pruning
Tomato plants, especially indeterminate varieties, need support to keep them from sprawling on the ground. This helps prevent disease, improves air circulation, and makes it easier to harvest the fruit.
* Staking: Staking involves tying the tomato plant to a single stake. This is a simple and effective method, but it requires regular pruning to remove suckers (the small shoots that grow between the main stem and the branches).
* Caging: Caging involves placing a wire cage around the tomato plant. This provides support and allows the plant to grow naturally without much pruning. I prefer caging because it’s less work.
* Pruning: Pruning is the process of removing suckers from the tomato plant. This encourages the plant to focus its energy on producing fruit rather than foliage. If you’re staking your tomatoes, you’ll need to prune them regularly. If you’re caging them, you can get away with less pruning.
My Pruning Technique (for Staked Tomatoes):
1. Identify Suckers: Suckers are the small shoots that grow between the main stem and the branches.
2. Remove Suckers: Pinch off the suckers when they’re small (a few inches long). This is easier than trying to remove them when they’re larger.
3. Leave Some Foliage: Don’t remove too much foliage, as the leaves are needed for photosynthesis.
Watering and Feeding: Keeping Your Tomatoes Happy and Healthy
Tomatoes need consistent watering and feeding to thrive. Here’s my watering and feeding schedule:
* Watering: Water deeply and regularly, especially during hot, dry weather. Aim for about 1-2 inches of water per week. Avoid watering the foliage, as this can encourage disease. I prefer to use a soaker hose or drip irrigation to water my tomatoes at the base of the plant.
* Fertilizing: Fertilize your tomato plants every 2-3 weeks with a balanced fertilizer. Look for a fertilizer that’s specifically formulated for tomatoes. I also like to use liquid seaweed fertilizer, which is a great source of micronutrients.
My DIY Fertilizer Boost:
I make a simple fertilizer tea by steeping compost in water. Just fill a bucket with compost, add water, and let it sit for a few days. Then, strain the liquid and use it to water your tomato plants. This is a great way to give your tomatoes a boost of nutrients.
Pest and Disease Control: Protecting Your Precious Tomatoes
Unfortunately, tomatoes are susceptible to a variety of pests and diseases. Here are some common problems and how to deal with them:
* Aphids: These tiny insects suck the sap from tomato plants. You can control them with insecticidal soap or by releasing ladybugs, which are natural predators of aphids.
* Tomato Hornworms: These large caterpillars can quickly defoliate a tomato plant. Handpick them off the plants and drop them into a bucket of soapy water.
* Blossom End Rot: This is a common problem caused by calcium deficiency. You can prevent it by adding bone meal to the planting hole and by watering consistently.
* Early Blight: This fungal disease causes dark spots on the leaves. Remove infected leaves and apply a fungicide.
* Septoria Leaf Spot: Another fungal disease that causes small, circular spots on the leaves. Remove infected leaves and apply a fungicide.
My DIY Pest Control Spray:
I make a simple pest control spray by mixing water, dish soap, and neem oil. Neem oil is a natural insecticide and fungicide that’s effective against a wide range of pests and diseases. Just mix 1 tablespoon of dish soap and 1 tablespoon of neem oil with 1 gallon of water. Spray the mixture on your tomato plants every week or two.
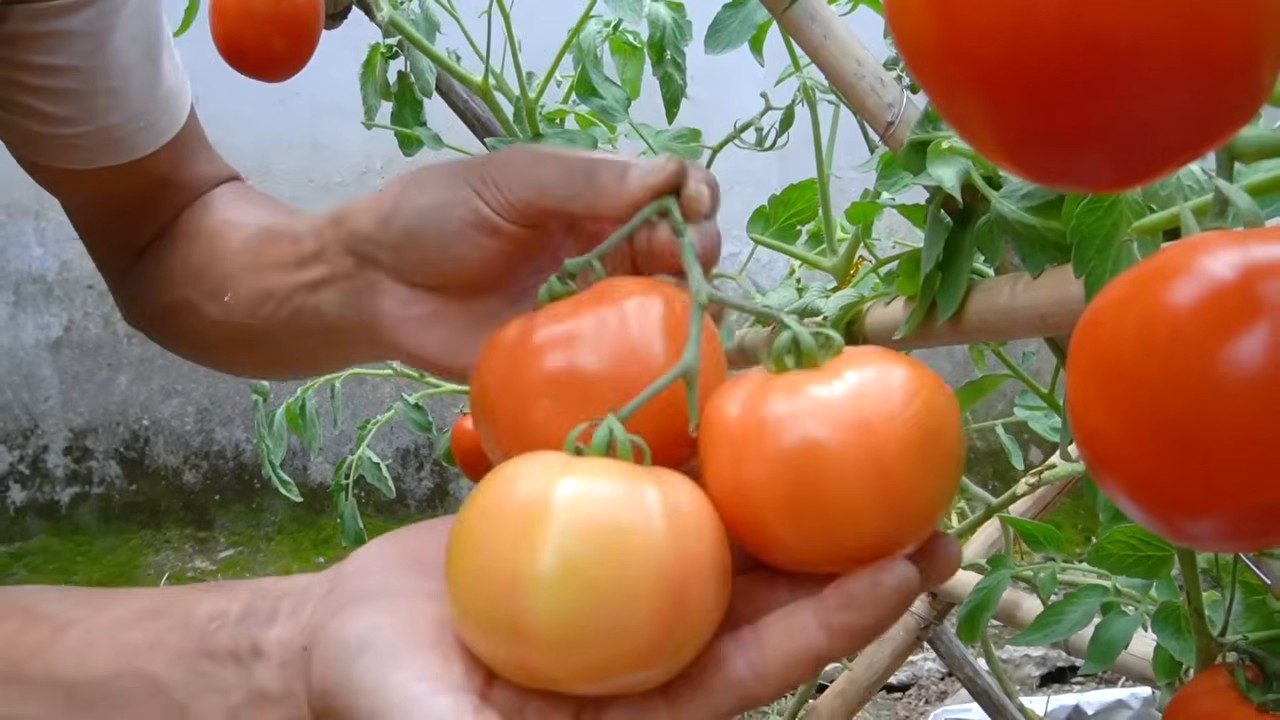
Harvesting Your Bumper Crop: The Sweet Reward
Finally, the moment you’ve been waiting for – harvesting your delicious tomatoes!
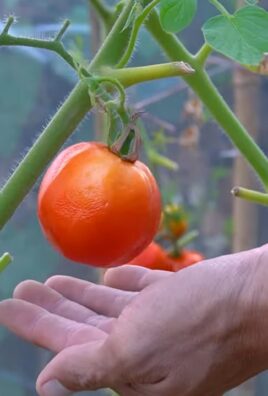
* Ripeness: Tomatoes are ripe when they’re fully colored and slightly soft to the touch.
* Harvesting Technique:
Conclusion
So, there you have it! This simple, yet incredibly effective DIY trick for achieving bigger tomato harvests is a game-changer for any gardener, regardless of experience level. We’ve walked you through the process, highlighting the science behind why it works and offering practical tips to ensure your success.
Why is this a must-try? Because it addresses a fundamental need for tomato plants: a robust root system. By encouraging root growth along the buried stem, you’re essentially giving your plants a supercharged nutrient highway. This translates directly into more blossoms, more fruit, and ultimately, a significantly larger and more satisfying tomato harvest. Imagine the pride of sharing your bountiful crop with friends and family, knowing you achieved it with a simple, cost-effective technique.
But don’t just take our word for it! The beauty of this DIY method lies in its adaptability. Feel free to experiment with different types of organic fertilizers when preparing the planting hole. Bone meal, for instance, is an excellent source of phosphorus, which is crucial for root development. You could also try adding a handful of compost to further enrich the soil and provide beneficial microbes.
Consider the variety of tomatoes you’re growing. For larger, indeterminate varieties that require staking or caging, this technique is especially beneficial as it provides the plant with the structural support it needs to bear the weight of a heavy fruit load. For smaller, determinate varieties, while still beneficial, you might adjust the depth of the planting hole accordingly.
Don’t be afraid to tweak the process to suit your specific growing conditions and preferences. If you live in an area with heavy clay soil, amend the soil with plenty of organic matter to improve drainage before planting. If you’re growing in containers, ensure the container is large enough to accommodate the expanded root system.
The key is to observe your plants closely and adjust your approach as needed. Gardening is a learning process, and every season brings new opportunities to refine your techniques.
We are confident that this DIY trick will revolutionize your tomato growing experience. It’s easy, affordable, and yields impressive results. So, grab your trowel, select your favorite tomato seedlings, and get ready to witness the magic unfold.
We’re eager to hear about your experiences! Did you notice a significant increase in your tomato harvest? Did you try any variations of the technique? Share your stories, tips, and photos in the comments below. Let’s create a community of tomato-growing enthusiasts and learn from each other’s successes. Together, we can all achieve bigger, better, and more delicious tomato harvests!
Frequently Asked Questions (FAQ)
What types of tomatoes benefit most from this DIY trick?
This technique is beneficial for virtually all types of tomatoes, but it’s particularly effective for indeterminate varieties. Indeterminate tomatoes continue to grow and produce fruit throughout the season, requiring a strong root system to support their continuous growth and heavy fruit load. Determinate tomatoes, which grow to a certain size and then produce all their fruit at once, also benefit from the enhanced root system, leading to a larger and more uniform harvest. Even cherry tomatoes can benefit from this technique, producing more abundant clusters of sweet, juicy fruit.
How deep should I bury the tomato stem?
Ideally, you should bury approximately two-thirds of the tomato stem. Remove the lower leaves from the stem before planting to prevent them from rotting underground. The goal is to bury as much of the stem as possible without burying any leaves. This allows for maximum root development along the buried portion of the stem. For smaller seedlings, you might adjust the depth accordingly, ensuring that at least half of the stem is buried.
What kind of soil is best for this method?
Well-draining soil is crucial for successful tomato growing, regardless of the planting method. Amend heavy clay soil with plenty of organic matter, such as compost, peat moss, or aged manure, to improve drainage and aeration. Sandy soil, on the other hand, may require the addition of organic matter to improve water retention. A slightly acidic soil pH (around 6.0 to 6.8) is ideal for tomatoes. You can test your soil pH with a simple soil testing kit and amend it accordingly.
Can I use this technique for container-grown tomatoes?
Yes, this technique works well for container-grown tomatoes. Choose a container that is large enough to accommodate the mature size of the tomato plant and its expanded root system. A 5-gallon container is generally a good starting point, but larger varieties may require a 10-gallon or even larger container. Ensure the container has adequate drainage holes to prevent waterlogging. Use a high-quality potting mix that is specifically formulated for vegetables.
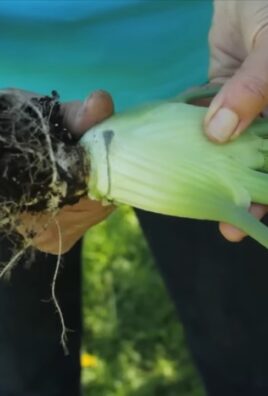
What if the buried stem starts to rot?
While uncommon, stem rot can occur if the soil is consistently waterlogged or if the leaves were not properly removed before planting. To prevent stem rot, ensure the soil is well-draining and avoid overwatering. If you notice any signs of rot, such as discoloration or softening of the stem, gently remove the affected soil and allow the area to dry out. You can also apply a fungicide specifically designed for tomatoes.
How often should I water after planting?
Water deeply and regularly, especially during the first few weeks after planting. Aim to keep the soil consistently moist but not waterlogged. The frequency of watering will depend on the weather conditions and the type of soil. Check the soil moisture level regularly by sticking your finger into the soil. If the top inch of soil feels dry, it’s time to water. As the plants mature, you may need to water more frequently, especially during hot, dry weather.
What kind of fertilizer should I use?
A balanced fertilizer with an NPK ratio of 10-10-10 or 14-14-14 is a good starting point. However, tomatoes are heavy feeders and benefit from regular fertilization throughout the growing season. After the initial planting, side-dress the plants with a fertilizer that is higher in phosphorus and potassium to promote flowering and fruit production. Bone meal is an excellent source of phosphorus, while wood ash is a good source of potassium. Organic fertilizers, such as compost tea and fish emulsion, are also beneficial for providing essential nutrients and improving soil health.
How long does it take to see results?
You should start to see results within a few weeks of planting. The plants will typically exhibit faster growth, more abundant foliage, and earlier flowering. The increase in fruit production may not be immediately apparent, but you should notice a significant difference in the size and number of tomatoes compared to plants grown without this technique. Remember that results may vary depending on the variety of tomato, the growing conditions, and the overall health of the plants.
Can I use this technique with grafted tomato plants?
Yes, you can use this technique with grafted tomato plants, but it’s crucial to ensure that the graft union remains above the soil line. Burying the graft union can compromise the integrity of the graft and potentially lead to disease or failure. When planting grafted tomatoes, carefully position the plant so that the graft union is several inches above the soil surface.
What other tips can I use to maximize my tomato harvest?
In addition to this DIY trick, there are several other things you can do to maximize your tomato harvest. Provide your plants with plenty of sunlight (at least 6-8 hours per day). Prune suckers (the small shoots that grow between the main stem and the branches) to improve air circulation and encourage fruit production. Stake or cage your plants to provide support and prevent the fruit from touching the ground. Protect your plants from pests and diseases by using organic pest control methods and practicing good sanitation. And finally, be patient and enjoy the process!
Leave a Comment