
Grow Big Pumpkins Small Yard – sounds impossible, right? I get it! You’re dreaming of carving a prize-winning pumpkin this Halloween, but your backyard resembles more of a postage stamp than a sprawling pumpkin patch. Don’t despair! This isn’t just another article filled with vague gardening advice; it’s your personalized guide to achieving pumpkin glory, even with limited space.
For centuries, pumpkins have symbolized abundance and harvest, deeply rooted in autumnal celebrations. From Native American traditions to modern-day jack-o’-lanterns, these gourds hold a special place in our hearts. But what if you thought you couldn’t participate in the fun because of space constraints? That’s where these DIY tricks come in!
Let’s face it, most of us don’t have acres of farmland. We’re working with balconies, patios, or tiny backyards. That’s why I’ve compiled these easy-to-follow, space-saving hacks to help you grow big pumpkins small yard. Imagine the look on your neighbor’s faces when you unveil your giant, homegrown masterpiece! These aren’t just gardening tips; they’re game-changers that will transform your small space into a pumpkin-producing powerhouse. Get ready to roll up your sleeves and discover the secrets to maximizing your yield and cultivating the pumpkin of your dreams, no matter how limited your garden space may be.
Growing Giant Pumpkins in a Small Yard: My Secrets Revealed!
Okay, so you’re dreaming of a prize-winning pumpkin, the kind that needs a forklift to move, but you’re stuck with a postage-stamp-sized yard? Don’t despair! I’m here to tell you it’s totally possible. I’ve done it, and I’m going to share all my secrets to growing massive pumpkins, even when space is limited. It’s all about maximizing what you *do* have.
Choosing the Right Seeds and Location
First things first, you need to set yourself up for success from the very beginning. This means selecting the right seeds and finding the best possible spot in your yard.
* Seed Selection: Don’t just grab any pumpkin seeds! You want seeds from Atlantic Giant pumpkins. These are specifically bred for size. Look for seeds from pumpkins that have weighed over 1000 pounds – the bigger the parent, the better the potential. Reputable online seed vendors specializing in giant pumpkins are your best bet.
* Sunlight is King: Pumpkins are sun-worshippers. They need at least 6-8 hours of direct sunlight per day. Observe your yard throughout the day to identify the sunniest spot.
* Soil Matters: Giant pumpkins are heavy feeders. They need rich, well-draining soil. If your soil is poor, don’t worry! We’ll fix that.
* Wind Protection: Strong winds can damage the vines and developing pumpkins. If your yard is exposed, consider planting a windbreak (like sunflowers) or using temporary fencing.
Preparing the Soil: The Foundation for Growth
This is where the magic happens! You can’t expect a giant pumpkin to grow in mediocre soil. We’re going to create a super-charged growing environment.
1. Soil Testing: Before you do anything, get your soil tested. You can buy a DIY kit or send a sample to your local agricultural extension office. This will tell you the pH level and nutrient content of your soil. Giant pumpkins thrive in slightly acidic soil (pH 6.0-6.8).
2. Amending the Soil: Based on your soil test results, amend your soil accordingly. Here’s what I usually do:
* Compost: Add a generous amount of compost. This improves soil structure, drainage, and provides essential nutrients. I use a mix of homemade compost and store-bought compost.
* Aged Manure: Aged manure is another excellent soil amendment. It’s rich in nitrogen, phosphorus, and potassium. Make sure it’s well-aged to avoid burning the plants.
* Peat Moss: Peat moss helps retain moisture and improves soil aeration.
* Fertilizer: Incorporate a slow-release fertilizer specifically formulated for vegetables. Follow the instructions on the package. I prefer organic fertilizers.
3. Creating a Mound: Giant pumpkins do best when planted on a mound. This improves drainage and warms the soil. Create a mound that’s about 12 inches high and 4 feet in diameter.
4. Cover Cropping (Optional): If you have time, consider planting a cover crop in the fall before planting your pumpkin. Cover crops like rye or oats improve soil health and suppress weeds.
Starting Your Seeds Indoors: Getting a Head Start
Because the growing season is limited, starting your seeds indoors gives you a significant head start.
1. Timing is Key: Start your seeds about 3-4 weeks before the last expected frost in your area.
2. Seed Starting Mix: Use a high-quality seed starting mix. Don’t use garden soil, as it can be too heavy and may contain diseases.
3. Planting the Seeds: Plant the seeds about 1 inch deep in individual pots. I use peat pots, as they can be planted directly into the ground, minimizing transplant shock.
4. Warmth and Light: Keep the pots warm (around 80-85°F) using a heat mat. Provide plenty of light using grow lights or a sunny windowsill.
5. Watering: Keep the soil consistently moist, but not soggy.
6. Hardening Off: Before transplanting your seedlings outdoors, you need to harden them off. This means gradually exposing them to outdoor conditions over a period of 7-10 days. Start by placing them in a sheltered spot for a few hours each day, gradually increasing the amount of time they spend outdoors.
Transplanting and Vine Training: Directing the Growth
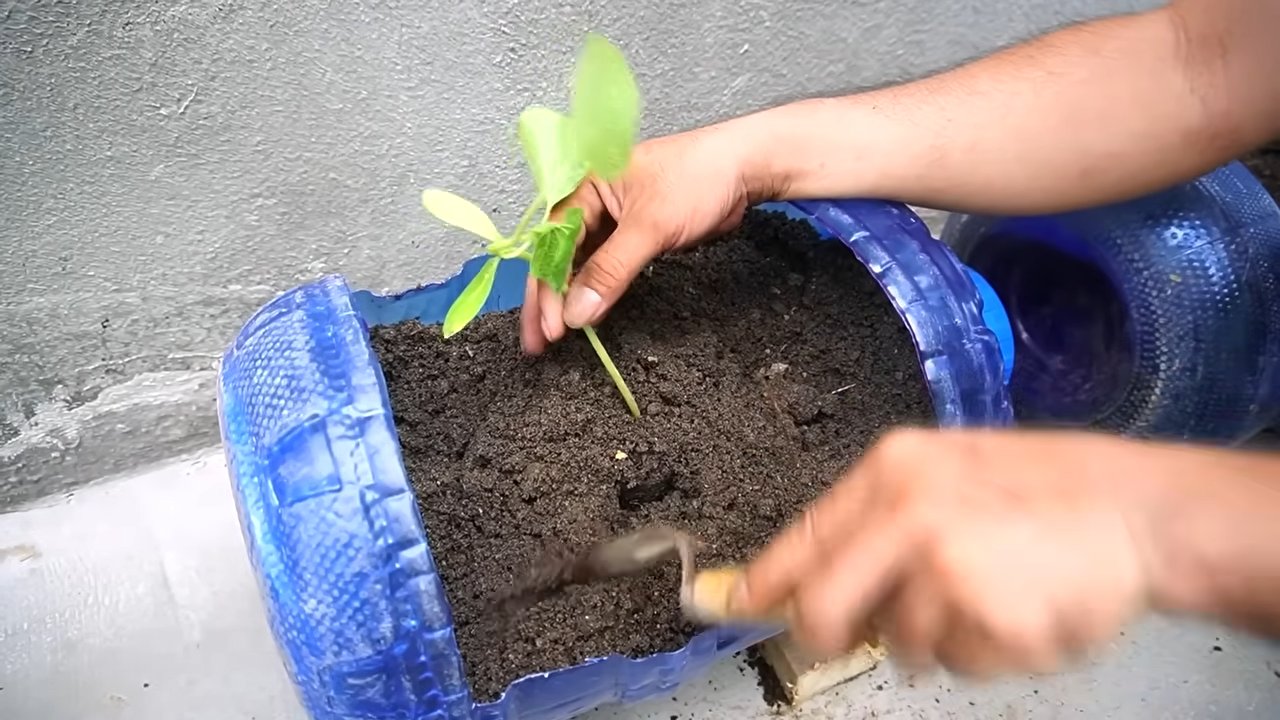
Once the danger of frost has passed and your seedlings have been hardened off, it’s time to transplant them into your prepared mound. This is where the vine training begins, crucial for managing space in a small yard.
1. Transplanting: Carefully transplant your seedlings into the center of the mound. Water them thoroughly.
2. Vine Training: This is where the “small yard” strategy comes into play. You can’t let the vines sprawl randomly. You need to train them.
* Main Vine: Choose one main vine and train it to grow in a straight line. This will be the primary vine that produces your pumpkin.
* Secondary Vines: Pinch off any secondary vines that grow directly from the main vine. These will compete for resources.
* Tertiary Vines: Allow a few tertiary vines (vines that grow from the secondary vines) to develop, but keep them trimmed. These will provide additional leaves for photosynthesis.
* Directing Growth: Use stakes or trellises to guide the vines in the direction you want them to grow. You can also use rocks or bricks to hold the vines in place.
* Pruning: Regularly prune the vines to keep them under control. Remove any dead or diseased leaves.
3. Burying Vines: Burying sections of the vine can encourage root growth, providing the plant with more nutrients and water. Cover sections of the vine with soil, leaving the leaves exposed.
Pollination and Fruit Selection: Choosing Your Champion
Pumpkins have separate male and female flowers. You’ll need to hand-pollinate the female flowers to ensure fruit set.
1. Identifying Male and Female Flowers: Male flowers have a long, thin stem. Female flowers have a small, immature pumpkin at the base of the flower.
2. Hand-Pollination: The best time to hand-pollinate is in the morning. Use a small paintbrush to collect pollen from a male flower and transfer it to the stigma of a female flower.
3. Tagging: Tag the pollinated female flower with the date. This will help you track its development.
4. Fruit Selection: Once you have several pumpkins developing, you’ll need to choose the one you want to focus on. Select the pumpkin that is closest to the main vine and has the best shape. Remove all other pumpkins from the vine. This will allow the plant to focus all its energy on growing the chosen pumpkin.
5. Protecting the Pumpkin: As the pumpkin grows, protect it from pests and diseases. You can use a shade cloth to protect it from the sun. Place a piece of plywood or cardboard under the pumpkin to prevent it from rotting.
Watering and Fertilizing: Fueling the Growth
Giant pumpkins need a lot of water and nutrients.
1. Watering: Water deeply and regularly, especially during hot, dry weather. Aim for at least 1 inch of water per week. Use a soaker hose or drip irrigation to water the roots directly. Avoid watering the leaves, as this can promote disease.
2. Fertilizing: Fertilize regularly with a balanced fertilizer. I use a combination of liquid seaweed and fish emulsion. You can also use a fertilizer specifically formulated for pumpkins. Follow the instructions on the package.
3. Foliar Feeding: Foliar feeding (spraying the leaves with fertilizer) can provide a quick boost of nutrients. Use a diluted solution of liquid seaweed or fish emulsion.
Pest and Disease Control: Keeping Your Pumpkin Healthy
Pumpkins are susceptible to a variety of pests and diseases.
1. Common Pests: Squash bugs, squash vine borers, and aphids are common pumpkin pests. Inspect your plants regularly for signs of infestation.
2. Common Diseases: Powdery mildew and downy mildew are common pumpkin diseases. These diseases can be prevented by providing good air circulation and avoiding overhead watering.
3. Organic Pest and Disease Control: Use organic pest and disease control methods whenever possible. Insecticidal soap, neem oil, and copper fungicide are effective organic options.
Harvesting: The Grand Finale
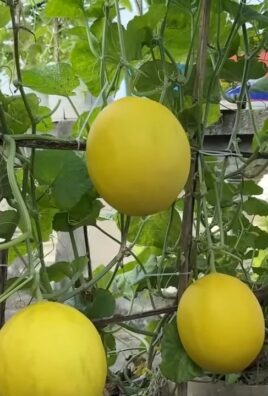
Harvest your pumpkin when it’s fully mature. The skin should be hard and resistant to scratching.
1. Timing: Harvest your pumpkin before the first frost.
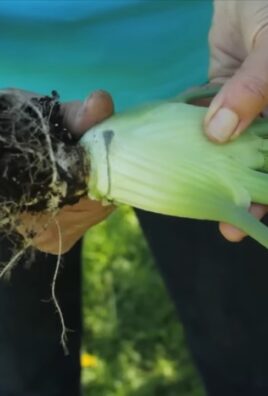
2. Cutting the Stem: Cut the stem several inches from the pumpkin. Do not lift the pumpkin by the stem, as this can damage it.
3. Moving the Pumpkin: Moving a giant
Conclusion
So, there you have it! Growing big pumpkins in a small yard might seem like an impossible feat, but with these simple yet effective DIY tricks, you can absolutely cultivate a prize-winning gourd, even if your space is limited. We’ve covered everything from selecting the right variety and preparing nutrient-rich soil to strategic pruning and hand-pollination techniques. Remember, the key is to maximize every inch of your available space and provide your pumpkin vine with the optimal conditions it needs to thrive.
This isn’t just about growing a pumpkin; it’s about the joy of nurturing life, the satisfaction of seeing your hard work pay off, and the bragging rights that come with showcasing a truly impressive specimen. Imagine the looks of awe and wonder as your neighbors marvel at the giant pumpkin you’ve managed to grow in your seemingly tiny yard!
But don’t just take our word for it. The real magic happens when you put these techniques into practice. We encourage you to embrace the challenge, get your hands dirty, and embark on your own pumpkin-growing adventure.
Consider these variations to personalize your approach:
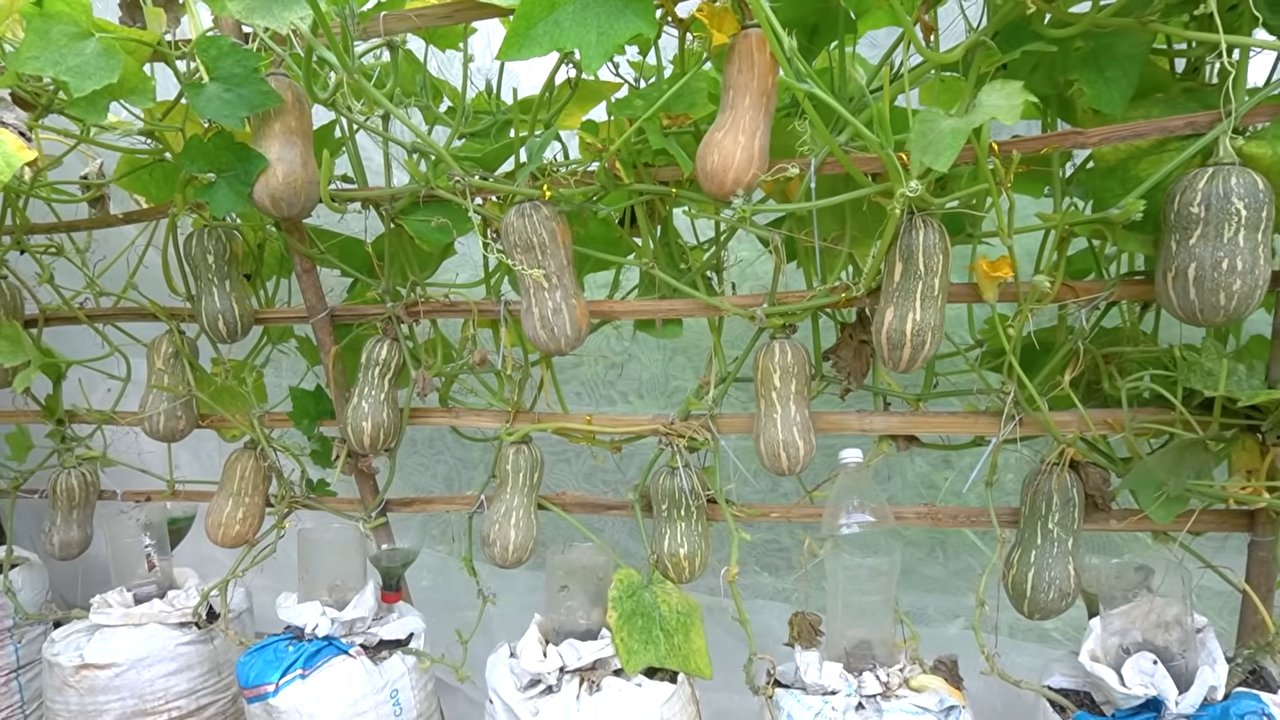
* Vertical Growing: If ground space is truly at a premium, explore vertical growing options. Train your pumpkin vine to climb a sturdy trellis or fence. This not only saves space but also adds a unique visual element to your garden. Just be sure to provide ample support for the developing pumpkin as it grows heavier.
* Container Gardening: While not ideal for truly massive pumpkins, you can still grow respectable-sized pumpkins in large containers. Choose a dwarf or semi-dwarf variety and ensure your container is at least 30 gallons in size.
* Companion Planting: Maximize your garden’s efficiency by incorporating companion plants. Marigolds, for example, can help deter pests, while beans can fix nitrogen in the soil, benefiting your pumpkin vine.
* Soil Amendments: Experiment with different soil amendments to find what works best for your soil type. Compost, aged manure, and bone meal are all excellent options for boosting soil fertility.
The most important thing is to experiment, learn from your mistakes, and adapt your approach as needed. Every garden is unique, and what works for one person may not work for another.
We are confident that with a little dedication and these DIY tricks, you’ll be well on your way to growing big pumpkins in your small yard. We can’t wait to hear about your experiences! Share your photos, tips, and stories with us in the comments below. Let’s create a community of passionate pumpkin growers and inspire others to embrace the challenge. Remember, even the smallest yard can yield the biggest results with the right approach. So, go ahead, give it a try, and prepare to be amazed by what you can achieve! The secret to success is in the details, and with these tips, you’ll be well-equipped to cultivate a truly impressive gourd. Happy growing!
Frequently Asked Questions (FAQ)
Q: What is the best pumpkin variety to grow in a small yard?
A: While Atlantic Giant is the go-to for massive pumpkins, it requires a lot of space. For smaller yards, consider varieties like ‘Baby Boo’ (for ornamental purposes), ‘Jack Be Little’ (also ornamental and edible), or smaller cultivars of ‘Dill’s Atlantic Giant’ that are specifically bred for slightly smaller sizes. These varieties still offer a rewarding growing experience without completely taking over your garden. Remember to check the mature size of the vine before planting to ensure it’s manageable for your space.
Q: How much sunlight do pumpkins need?
A: Pumpkins are sun-loving plants and require at least 6-8 hours of direct sunlight per day to thrive. Choose a location in your yard that receives ample sunlight throughout the day. If your yard is partially shaded, try to position your pumpkin vine so that it receives morning sun, which is generally less intense than afternoon sun.
Q: What kind of soil is best for growing pumpkins?
A: Pumpkins prefer well-drained, fertile soil that is rich in organic matter. Before planting, amend your soil with compost, aged manure, or other organic materials to improve its fertility and drainage. A slightly acidic to neutral soil pH (around 6.0-7.0) is ideal. You can test your soil pH using a soil testing kit and adjust it accordingly.
Q: How often should I water my pumpkin plant?
A: Pumpkins need consistent moisture, especially during hot, dry weather. Water deeply and regularly, aiming to keep the soil consistently moist but not waterlogged. Avoid overhead watering, as this can promote fungal diseases. Instead, water at the base of the plant, using a soaker hose or drip irrigation system if possible. As the pumpkin fruits develop, increase the watering frequency to support their rapid growth.
Q: How do I hand-pollinate my pumpkin flowers?
A: Hand-pollination is crucial for ensuring successful fruit set, especially if you have limited pollinator activity in your area. Identify the female flowers (they have a small immature pumpkin at the base) and the male flowers (they have a long, slender stem). In the early morning, use a small paintbrush or cotton swab to collect pollen from the male flower and transfer it to the stigma of the female flower. Repeat this process for several female flowers to increase your chances of success.
Q: How do I prune my pumpkin vine to encourage larger fruit?
A: Pruning is essential for directing the plant’s energy towards developing a few large pumpkins rather than many smaller ones. Once your vine has set a few pumpkins, prune off any additional flowers or small pumpkins that are not likely to mature. Also, prune off any side shoots or leaves that are shading the developing pumpkins. This will help to improve air circulation and reduce the risk of fungal diseases.
Q: How do I protect my pumpkin from pests and diseases?
A: Pumpkins are susceptible to various pests and diseases, including squash bugs, squash vine borers, powdery mildew, and blossom end rot. Regularly inspect your plants for signs of pests or diseases and take action promptly. Use organic pest control methods, such as insecticidal soap or neem oil, to control pests. Improve air circulation and avoid overhead watering to prevent fungal diseases. Ensure your soil is rich in calcium to prevent blossom end rot.
Q: How do I support the weight of a large pumpkin?
A: As your pumpkin grows larger, it will become increasingly heavy and may need additional support to prevent it from breaking off the vine. Place a piece of plywood or a thick layer of straw underneath the pumpkin to protect it from contact with the soil and to distribute its weight more evenly. You can also use slings or supports made from old pantyhose or fabric to cradle the pumpkin and provide additional support.
Q: When is the best time to harvest my pumpkin?
A: Pumpkins are typically ready to harvest in the fall, when the skin has hardened and turned a deep, uniform color. The stem should also be dry and brown. To harvest, use a sharp knife or pruning shears to cut the stem a few inches from the pumpkin. Avoid lifting the pumpkin by the stem, as this can damage it. Cure the pumpkin in a warm, dry place for a few weeks to harden the skin and improve its storage life.
Q: Can I really grow a giant pumpkin in a small yard using these DIY tricks?
A: While achieving a world-record-breaking pumpkin in a tiny yard might be a stretch, you can absolutely grow impressively large pumpkins using the techniques outlined. The key is to focus on maximizing the available space, providing optimal growing conditions, and diligently pruning and caring for your plant. The results will depend on various factors, including the variety of pumpkin you choose, the quality of your soil, and the amount of sunlight your yard receives. However, with dedication and these DIY tricks, you’ll be well on your way to growing a pumpkin that will be the envy of your neighborhood. The focus keyword, **grow big pumpkins small yard**, is achievable with dedication and the right techniques.
Leave a Comment