
DIY wrinkle spray: who doesn’t dream of banishing those pesky lines without breaking the bank or resorting to harsh chemicals? I know I do! For centuries, people have sought ways to preserve youthful skin, from ancient Egyptians using milk and honey masks to Renaissance Europeans experimenting with herbal concoctions. While we’ve come a long way since then, the desire for a natural, effective solution remains strong.
That’s why I’m so excited to share this incredible DIY wrinkle spray recipe with you. In today’s world, we’re constantly bombarded with expensive creams and serums promising miraculous results. But what if I told you that you could achieve similar benefits with ingredients you probably already have in your pantry? This isn’t just about saving money; it’s about taking control of what you put on your skin and embracing a more sustainable, holistic approach to beauty.
This DIY wrinkle spray is a game-changer because it’s simple, affordable, and effective. It’s perfect for anyone looking to reduce the appearance of fine lines, hydrate their skin, and achieve a healthy, radiant glow. Plus, you’ll know exactly what’s going into your spray, avoiding potentially harmful additives found in many commercial products. So, are you ready to unlock the secret to smoother, younger-looking skin? Let’s dive in and create your own miracle in a bottle!
DIY Wrinkle Release Spray: Say Goodbye to Ironing!
Okay, let’s be honest, who actually *enjoys* ironing? I know I don’t! That’s why I’m so excited to share my super easy and effective DIY wrinkle release spray recipe. This stuff is a lifesaver, especially when you’re traveling or just don’t have the time (or energy!) to break out the ironing board. It’s also much gentler on your clothes than constant ironing. So, ditch the iron (at least sometimes!) and let’s get started!
What You’ll Need: The Wrinkle-Fighting Arsenal
Before we dive in, let’s gather all the necessary supplies. Don’t worry, you probably already have most of these lying around your house!
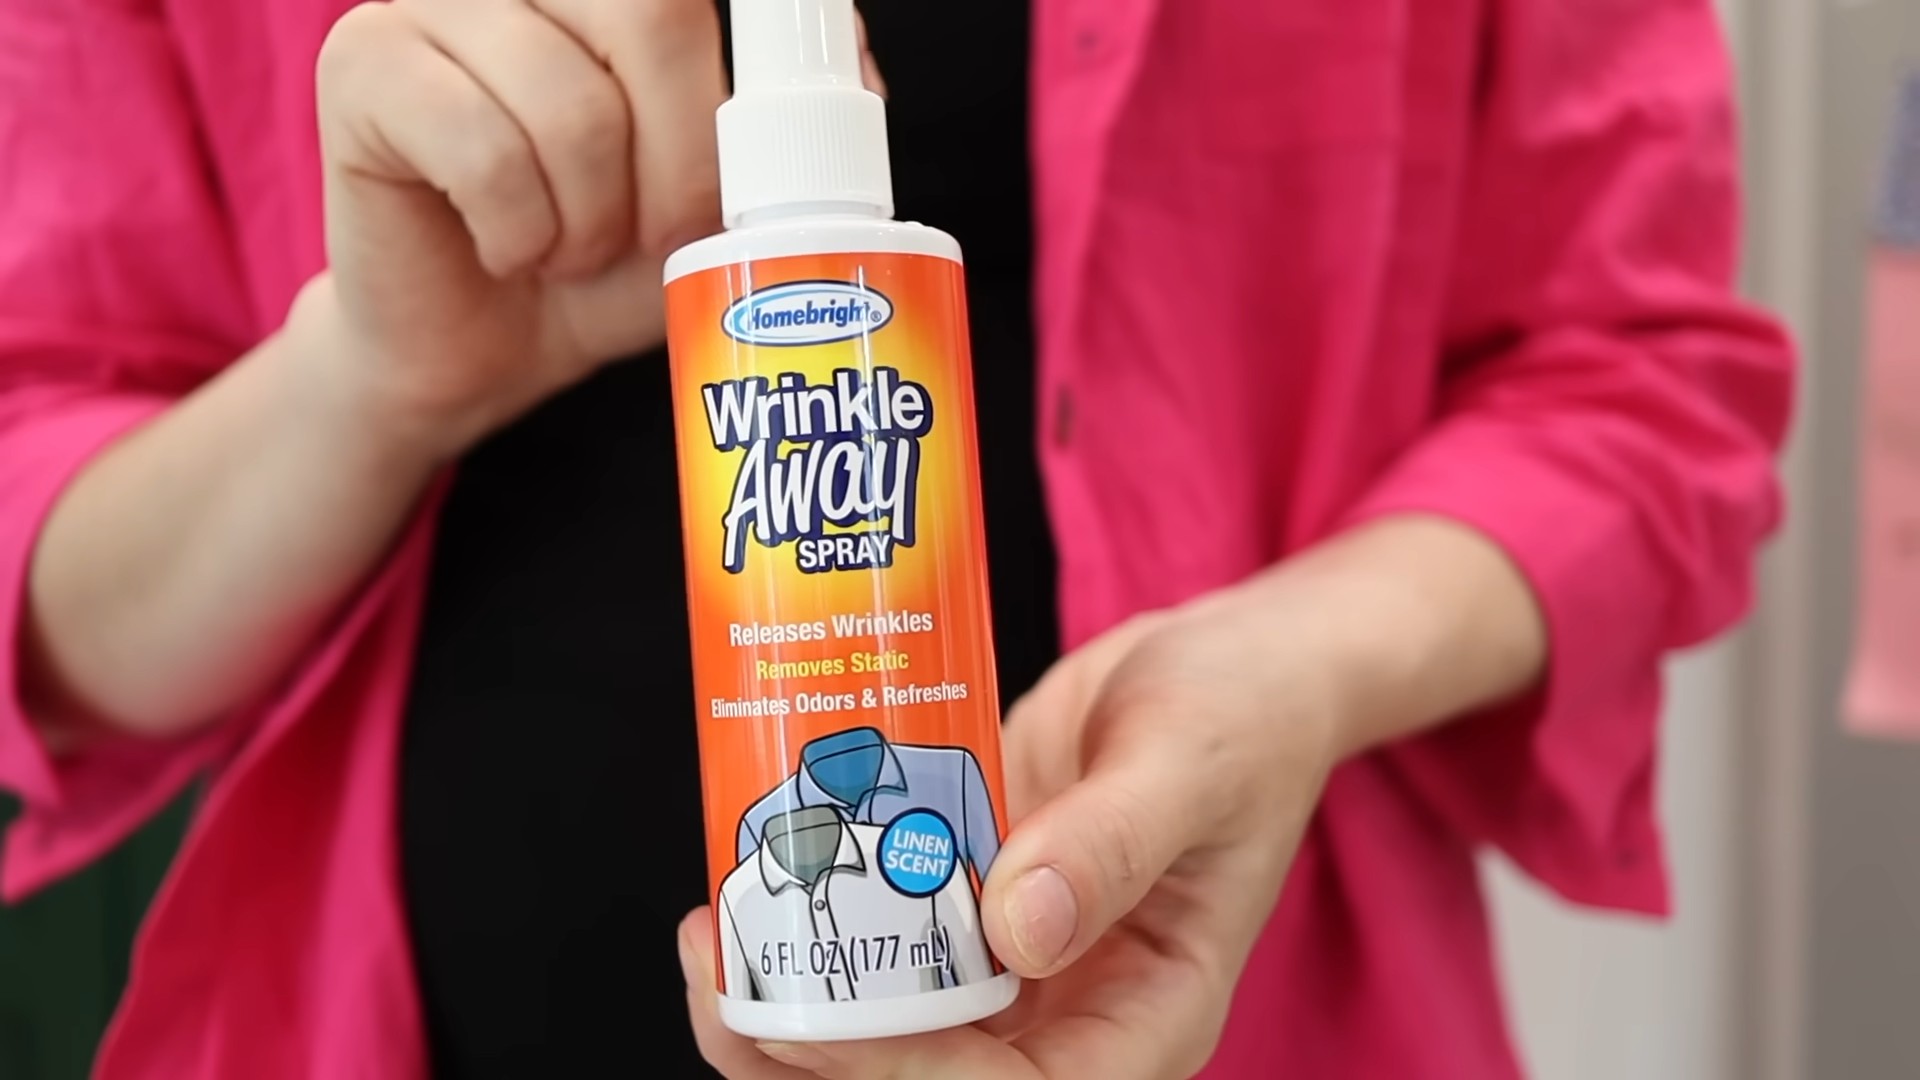
* **Spray Bottle:** A clean, empty spray bottle is essential. I recommend a 16-ounce bottle, but anything close will work. Make sure it sprays a fine mist, not a stream.
* **Distilled Water:** This is important! Tap water can contain minerals that can leave residue on your clothes. Distilled water ensures a clean and effective spray.
* **White Vinegar:** The secret weapon! Vinegar helps to relax the fibers in your clothing, allowing the wrinkles to release. Don’t worry, the vinegar smell dissipates quickly.
* **Liquid Fabric Softener (Optional):** This adds a nice scent and extra softening power. If you’re sensitive to fragrances, you can skip this.
* **Essential Oil (Optional):** If you’re skipping the fabric softener or just want a more personalized scent, a few drops of your favorite essential oil will do the trick. Lavender, lemon, or eucalyptus are great choices.
* **Measuring Spoons or Cups:** For accurate measuring.
* **Funnel (Optional):** Makes pouring liquids into the spray bottle much easier and less messy.
The Magic Formula: Ratios and Measurements
Getting the ratios right is key to a successful wrinkle release spray. Here’s my go-to recipe:
* **Distilled Water:** 1 cup (8 ounces)
* **White Vinegar:** 1/2 cup (4 ounces)
* **Liquid Fabric Softener (Optional):** 1 teaspoon
* **Essential Oil (Optional):** 5-10 drops
Mixing It Up: Step-by-Step Instructions
Now for the fun part – creating our wrinkle-busting concoction!
1. **Prepare the Spray Bottle:** Make sure your spray bottle is clean and dry. This will prevent any unwanted odors or residue from affecting your clothes.
2. **Add Distilled Water:** Pour the distilled water into the spray bottle. Using a funnel can help prevent spills.
3. **Incorporate the White Vinegar:** Carefully add the white vinegar to the spray bottle. Don’t be alarmed by the smell – it will fade quickly once the spray dries.
4. **Introduce Fabric Softener (Optional):** If you’re using fabric softener, add one teaspoon to the mixture.
5. **Add Essential Oil (Optional):** If you’re using essential oil, add 5-10 drops to the spray bottle. Start with a smaller amount and add more if you want a stronger scent.
6. **Shake Well:** Secure the spray nozzle onto the bottle and shake the mixture vigorously for at least 30 seconds to ensure all the ingredients are thoroughly combined.
Putting It to the Test: How to Use Your Wrinkle Release Spray
Now that you’ve created your wrinkle release spray, it’s time to put it to the test! Here’s how to use it effectively:
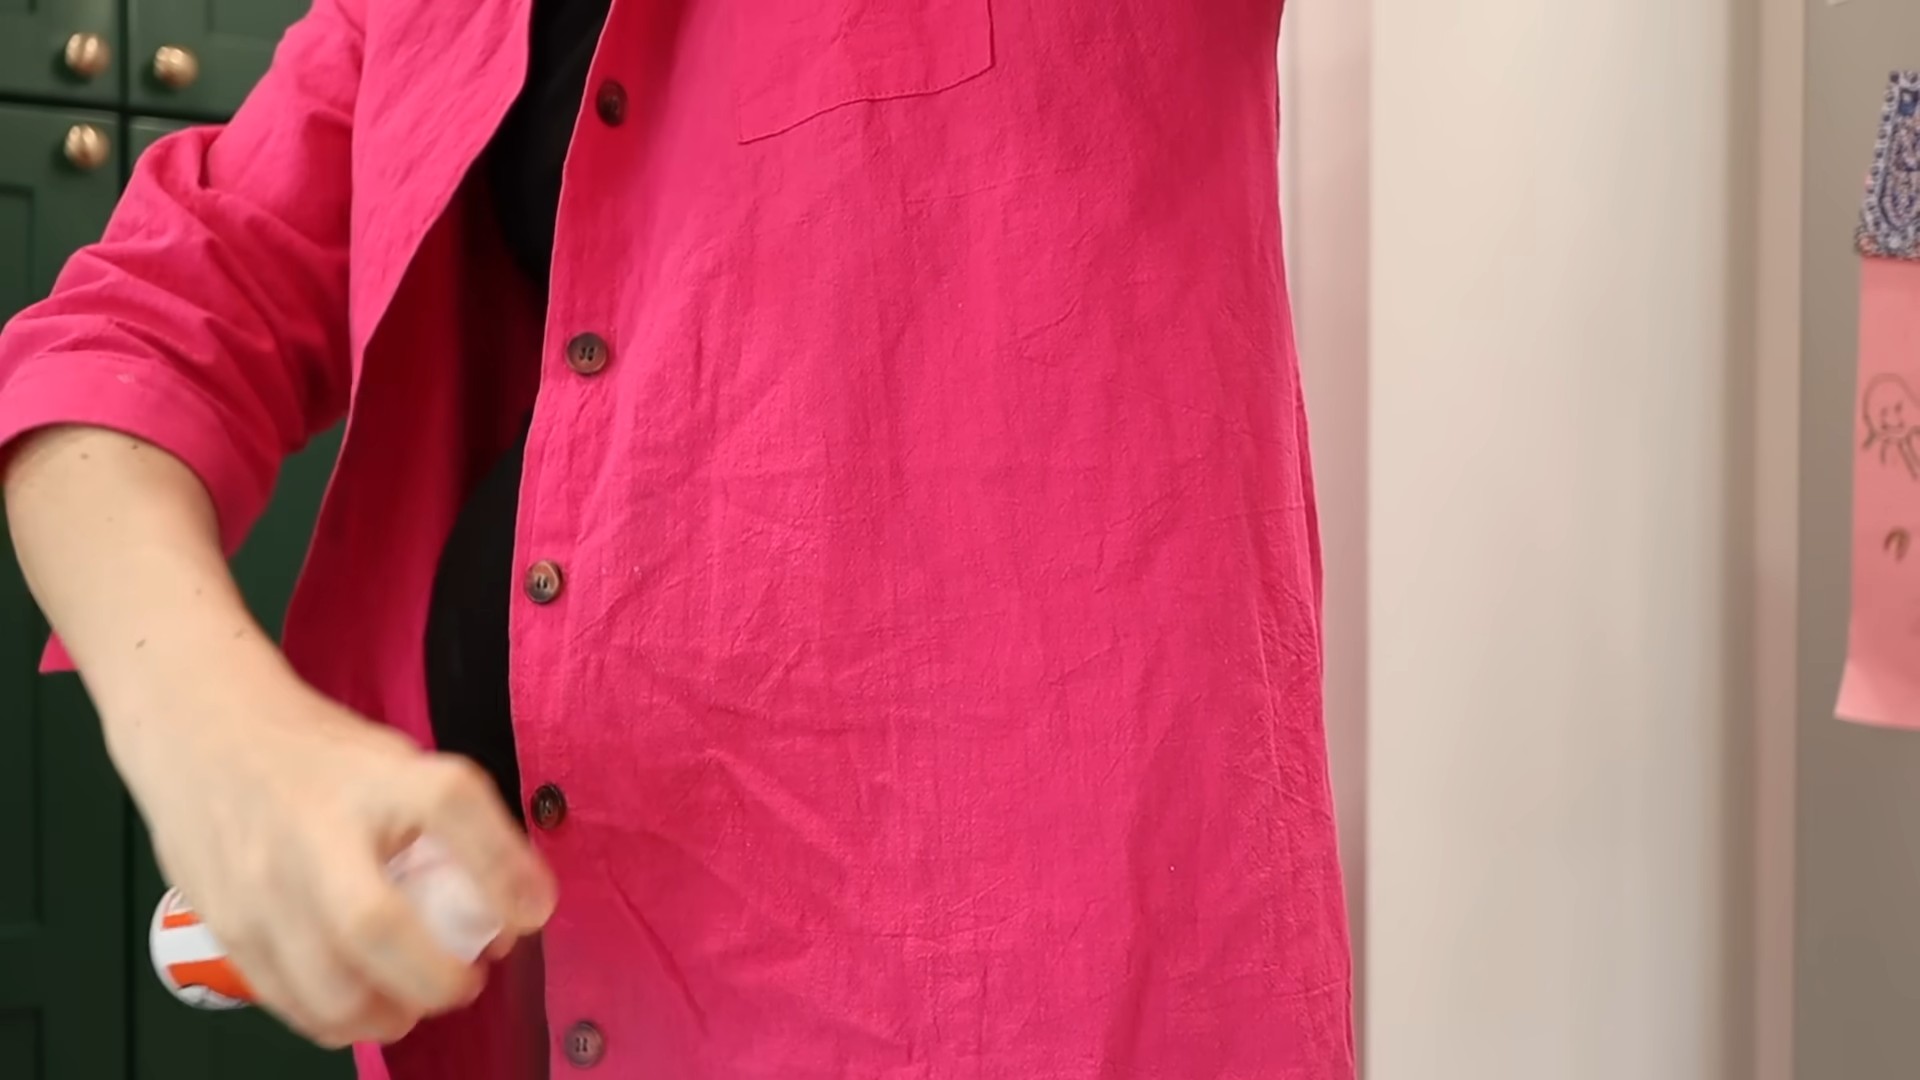
1. **Hang the Garment:** Hang the wrinkled garment on a hanger. This allows the spray to work its magic evenly.
2. **Spray Lightly:** Hold the spray bottle about 6-8 inches away from the garment and spray lightly, focusing on the wrinkled areas. Don’t saturate the fabric – a light mist is all you need.
3. **Smooth and Stretch:** Gently smooth out the fabric with your hands, stretching it slightly to help release the wrinkles.
4. **Let It Dry:** Allow the garment to air dry completely. This usually takes about 15-30 minutes, depending on the fabric and humidity. You can also use a hairdryer on a low setting to speed up the drying process.
5. **Enjoy Wrinkle-Free Clothes!** Once the garment is dry, it should be noticeably less wrinkled. If necessary, repeat the process for stubborn wrinkles.
Tips and Tricks for Wrinkle-Free Success
Here are a few extra tips to help you get the most out of your DIY wrinkle release spray:
* **Test on a Small Area First:** Before spraying an entire garment, test the spray on a small, inconspicuous area to ensure it doesn’t cause any discoloration or damage.
* **Use on Natural Fabrics:** This spray works best on natural fabrics like cotton, linen, and rayon. It may not be as effective on synthetic fabrics like polyester or nylon.
* **Don’t Over-Saturate:** Over-saturating the fabric can make it stiff and take longer to dry. A light mist is all you need.
* **Store in a Cool, Dark Place:** Store your wrinkle release spray in a cool, dark place to prevent the essential oils from degrading.
* **Re-Shake Before Each Use:** The ingredients may separate over time, so be sure to shake the bottle well before each use.
* **Adjust the Recipe:** Feel free to adjust the recipe to suit your preferences. If you find the vinegar smell too strong, reduce the amount slightly. If you want a stronger scent, add more essential oil.
* **Perfect for Travel:** This spray is perfect for travel! Just pour some into a small travel-sized spray bottle and you’re good to go.
* **Use on Curtains and Linens:** This spray isn’t just for clothes! You can also use it to freshen up curtains, linens, and other fabrics around your home.
* **Ironing Alternative:** While this spray isn’t a complete replacement for ironing, it’s a great alternative for lightly wrinkled clothes or when you’re short on time.
* **Experiment with Scents:** Have fun experimenting with different essential oil combinations to create your own signature scent.
Troubleshooting: Common Issues and Solutions
Sometimes, things don’t go exactly as planned. Here are some common issues you might encounter and how to fix them:
* **Vinegar Smell Too Strong:** If the vinegar smell is too strong, try reducing the amount of vinegar in the recipe or adding more essential oil. You can also try using a scented fabric softener.
* **Spray Leaves Residue:** If the spray leaves a residue on your clothes, try using less fabric softener or switching to a different brand. Make sure you’re using distilled water, as tap water can contain minerals that can leave residue.
* **Spray Doesn’t Work:** If the spray doesn’t seem to be working, make sure you’re using it on the right type of fabric. It works best on natural fabrics. You may also need to repeat the process for stubborn wrinkles.
* **Spray Bottle Clogs:** If your spray bottle clogs, try cleaning it with warm, soapy water. You can also try using a different spray bottle.
Why This Works: The Science Behind the Spray
So, what makes this wrinkle release spray so effective? It all comes down to the science behind the ingredients:
* **Water:** Water helps to hydrate the fabric fibers, making them more pliable and easier to stretch.
* **Vinegar:** Vinegar is a mild acid that helps to relax the bonds between the fibers in the fabric, allowing the wrinkles to release.
* **Fabric Softener:** Fabric softener helps to lubricate the fibers, making them smoother and less likely to wrinkle.
* **Essential Oils:** Essential oils add a pleasant scent and can also have antimicrobial properties.
Beyond the Basics: Advanced Wrinkle-Fighting Techniques
Want to take your wrinkle-fighting game to the next level? Here are a few advanced techniques to try:
* **Steam Ironing:** After spraying the garment, use a steam iron on a low setting to further relax the fibers and remove stubborn wrinkles.
* **Tumble Drying:** After spraying the garment, toss it in the dryer on a low setting for a few minutes to help release the wrinkles. Be careful not to over-dry the garment, as this can cause it to shrink.
* **Wrinkle-Resistant Fabrics:** When shopping for clothes, look for fabrics that are naturally wrinkle-resistant, such as linen blends or wrinkle-free cotton.
* **Proper Storage:** Store your clothes properly to prevent wrinkles from forming in the first place. Hang clothes up immediately after washing and folding them neatly.
Final Thoughts: Embrace the Wrinkle-Free Life!
I hope you found this DIY wrinkle release spray recipe helpful! It’s a simple, effective, and affordable way to keep your clothes looking their best without spending hours ironing. So, go ahead and give it a try – you might just be surprised at how much time and effort you save! Happy wrinkle-free living!
Conclusion
So, there you have it! This DIY wrinkle spray is more than just a quick fix; it’s a game-changer for anyone looking to streamline their routine, save money, and embrace a more natural approach to garment care. We’ve explored the simplicity of creating your own wrinkle-releasing solution, highlighting its cost-effectiveness, eco-friendliness, and the peace of mind that comes with knowing exactly what ingredients are touching your clothes and your skin.
But why is this DIY trick a must-try? It boils down to control and convenience. Store-bought wrinkle sprays often contain harsh chemicals and artificial fragrances that can irritate sensitive skin or leave behind an unpleasant odor. With this DIY version, you’re in the driver’s seat. You choose the ingredients, tailoring the formula to your specific needs and preferences. Need a scent boost? Add a few drops of your favorite essential oil. Prefer a stronger solution for stubborn wrinkles? Adjust the ratio of ingredients accordingly. The possibilities are endless!
Beyond the practical benefits, this DIY wrinkle spray empowers you to be more conscious of your consumption habits. By opting for homemade solutions, you’re reducing your reliance on mass-produced products and minimizing your environmental footprint. It’s a small change that can make a big difference.
Consider these variations to personalize your DIY wrinkle spray:
* For delicate fabrics: Reduce the amount of vinegar or witch hazel to prevent any potential discoloration or damage.
* For a refreshing scent: Add a few drops of lavender, lemon, or eucalyptus essential oil.
* For extra moisturizing: Incorporate a teaspoon of vegetable glycerin to help soften fabrics and prevent static cling.
* For travel: Decant the spray into a small, travel-sized bottle for on-the-go wrinkle relief.
We’re confident that once you try this DIY wrinkle spray, you’ll wonder how you ever lived without it. It’s a simple, effective, and affordable solution for keeping your clothes looking their best, without the hassle of ironing or the expense of commercial products.
Don’t just take our word for it – give it a try! We encourage you to experiment with different variations, find the formula that works best for you, and share your experience with us. Let us know what essential oils you added, what fabrics you found it most effective on, and any other tips or tricks you discovered along the way. Your feedback will help us refine this recipe and inspire others to embrace the power of DIY.
Ready to ditch the iron and embrace a wrinkle-free life? Grab your ingredients, mix up a batch of this amazing DIY wrinkle spray, and prepare to be amazed! We can’t wait to hear about your results.
Frequently Asked Questions (FAQ)
What exactly is a DIY wrinkle spray, and how does it work?
A DIY wrinkle spray is a homemade solution designed to relax fabric fibers and release wrinkles without the need for ironing. It typically consists of water, a wrinkle-releasing agent like vinegar or witch hazel, and optional ingredients like essential oils for fragrance. The spray works by lightly dampening the fabric, allowing the fibers to relax and unfold. As the fabric dries, the wrinkles smooth out, leaving your clothes looking fresh and presentable. It’s a convenient and cost-effective alternative to ironing, especially for travel or quick touch-ups.
What are the key ingredients in this DIY wrinkle spray, and why are they used?
The core ingredients are water, vinegar (or witch hazel), and optionally, essential oils. Water acts as the base, allowing the other ingredients to disperse evenly. Vinegar (white distilled vinegar is recommended) is a natural fabric softener and wrinkle releaser. Its mild acidity helps to relax the fibers, making them more pliable and less prone to creasing. Witch hazel is a gentler alternative to vinegar, suitable for delicate fabrics or those sensitive to strong smells. Essential oils are added for fragrance and can also provide additional benefits, such as antibacterial properties or a calming aroma.
Is this DIY wrinkle spray safe for all types of fabrics?
While generally safe, it’s always a good idea to test the spray on an inconspicuous area of the fabric first, especially for delicate materials like silk or rayon. Vinegar can be too harsh for some fabrics, so consider using witch hazel as a gentler alternative. Avoid using the spray on fabrics that are known to be water-sensitive or prone to staining. Always check the care label of your garment before applying any wrinkle-releasing solution.
How do I use the DIY wrinkle spray effectively?
First, shake the bottle well to ensure the ingredients are properly mixed. Hang the garment on a hanger or lay it flat on a clean surface. Lightly mist the wrinkled areas of the fabric, holding the spray bottle about 6-8 inches away. Avoid saturating the fabric, as this can lead to water spots or prolonged drying time. Gently smooth out the wrinkles with your hands. Allow the garment to air dry completely. For best results, use the spray on slightly damp clothes or after steaming them.
Can I use essential oils in my DIY wrinkle spray, and which ones are recommended?
Yes, essential oils can be a great addition to your DIY wrinkle spray, adding a pleasant fragrance and potential therapeutic benefits. Some popular choices include lavender (for its calming scent), lemon (for its refreshing and antibacterial properties), eucalyptus (for its invigorating aroma), and tea tree oil (for its antibacterial and antifungal properties). When using essential oils, be sure to use high-quality, pure oils and add them sparingly, typically a few drops per batch of spray. Always test the spray on an inconspicuous area of the fabric first to ensure the essential oil doesn’t cause any discoloration or staining.
How long does the DIY wrinkle spray last, and how should I store it?
The DIY wrinkle spray typically lasts for several months when stored properly. To maximize its shelf life, store it in a cool, dark place away from direct sunlight and heat. A dark-colored glass bottle is ideal, as it helps to protect the ingredients from light degradation. Be sure to label the bottle with the date you made the spray so you can keep track of its freshness. If you notice any changes in color, odor, or consistency, it’s best to discard the spray and make a fresh batch.
Can I use this DIY wrinkle spray on bedding and curtains?
Yes, this DIY wrinkle spray can be used on bedding and curtains to help release wrinkles and freshen them up. Follow the same instructions as you would for clothing: lightly mist the fabric, smooth out the wrinkles, and allow it to air dry. For large items like curtains, you may want to use a larger spray bottle or work in sections. Be sure to test the spray on an inconspicuous area first, especially for delicate or expensive fabrics.
What if the DIY wrinkle spray leaves a vinegar smell on my clothes?
The vinegar smell should dissipate as the fabric dries. However, if you’re concerned about the odor, you can reduce the amount of vinegar in the recipe or add a few drops of your favorite essential oil to mask the scent. You can also try using witch hazel instead of vinegar, as it has a milder smell. Another tip is to ensure the fabric is completely dry before wearing it, as the vinegar smell is more noticeable when the fabric is damp.
Can I use tap water for this DIY wrinkle spray, or should I use distilled water?
While tap water can be used, distilled water is generally recommended for making DIY beauty and cleaning products, including this wrinkle spray. Distilled water is free of minerals and impurities that can potentially affect the quality and shelf life of the spray. Using distilled water can also help to prevent mineral buildup in your spray bottle. However, if you don’t have distilled water on hand, tap water is a suitable alternative.
Is there anything else I should know before making and using this DIY wrinkle spray?
Always shake the bottle well before each use to ensure the ingredients are properly mixed. Avoid spraying the solution directly onto your skin or into your eyes. If you have sensitive skin, consider wearing gloves when handling the spray. Keep the spray out of reach of children and pets. And most importantly, have fun experimenting with different variations and finding the formula that works best for you! Remember, this DIY wrinkle spray is all about creating a personalized and effective solution for your wrinkle-releasing needs.


Leave a Comment