
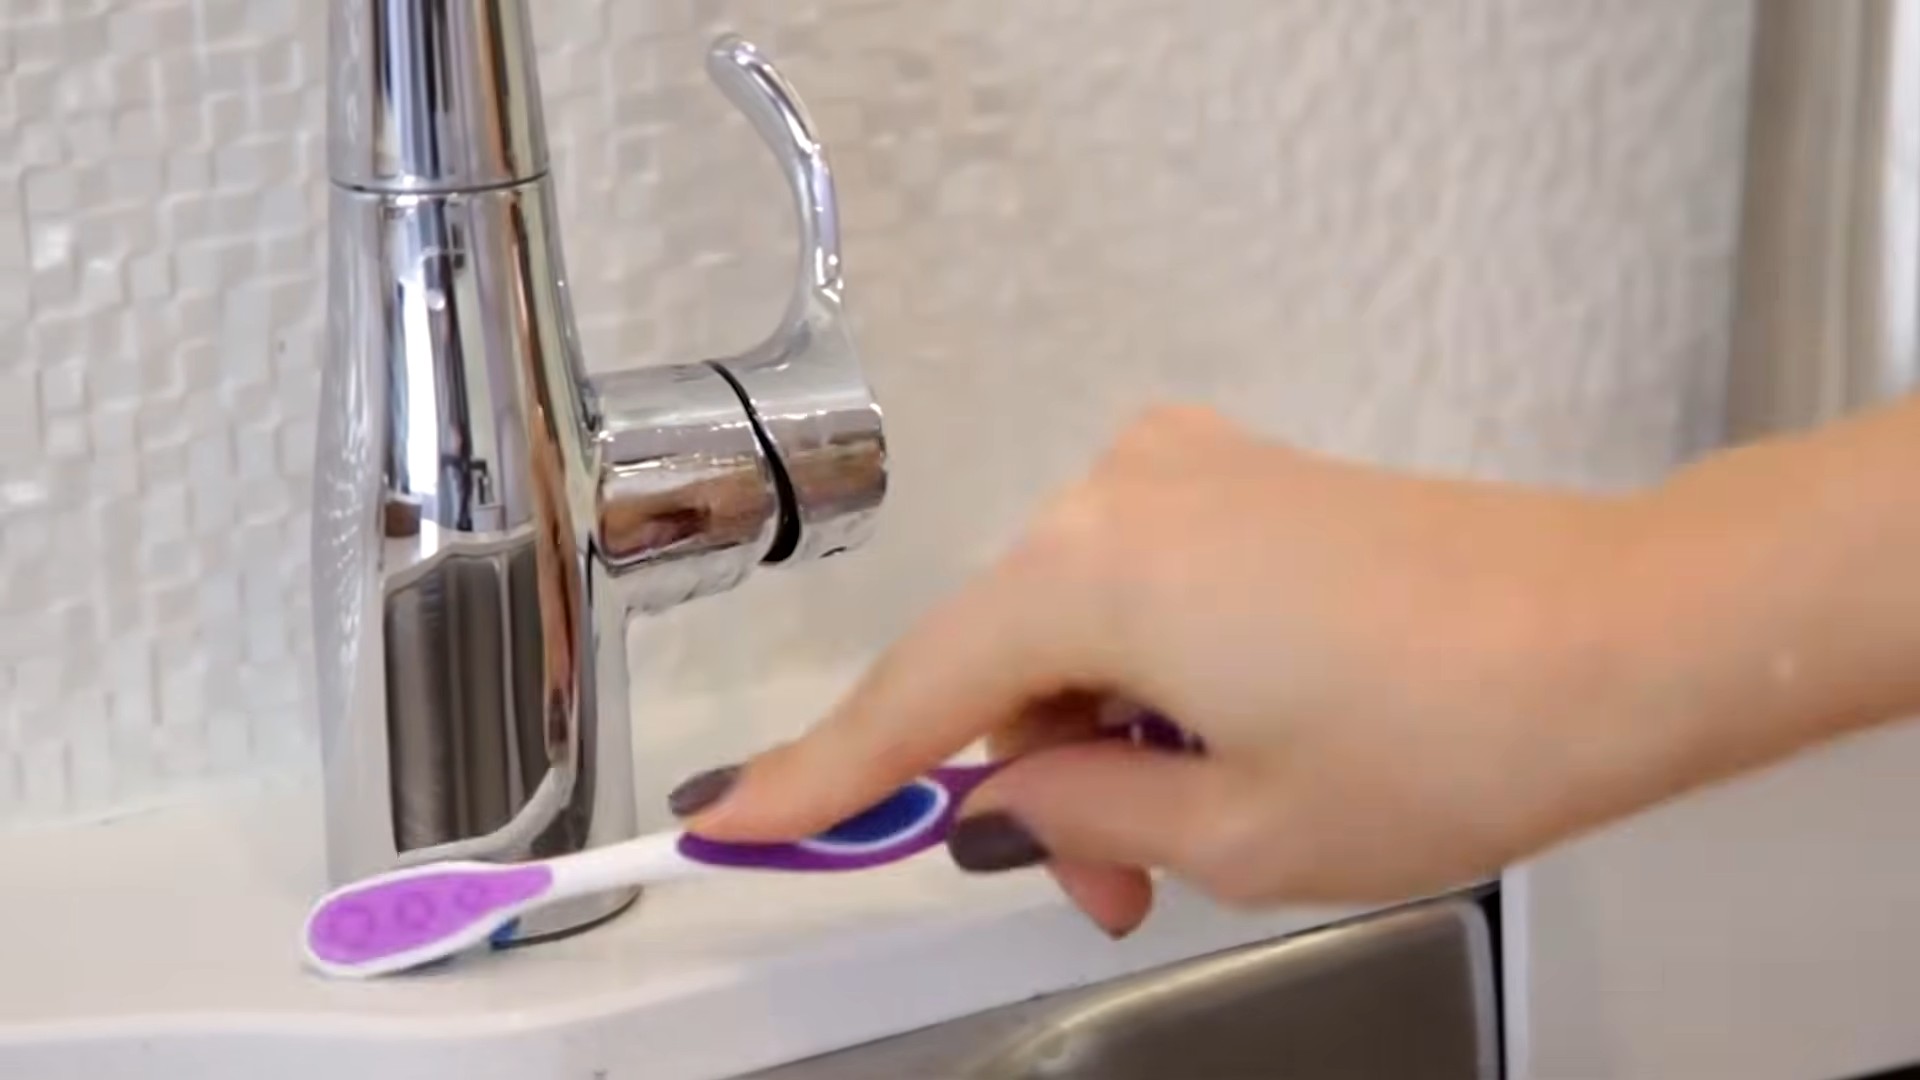
Toothbrush uses beyond teeth? You might be thinking, “Wait, what else can I do with my toothbrush besides keeping my pearly whites sparkling?” Well, prepare to be amazed! For generations, the humble toothbrush has been a staple in our oral hygiene routines. But its potential extends far beyond the bathroom sink. Think of it as a mini cleaning and detailing powerhouse just waiting to be unleashed around your home.
I’m going to let you in on some amazing DIY tricks and hacks that will transform your old toothbrushes into indispensable tools. From scrubbing grout to taming flyaway hairs, the possibilities are truly endless. Why throw away those old toothbrushes when they can become your secret weapon for tackling those tricky cleaning tasks?
In today’s world, we’re all looking for ways to save money and be more resourceful. These toothbrush uses beyond teeth not only help you declutter but also offer eco-friendly alternatives to harsh chemicals and expensive cleaning gadgets. So, grab that old toothbrush, and let’s dive into a world of creative and practical DIY solutions that will make your life a little bit easier and a lot more sparkling!
Beyond the Brush: 10 Unexpected DIY Hacks Using Old Toothbrushes
Hey there, fellow DIY enthusiasts! I’m so excited to share some of my favorite ways to repurpose old toothbrushes. Before you toss that worn-out brush, consider its potential! It’s amazing how handy these little tools can be around the house. Let’s dive into 10 fantastic DIY hacks that will give your old toothbrushes a new lease on life.
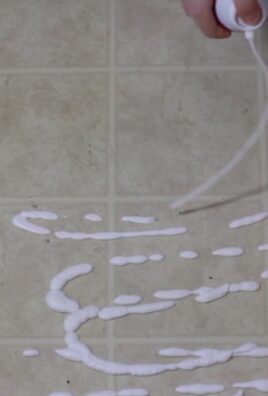
1. Grout Cleaning Powerhouse
Those narrow grout lines between tiles can be a real pain to clean. But fear not! Your old toothbrush is the perfect weapon against grime and mildew.
What you’ll need:
* Old toothbrush
* Baking soda
* White vinegar
* Small bowl
* Water
* Gloves (optional, but recommended)
Step-by-step instructions:
1. Prepare the cleaning paste: In the small bowl, mix baking soda and a little water to form a thick paste. You can also use a mixture of equal parts white vinegar and water for a more powerful cleaning solution. I personally prefer the baking soda paste for its gentle abrasive action.
2. Apply the paste: Dip the toothbrush into the baking soda paste (or vinegar solution).
3. Scrub the grout: Use the toothbrush to scrub the grout lines vigorously. Focus on areas with visible dirt or mildew. The small bristles will get into those tight spaces and loosen the grime.
4. Let it sit: Allow the paste to sit on the grout for about 5-10 minutes. This gives the baking soda or vinegar time to work its magic.
5. Rinse and wipe: Rinse the area with clean water. Use a damp cloth or sponge to wipe away any remaining residue.
6. Dry the area: Use a clean, dry cloth to dry the grout lines. This will help prevent mildew from returning.
2. Jewelry Polishing Savior
Keep your precious jewelry sparkling with a gentle toothbrush cleaning. This is especially great for intricate pieces with hard-to-reach areas.
What you’ll need:
* Old toothbrush (soft bristles are best)
* Mild dish soap
* Warm water
* Small bowl
* Soft cloth
Step-by-step instructions:
1. Prepare the cleaning solution: Fill the small bowl with warm water and add a drop or two of mild dish soap. Mix gently.
2. Soak the jewelry: Place the jewelry in the soapy water and let it soak for a few minutes. This will help loosen any dirt or grime.
3. Gently scrub: Dip the toothbrush into the soapy water and gently scrub the jewelry. Pay special attention to any crevices or hard-to-reach areas. Be very gentle, especially with delicate stones.
4. Rinse thoroughly: Rinse the jewelry thoroughly under warm running water to remove all traces of soap.
5. Dry and polish: Pat the jewelry dry with a soft cloth. You can also use a jewelry polishing cloth for extra shine.
3. Keyboard Cleaning Companion
Keyboards are notorious for collecting dust, crumbs, and other debris. A toothbrush is the perfect tool for cleaning between the keys.
What you’ll need:
* Old toothbrush
* Compressed air (optional)
* Isopropyl alcohol (optional)
* Cotton swabs (optional)
Step-by-step instructions:
1. Unplug the keyboard: Before you start cleaning, make sure to unplug the keyboard from your computer.
2. Remove loose debris: Turn the keyboard upside down and gently shake it to remove any loose debris. You can also use compressed air to blow out any dust or crumbs.
3. Brush between the keys: Use the toothbrush to gently brush between the keys, dislodging any remaining dirt or grime.
4. Sanitize (optional): If you want to sanitize the keyboard, dampen a cotton swab with isopropyl alcohol and gently wipe the keys. Be careful not to get any liquid inside the keyboard.
5. Dry thoroughly: Allow the keyboard to dry completely before plugging it back in.
4. Shoe Cleaning Specialist
Keep your shoes looking their best by using an old toothbrush to clean those hard-to-reach areas.
What you’ll need:
* Old toothbrush
* Shoe cleaner or mild soap
* Warm water
* Soft cloth
Step-by-step instructions:
1. Prepare the cleaning solution: Mix shoe cleaner or mild soap with warm water.
2. Apply the solution: Dip the toothbrush into the cleaning solution and apply it to the dirty areas of your shoes.
3. Scrub gently: Use the toothbrush to gently scrub the shoes, paying special attention to the soles, seams, and any areas with stubborn stains.
4. Rinse and wipe: Rinse the shoes with clean water and wipe them dry with a soft cloth.
5. Air dry: Allow the shoes to air dry completely before wearing them.
5. Detailing Your Car’s Interior
A toothbrush is surprisingly effective for cleaning the nooks and crannies of your car’s interior.
What you’ll need:
* Old toothbrush
* Car interior cleaner
* Microfiber cloth
Step-by-step instructions:
1. Spray the cleaner: Lightly spray the car interior cleaner onto the area you want to clean.
2. Agitate with the toothbrush: Use the toothbrush to gently agitate the cleaner, working it into the crevices and hard-to-reach spots. Think around the gear shift, air vents, and dashboard buttons.
3. Wipe clean: Use a microfiber cloth to wipe away the cleaner and any loosened dirt.
4. Repeat as needed: Repeat the process until the area is clean.
6. Cleaning Small Appliances
Toasters, blenders, and other small appliances can be tricky to clean. A toothbrush can help you reach those tight spots.
What you’ll need:
* Old toothbrush
* Damp cloth
* Mild dish soap (optional)
Step-by-step instructions:
1. Unplug the appliance: Always unplug the appliance before cleaning it.
2. Remove loose debris: Remove any loose debris from the appliance.
3. Dampen the toothbrush: Dampen the toothbrush with water. You can also add a drop of mild dish soap if needed.
4. Scrub the appliance: Use the toothbrush to scrub the appliance, paying special attention to any hard-to-reach areas.
5. Wipe clean: Wipe the appliance clean with a damp cloth.
6. Dry thoroughly: Allow the appliance to dry completely before using it.
7. Zipper Savior
Stuck zippers? A toothbrush can help!
What you’ll need:
* Old toothbrush
* Lubricant (e.g., graphite pencil, zipper lubricant)
Step-by-step instructions:
1. Apply lubricant: Apply a small amount of lubricant to the zipper teeth around the stuck area. A graphite pencil works surprisingly well – just rub the pencil lead along the zipper teeth.
2. Brush the zipper: Use the toothbrush to gently brush the lubricant into the zipper teeth. This will help to loosen any debris or friction that is causing the zipper to stick.
3. Gently wiggle the zipper: Gently wiggle the zipper pull back and forth while continuing to brush the zipper teeth.
4. Repeat as needed: Repeat the process until the zipper is unstuck.
8. Nail Art Tool
Get creative with your nail art! An old toothbrush can be used to create unique textures and designs.
What you’ll need:
* Old toothbrush
* Nail polish
* Paper towel
Step-by-step instructions:
1. Apply base coat: Apply a base coat to your nails and let it dry completely.
2. Dip the toothbrush: Dip the toothbrush into a small amount of nail polish.
3. Remove excess polish: Dab the toothbrush on a paper towel to remove any excess polish. This is important to prevent the polish from clumping on your nails.
4. Create the design: Lightly flick the toothbrush bristles over your nails to create a splatter effect. You can also use the toothbrush to create other textures and designs.
5. Apply top coat: Apply a top coat to seal the design and protect your nails.
9. Cleaning Window Tracks
Window tracks are notorious for collecting dirt, dust, and insects. A toothbrush is the perfect tool for cleaning these narrow spaces.
What you’ll need:
* Old toothbrush
* Vacuum cleaner
* All-purpose cleaner
* Paper towels
Step-by-step instructions:
1. Vacuum the tracks: Use

Conclusion
So, there you have it! Transforming your old toothbrush into a versatile cleaning tool is not just a clever way to repurpose household items; it’s a game-changer for tackling those hard-to-reach and often overlooked nooks and crannies around your home. We’ve explored a multitude of uses, from scrubbing grout and detailing car interiors to cleaning jewelry and even taming unruly eyebrows. The sheer adaptability of this simple tool makes it an indispensable addition to your cleaning arsenal.
But why is this DIY trick a must-try? Because it’s effective, economical, and environmentally conscious. Instead of throwing away old toothbrushes, contributing to landfill waste, you’re giving them a second life, saving money on specialized cleaning brushes, and achieving superior results in many cases. The precision and maneuverability of a toothbrush are unmatched when it comes to detail cleaning. Think about it: those tiny bristles are designed to get into the smallest crevices of your teeth; imagine the power they wield against stubborn grime in your bathroom tiles!
Beyond the uses we’ve already discussed, the possibilities are truly endless. Consider these variations and suggestions to further customize your toothbrush cleaning experience:
* For delicate surfaces: Use a toothbrush with extra-soft bristles to avoid scratching. This is particularly important when cleaning jewelry or delicate electronics.
* For stubborn stains: Dip your toothbrush in a paste of baking soda and water for extra scrubbing power. This works wonders on grout and other tough stains.
* For sanitizing: After each use, thoroughly rinse your toothbrush and soak it in a solution of vinegar and water to kill bacteria.
* Color-coding: Use different colored toothbrushes for different cleaning tasks to avoid cross-contamination. For example, dedicate one color to bathroom cleaning, another to kitchen cleaning, and so on.
* Handle modification: If you find the handle uncomfortable, try wrapping it with grip tape or adding a small extension for better leverage.
Ultimately, the best way to discover the full potential of this DIY trick is to try it for yourself. We encourage you to experiment with different uses and variations to find what works best for you and your home. Don’t be afraid to get creative and think outside the box!
We’re confident that once you experience the cleaning power of a repurposed toothbrush, you’ll wonder how you ever lived without it. So, grab that old toothbrush, put on your cleaning gloves, and get ready to transform your home, one scrub at a time.
And now, we want to hear from you! Have you tried using a toothbrush for cleaning beyond your teeth? What are your favorite uses? What tips and tricks have you discovered? Share your experiences in the comments below! Your insights could help other readers discover even more innovative ways to repurpose this humble tool. Let’s build a community of resourceful cleaners and make the most of our everyday household items. Embrace the power of the repurposed toothbrush and unlock a world of cleaning possibilities!
Frequently Asked Questions (FAQ)
Why should I use an old toothbrush for cleaning instead of a regular cleaning brush?
Using an old toothbrush for cleaning offers several advantages over regular cleaning brushes, especially when it comes to detail work. The small size and precise bristles of a toothbrush allow you to reach tight spaces and crevices that larger brushes simply can’t access. This makes it ideal for cleaning grout, fixtures, small appliances, and other areas where precision is key. Additionally, repurposing an old toothbrush is an environmentally friendly and cost-effective way to reduce waste and save money on specialized cleaning tools. It’s a win-win situation for your home and the planet!
What types of toothbrushes are best for cleaning?
The best type of toothbrush for cleaning depends on the specific task at hand. For delicate surfaces like jewelry or electronics, a toothbrush with extra-soft bristles is recommended to avoid scratching. For more heavy-duty cleaning tasks, such as scrubbing grout or removing stubborn stains, a toothbrush with medium or firm bristles may be more effective. Electric toothbrushes can also be used for cleaning, but be sure to use a lower speed setting and avoid using them on delicate surfaces. Ultimately, the best way to determine which type of toothbrush is best for you is to experiment and see what works best for your specific needs.
How do I sanitize a toothbrush after using it for cleaning?
Sanitizing your toothbrush after each use is crucial to prevent the spread of bacteria and ensure that it remains a safe and effective cleaning tool. There are several ways to sanitize a toothbrush:
* Rinse thoroughly: After each use, rinse the toothbrush thoroughly under hot running water to remove any debris or cleaning solution.
* Soak in vinegar: Soak the toothbrush in a solution of equal parts white vinegar and water for at least 30 minutes to kill bacteria.
* Soak in hydrogen peroxide: Soak the toothbrush in a 3% hydrogen peroxide solution for 5-10 minutes to disinfect it.
* Use a toothbrush sanitizer: There are several commercially available toothbrush sanitizers that use UV light or other methods to kill bacteria.
* Replace regularly: Even with proper sanitization, it’s important to replace your cleaning toothbrush regularly, ideally every 1-3 months, to ensure that it remains hygienic.
Can I use the same toothbrush for cleaning different areas of my home?
While it’s possible to use the same toothbrush for cleaning different areas of your home, it’s generally not recommended due to the risk of cross-contamination. To avoid spreading germs and bacteria, it’s best to dedicate different toothbrushes to different cleaning tasks. For example, you could use one toothbrush for bathroom cleaning, another for kitchen cleaning, and another for cleaning electronics. Color-coding your toothbrushes can help you keep track of which one is used for which task.
Are there any surfaces that I should avoid cleaning with a toothbrush?
While toothbrushes are versatile cleaning tools, there are some surfaces that you should avoid cleaning with them. These include:
* Painted surfaces: The bristles of a toothbrush can scratch or damage painted surfaces, especially if the paint is old or delicate.
* Soft plastics: Some soft plastics can be easily scratched by the bristles of a toothbrush.
* Delicate fabrics: Avoid using a toothbrush on delicate fabrics, as the bristles can snag or damage the fibers.
* Surfaces that come into direct contact with food: While you can use a toothbrush to clean around food preparation areas, avoid using it directly on surfaces that come into direct contact with food, such as cutting boards or countertops.
When in doubt, always test the toothbrush on a small, inconspicuous area first to ensure that it doesn’t damage the surface.
How can I make the toothbrush handle more comfortable to grip?
If you find the toothbrush handle uncomfortable to grip, there are several ways to improve its ergonomics:
* Wrap with grip tape: Wrap the handle with grip tape, such as that used for tennis rackets or golf clubs, to provide a more comfortable and secure grip.
* Add a foam grip: Slide a foam grip over the handle to cushion your hand and provide a more comfortable grip.
* Use a toothbrush with an ergonomic handle: Some toothbrushes are designed with ergonomic handles that are more comfortable to hold.
* Add a handle extension: Attach a small handle extension to the toothbrush to provide more leverage and reduce strain on your hand.
Experiment with different methods to find what works best for you and your individual needs.
What are some other creative uses for old toothbrushes besides cleaning?
Beyond cleaning, old toothbrushes can be repurposed for a variety of other creative uses, including:
* Grooming eyebrows: Use a clean toothbrush to tame unruly eyebrows and apply eyebrow gel or powder.
* Exfoliating lips: Gently exfoliate your lips with a damp toothbrush to remove dead skin cells and reveal smoother, softer lips.
* Applying hair dye: Use a toothbrush to apply hair dye to small sections of hair, such as roots or highlights.
* Cleaning shoes: Use a toothbrush to clean dirt and grime from shoes, especially in hard-to-reach areas like the soles and seams.
* Creating art: Use a toothbrush to create textured effects in paintings or other art projects.
The possibilities are endless! With a little creativity, you can find countless ways to repurpose old toothbrushes and give them a new lease on life.
Leave a Comment