
Balcony Mint Planter DIY: Imagine stepping onto your balcony and being greeted by the invigorating aroma of fresh mint. Sounds delightful, right? Well, you don’t need a sprawling garden to enjoy the simple pleasure of homegrown herbs. I’m here to show you how incredibly easy it is to create your very own thriving balcony mint planter!
Mint has a rich history, dating back to ancient civilizations where it was prized for its medicinal and culinary properties. From the Egyptians using it in religious ceremonies to the Romans flavoring their sauces and wines, mint has always been a beloved herb. Today, it’s a staple in everything from refreshing mojitos to soothing teas.
But why should you bother with a balcony mint planter DIY project? Simple! Store-bought mint can be expensive and often wilts quickly. Growing your own ensures a constant supply of fresh, flavorful mint right at your fingertips. Plus, it’s a fantastic way to add a touch of green to your urban oasis, even if you’re short on space. This DIY project is not only cost-effective and convenient, but it’s also incredibly rewarding to nurture your own little patch of green. So, let’s dive in and transform your balcony into a minty paradise!
DIY Balcony Mint Planter: Fresh Herbs at Your Fingertips!
Okay, let’s get our hands dirty! I’m going to walk you through creating a fantastic mint planter perfect for your balcony. Imagine stepping outside and snipping fresh mint for your mojitos, teas, or even just to add a refreshing touch to your water. This project is relatively simple, even for beginners, and the results are so rewarding. Plus, growing your own mint is way cheaper (and fresher!) than buying it from the store.
Materials You’ll Need
Before we dive in, let’s gather everything we need. This will make the whole process smoother and less stressful. Trust me, nothing’s worse than realizing you’re missing a crucial item halfway through!
* A Container: This is the heart of our planter! You have a few options here.
* Hanging Basket: These are great for balconies with limited floor space. Make sure it’s sturdy and has good drainage.
* Window Box: Perfect for attaching to your balcony railing. Choose one that’s deep enough for mint roots to spread.
* Large Pot: A standard pot works just fine, especially if you have a bit more space. Aim for at least 12 inches in diameter.
* Potting Soil: Don’t skimp on this! Use a good quality potting mix specifically designed for containers. It should be well-draining and nutrient-rich. Avoid using garden soil, as it can compact and suffocate the roots.
* Drainage Material: This is essential for preventing root rot. You can use:
* Gravel: A layer of gravel at the bottom of the container helps water drain freely.
* Broken Pottery Shards: Recycle old pots by breaking them up and using the pieces for drainage.
* Landscape Fabric: Place a piece of landscape fabric over the drainage material to prevent soil from washing through.
* Mint Seedlings or Cuttings: You can start from seeds, but seedlings or cuttings are much faster and easier. You can find mint seedlings at most garden centers. If you have a friend with a mint plant, ask for a cutting!
* Gardening Gloves: Protect your hands from dirt and potential irritants.
* Trowel or Small Shovel: For scooping and moving soil.
* Watering Can or Hose: For watering your newly planted mint.
* Optional: Slow-Release Fertilizer: This will provide your mint with a steady supply of nutrients.
* Optional: Plant Labels: If you’re planting multiple varieties of mint, labels will help you keep track of them.
Step-by-Step Planting Guide
Alright, let’s get planting! Follow these steps, and you’ll have a thriving mint planter in no time.
1. Prepare Your Container:
* First, make sure your container is clean. Wash it out with soap and water to remove any dirt or debris.
* If your container doesn’t have drainage holes, you’ll need to drill some. Mint needs good drainage to prevent root rot.
* Add a layer of drainage material to the bottom of the container. This could be gravel, broken pottery shards, or anything similar. Aim for a layer that’s about 1-2 inches thick.
* Cover the drainage material with a piece of landscape fabric (optional). This will prevent the potting soil from washing through the drainage holes.
2. Add Potting Soil:
* Now, it’s time to add the potting soil. Fill the container about two-thirds full with potting mix.
* Gently press down on the soil to remove any air pockets.
* If you’re using slow-release fertilizer, mix it into the potting soil according to the package directions.
3. Plant Your Mint:
* Carefully remove the mint seedlings from their containers. Gently loosen the roots with your fingers.
* Dig a small hole in the potting soil for each seedling. The hole should be deep enough to accommodate the root ball.
* Place the seedling in the hole and gently backfill with potting soil. Make sure the top of the root ball is level with the surrounding soil.
* If you’re planting multiple mint plants, space them about 6-8 inches apart. Mint can spread quickly, so giving them some room to grow is important.
4. Water Thoroughly:
* Once you’ve planted all the mint, water the container thoroughly. Water until the water drains out of the drainage holes.
* This will help settle the soil and ensure that the roots are well-hydrated.
5. Place in a Sunny Location:
* Mint thrives in a sunny location. Place your planter on your balcony where it will receive at least 4-6 hours of sunlight per day.
* If your balcony is particularly hot, you may need to provide some afternoon shade to prevent the mint from scorching.
Maintaining Your Mint Planter
Now that your mint is planted, it’s important to provide it with the care it needs to thrive. Here’s what you need to do:
* Watering:
* Water your mint regularly, especially during hot, dry weather. The soil should be consistently moist, but not soggy.
* Check the soil moisture by sticking your finger into the soil. If the top inch of soil is dry, it’s time to water.
* Avoid overwatering, as this can lead to root rot.
* Fertilizing:
* If you didn’t use slow-release fertilizer, you’ll need to fertilize your mint regularly.
* Use a balanced liquid fertilizer diluted to half strength.
* Fertilize every 2-4 weeks during the growing season.
* Pruning:
* Pruning is essential for keeping your mint plant healthy and productive.
* Pinch off the top growth regularly to encourage bushier growth.
* Remove any dead or yellowing leaves.
* Harvest mint leaves as needed. The more you harvest, the more the plant will produce.
* Controlling Spread:
* Mint is notorious for spreading aggressively. If you don’t want it to take over your entire balcony, it’s important to keep it contained.
* Growing it in a container is the best way to control its spread.
* You can also prune the roots regularly to prevent them from escaping the container.
* Pest Control:
* Mint is generally pest-resistant, but it can occasionally be affected by aphids or spider mites.
* If you notice any pests, try spraying the plant with a strong stream of water.
* You can also use insecticidal soap or neem oil to control pests.
Harvesting Your Mint
One of the best parts about growing your own mint is being able to harvest fresh leaves whenever you need them! Here’s how to harvest your mint:
* When to Harvest:
* You can start harvesting mint leaves as soon as the plant is established.
* The best time to harvest is in the morning, after the dew has dried.
* Avoid harvesting during the hottest part of the day, as this can stress the plant.
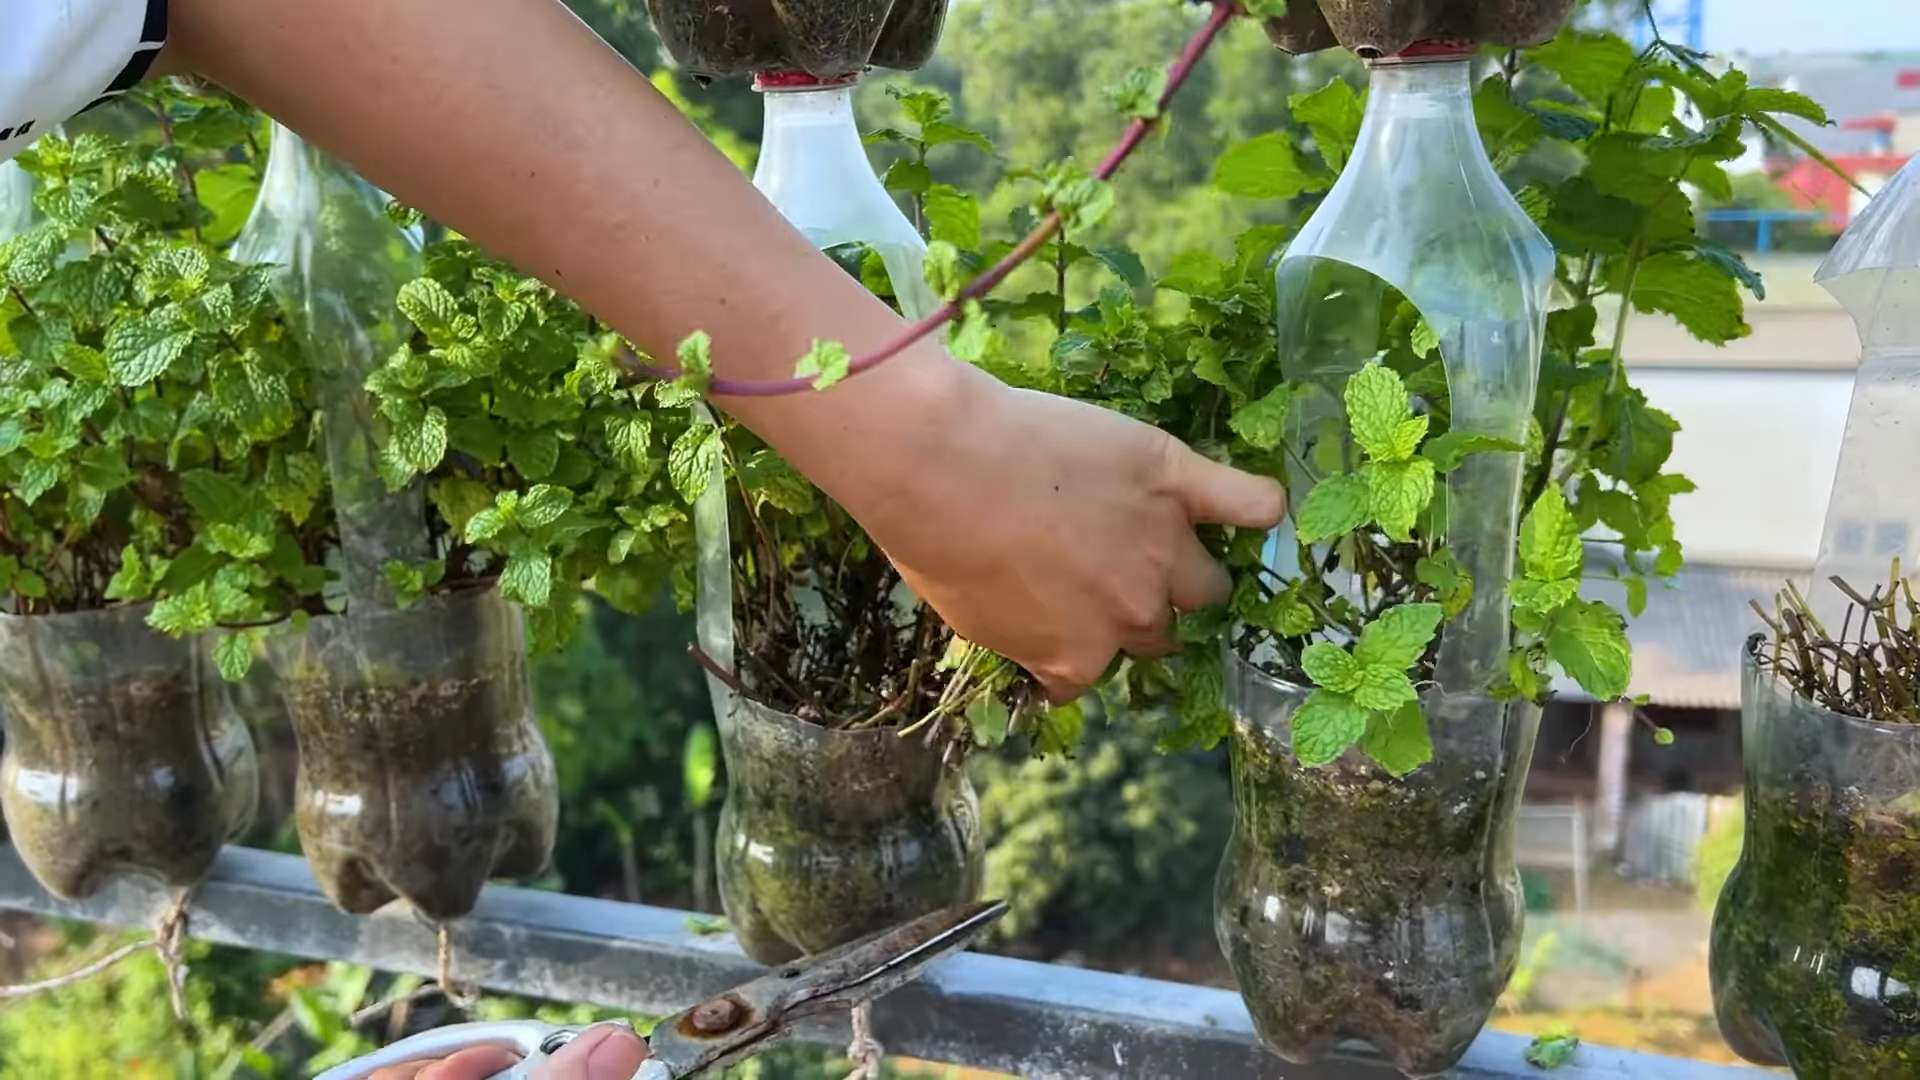
* How to Harvest:
* Use scissors or pruning shears to cut off stems of mint.
* Cut the stems just above a leaf node. This will encourage new growth.
* You can harvest up to one-third of the plant at a time without harming it.
* Storing Your Mint:
* Fresh mint leaves can be stored in the refrigerator for up to a week.
* Wrap the leaves in a damp paper towel and store them in a plastic bag.
* You can also dry mint leaves for longer storage.
* Hang the stems upside down in a cool, dry place until the leaves are completely dry.
* Store the dried leaves in an airtight container.
Troubleshooting
Even with the best care, you might encounter some problems with your mint plant. Here are some common issues and how to fix them:
* Yellowing Leaves: This could be caused by overwatering, underwatering, or nutrient deficiency. Adjust your watering schedule and fertilize the plant if necessary.
* Leggy Growth: This is usually caused by insufficient sunlight. Move the plant to a sunnier location.
* Root Rot: This is caused by overwatering and poor drainage. Make sure your container has drainage holes and avoid overwatering.
* Pests: As mentioned earlier, aphids and spider mites can sometimes affect mint plants. Treat with insecticidal soap or neem oil.
Mint Varieties to Consider
While spearmint is the most common type, there are many other varieties of mint you might want to try!
* Peppermint:
Conclusion
So, there you have it! Creating your own balcony mint planter isn’t just a fun weekend project; it’s a gateway to fresher flavors, a greener living space, and a more sustainable lifestyle. Forget those wilted, overpriced bunches from the grocery store. With a little effort, you can have a thriving mint patch right outside your door, ready to infuse your teas, cocktails, and culinary creations with its vibrant essence.
Why is this DIY balcony mint planter a must-try? Because it puts you in control. You choose the variety of mint you love – spearmint, peppermint, chocolate mint, even orange mint! You control the soil quality, ensuring your mint gets the nutrients it needs to flourish. And you control the aesthetics, crafting a planter that perfectly complements your balcony’s style.
But the benefits extend beyond the practical. There’s a certain satisfaction that comes from nurturing something from seed (or seedling) to harvest. Watching your mint grow, breathing in its invigorating aroma, and knowing you created this little oasis yourself – it’s a truly rewarding experience.
Feeling adventurous? Consider these variations:
* Vertical Mint Garden: If balcony space is limited, explore vertical planters or hanging baskets. This maximizes your growing area and adds a visually stunning element to your outdoor space.
* Mint Companion Planting: Plant your mint alongside other herbs or flowers that benefit from its presence. Mint is known to repel certain pests, making it a valuable companion for plants like tomatoes and cabbage. Just be mindful of its aggressive growth and keep it contained!
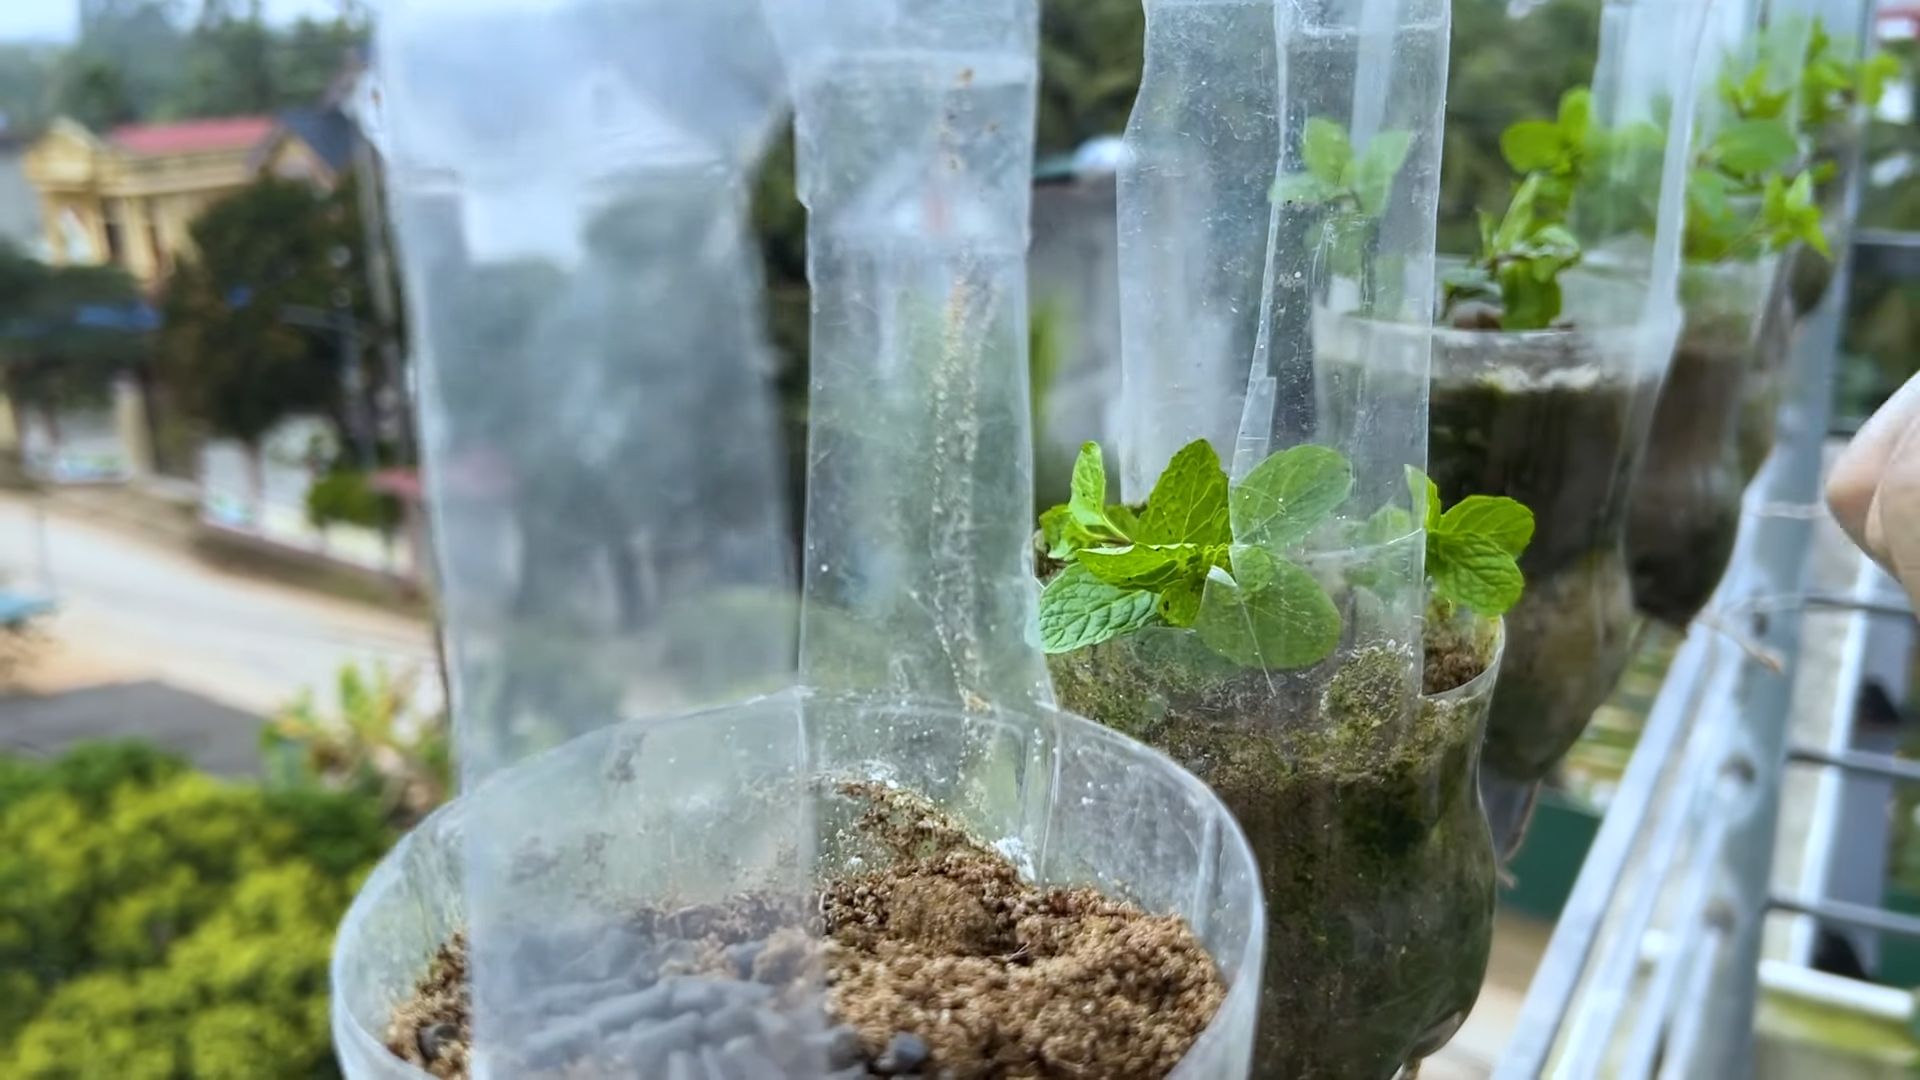
* Upcycled Planters: Get creative with your planter! Use old buckets, wooden crates, or even repurposed tires to create a unique and eco-friendly home for your mint.
* Mint Tea Garden: Expand your mint collection to include different varieties specifically for tea. Lemon balm, chamomile, and lavender make excellent companions and create a diverse and fragrant tea garden.
Don’t be intimidated if you’re new to gardening. Mint is a relatively forgiving plant, and this DIY project is designed to be simple and straightforward. The most important thing is to get started!
We’re confident that you’ll love having fresh mint readily available. So, gather your supplies, get your hands dirty, and create your own balcony mint planter today. We can’t wait to hear about your experience! Share your photos and tips in the comments below. Let’s inspire each other to cultivate a greener, more flavorful world, one balcony mint planter at a time. This simple project is a fantastic way to embrace the joys of gardening and enjoy the delightful benefits of fresh, homegrown mint.
FAQ
What kind of mint should I plant in my balcony mint planter?
The best type of mint for your balcony mint planter depends on your personal preferences and how you plan to use it. Spearmint is a classic choice, known for its refreshing flavor and versatility in teas, cocktails, and culinary dishes. Peppermint has a stronger, more intense flavor, making it ideal for candies, desserts, and digestive teas. Chocolate mint offers a unique chocolatey aroma and flavor, perfect for desserts and specialty drinks. Other options include orange mint, apple mint, and even pineapple mint, each with its own distinct characteristics. Consider trying a few different varieties to discover your favorites! Remember that mint spreads aggressively, so keep each variety in its own container within your planter to prevent them from taking over.
How much sunlight does my balcony mint planter need?
Mint thrives in partial shade to full sun. Ideally, your balcony mint planter should receive at least 4-6 hours of sunlight per day. However, in hotter climates, afternoon shade can help prevent the leaves from scorching. Observe your mint plants closely and adjust their location as needed. If the leaves appear pale or leggy, they may not be getting enough sunlight. If the leaves are wilting or turning brown, they may be getting too much direct sun.
What kind of soil should I use for my balcony mint planter?
Use a well-draining potting mix that is rich in organic matter. A good quality potting mix will provide the necessary nutrients for your mint plants to thrive. You can also amend the soil with compost or aged manure to improve its fertility and drainage. Avoid using garden soil, as it can be too heavy and compact for container gardening.
How often should I water my balcony mint planter?
Water your mint plants regularly, especially during hot and dry weather. The soil should be consistently moist, but not waterlogged. Check the soil moisture by sticking your finger about an inch into the soil. If it feels dry, it’s time to water. Avoid overwatering, as this can lead to root rot. Ensure your planter has drainage holes to allow excess water to escape.
How do I prevent my mint from spreading too much in my balcony mint planter?
Mint is notorious for its aggressive growth habit. To prevent it from taking over your entire planter, it’s best to grow it in a container. You can also line the bottom of your planter with a barrier, such as landscape fabric, to prevent the roots from spreading into the surrounding soil. Regularly prune your mint plants to keep them under control and encourage bushier growth.
How do I harvest mint from my balcony mint planter?
Harvest mint by snipping off stems just above a leaf node. This will encourage the plant to branch out and produce more leaves. You can harvest mint throughout the growing season, as needed. For the best flavor, harvest mint in the morning, after the dew has dried.
How do I store harvested mint?
Freshly harvested mint can be stored in the refrigerator for up to a week. Wrap the stems in a damp paper towel and place them in a plastic bag. You can also dry mint by hanging it upside down in a cool, dark place. Once dried, store the mint in an airtight container. Mint can also be frozen. Chop the mint and place it in ice cube trays with water or oil. Once frozen, transfer the cubes to a freezer bag.
Can I grow mint indoors?
Yes, you can grow mint indoors, but it will need plenty of light. Place your indoor mint plant near a sunny window or under a grow light. Rotate the plant regularly to ensure even growth. Keep the soil moist and fertilize regularly.
What are some common problems with growing mint?
Some common problems with growing mint include pests, diseases, and nutrient deficiencies. Aphids, spider mites, and whiteflies can infest mint plants. Treat infestations with insecticidal soap or neem oil. Mint can also be susceptible to fungal diseases, such as powdery mildew and rust. Prevent these diseases by providing good air circulation and avoiding overwatering. Nutrient deficiencies can cause yellowing or stunted growth. Fertilize your mint plants regularly with a balanced fertilizer.
How can I use the mint I grow in my balcony mint planter?
The possibilities are endless! Use fresh mint to flavor teas, cocktails, and other beverages. Add it to salads, soups, and sauces. Use it to make mint jelly or mint chutney. Garnish desserts with fresh mint leaves. You can even use mint to make homemade beauty products, such as mint-infused toner or lip balm. Enjoy the fresh, vibrant flavor of your homegrown min
So, there you have it! Creating your own balcony mint planter isn’t just a fun weekend project; it’s a gateway to fresher flavors, a greener living space, and a more sustainable lifestyle. Forget those wilted, overpriced bunches from the grocery store. With a little effort, you can have a thriving mint patch right outside your door, ready to infuse your teas, cocktails, and culinary creations with its vibrant essence.
Why is this DIY balcony mint planter a must-try? Because it puts you in control. You choose the variety of mint you love – spearmint, peppermint, chocolate mint, even orange mint! You control the soil quality, ensuring your mint gets the nutrients it needs to flourish. And you control the aesthetics, crafting a planter that perfectly complements your balcony’s style.
But the benefits extend beyond the practical. There’s a certain satisfaction that comes from nurturing something from seed (or seedling) to harvest. Watching your mint grow, breathing in its invigorating aroma, and knowing you created this little oasis yourself – it’s a truly rewarding experience.
Feeling adventurous? Consider these variations:
* Vertical Mint Garden: If balcony space is limited, explore vertical planters or hanging baskets. This maximizes your growing area and adds a visually stunning element to your outdoor space.
* Mint Companion Planting: Plant your mint alongside other herbs or flowers that benefit from its presence. Mint is known to repel certain pests, making it a valuable companion for plants like tomatoes and cabbage. Just be mindful of its aggressive growth and keep it contained!
* Upcycled Planters: Get creative with your planter! Use old buckets, wooden crates, or even repurposed tires to create a unique and eco-friendly home for your mint.
* Mint Tea Garden: Expand your mint collection to include different varieties specifically for tea. Lemon balm, chamomile, and lavender make excellent companions and create a diverse and fragrant tea garden.
Don’t be intimidated if you’re new to gardening. Mint is a relatively forgiving plant, and this DIY project is designed to be simple and straightforward. The most important thing is to get started!
We’re confident that you’ll love having fresh mint readily available. So, gather your supplies, get your hands dirty, and create your own balcony mint planter today. We can’t wait to hear about your experience! Share your photos and tips in the comments below. Let’s inspire each other to cultivate a greener, more flavorful world, one balcony mint planter at a time. This simple project is a fantastic way to embrace the joys of gardening and enjoy the delightful benefits of fresh, homegrown mint.
FAQ
What kind of mint should I plant in my balcony mint planter?
The best type of mint for your balcony mint planter depends on your personal preferences and how you plan to use it. Spearmint is a classic choice, known for its refreshing flavor and versatility in teas, cocktails, and culinary dishes. Peppermint has a stronger, more intense flavor, making it ideal for candies, desserts, and digestive teas. Chocolate mint offers a unique chocolatey aroma and flavor, perfect for desserts and specialty drinks. Other options include orange mint, apple mint, and even pineapple mint, each with its own distinct characteristics. Consider trying a few different varieties to discover your favorites! Remember that mint spreads aggressively, so keep each variety in its own container within your planter to prevent them from taking over.
How much sunlight does my balcony mint planter need?
Mint thrives in partial shade to full sun. Ideally, your balcony mint planter should receive at least 4-6 hours of sunlight per day. However, in hotter climates, afternoon shade can help prevent the leaves from scorching. Observe your mint plants closely and adjust their location as needed. If the leaves appear pale or leggy, they may not be getting enough sunlight. If the leaves are wilting or turning brown, they may be getting too much direct sun.
What kind of soil should I use for my balcony mint planter?
Use a well-draining potting mix that is rich in organic matter. A good quality potting mix will provide the necessary nutrients for your mint plants to thrive. You can also amend the soil with compost or aged manure to improve its fertility and drainage. Avoid using garden soil, as it can be too heavy and compact for container gardening.
How often should I water my balcony mint planter?
Water your mint plants regularly, especially during hot and dry weather. The soil should be consistently moist, but not waterlogged. Check the soil moisture by sticking your finger about an inch into the soil. If it feels dry, it’s time to water. Avoid overwatering, as this can lead to root rot. Ensure your planter has drainage holes to allow excess water to escape.
How do I prevent my mint from spreading too much in my balcony mint planter?
Mint is notorious for its aggressive growth habit. To prevent it from taking over your entire planter, it’s best to grow it in a container. You can also line the bottom of your planter with a barrier, such as landscape fabric, to prevent the roots from spreading into the surrounding soil. Regularly prune your mint plants to keep them under control and encourage bushier growth.
How do I harvest mint from my balcony mint planter?
Harvest mint by snipping off stems just above a leaf node. This will encourage the plant to branch out and produce more leaves. You can harvest mint throughout the growing season, as needed. For the best flavor, harvest mint in the morning, after the dew has dried.
How do I store harvested mint?
Freshly harvested mint can be stored in the refrigerator for up to a week. Wrap the stems in a damp paper towel and place them in a plastic bag. You can also dry mint by hanging it upside down in a cool, dark place. Once dried, store the mint in an airtight container. Mint can also be frozen. Chop the mint and place it in ice cube trays with water or oil. Once frozen, transfer the cubes to a freezer bag.
Can I grow mint indoors?
Yes, you can grow mint indoors, but it will need plenty of light. Place your indoor mint plant near a sunny window or under a grow light. Rotate the plant regularly to ensure even growth. Keep the soil moist and fertilize regularly.
What are some common problems with growing mint?
Some common problems with growing mint include pests, diseases, and nutrient deficiencies. Aphids, spider mites, and whiteflies can infest mint plants. Treat infestations with insecticidal soap or neem oil. Mint can also be susceptible to fungal diseases, such as powdery mildew and rust. Prevent these diseases by providing good air circulation and avoiding overwatering. Nutrient deficiencies can cause yellowing or stunted growth. Fertilize your mint plants regularly with a balanced fertilizer.
How can I use the mint I grow in my balcony mint planter?
The possibilities are endless! Use fresh mint to flavor teas, cocktails, and other beverages. Add it to salads, soups, and sauces. Use it to make mint jelly or mint chutney. Garnish desserts with fresh mint leaves. You can even use mint to make homemade beauty products, such as mint-infused toner or lip balm. Enjoy the fresh, vibrant flavor of your homegrown mint!


Leave a Comment