
Balcony strawberry gardening monthly can seem daunting, but trust me, with a few clever tricks, you can enjoy a bountiful harvest of sweet, juicy strawberries right outside your door! Imagine stepping onto your balcony each morning, the aroma of fresh berries filling the air, and plucking a handful to enjoy with your breakfast. Sounds idyllic, right?
Growing strawberries isn’t a new fad. In fact, evidence suggests that wild strawberries were enjoyed by Romans as far back as the 1st century AD! Over time, cultivation techniques have evolved, but the joy of harvesting your own berries remains timeless.
So, why do you need these DIY tricks for balcony strawberry gardening monthly? Well, traditional gardening methods can be space-consuming and time-intensive. But with limited balcony space and busy schedules, we need efficient and effective solutions. This article is your guide to maximizing your strawberry yield with minimal effort. I’ll share my favorite hacks for optimizing space, watering efficiently, and protecting your precious plants from pests, ensuring you have a thriving strawberry patch all season long. Get ready to transform your balcony into a strawberry paradise!
DIY Balcony Strawberry Garden: A Month-by-Month Guide to Sweet Success!
Hey there, fellow gardening enthusiasts! Dreaming of fresh, juicy strawberries right outside your door? Well, you’ve come to the right place! I’m going to walk you through creating and maintaining a thriving strawberry garden on your balcony, month by month. Get ready for a delicious and rewarding experience!
What You’ll Need: The Strawberry Starter Pack
Before we dive into the monthly breakdown, let’s gather our supplies. This is what I’ve found works best for me:
* Strawberry Plants: Choose everbearing or June-bearing varieties based on your preference. Everbearing produce throughout the season, while June-bearing have a large harvest in June. I personally love everbearing for a continuous supply!
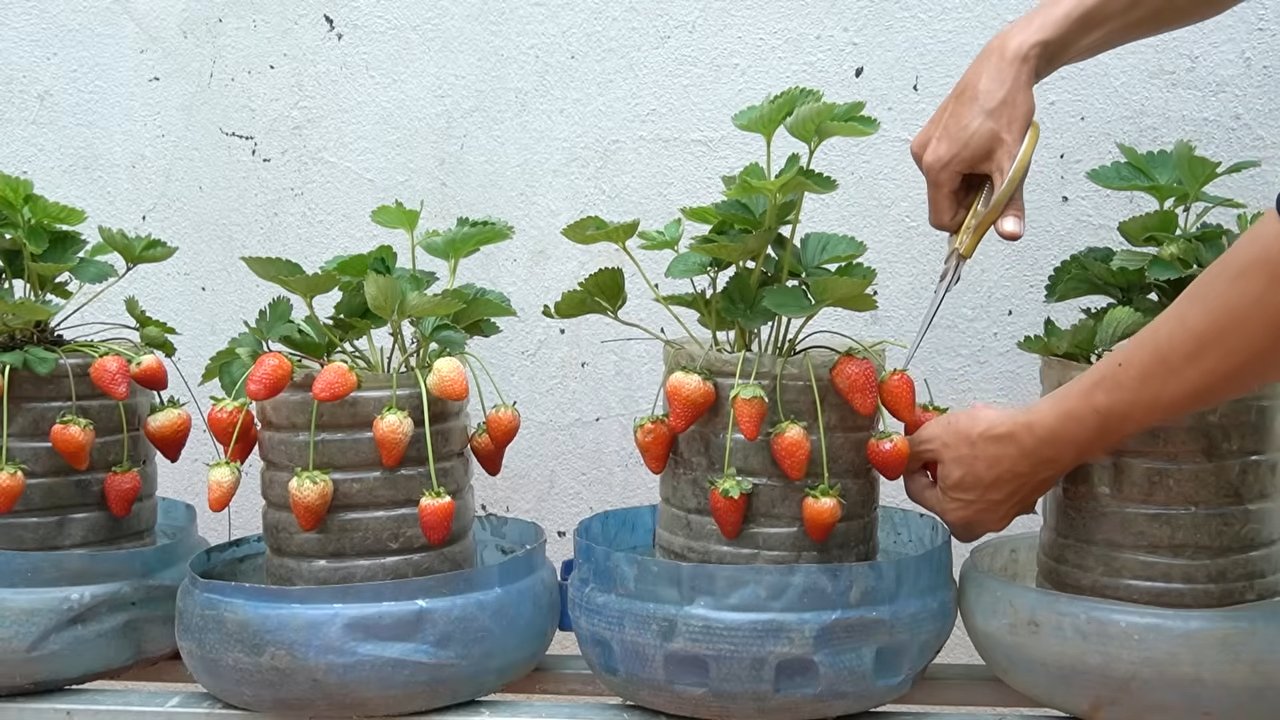
* Containers: Hanging baskets, window boxes, or even stacked planters work great. Make sure they have drainage holes!
* Potting Mix: Use a high-quality potting mix specifically formulated for containers. Avoid garden soil, as it can compact and hinder drainage.
* Fertilizer: A balanced, slow-release fertilizer is ideal. I also supplement with liquid fertilizer during the growing season.
* Watering Can or Hose: Essential for keeping your plants hydrated.
* Gardening Gloves: Protect your hands from dirt and potential irritants.
* Pruning Shears or Scissors: For trimming runners and dead leaves.
* Bird Netting (Optional): To protect your precious berries from hungry birds.
* Mulch (Optional): Straw or wood chips to help retain moisture and suppress weeds.
* pH Testing Kit (Optional): To ensure your soil pH is optimal (around 6.0-6.5).
January: Planning and Preparation
Even though it’s cold outside, January is a crucial month for planning your strawberry garden!
1. Dream Big, Plan Smart: Decide where you want to place your strawberry containers. Consider sunlight exposure (strawberries need at least 6 hours of sun per day) and accessibility for watering. Sketch out your balcony layout and visualize your strawberry paradise!
2. Order Your Plants: If you’re starting with bare-root plants, now’s the time to order them. Reputable nurseries often have pre-orders available. If you’re buying established plants from a local garden center, keep an eye out for sales and new arrivals.
3. Clean Your Containers: If you’re reusing containers from last year, thoroughly clean them with soap and water to remove any lingering diseases or pests.
4. Gather Your Supplies: Make sure you have all the necessary materials on hand, so you’re ready to plant when the time comes.
February: Planting Time (Depending on Your Climate)
February can be tricky, depending on where you live. If you’re in a warmer climate, you might be able to start planting now. If you’re in a colder region, you might need to wait until March.
1. Check the Weather: Keep an eye on the forecast and make sure there’s no risk of frost before planting.
2. Prepare Your Containers: Fill your containers with high-quality potting mix, leaving about an inch of space at the top.
3. Plant Your Strawberries:
* Bare-Root Plants: Soak the roots in water for about an hour before planting. Dig a small hole in the potting mix and gently spread the roots out. Make sure the crown of the plant (where the roots meet the stem) is level with the soil surface.
* Established Plants: Gently remove the plant from its nursery pot and loosen the roots. Dig a hole in the potting mix that’s slightly larger than the root ball. Place the plant in the hole and backfill with potting mix, gently firming the soil around the base of the plant.
4. Water Thoroughly: After planting, water your strawberries thoroughly to help settle the soil and encourage root growth.
5. Mulch (Optional): Add a layer of straw or wood chip mulch around the base of the plants to help retain moisture and suppress weeds.
March: Early Growth and Care
As the weather warms up, your strawberry plants will start to grow.
1. Water Regularly: Strawberries need consistent moisture, especially during the growing season. Water deeply whenever the top inch of soil feels dry to the touch. Avoid overwatering, as this can lead to root rot.
2. Fertilize: Apply a balanced, slow-release fertilizer according to the package instructions. You can also supplement with a liquid fertilizer every few weeks.
3. Monitor for Pests and Diseases: Keep an eye out for common strawberry pests like aphids, slugs, and spider mites. Treat any infestations promptly with insecticidal soap or other appropriate methods. Also, watch for signs of diseases like powdery mildew or leaf spot.
4. Remove Runners (If Desired): Strawberry plants produce runners, which are long stems that grow horizontally and develop new plantlets. If you want to maximize fruit production, remove the runners as they appear. However, if you want to propagate new plants, you can allow the runners to root in small pots filled with potting mix.
April: Blooming and Fruiting Begins
April is when your strawberry plants will start to bloom and set fruit.
1. Protect from Frost: If there’s a late frost, cover your plants with a blanket or tarp to protect the delicate blossoms.
2. Water Consistently: Consistent watering is even more important now that your plants are fruiting.
3. Fertilize Regularly: Continue to fertilize your plants every few weeks to provide them with the nutrients they need to produce delicious berries.
4. Support the Fruit: As the berries grow, they may become heavy and droop. You can use small supports or stakes to keep the fruit off the ground and prevent it from rotting.
5. Netting: Install bird netting to protect your ripening berries from hungry birds.
May: Harvest Time!
May is the month we’ve all been waiting for – harvest time!
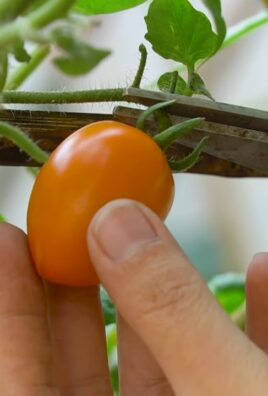
1. Harvest Ripe Berries: Pick your strawberries when they are fully red and slightly soft to the touch. Gently twist the berry off the stem, leaving the green cap attached.
2. Harvest Frequently: Check your plants daily and harvest any ripe berries. This will encourage the plants to produce more fruit.
3. Enjoy Your Harvest: Eat your strawberries fresh, use them in desserts, or make jam. The possibilities are endless!
4. Continue Watering and Fertilizing: Even after the initial harvest, continue to water and fertilize your plants to keep them producing throughout the season.
June: Peak Production and Maintenance
June is typically the peak production month for June-bearing varieties, while everbearing varieties will continue to produce.
1. Maintain Consistent Care: Continue watering, fertilizing, and monitoring for pests and diseases.
2. Remove Old Leaves: Trim away any old, yellowing, or diseased leaves to improve air circulation and prevent the spread of disease.
3. Consider a Second Fertilizer Application: For everbearing varieties, a second application of slow-release fertilizer can help boost production for the rest of the season.
July & August: Summer Heat and Continued Care
The summer heat can be tough on strawberry plants.
1. Water Deeply and Regularly: Water deeply and regularly, especially during hot, dry spells. You may need to water more than once a day.
2. Provide Shade: If your balcony gets intense afternoon sun, consider providing some shade for your plants. You can use shade cloth or move the containers to a shadier location.
3. Monitor for Pests and Diseases: Pests and diseases can thrive in hot, humid weather. Keep a close eye on your plants and treat any problems promptly.
4. Harvest Regularly: Continue to harvest ripe berries as they appear.
5. Remove Runners: Keep removing runners unless you want to propagate new plants.
September: Preparing for Fall
As the weather cools down, it’s time to start preparing your strawberry plants for fall.
1. Reduce Watering: Gradually reduce watering as the weather cools down.
2. Stop Fertilizing: Stop fertilizing your plants in September to allow them to harden off for winter.
3. Clean Up Debris: Remove any dead leaves or debris from around the plants.
4. Consider Winter Protection: In colder climates, you may need to provide some winter protection for your strawberry plants. You can cover them with a layer of straw or move the containers to a sheltered location.
October & November: Dormancy and Winter Protection
Your strawberry plants will enter dormancy during the winter months.
1. Water Sparingly: Water only when the soil is dry to the touch.
2. Protect from Extreme Cold: If you live in a very cold climate, you may need to move your containers to an unheated garage or shed

Conclusion
So, there you have it! Transforming your balcony into a thriving strawberry patch is not only achievable but incredibly rewarding. This DIY trick for **balcony strawberry gardening monthly** maintenance is a game-changer, simplifying the process and maximizing your yield. Forget complicated schedules and guesswork; this method provides a clear, concise, and effective approach to nurturing your strawberry plants throughout the growing season.
Why is this a must-try? Because it’s about more than just growing strawberries; it’s about creating a sustainable, enjoyable, and visually appealing space right outside your door. Imagine stepping onto your balcony each morning to the sweet scent of ripening berries, knowing you cultivated that abundance with your own hands. It’s a connection to nature, a stress reliever, and a source of fresh, delicious fruit, all rolled into one.
But the beauty of this DIY approach lies in its adaptability. Feel free to experiment with different strawberry varieties to discover your favorites. Try adding companion plants like basil or marigolds to deter pests and attract pollinators. Consider using different types of containers, from hanging baskets to vertical planters, to maximize space and create a visually stunning display. You can even adjust the feeding schedule based on your specific climate and the needs of your plants.
Don’t be afraid to get creative and personalize this method to suit your own unique balcony environment and preferences. For example, if you live in a particularly windy area, you might want to provide extra support for your plants. If you have limited sunlight, consider using grow lights to supplement natural light.
This DIY trick isn’t just about following a set of instructions; it’s about understanding the principles of strawberry gardening and applying them in a way that works best for you. It’s about learning, experimenting, and enjoying the process of nurturing life.
We are confident that this method will revolutionize your balcony strawberry gardening experience. It’s simple, effective, and adaptable, making it perfect for both beginner and experienced gardeners alike.
So, what are you waiting for? Grab your gardening gloves, gather your supplies, and get ready to transform your balcony into a strawberry paradise. We encourage you to try this DIY trick and witness the incredible results for yourself.
And most importantly, we want to hear about your experience! Share your photos, tips, and stories with us in the comments below. Let us know what worked well for you, what challenges you faced, and any variations you tried. Together, we can create a community of balcony strawberry gardeners, sharing our knowledge and inspiring others to embrace the joy of growing their own food. Let’s make every balcony a little bit greener, one strawberry at a time! We are eager to see how you implement this **balcony strawberry gardening monthly** guide.
Frequently Asked Questions (FAQ)
Q: How often should I water my balcony strawberry plants?
A: Watering frequency depends on several factors, including the weather, the type of container you’re using, and the stage of growth of your plants. As a general rule, water deeply whenever the top inch of soil feels dry to the touch. During hot, sunny weather, you may need to water daily, while during cooler, cloudy weather, you may only need to water every few days. Avoid overwatering, as this can lead to root rot. Ensure your containers have adequate drainage. A good way to check is to stick your finger about an inch into the soil. If it feels dry, it’s time to water. If it feels moist, wait a day or two and check again.
Q: What type of fertilizer should I use for my balcony strawberry plants?
A: Strawberries are heavy feeders, so regular fertilization is essential for optimal growth and fruit production. Use a balanced fertilizer specifically formulated for strawberries, or a general-purpose fertilizer with a higher phosphorus content. Follow the instructions on the fertilizer packaging carefully, and avoid over-fertilizing, as this can burn the roots. Organic options like compost tea or fish emulsion are also excellent choices. Fertilize every 2-4 weeks during the growing season.
Q: How do I protect my balcony strawberry plants from pests and diseases?
A: Prevention is key when it comes to pests and diseases. Regularly inspect your plants for any signs of trouble, such as aphids, spider mites, or powdery mildew. Remove any affected leaves or fruit immediately. Encourage beneficial insects like ladybugs and lacewings to visit your balcony by planting companion plants like dill or fennel. If you need to use pesticides, opt for organic options like neem oil or insecticidal soap. Ensure good air circulation around your plants to prevent fungal diseases.
Q: What should I do with my balcony strawberry plants in the winter?
A: The winter care for your strawberry plants depends on your climate. In mild climates, you may be able to leave your plants outdoors with minimal protection. In colder climates, you’ll need to overwinter your plants indoors or provide them with extra insulation. You can move your containers to a sheltered location, such as a garage or shed, or wrap them in burlap or bubble wrap to protect the roots from freezing. Water sparingly during the winter months, and avoid fertilizing.
Q: How do I know when my strawberries are ripe and ready to harvest?
A: Strawberries are typically ready to harvest when they are fully red and slightly soft to the touch. The berries should also detach easily from the plant. Avoid picking strawberries that are still green or white, as they will not ripen further after being picked. Harvest your strawberries in the morning, after the dew has dried.
Q: Can I grow strawberries in hanging baskets on my balcony?
A: Absolutely! Hanging baskets are an excellent option for growing strawberries on a balcony, especially if you have limited space. Choose a hanging basket that is at least 12 inches in diameter, and use a well-draining potting mix. Be sure to water your hanging baskets regularly, as they tend to dry out more quickly than containers on the ground.
Q: What are some good companion plants for strawberries on a balcony?
A: Several plants can benefit strawberries when grown together. Basil repels pests and improves the flavor of the berries. Marigolds deter nematodes and other soil pests. Borage attracts pollinators and provides nutrients to the soil. Thyme repels cabbage moths and other insects.
Q: How much sunlight do my balcony strawberry plants need?
A: Strawberries need at least 6-8 hours of sunlight per day to thrive. Choose a location on your balcony that receives plenty of direct sunlight. If you don’t have enough natural sunlight, you can supplement with grow lights.
Q: My strawberry plants are producing runners. Should I remove them?
A: Runners are horizontal stems that grow from the main plant and can produce new strawberry plants. If you want to propagate new plants, you can allow the runners to root in small pots filled with potting mix. However, if you want to maximize fruit production, it’s best to remove the runners, as they divert energy away from fruit development.
Q: How often should I repot my balcony strawberry plants?
A: Strawberry plants should be repotted every 1-2 years, or when they become root-bound. Choose a container that is slightly larger than the previous one, and use a fresh potting mix. Repotting helps to revitalize the plants and provides them with more space to grow.
We hope these FAQs have answered some of your questions about **balcony strawberry gardening monthly** maintenance. Remember, gardening is a learning process, so don’t be afraid to experiment and have fun!
Leave a Comment