
Best Tasting Honeyberries Review: Are you ready to discover a fruit that’s not only delicious but also incredibly easy to grow in your own backyard? I’m talking about honeyberries, the early-fruiting superstars that are taking the home gardening world by storm! Forget waiting for summer strawberries; honeyberries ripen in late spring, offering a burst of sweet-tart flavor when you need it most.
Honeyberries, also known as Haskap berries, have a fascinating history, originating in colder climates like Russia and Japan. For centuries, these hardy berries have been cherished for their resilience and nutritional benefits. Now, thanks to dedicated breeders, we have varieties perfectly suited for home gardens across a wider range of climates.
But with so many honeyberry varieties available, how do you choose the best tasting honeyberries for your garden and your palate? That’s where I come in! I’ve done the research (and the taste-testing!) to bring you a comprehensive review of the top contenders. I’ll guide you through the flavor profiles, growth habits, and care requirements of different honeyberry cultivars, so you can make an informed decision and enjoy a bountiful harvest of these delightful berries year after year. Trust me, once you taste a perfectly ripe honeyberry, you’ll be hooked!
DIY Honeyberry Taste Test & Growing Guide: Finding Your Perfect Berry!
Okay, honeyberry enthusiasts, let’s dive deep! I’ve been obsessed with honeyberries (also known as haskaps) for years, and one of the biggest questions I get is, “Which variety tastes the best?” Well, taste is subjective, but I’m going to share my personal experiences and guide you through a DIY taste test so you can find your own favorite. Plus, I’ll give you a basic growing guide to get you started!
Honeyberry Taste Test: Your DIY Adventure
This isn’t just about popping berries in your mouth (though that’s definitely part of it!). It’s about a structured approach to really understand the nuances of each variety.
What You’ll Need:
* A selection of honeyberry varieties (at least 3-4 is ideal). If you don’t have your own bushes yet, see if you can find a local grower who will let you sample. Farmer’s markets are a great place to start!
* A notebook and pen (or your favorite note-taking app).
* Small bowls or plates for each variety.
* Water or plain crackers to cleanse your palate between tastings.
* A friend or family member to join you! (Taste testing is more fun with company.)
* Optional: A camera to document your findings.
The Tasting Process:
1. Label Everything: Before you even start, clearly label each bowl or plate with the name of the honeyberry variety. This is crucial to avoid confusion!
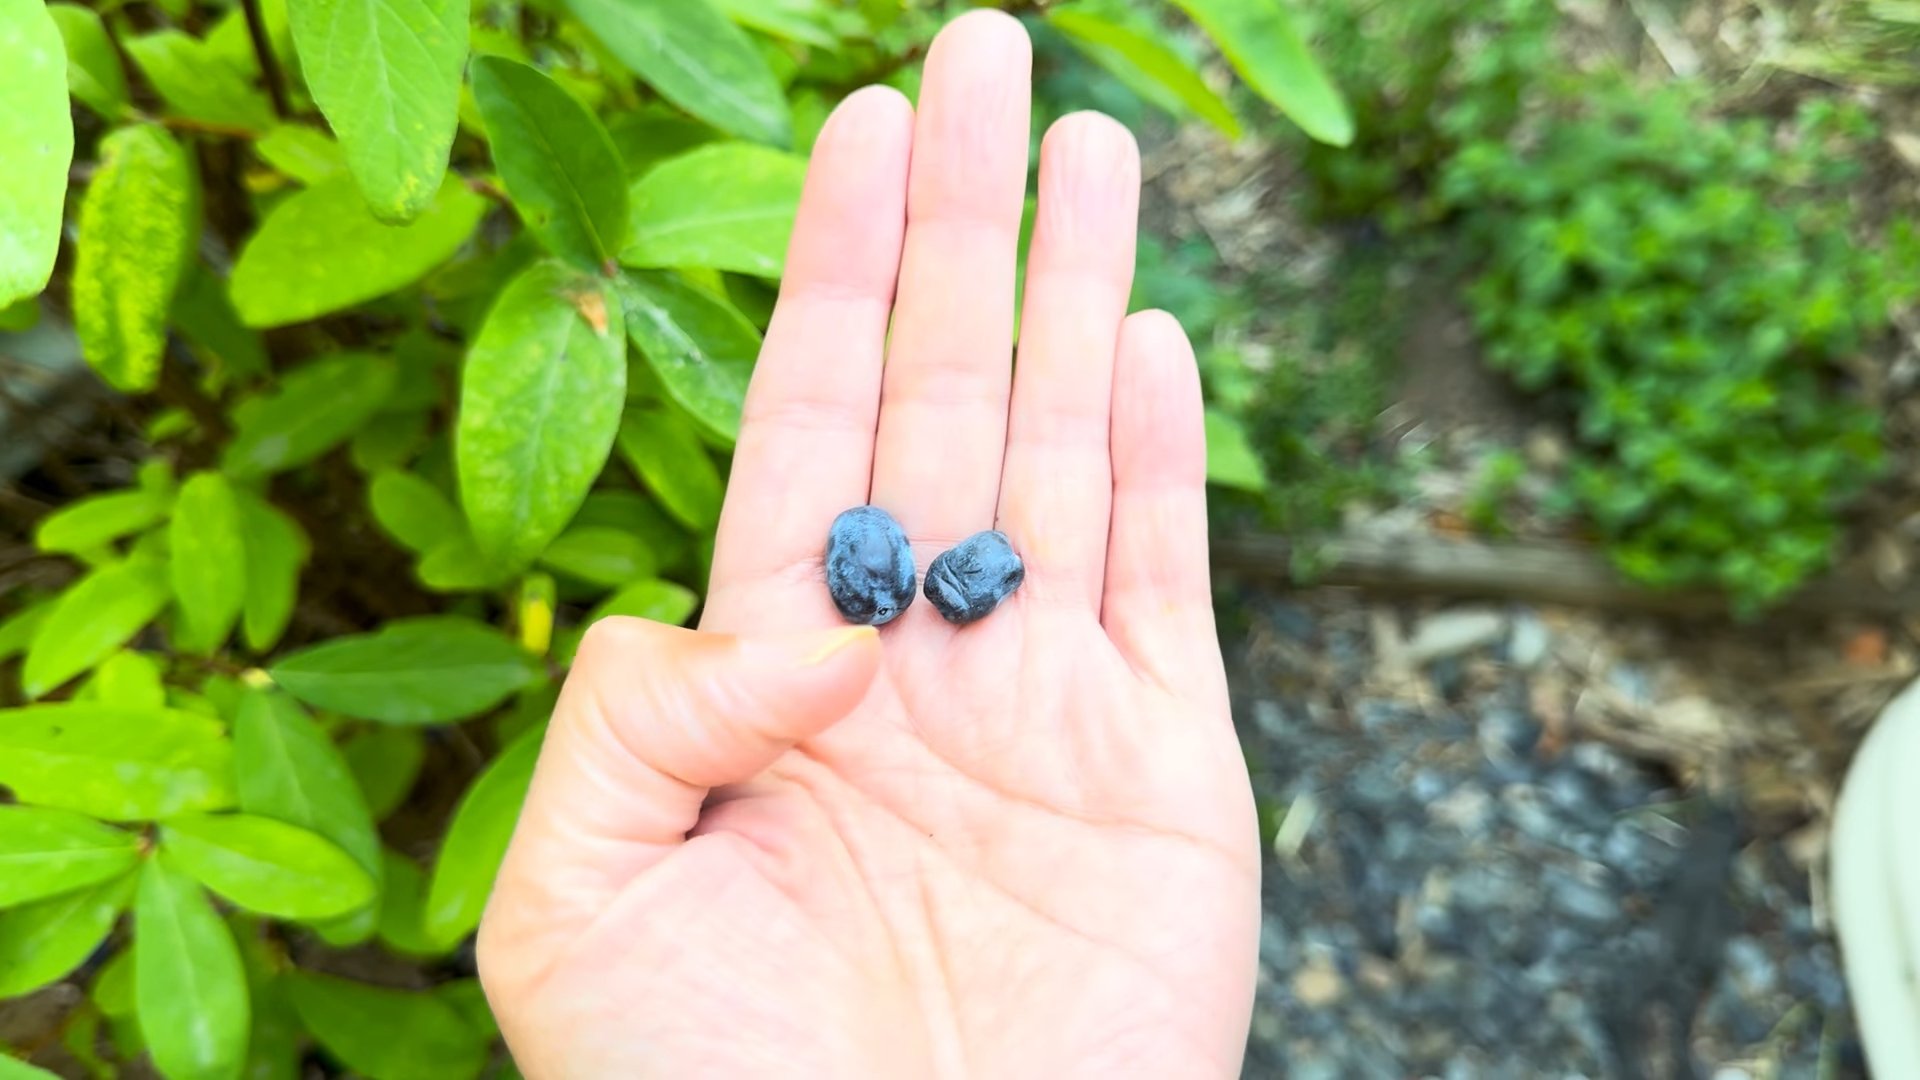
2. Visual Inspection: Take a good look at each variety. Note the size, shape, and color of the berries. Are they long and slender, round and plump, or something in between? Is the color a deep blue-purple, a lighter blue, or even a reddish-purple? Write down your observations.
3. The Sniff Test: Gently bring the bowl to your nose and inhale. Does it have a strong aroma? Is it fruity, floral, or earthy? Some varieties have a very subtle scent, while others are quite fragrant. Record your impressions.
4. The First Bite: Now for the fun part! Take a single berry and slowly chew it. Pay attention to the initial flavor, the texture, and the aftertaste.
* Flavor Notes: Is it sweet, tart, or a combination of both? Does it remind you of any other fruits, like blueberries, raspberries, or even grapes? Some varieties have hints of almond or other unique flavors.
* Texture: Is it juicy, firm, or slightly grainy? Some honeyberries have a thinner skin than others.
* Aftertaste: Does the flavor linger? Is it pleasant or slightly bitter?
5. Palate Cleanser: After each variety, take a sip of water or eat a plain cracker to cleanse your palate. This will help you accurately assess the next variety.
6. Record Your Thoughts: Immediately after tasting each variety, write down your impressions in your notebook. Be as specific as possible. Don’t just say “good” or “bad.” Instead, try to describe the flavors and textures in detail.
7. Repeat: Repeat steps 2-6 for each honeyberry variety.
8. Compare and Contrast: Once you’ve tasted all the varieties, take a moment to compare and contrast your notes. Which varieties did you like the best? Which ones did you like the least? What were the key differences between them?
9. Rank Your Favorites: Create a ranking of your favorite honeyberry varieties based on your taste test. This will help you decide which ones to plant in your own garden.
My Personal Taste Test Notes (Examples):
* ‘Aurora’: Medium-sized, elongated berries. Sweet-tart flavor with a hint of raspberry. Juicy and refreshing. Good overall balance.
* ‘Honeybee’: Smaller, round berries. Very tart flavor, almost cranberry-like. Firm texture. Might be good for jams or baking.
* ‘Indigo Treat’: Larger, plump berries. Sweet and juicy with a blueberry-like flavor. Very pleasant aftertaste. One of my favorites!
* ‘Borealis’: Medium-sized, oblong berries. Mildly sweet with a slightly earthy flavor. Not as flavorful as some of the others, but still enjoyable.
Remember, these are just my personal opinions. Your taste preferences may be different! That’s why it’s so important to conduct your own taste test.
Growing Honeyberries: A Beginner’s Guide
Okay, so you’ve found some honeyberry varieties you love. Now it’s time to plant them! Honeyberries are relatively easy to grow, but here’s a basic guide to get you started.
Choosing the Right Location:
* Sunlight: Honeyberries need at least 6 hours of sunlight per day to produce a good crop of berries. More sun is generally better.
* Soil: They prefer well-drained soil that is rich in organic matter. Amend your soil with compost or other organic materials before planting. Honeyberries are adaptable to a range of soil pH levels, but slightly acidic soil (pH 6.0-6.8) is ideal.
* Space: Honeyberries can grow to be 3-5 feet tall and wide, so give them plenty of space to spread out. Plant them at least 4-5 feet apart.
* Cross-Pollination: This is crucial! Honeyberries are not self-pollinating, so you need to plant at least two different varieties to get a good crop of berries. Make sure the varieties you choose are compatible pollinators. Most nurseries will indicate which varieties pollinate each other well.
Planting Your Honeyberries:
1. Prepare the Planting Hole: Dig a hole that is twice as wide and just as deep as the root ball of your honeyberry plant.
2. Amend the Soil: Mix some compost or other organic matter into the soil you removed from the hole.
3. Remove the Plant from the Container: Gently remove the honeyberry plant from its container. Loosen any circling roots.
4. Plant the Honeyberry: Place the honeyberry plant in the hole, making sure the top of the root ball is level with the surrounding soil.
5. Backfill the Hole: Fill the hole with the amended soil, gently tamping it down around the plant.
6. Water Thoroughly: Water the newly planted honeyberry thoroughly.
7. Mulch: Apply a layer of mulch around the base of the plant to help retain moisture and suppress weeds. Wood chips, straw, or shredded bark are all good options.
Caring for Your Honeyberries:
* Watering: Honeyberries need regular watering, especially during dry periods. Water deeply and infrequently, rather than shallowly and frequently.
* Fertilizing: Fertilize your honeyberries in the spring with a balanced fertilizer. Follow the instructions on the fertilizer package.
* Pruning: Honeyberries don’t require a lot of pruning, but you may need to remove any dead, damaged, or crossing branches. Prune in late winter or early spring before new growth begins.
* Pest and Disease Control: Honeyberries are generally resistant to pests and diseases. However, keep an eye out for common garden pests like aphids or spider mites. If you notice any problems, treat them promptly with an appropriate insecticide or fungicide.
* Bird Protection: Birds love honeyberries just as much as we do! To protect your crop, you may need to cover your bushes with netting.
Harvesting Your Honeyberries:
* Honeyberries typically ripen in late spring or early summer, depending on the variety and your climate.
* The berries are ready to harvest when they are a deep blue-purple color and easily detach from the plant.
* Gently pick the berries by hand.
* Honeyberries can be eaten fresh, or they can be used in jams, jellies, pies, and other desserts. They also freeze well.
Troubleshooting:
* Poor Fruit Set: If your honeyberries are not producing many berries, it could be due to a lack of pollination, insufficient sunlight, or poor soil. Make sure you have at least two different varieties planted, that they are getting enough sunlight, and that your soil is well-drained and rich in organic matter.
* Berries Falling Off Before Ripe: This could be due to inconsistent watering or nutrient deficiencies. Make sure you are watering your honeyberries regularly and fertilizing them in the spring.
* Yellowing Leaves: This could be a sign of nutrient deficiency or overwatering. Check your soil drainage and fertilize your honeyberries if necessary.
I hope this guide helps you find your perfect honeyberry and successfully grow your own delicious berries! Happy gardening!
Conclusion
So, there you have it! Unlocking the full potential of honeyberries doesn’t require fancy equipment or complicated techniques. This simple DIY trick, focusing on maximizing the inherent sweetness and flavor of these unique berries, is a game-changer. We’ve explored how a little bit of patience and the right approach can transform your honeyberries from tart to tantalizing.
Why is this a must-try? Because it’s about more than just eating berries; it’s about experiencing the best possible version of them. It’s about reducing the tartness that can sometimes overshadow their complex flavor profile, allowing the notes of cherry, raspberry, and even a hint of plum to truly shine. It’s about elevating your honeyberry experience from a simple snack to a gourmet treat.
Beyond the basic method, consider these variations to tailor the process to your specific preferences and harvest:
* Honey Infusion: After the initial freezing and thawing, gently macerate the honeyberries with a tablespoon or two of high-quality local honey. This adds another layer of sweetness and complexity, complementing the berries’ natural flavors. Let it sit for an hour before using.
* Citrus Zest Boost: A tiny amount of lemon or orange zest, added during the thawing process, can brighten the flavor and cut through any lingering tartness. Be careful not to overdo it – a little goes a long way.
* Berry Blend Bonanza: Combine your treated honeyberries with other berries like blueberries, raspberries, or strawberries for a mixed berry medley that’s bursting with flavor and antioxidants. The honeyberries will add a unique depth to the blend.
* Honeyberry Jam Enhancement: Use this method on your honeyberries before making jam. The reduced tartness will allow you to use less sugar in your jam recipe, resulting in a healthier and more flavorful preserve.
* Honeyberry Ice Cream Sensation: Puree the treated honeyberries and swirl them into homemade ice cream for a refreshing and intensely flavored dessert. The freezing process further enhances the flavor.
This DIY trick is not just about improving the taste; it’s about making the most of your harvest. Whether you’re a seasoned gardener or a curious newcomer to the world of honeyberries, this technique is accessible and effective. It’s a simple way to ensure that every bite of your honeyberries is a delightful experience.
We wholeheartedly encourage you to try this DIY trick with your next batch of honeyberries. Experiment with the variations, find what works best for your taste buds, and most importantly, share your experience with us! Let us know in the comments below how this method transformed your honeyberries and any creative variations you discovered. We’re eager to hear your success stories and learn from your experiences. Together, we can unlock the full potential of these amazing berries and spread the word about their deliciousness. Don’t forget to share this article with your fellow honeyberry enthusiasts!
Frequently Asked Questions (FAQ)
What exactly does freezing and thawing do to honeyberries?
Freezing and thawing honeyberries breaks down the cell walls within the fruit. This process softens the berries and, more importantly, reduces the tartness. The ice crystals that form during freezing disrupt the compounds responsible for the tart flavor, making the berries taste sweeter and more palatable after thawing. It essentially mellows out the less desirable aspects of the honeyberry’s flavor profile, allowing the more nuanced and enjoyable notes to come forward.
How long should I freeze the honeyberries?
For optimal results, freeze the honeyberries for at least 24 hours. However, longer freezing periods, up to several months, will not negatively impact the flavor or texture. In fact, some people find that longer freezing actually enhances the sweetness even further. Just ensure the berries are stored in an airtight container or freezer bag to prevent freezer burn.
Can I use frozen honeyberries from the store for this trick?
Yes, you can absolutely use frozen honeyberries from the store. While fresh, homegrown honeyberries are ideal, this trick works equally well with commercially frozen berries. Just be sure to thaw them completely before using them in your recipes or enjoying them as a snack.
What’s the best way to thaw the honeyberries?
The best way to thaw honeyberries is slowly in the refrigerator. This allows for a more gradual breakdown of the cell walls and helps to preserve the berries’ texture. Thawing in the refrigerator typically takes several hours, so plan accordingly. You can also thaw them at room temperature, but keep a close eye on them to prevent them from becoming too mushy. Avoid using the microwave, as this can cook the berries and negatively impact their flavor and texture.
Will this trick completely eliminate the tartness of honeyberries?
While this trick significantly reduces the tartness of honeyberries, it may not completely eliminate it, especially in varieties that are naturally more tart. However, the remaining tartness will be much more balanced and enjoyable, complementing the other flavors of the berry. Experiment with different freezing times and variations, like adding honey or citrus zest, to further customize the flavor to your liking.
How do I store the thawed honeyberries?
Thawed honeyberries are best used immediately. However, if you need to store them, keep them in an airtight container in the refrigerator for up to 2-3 days. Be aware that they may become slightly softer over time.
Can I refreeze the honeyberries after thawing?
Refreezing thawed honeyberries is generally not recommended, as it can further degrade their texture and flavor. The ice crystals that form during the initial freezing process can damage the cell walls, and refreezing can exacerbate this damage. It’s best to thaw only the amount of honeyberries you plan to use at one time.
What are some other ways to use honeyberries besides eating them fresh?
Honeyberries are incredibly versatile and can be used in a wide variety of culinary applications. Here are a few ideas:
* Jams and Jellies: Honeyberries make delicious and unique jams and jellies.
* Smoothies: Add honeyberries to your smoothies for a boost of antioxidants and flavor.
* Baked Goods: Incorporate honeyberries into muffins, scones, pies, and other baked goods.
* Sauces: Use honeyberries to create sweet and savory sauces for meats or desserts.
* Wine and Liqueurs: Honeyberries can be used to make flavorful wines and liqueurs.
* Ice Cream and Yogurt: Swirl honeyberry puree into ice cream or yogurt for a refreshing treat.
Are there any specific varieties of honeyberries that benefit most from this trick?
While all honeyberry varieties can benefit from this trick, those that are known for being particularly tart, such as ‘Boreal Blizzard’ or some of the older varieties, will see the most dramatic improvement in flavor. Experiment with different varieties to find your favorites and see how this method enhances their individual characteristics.
Is there a way to tell if my honeyberries are ripe and ready to harvest?
Honeyberries are typically ripe when they turn a deep blue or purple color and are easily detached from the bush. They should also feel slightly soft to the touch. Taste-testing is the best way to determine ripeness – if they taste sweet and flavorful, they’re ready to harvest! Remember that honeyberries ripen over a period of several weeks, so you may need to harvest them in multiple batches.


Leave a Comment