
Easy Potato Harvesting Method: Unearthing a bountiful potato harvest can feel like striking gold in your own backyard! For centuries, potatoes have been a staple food source, woven into the culinary traditions of cultures worldwide. From the Andean highlands where they originated to the family farms of today, the humble potato has nourished generations. But let’s be honest, the actual harvesting process can sometimes feel like a treasure hunt gone wrong – digging blindly, hoping to avoid slicing into your precious spuds.
That’s where this DIY guide comes in! I’m going to share an easy potato harvesting method that will transform your potato-digging experience from a back-breaking chore into a satisfying and efficient task. Forget the guesswork and the damaged potatoes. This simple trick will not only save you time and effort but also maximize your yield. Imagine effortlessly unearthing perfectly intact potatoes, ready for roasting, mashing, or frying. Ready to learn how? Let’s get digging!
Easy Potato Harvesting Method: No Digging Required!
Forget back-breaking digging! I’m going to show you a super simple method for harvesting potatoes that requires minimal effort and keeps your precious spuds safe from accidental fork punctures. This method is perfect if you’re growing potatoes in containers, raised beds, or even directly in the ground with a little modification. It’s all about the “lasagna” layering technique!
What You’ll Need:
* Potato Seeds or Seed Potatoes: Choose your favorite variety!
* Large Container or Raised Bed (or a designated area in your garden): The bigger, the better, as potatoes need room to grow. Think at least 2 feet wide and 2 feet deep.
* Soil: A well-draining mix is crucial. I like to use a blend of compost, potting soil, and a little bit of perlite for extra drainage.
* Straw or Hay: This is the key to our no-dig harvesting!
* Water: Potatoes need consistent moisture, especially during tuber development.
* Fertilizer (Optional): A balanced fertilizer can give your potatoes a boost, but it’s not strictly necessary if your soil is already rich.
* Gardening Gloves: To keep your hands clean and protected.
* Trowel or Small Shovel: For initial planting.
Planting Your Potatoes: The Lasagna Method
This method involves layering soil and straw as the potato plants grow, encouraging them to produce tubers all along the stem, not just at the bottom.
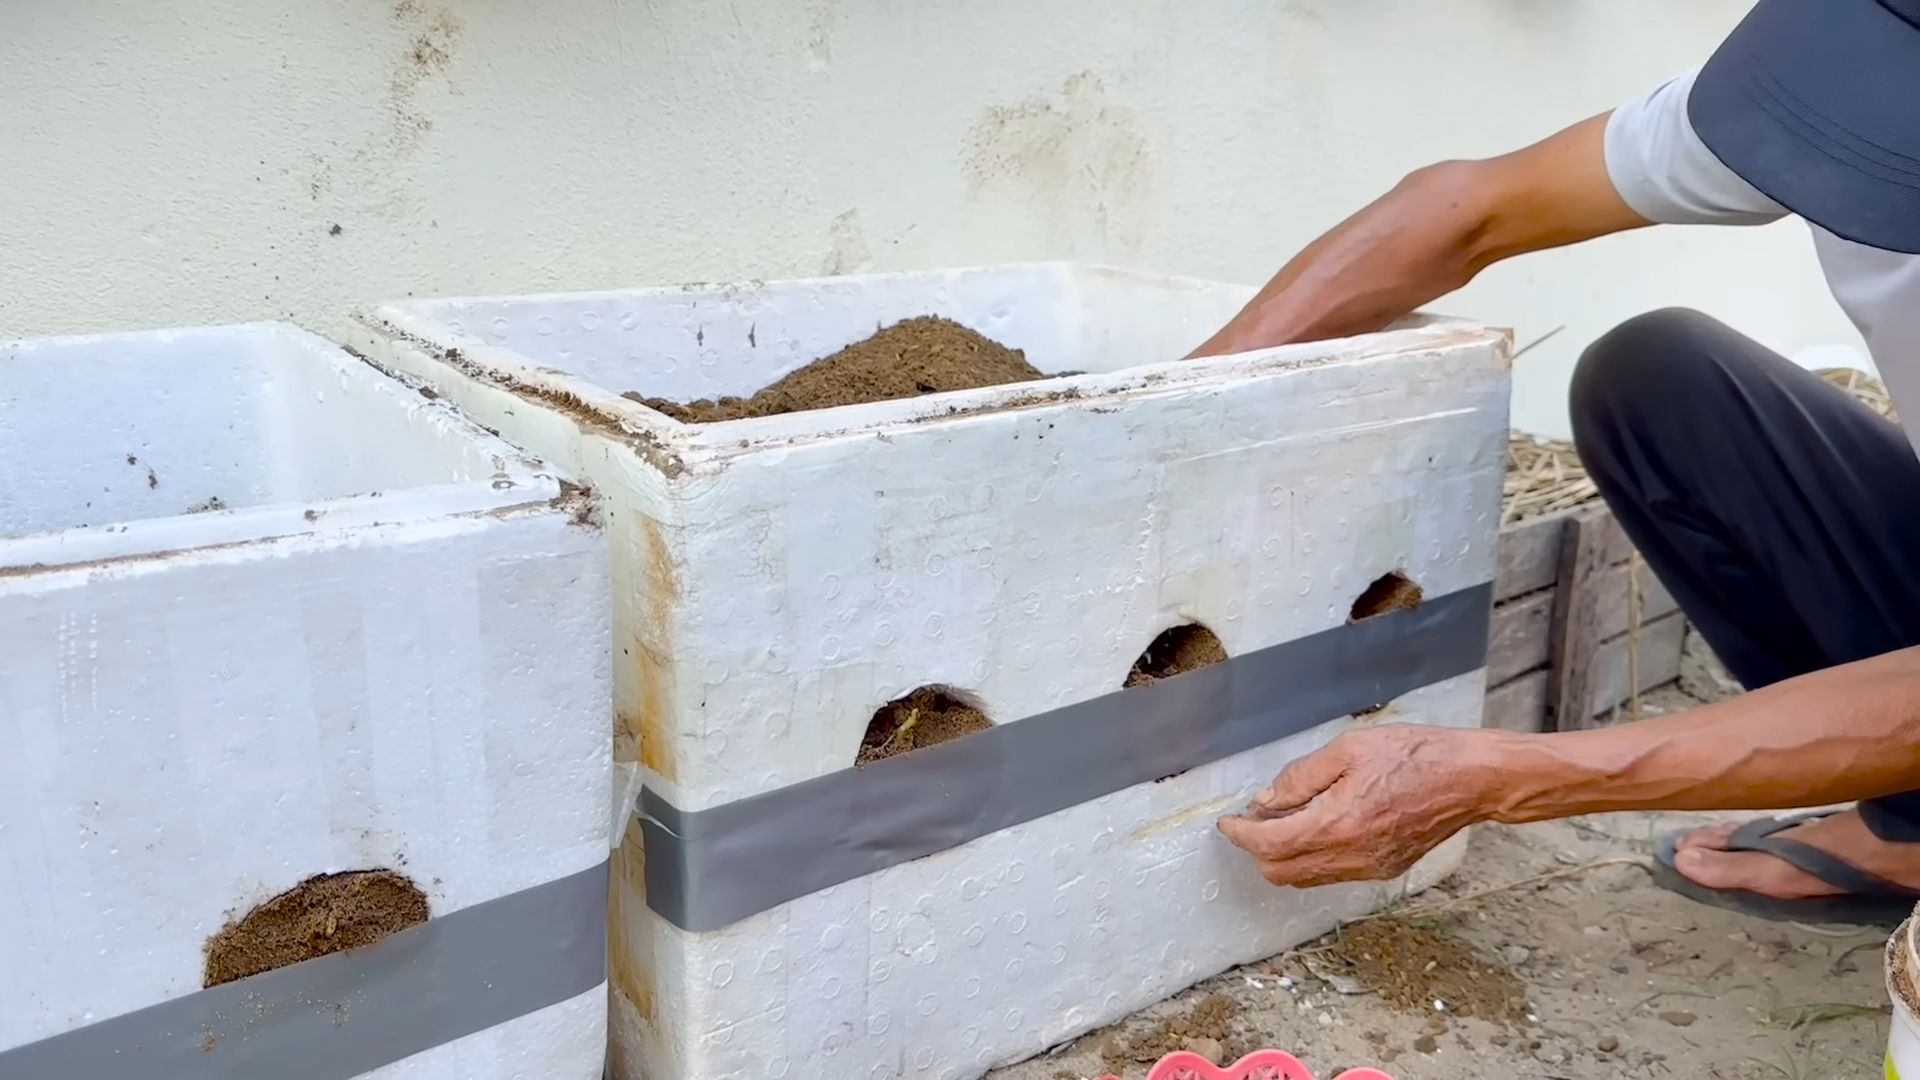
1. Prepare Your Container or Bed: If you’re using a container or raised bed, fill the bottom 6-8 inches with your soil mixture. If you’re planting directly in the ground, loosen the soil in a designated area and amend it with compost.
2. Plant Your Seed Potatoes: Cut your seed potatoes into pieces, ensuring each piece has at least one “eye” (the little buds that will sprout). Let the cut pieces dry for a day or two to prevent rotting. Plant the seed potato pieces about 4 inches deep and 12 inches apart.
3. Cover and Water: Cover the seed potatoes with another 4 inches of soil. Gently water the soil until it’s moist but not soggy.
4. Wait for Sprouts: Be patient! It can take a week or two for the potato plants to emerge.
5. The First Layer of Straw: Once the plants are about 6-8 inches tall, it’s time to add the first layer of straw. Gently mound straw around the base of the plants, covering the lower part of the stems, leaving the top leaves exposed.
6. Water Again: Water the straw-covered area thoroughly. The straw will help retain moisture and suppress weeds.
7. Repeat the Layering: As the plants continue to grow, keep adding layers of straw. Every time the plants grow another 6-8 inches, add another layer of straw, covering the stems and leaving the top leaves exposed. Continue this process until your container or bed is almost full, or until the plants reach their mature height. This layering encourages the potato plants to produce tubers all along the buried stems.
8. Water Consistently: Potatoes need consistent moisture, especially during tuber development. Water deeply whenever the soil feels dry to the touch.
9. Fertilize (Optional): If you choose to fertilize, do so every few weeks with a balanced fertilizer. Follow the instructions on the fertilizer package.
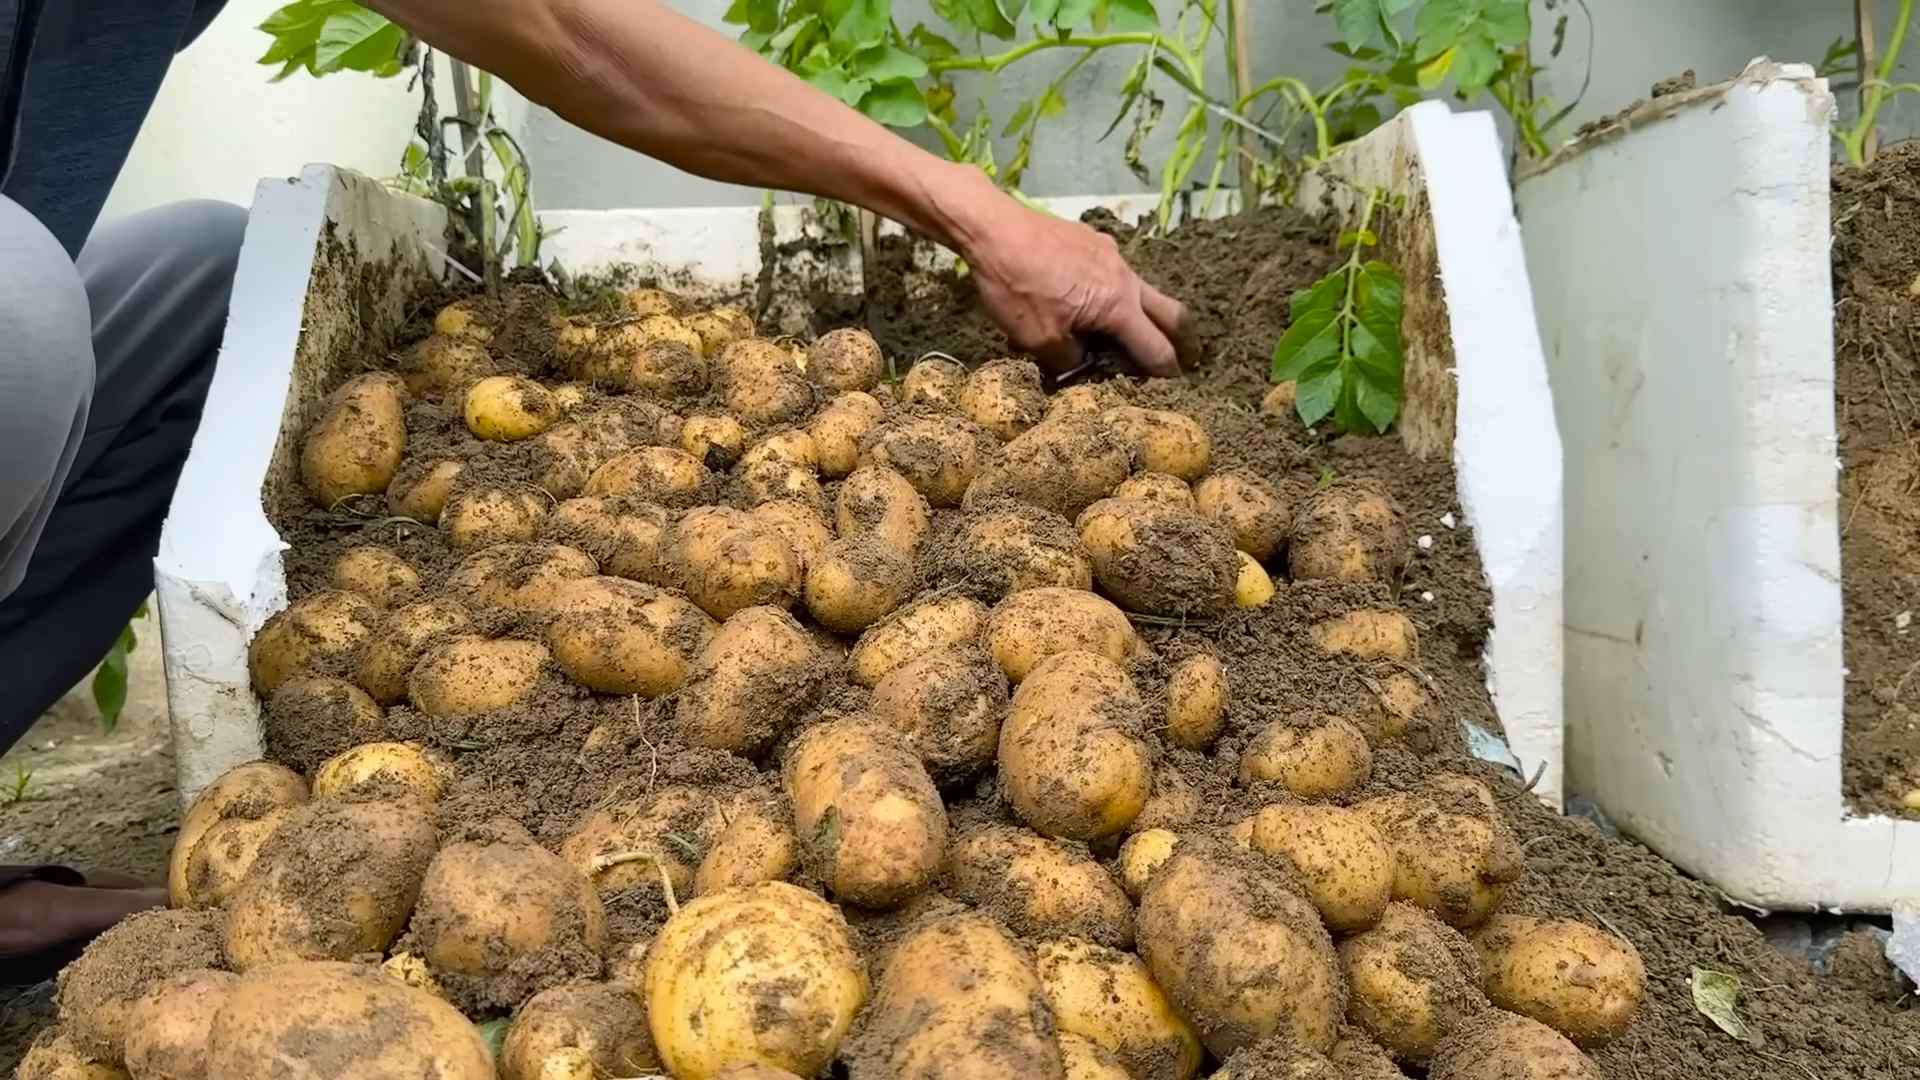
Harvesting Your Potatoes: The Easy Part!
This is where the magic happens! Because we’ve layered the potatoes with straw, harvesting is a breeze.
1. Wait for the Right Time: Potatoes are typically ready to harvest when the plants start to flower or when the foliage begins to die back. This usually happens about 80-100 days after planting, depending on the variety.
2. Gently Pull Back the Straw: Instead of digging, simply pull back the layers of straw to reveal the potatoes growing along the stems.
3. Harvest the Potatoes: Gently remove the potatoes from the soil and straw. They should be clean and easy to pick.
4. Continue Layer by Layer: Continue pulling back the straw layer by layer, harvesting the potatoes as you go. You’ll be amazed at how many potatoes you find!
5. Check the Bottom: Once you’ve harvested all the potatoes from the straw layers, you can gently dig into the bottom of the container or bed to find any remaining potatoes.
Tips for Success:
* Choose the Right Variety: Some potato varieties are better suited for container growing than others. Look for varieties that are described as “early” or “determinate,” as these tend to produce smaller plants and mature more quickly.
* Ensure Good Drainage: Potatoes don’t like to sit in soggy soil, so make sure your container or bed has good drainage.
* Protect from Frost: Potato plants are sensitive to frost. If frost is predicted, cover the plants with a blanket or tarp.
* Watch Out for Pests and Diseases: Keep an eye out for common potato pests and diseases, such as potato beetles and blight. Take action promptly if you notice any problems.
* Don’t Overwater: While potatoes need consistent moisture, overwatering can lead to rot. Water deeply but infrequently, allowing the soil to dry out slightly between waterings.
* Sunlight is Key: Potatoes need at least 6 hours of sunlight per day to thrive. Choose a sunny location for your container or bed.
* Consider “Chitting” Your Potatoes: Chitting is the process of encouraging seed potatoes to sprout before planting. This can give them a head start and result in an earlier harvest. To chit your potatoes, place them in a cool, bright location for a few weeks before planting.
* Use Organic Straw: Opt for organic straw or hay to avoid introducing pesticides or herbicides to your potato crop.
* Don’t Be Afraid to Experiment: Gardening is all about experimentation! Try different potato varieties, soil mixes, and watering schedules to see what works best for you.
* Store Your Potatoes Properly: After harvesting, store your potatoes in a cool, dark, and dry place. This will help them last longer.
* Compost Old Plants: Once you’ve harvested all your potatoes, you can compost the old plants. This will add valuable nutrients to your compost pile.
Troubleshooting:
* Plants are Yellowing: This could be a sign of overwatering, nutrient deficiency, or disease. Check the soil moisture and fertilize if necessary.
* No Potatoes Forming: This could be due to insufficient sunlight, poor soil, or lack of water. Make sure your plants are getting enough sunlight and water, and amend the soil with compost.
* Potatoes are Small: This could be due to overcrowding, insufficient water, or nutrient deficiency. Thin out the plants if necessary, water regularly, and fertilize if needed.
* Pests are Attacking: Identify the pest and take appropriate action. There are many organic pest control methods available.
Enjoy Your Homegrown Potatoes!
There’s nothing quite like the taste of freshly harvested, homegrown potatoes. This no-dig method makes it easy to grow your own potatoes, even if you have limited space or physical limitations. So, give it a try and enjoy the fruits (or rather, tubers) of your labor! I hope this helps you have a bountiful potato harvest!
Conclusion
So, there you have it! This simple, yet incredibly effective, DIY potato harvesting method is a game-changer for any gardener, whether you’re a seasoned pro or just starting out. Forget back-breaking digging and the frustration of accidentally slicing through your precious potatoes. This method is all about ease, efficiency, and maximizing your yield.
Why is this a must-try? Because it saves you time, energy, and reduces the risk of damaging your potatoes. Imagine spending less time hunched over in the garden and more time enjoying the fruits (or rather, vegetables!) of your labor. Plus, the gentle approach minimizes bruising, leading to better storage and longer-lasting potatoes. This is especially important if you’re planning on storing your harvest for the winter months.
But the beauty of this DIY trick lies not only in its simplicity but also in its adaptability. Feel free to experiment with different tools. While a garden fork is recommended, a sturdy pitchfork or even a broad spade can work in a pinch. The key is to gently loosen the soil around the potato plant without directly impacting the tubers.
Consider these variations to tailor the method to your specific needs and garden conditions:
* For heavy clay soil: If your soil is particularly dense and compacted, pre-soaking the area the day before harvesting can make the process significantly easier. The water will help to soften the soil, allowing you to lift the potatoes with less resistance.
* For raised beds: This method works exceptionally well in raised beds, where the soil is typically looser and more manageable. You might even find that you can gently pull the entire plant up with minimal effort.
* For small gardens: Even if you only have a few potato plants, this method is still worthwhile. It ensures that you harvest every last potato, maximizing your yield even in a limited space.
* Companion Planting Considerations: If you’ve practiced companion planting, be mindful of the plants surrounding your potatoes. Gently work around them to avoid disturbing their root systems.
This easy potato harvesting method is more than just a technique; it’s a way to connect with your garden and appreciate the bounty it provides. It’s about working smarter, not harder, and enjoying the process from planting to harvest.
We wholeheartedly encourage you to give this DIY trick a try. You’ll be amazed at how much easier and more enjoyable potato harvesting can be. And most importantly, don’t forget to share your experience with us! Let us know how it worked for you, any modifications you made, and any tips you discovered along the way. Your feedback will help other gardeners discover the joy of this simple yet effective method. Share your photos and stories on social media using #EasyPotatoHarvesting and let’s build a community of happy potato growers!
Frequently Asked Questions (FAQ)
What is the best time of day to harvest potatoes?
The ideal time to harvest potatoes is on a dry, overcast day. Avoid harvesting in direct sunlight, as the potatoes can become sunburned, which reduces their storage life. Early morning or late afternoon are generally good choices. Harvesting on a dry day also helps prevent the spread of diseases.
How do I know when my potatoes are ready to harvest?
The timing of potato harvesting depends on the variety and whether you want “new potatoes” or mature potatoes for storage. For new potatoes, harvest when the plants begin to flower. These potatoes will be small and have thin skins. For mature potatoes, wait until the foliage has died back completely. This indicates that the potatoes have reached their full size and the skins have thickened, making them suitable for long-term storage.
What tools do I need for this DIY potato harvesting method?
The essential tool is a garden fork. A sturdy pitchfork or broad spade can also work. You’ll also need gloves to protect your hands and a container (such as a basket or bucket) to collect the harvested potatoes. A tarp or sheet can be helpful to lay the potatoes on as you harvest, keeping them clean and organized.
Can I use this method on all types of soil?
This method is generally effective on most soil types. However, if you have very heavy clay soil, it may be more challenging. In such cases, consider pre-soaking the area the day before harvesting to soften the soil. Adding organic matter to your soil can also improve its texture and drainage, making harvesting easier in the long run.
What if I accidentally damage some of the potatoes during harvesting?
Even with the gentlest methods, some potatoes may get accidentally bruised or cut during harvesting. These damaged potatoes should be used as soon as possible, as they are more susceptible to rot. Don’t store them with the rest of your harvest.
How should I store my harvested potatoes?
Store your harvested potatoes in a cool, dark, and well-ventilated place. A root cellar is ideal, but a basement or garage can also work. The temperature should be between 40-50°F (4-10°C). Avoid storing potatoes near apples or onions, as they release gases that can cause potatoes to sprout or rot. Store them in burlap sacks or well-ventilated containers.
Can I leave potatoes in the ground over winter?
While it’s possible to leave potatoes in the ground over winter in mild climates, it’s generally not recommended. The potatoes are susceptible to frost damage, pests, and diseases. It’s best to harvest them before the first frost and store them properly.
What if I find small, green potatoes during harvesting?
Green potatoes contain solanine, a toxic compound that can cause illness. This greening occurs when potatoes are exposed to sunlight. Discard any green potatoes you find during harvesting. To prevent greening, hill your potato plants regularly during the growing season to keep the tubers covered with soil.
Is this method suitable for harvesting sweet potatoes?
While the general principle of loosening the soil around the plant applies to sweet potatoes, they are more delicate and have a more extensive root system. You may need to dig a wider area around the plant and be extra careful when lifting them.
How can I improve my potato harvest next year?
To improve your potato harvest next year, consider these tips:
* Choose disease-resistant varieties: Select potato varieties that are known to be resistant to common diseases in your area.
* Practice crop rotation: Avoid planting potatoes in the same location year after year. This helps prevent the buildup of soilborne diseases and pests.
* Amend your soil: Add organic matter to your soil to improve its fertility, drainage, and texture.
* Hill your plants regularly: Hilling helps to protect the developing tubers from sunlight and encourages more potato production.
* Control pests and diseases: Monitor your plants regularly for signs of pests or diseases and take appropriate action.
What are the benefits of using this easy potato harvesting method compared to traditional digging?
This method offers several advantages:
* Reduced back strain: Loosening the soil with a fork requires less bending and lifting compared to digging, reducing strain on your back.
* Minimized potato damage: The gentle approach minimizes the risk of cutting or bruising the potatoes, leading to better storage.
* Increased efficiency: You can harvest potatoes more quickly and efficiently with this method.
* Less soil disturbance: This method disturbs the soil less than traditional digging, which is beneficial for soil health.
Leave a Comment