
Budget Winged Bean Growing: Dreaming of a lush, productive garden bursting with unique and delicious vegetables, but worried about breaking the bank? I get it! Gardening can sometimes feel like an expensive hobby, but it doesn’t have to be. Forget those pricey seed packets and complicated setups – I’m here to show you how to cultivate the fascinating and nutritious winged bean without emptying your wallet.
Winged beans, also known as Goa beans or asparagus peas, have a rich history, particularly in Southeast Asia and Papua New Guinea, where they’ve been a staple food source for centuries. Every part of the plant is edible, from the pods and leaves to the roots and seeds, making it an incredibly versatile and sustainable crop. Imagine harvesting fresh, protein-rich beans right from your own backyard!
But why should you bother with this particular DIY project? Well, for starters, budget winged bean growing is incredibly rewarding. It’s a fantastic way to connect with nature, learn new skills, and enjoy the satisfaction of growing your own food. Plus, in today’s world, where food costs are constantly rising, having a sustainable and affordable source of fresh produce is more important than ever. This DIY guide will provide you with simple, cost-effective techniques and hacks to successfully grow winged beans, even if you’re a complete beginner. So, let’s ditch the expensive gardening myths and get our hands dirty!
Growing Winged Beans on a Shoestring: A DIY Guide
Hey there, fellow gardening enthusiasts! I’m so excited to share my tried-and-true method for growing winged beans (also known as asparagus peas) without breaking the bank. These fascinating legumes are not only delicious but also incredibly nutritious, offering a complete protein source right from your garden. Plus, they’re beautiful climbers, adding a touch of exotic flair to any space. Let’s dive in!
What You’ll Need: The Budget-Friendly Supply List
Before we get our hands dirty, let’s gather our supplies. The beauty of this project is that we’re focusing on affordability and resourcefulness.
* Winged Bean Seeds: You can find these online or at some specialty nurseries. Look for sales or seed swaps to save money. Even better, if you know someone who grows them, ask for some seeds!
* Seed Starting Trays or Small Pots: Recycled yogurt containers, egg cartons, or even cut-up plastic bottles work perfectly. Just make sure they have drainage holes.
* Seed Starting Mix: You can buy this, but to save money, I make my own! A mix of compost, peat moss (or coconut coir), and vermiculite (or perlite) works wonders.
* Garden Soil: The soil where you’ll be planting your winged beans. Amend it with compost if it’s not already rich in nutrients.
* Compost: This is your best friend in the garden! It provides essential nutrients and improves soil structure. Homemade compost is the ultimate budget-friendly option.
* Trellis or Support Structure: Winged beans are climbers, so they need something to grow on. Think bamboo poles, sturdy branches, old ladders, repurposed fencing, or even strong twine strung between posts. Get creative!
* Watering Can or Hose: For keeping your seedlings and plants hydrated.
* Optional:
* Liquid seaweed fertilizer: A great natural boost for your plants.
* Mulch: Helps retain moisture and suppress weeds. Straw, wood chips, or even shredded leaves work well.
Phase 1: Starting Your Winged Bean Seeds
Winged beans have a hard seed coat, so we need to give them a little head start.
1. Scarification (Optional but Recommended): Gently nick the seed coat with a nail file or sandpaper. Be careful not to damage the inside of the seed. This helps water penetrate and speeds up germination. Alternatively, you can soak the seeds in warm water for 24 hours.
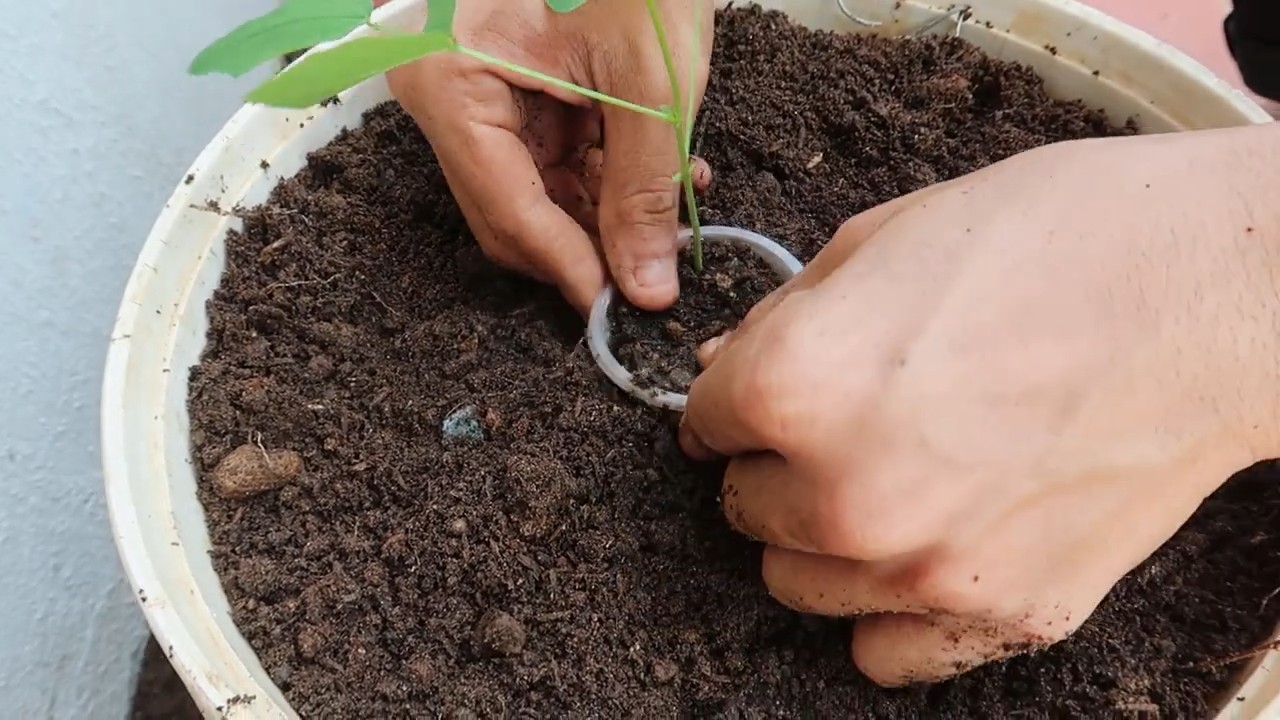
2. Sowing the Seeds: Fill your seed starting trays or pots with seed starting mix. Make a small hole (about 1 inch deep) in each container. Place one or two seeds in each hole and cover with soil.
3. Watering: Gently water the soil until it’s moist but not soggy.
4. Providing Warmth: Winged beans love warmth! Place your seed starting trays in a warm location, such as a sunny windowsill or under grow lights. A heat mat can also be helpful, especially in cooler climates.
5. Patience is Key: Germination can take anywhere from 7 to 21 days, depending on the temperature and seed quality. Keep the soil consistently moist during this time.
Phase 2: Transplanting Your Seedlings
Once your seedlings have developed a few sets of true leaves (the leaves that look like miniature versions of the adult plant’s leaves), they’re ready to be transplanted into the garden.
1. Hardening Off: Before transplanting, you need to “harden off” your seedlings. This means gradually exposing them to outdoor conditions over a period of about a week. Start by placing them in a sheltered spot outdoors for a few hours each day, gradually increasing the amount of time they spend outside. This helps them adjust to the sun, wind, and temperature changes.
2. Preparing the Planting Site: Choose a sunny location with well-drained soil. Winged beans need at least 6-8 hours of sunlight per day. Amend the soil with compost to improve its fertility and drainage.
3. Setting Up the Trellis: Install your trellis or support structure before transplanting. Make sure it’s sturdy enough to support the weight of the mature plants. Winged beans can grow quite tall!
4. Transplanting: Gently remove the seedlings from their containers. Be careful not to damage the roots. Dig a hole in the soil that’s slightly larger than the root ball. Place the seedling in the hole and backfill with soil. Water thoroughly. Space the plants about 12-18 inches apart.
5. Mulching: Apply a layer of mulch around the base of the plants to help retain moisture and suppress weeds.
Phase 3: Caring for Your Winged Bean Plants
Now that your winged beans are in the ground, it’s time to provide them with the care they need to thrive.
1. Watering: Water regularly, especially during dry periods. Winged beans need consistent moisture to produce well. Aim for about 1 inch of water per week.
2. Fertilizing: Feed your plants with a liquid seaweed fertilizer every few weeks to provide them with essential nutrients. You can also side-dress them with compost.
3. Training the Vines: As the vines grow, gently guide them onto the trellis or support structure. They’ll naturally start to climb, but you may need to help them along.
4. Pest and Disease Control: Winged beans are generally resistant to pests and diseases, but keep an eye out for common garden pests like aphids and bean beetles. You can control these with organic methods like insecticidal soap or neem oil.
5. Weeding: Keep the area around your plants free of weeds. Weeds compete with your winged beans for nutrients and water.
6. Pruning (Optional): You can prune your winged bean plants to encourage bushier growth and more pods. Simply pinch off the tips of the vines.
Phase 4: Harvesting Your Winged Beans
The best part! Harvesting your delicious winged beans.
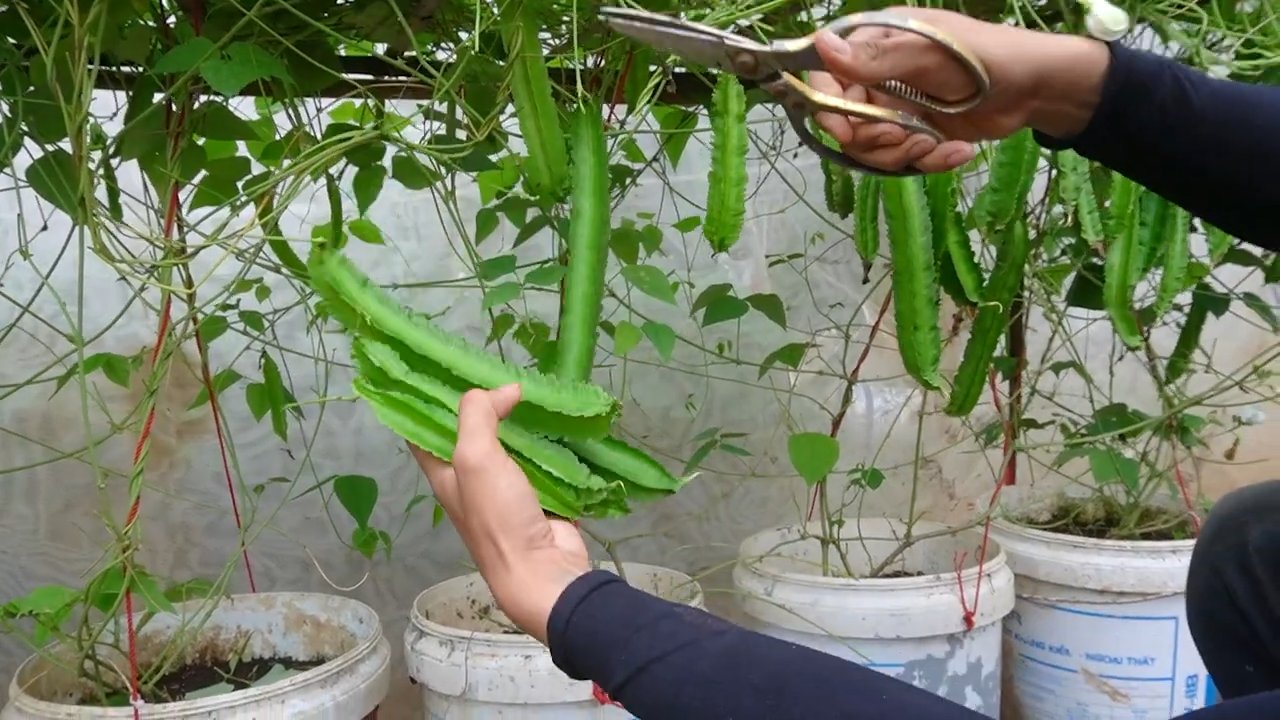
1. When to Harvest: You can harvest the pods when they are young and tender, about 6-8 inches long. The younger the pods, the more tender they will be. You can also harvest the leaves, flowers, and tubers.
2. How to Harvest: Simply snap the pods off the vine. Use scissors or pruning shears if necessary.
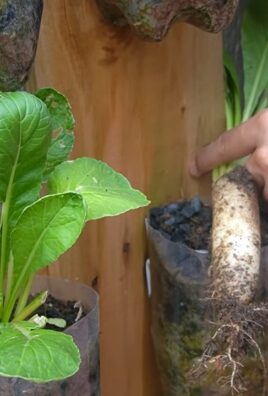
3. Harvesting the Tubers: The tubers can be harvested in the fall, after the plants have died back. They are similar to potatoes in texture and flavor.
4. Enjoying Your Harvest: Winged beans can be eaten raw or cooked. They are delicious in salads, stir-fries, soups, and stews. The leaves and flowers can also be eaten raw or cooked. The tubers can be roasted, boiled, or mashed.
Maximizing Your Budget: Tips and Tricks
Here are some extra tips to help you grow winged beans on a tight budget:
* Save Seeds: Once your plants produce pods, save some of the seeds for next year’s crop. This is a great way to save money and ensure that you always have a supply of winged bean seeds.
* Compost, Compost, Compost: I can’t stress this enough! Homemade compost is the key to healthy plants and a thriving garden. It’s also a free and sustainable way to improve your soil.
* Repurpose and Recycle: Get creative with your materials! Use old tires as planters, repurpose pallets into trellises, and collect rainwater for irrigation.
* Join a Gardening Community: Connect with other gardeners in your area. You can share seeds, seedlings, and gardening tips.
* Look for Free Resources: Many local libraries and extension offices offer free gardening workshops and resources.
Troubleshooting: Common Issues and Solutions
Even with the best care, you may encounter some challenges along the way. Here are some common issues and how to address them:
* Poor Germination: If your seeds aren’t germinating, make sure the soil is warm and moist. You can also try scarifying the seeds or soaking them in warm water before planting.
* Slow Growth: If your plants are growing slowly, make sure they’re getting enough sunlight and nutrients. Fertilize them with a liquid seaweed fertilizer or side-dress them with compost.
* Yellowing Leaves: Yellowing leaves can be a sign of nutrient deficiency or overwatering. Check the soil moisture and adjust your watering schedule accordingly. You can also fertilize your plants with a balanced fertilizer.
* Pest Infestations: If you notice pests on your plants, try using organic methods like insecticidal soap or neem oil. You can also handpick the pests off the plants.
Growing winged beans is a rewarding experience that can provide you with a delicious and nutritious harvest. By following these tips and tricks, you can grow winged beans on a shoestring budget and enjoy the fruits (or rather, the pods) of
Conclusion
So, there you have it! Transforming your garden into a winged bean haven doesn’t require breaking the bank. This budget-friendly approach to growing winged beans opens up a world of culinary possibilities and gardening satisfaction, regardless of your financial constraints. We’ve shown you how to leverage readily available resources, repurpose materials, and embrace cost-effective techniques to cultivate these nutritional powerhouses right in your own backyard.
Why is this DIY trick a must-try? Because it empowers you to take control of your food source, reduce your grocery bills, and connect with nature in a meaningful way. Winged beans are not only delicious and versatile, but they are also packed with protein, vitamins, and minerals, making them a valuable addition to any diet. By growing your own, you can ensure that you’re consuming the freshest, most nutritious produce possible, free from harmful pesticides and chemicals.
But the benefits extend beyond just the nutritional value. Gardening itself is a therapeutic activity that can reduce stress, improve your mood, and provide a sense of accomplishment. And when you’re doing it on a budget, you’re also honing your resourcefulness and creativity, skills that can be applied to other areas of your life.
Looking for variations? Consider these ideas to personalize your winged bean growing experience:
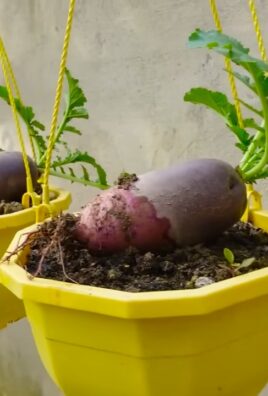
* **Vertical Gardening:** If you’re short on space, explore vertical gardening techniques using repurposed pallets, trellises made from bamboo, or even hanging baskets. This maximizes your growing area and adds visual appeal to your garden.
* **Companion Planting:** Enhance your winged bean growth by planting companion plants like basil, marigolds, or nasturtiums. These plants can deter pests, attract beneficial insects, and improve soil health.
* **Seed Saving:** Once your winged beans mature, save some of the seeds for future planting. This ensures a continuous supply of seeds and allows you to adapt your winged bean varieties to your specific climate and growing conditions.
* **Different Varieties:** Experiment with different varieties of winged beans to find the ones that best suit your taste and climate. Some varieties are more heat-tolerant, while others are more productive.
We strongly encourage you to try this budget-friendly approach to **budget winged bean growing**. It’s a rewarding experience that will not only provide you with delicious and nutritious food but also connect you with nature and empower you to live a more sustainable lifestyle.
Don’t be afraid to get your hands dirty, experiment with different techniques, and adapt the methods to suit your own unique circumstances. The most important thing is to start growing and learn along the way.
And most importantly, we want to hear about your experiences! Share your successes, challenges, and tips in the comments below. Let’s create a community of budget-conscious winged bean growers who can learn from each other and inspire others to embark on this rewarding journey. Your insights could be invaluable to someone just starting out, and together, we can make winged bean growing accessible to everyone. So, get planting, get sharing, and get ready to enjoy the delicious rewards of your labor!
Frequently Asked Questions (FAQ)
What are the specific benefits of growing winged beans compared to other beans?
Winged beans offer a unique combination of benefits. Firstly, they are incredibly nutritious, boasting high protein content, comparable to soybeans, and are rich in vitamins and minerals like vitamin C, iron, and calcium. Secondly, almost the entire plant is edible – the pods, leaves, flowers, seeds, and even the tubers. This maximizes your yield and minimizes waste. Thirdly, winged beans are nitrogen-fixing plants, meaning they enrich the soil with nitrogen, benefiting other plants in your garden. Finally, they are relatively easy to grow, especially with the budget-friendly techniques we’ve outlined, making them a great choice for beginner gardeners.
How do I know when my winged beans are ready to harvest?
The timing of your harvest depends on which part of the plant you’re harvesting. For the pods, harvest them when they are young and tender, typically around 6-8 inches long. They should be bright green and snap easily. For the leaves, you can harvest them at any time, but they are most tender when young. The flowers can also be harvested when they are fully open. For the seeds, allow the pods to mature and dry on the vine. Once they are dry and brittle, you can harvest the seeds. The tubers can be harvested after the plant has died back in the fall.
What are some common pests and diseases that affect winged beans, and how can I prevent them on a budget?
Common pests include aphids, bean beetles, and spider mites. Diseases can include fungal infections like powdery mildew. To prevent these issues on a budget, start with healthy seeds and well-draining soil. Encourage beneficial insects like ladybugs by planting companion plants like marigolds. Regularly inspect your plants for signs of pests or diseases. If you spot any problems, you can try organic solutions like insecticidal soap or neem oil. For fungal diseases, ensure good air circulation and avoid overhead watering. You can also make a homemade fungicide by mixing baking soda with water and a drop of dish soap.
Can I grow winged beans in containers, and if so, what size container is recommended?
Yes, you can absolutely grow winged beans in containers! This is a great option for those with limited space or poor soil. Choose a large container, at least 12-18 inches in diameter and depth, to accommodate the plant’s root system. Ensure the container has good drainage holes. Use a high-quality potting mix that is well-draining and rich in organic matter. Provide a trellis or support structure for the vines to climb. Water regularly and fertilize every few weeks with a balanced fertilizer.
What are some creative ways to use winged beans in cooking?
Winged beans are incredibly versatile in the kitchen. The young pods can be eaten raw in salads or stir-fried, steamed, or boiled as a vegetable. The leaves can be added to salads or used as a leafy green in stir-fries and soups. The flowers can be used as a garnish or added to salads. The seeds can be roasted and eaten as a snack or ground into flour. The tubers can be boiled, roasted, or fried like potatoes. Try adding winged beans to curries, stews, soups, and stir-fries. You can also use them to make dips, spreads, and even desserts.
How can I save seeds from my winged bean plants for future planting?
Saving seeds is a great way to ensure a continuous supply of winged beans and adapt your varieties to your local climate. Allow the pods to mature and dry completely on the vine. Once they are dry and brittle, harvest the pods and remove the seeds. Spread the seeds out on a tray to dry completely for a few days. Store the dried seeds in an airtight container in a cool, dark, and dry place. Label the container with the variety and date. The seeds should remain viable for several years.
What type of soil is best for growing winged beans, and how can I improve my soil on a budget?
Winged beans prefer well-draining soil that is rich in organic matter. The ideal pH is between 6.0 and 7.0. To improve your soil on a budget, start by adding compost or well-rotted manure. These materials will improve soil drainage, fertility, and water retention. You can also use cover crops like buckwheat or clover to improve soil health. These crops can be grown and then tilled into the soil to add organic matter. Another budget-friendly option is to use leaf mold, which is simply decomposed leaves.
How much sunlight do winged beans need to thrive?
Winged beans need at least 6-8 hours of direct sunlight per day to thrive. Choose a location in your garden that receives plenty of sunlight. If you are growing winged beans in containers, make sure to place them in a sunny spot. If you live in a very hot climate, you may need to provide some afternoon shade to prevent the plants from getting scorched.
What are some common mistakes to avoid when growing winged beans?
Some common mistakes include planting too early in the season, not providing adequate support for the vines, overwatering or underwatering, and not fertilizing regularly. Make sure to wait until the soil has warmed up before planting. Provide a sturdy trellis or support structure for the vines to climb. Water regularly, but avoid overwatering, which can lead to root rot. Fertilize every few weeks with a balanced fertilizer to ensure healthy growth.
Where can I find more information and resources on growing winged beans?
You can find more information and resources on growing winged beans from your local agricultural extension office, online gardening forums, and gardening books. Look for resources that are specific to your region and climate. You can also find helpful videos and articles on YouTube and other online platforms. Don’t be afraid to experiment and learn from your own experiences.

Leave a Comment