
Chayote vine terrace garden – ever dreamt of transforming your balcony or rooftop into a lush, green paradise overflowing with delicious, homegrown produce? I know I have! And let me tell you, cultivating a chayote vine is a fantastic way to make that dream a reality. This often-overlooked vegetable, also known as mirliton or vegetable pear, is surprisingly easy to grow, incredibly versatile in the kitchen, and offers a beautiful, cascading display perfect for a terrace garden.
Chayote has a rich history, originating in Mesoamerica, where it has been cultivated for centuries. It was a staple food for the Aztecs and Mayans, and its popularity has since spread worldwide. Beyond its culinary uses, chayote also holds cultural significance in some regions, symbolizing abundance and good fortune.
But why should you consider adding a chayote vine to your terrace garden? Well, for starters, it’s a space-saver! Chayote vines are vigorous climbers, making them ideal for vertical gardening. They can quickly cover a trellis, fence, or even a pergola, providing shade and privacy while maximizing your growing area. Plus, who wouldn’t want a constant supply of fresh, organic chayote right outside their door? In this article, I’m going to share my favorite DIY tricks and hacks for creating a thriving chayote vine terrace garden, even if you’re a complete beginner. Get ready to unleash your inner gardener and enjoy the rewards of this amazing plant!
Creating Your Own Chayote Vine Terrace Garden: A Step-by-Step Guide
Hey there, fellow gardening enthusiasts! I’m so excited to share this project with you. I’ve always been fascinated by chayote squash – it’s delicious, versatile, and the vines are just gorgeous. So, I decided to build a terrace garden specifically for them. It’s a bit of a project, but trust me, the results are worth it! This guide will walk you through every step, from planning to planting, so you can create your own thriving chayote paradise.
Planning Your Chayote Terrace Garden
Before we get our hands dirty, let’s plan. Chayote vines are vigorous growers, so space is key. Here’s what you need to consider:
* Sunlight: Chayote needs at least 6-8 hours of direct sunlight per day. Choose a location that gets plenty of sun.
* Space: These vines can spread! Plan for at least 10-15 feet of horizontal space per plant. They also climb, so you’ll need a sturdy trellis or structure.
* Soil: Chayote prefers well-drained, fertile soil. We’ll talk about soil preparation later.
* Water: Consistent watering is crucial, especially during fruiting. Consider your watering system.
* Terrace Design: Decide on the number of terraces and their size. This will depend on your available space and how many chayote plants you want to grow.
Materials You’ll Need
Okay, let’s gather our supplies. This list might seem long, but it covers everything you’ll need for a successful terrace garden.
* Chayote Squash: You’ll need a mature chayote squash to sprout. Look for one that’s starting to show signs of sprouting already.
* Terrace Building Materials: This depends on your design. You can use:
* Retaining wall blocks (concrete, stone, or wood)
* Lumber (treated for outdoor use)
* Rocks or stones (for a more natural look)
* Soil: Good quality garden soil, compost, and potentially some amendments like perlite or vermiculite for drainage.
* Trellis Materials:
* Wooden posts
* Wire or strong twine
* Metal fencing
* Tools:
* Shovel
* Rake
* Level
* Measuring tape
* Wheelbarrow (optional, but helpful)
* Gloves
* Safety glasses
* Saw (if using lumber)
* Drill (if needed for trellis construction)
* Watering System:
* Hose
* Sprinkler
* Drip irrigation system (recommended for efficiency)
* Mulch: Straw, wood chips, or other organic mulch.
Building Your Chayote Terrace Garden: Step-by-Step
Alright, let’s get building! This is where the fun (and the hard work) begins.
Phase 1: Preparing the Site
1. Clear the Area: Remove any existing vegetation, rocks, or debris from the area where you’ll be building your terraces. This is crucial for a stable foundation.
2. Mark the Terrace Locations: Use a measuring tape and stakes to mark the outline of each terrace. Consider the slope of your land and how much leveling you’ll need to do. I used spray paint to mark the lines, which made it easier to visualize.
3. Level the Ground: This is probably the most physically demanding part. Use a shovel to level the ground within each terrace outline. You’ll be moving soil from higher areas to lower areas. A level is your best friend here! Make sure each terrace is relatively flat.
Phase 2: Constructing the Terraces
This section depends heavily on the materials you chose. I’ll give general instructions, but you’ll need to adapt them to your specific situation.
1. Building with Retaining Wall Blocks:
* Dig a Trench: Dig a shallow trench along the outline of each terrace where the first row of blocks will sit. This trench should be deep enough to bury the bottom row slightly for stability.
* Lay the First Row: Place the first row of blocks in the trench, ensuring they are level. Use a level to check both horizontally and vertically.
* Stack Subsequent Rows: Stack the remaining rows of blocks, staggering the joints for added strength. Some blocks have interlocking features, which make this easier.
* Backfill: As you build, backfill behind the blocks with soil. This will help to stabilize the wall and prevent it from collapsing. Compact the soil as you go.
2. Building with Lumber:
* Cut the Lumber: Cut the lumber to the desired lengths for the terrace walls.
* Build the Frames: Assemble the lumber into rectangular frames using screws or nails. Make sure the frames are sturdy.
* Install the Frames: Position the frames along the terrace outlines. Use stakes to secure them in place.
* Backfill: Backfill behind the frames with soil, compacting it as you go.
3. Building with Rocks/Stones:
* Sort the Rocks: Sort the rocks by size and shape.
* Build the Walls: Carefully stack the rocks to create the terrace walls. Use smaller rocks to fill in gaps and provide stability. This method requires patience and a good eye for balance.
* Backfill: Backfill behind the rocks with soil, compacting it as you go.
Phase 3: Preparing the Soil
1. Fill the Terraces: Fill each terrace with a mixture of garden soil and compost. I used a 2:1 ratio of soil to compost. This provides a rich, well-draining growing medium for your chayote.
2. Amend the Soil (Optional): If your soil is heavy clay or sandy, consider adding amendments like perlite or vermiculite to improve drainage and aeration.
3. Test the Soil pH: Chayote prefers a slightly acidic to neutral soil pH (around 6.0-7.0). You can test your soil using a soil testing kit and amend it accordingly.
4. Rake and Level: Rake the soil surface to create a smooth, even planting bed.
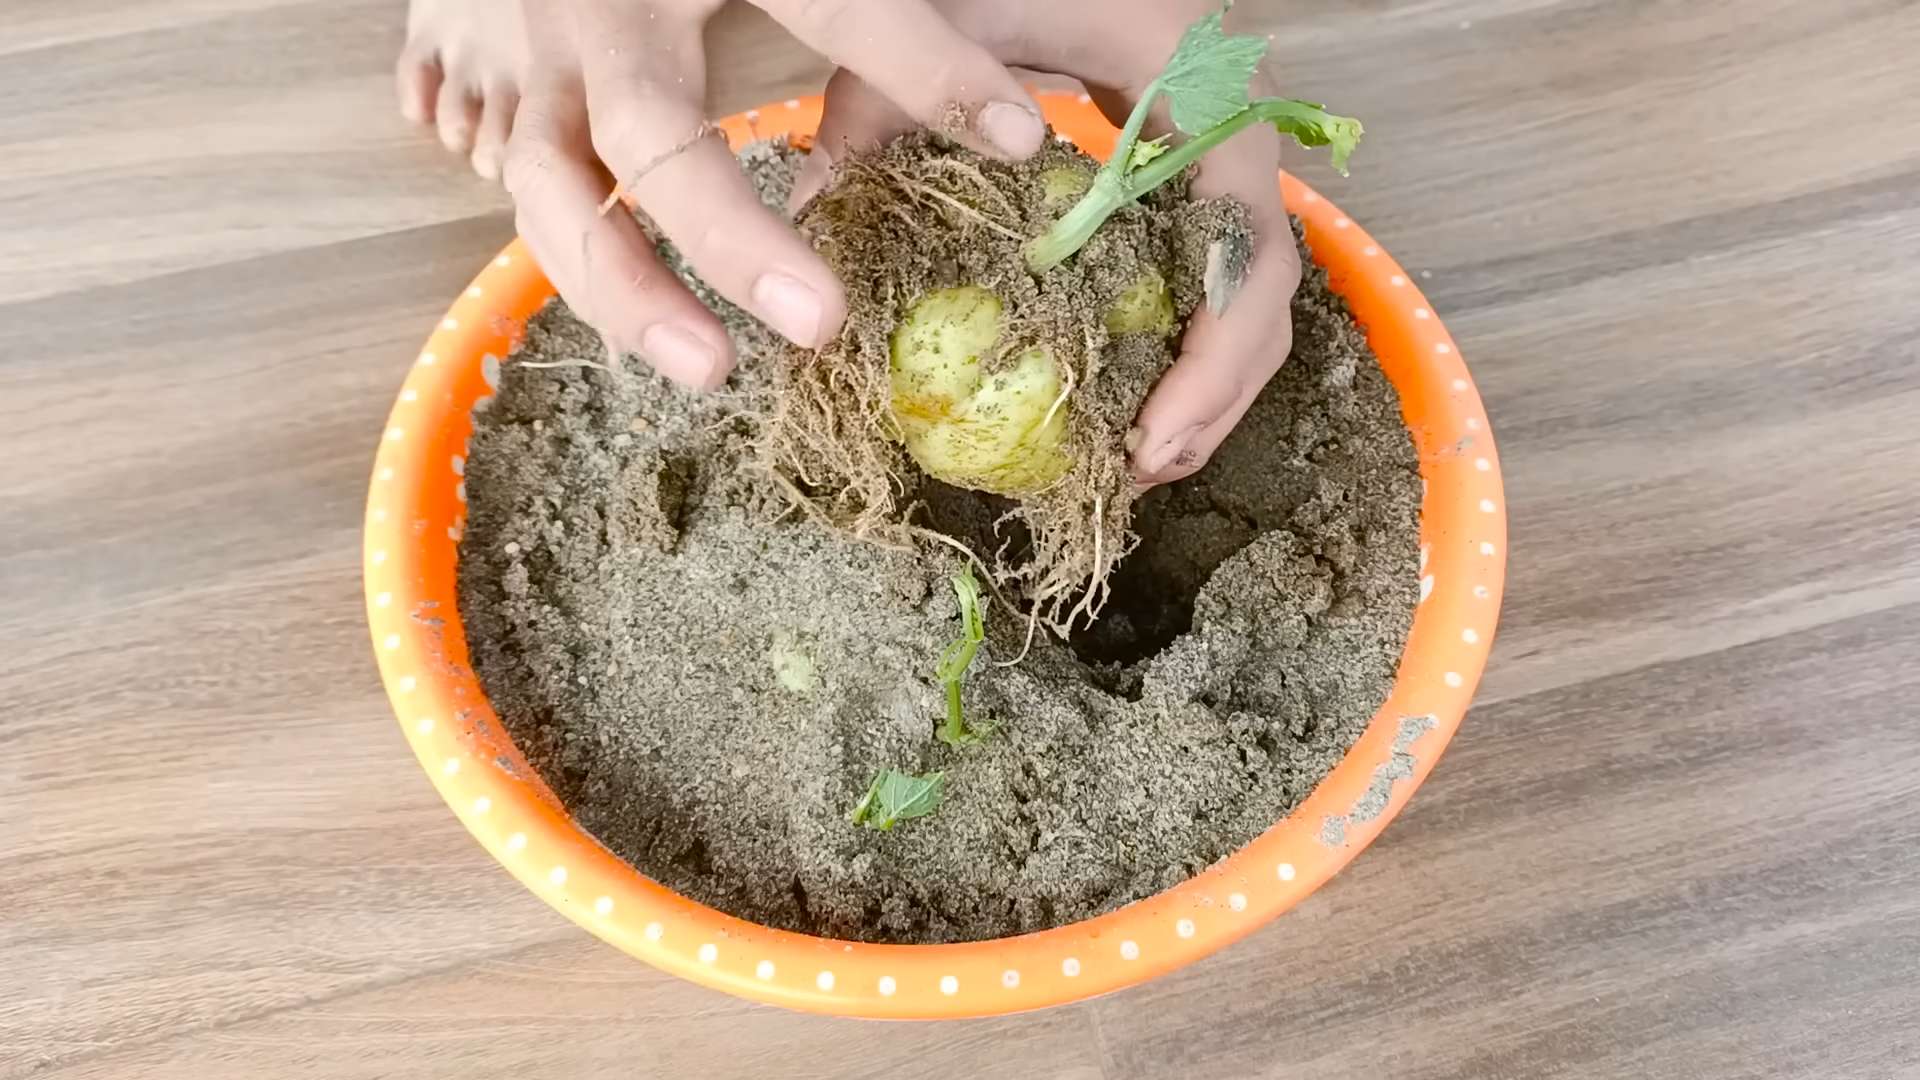
Phase 4: Sprouting the Chayote Squash
This is a crucial step, as chayote can be a bit finicky to sprout.
1. Choose a Mature Squash: Select a mature chayote squash that is starting to show signs of sprouting. You might see a small root emerging from the bottom.
2. Prepare a Pot: Fill a large pot (at least 12 inches in diameter) with well-draining potting mix.
3. Plant the Squash: Place the squash horizontally on top of the soil, with the sprouting end slightly buried. Don’t completely cover the squash.
4. Water Regularly: Keep the soil consistently moist, but not waterlogged.
5. Provide Warmth: Chayote needs warmth to sprout. Place the pot in a sunny location or use a heat mat.
6. Be Patient: It can take several weeks for the chayote to sprout and develop roots. Don’t give up!
Phase 5: Installing the Trellis
Chayote vines need a strong trellis to climb. Here’s how to build one:
1. Choose a Trellis Design: There are many trellis designs to choose from. You can use wooden posts and wire, metal fencing, or even a sturdy pergola.
2. Install the Posts: If using wooden posts, drive them into the ground at the back of each terrace. Make sure they are securely anchored.
3. Attach the Wire or Fencing: Attach the wire or fencing to the posts, creating a climbing surface for the vines. Make sure the wire is taut and securely fastened.
4. Ensure Stability: The trellis needs to be strong enough to support the weight of the mature vines and the squash. Reinforce it as needed.
Phase 6: Planting the Chayote
1. Check for Root Development: Once the chayote has developed a good root system in the pot, it’s ready to be transplanted.
2. Dig a Hole: Dig a hole in the soil at the base of the trellis, large enough to accommodate the root ball.
3. Transplant Carefully: Gently remove the chayote from the pot and place it in the hole. Be careful not to damage the roots.
4. Backfill and Water: Backfill the hole with soil and water thoroughly.
5. Guide the Vines: Gently guide the vines onto the trellis. They will eventually start to climb on
Conclusion
So, there you have it! Transforming your outdoor space with a thriving chayote vine terrace garden is not just a gardening project; it’s an investment in fresh, homegrown produce, a beautiful aesthetic upgrade, and a sustainable lifestyle. We’ve explored the simple yet effective steps to create your own chayote haven, and hopefully, you’re feeling inspired to embark on this rewarding journey.
Why is this DIY trick a must-try? Because it offers a unique blend of functionality and beauty. Imagine stepping outside to harvest your own crisp, delicious chayote squash, knowing exactly where it came from and how it was grown. Beyond the culinary benefits, a chayote vine terrace garden adds a touch of lush greenery to your home, creating a tranquil and inviting atmosphere. It’s a conversation starter, a source of pride, and a testament to your green thumb. Plus, chayote vines are vigorous growers, providing ample shade and potentially reducing your energy bills during the warmer months.
But the beauty of this project lies in its adaptability. Feel free to experiment with different terrace designs. Instead of traditional wooden structures, consider using repurposed materials like old tires, concrete blocks, or even woven bamboo for a more rustic and eco-friendly look. You can also integrate other climbing plants like passionfruit or beans alongside your chayote vine, creating a diverse and productive vertical garden. Think about adding companion plants like marigolds or basil to deter pests and attract beneficial insects.
For those with limited space, consider growing your chayote vine in large containers on a balcony or patio. Just ensure the containers are sturdy enough to support the weight of the mature vine and provide adequate drainage. Another variation is to train the vine along an existing fence or pergola, creating a living wall that adds privacy and beauty to your property.
The possibilities are endless! The key is to tailor the project to your specific needs, preferences, and available resources. Don’t be afraid to get creative and personalize your chayote vine terrace garden to reflect your unique style.
We wholeheartedly encourage you to give this DIY trick a try. It’s a relatively simple project that yields incredible results. Not only will you enjoy a bountiful harvest of chayote squash, but you’ll also experience the satisfaction of creating something beautiful and sustainable with your own hands.
And most importantly, we want to hear about your experience! Share your photos, tips, and challenges in the comments below. Let’s build a community of chayote enthusiasts and inspire others to embrace the joys of homegrown food and sustainable gardening. What kind of support structure did you use? What challenges did you face, and how did you overcome them? What are your favorite chayote recipes? Your insights will be invaluable to other readers who are just starting out. Let’s learn from each other and create a world filled with thriving chayote vine terrace gardens!
Frequently Asked Questions (FAQ)
What exactly is chayote and what does it taste like?
Chayote, also known as vegetable pear or mirliton, is a type of squash that belongs to the gourd family. It has a mild, slightly sweet flavor that is often compared to a blend of cucumber and apple. Its texture is crisp and refreshing, making it a versatile ingredient in both savory and sweet dishes. The entire plant is edible, including the fruit, seeds, leaves, and roots, although the fruit is the most commonly consumed part.
How much space does a chayote vine need?
Chayote vines are vigorous growers and require ample space to thrive. A single vine can easily spread 15-20 feet in all directions. Therefore, it’s crucial to provide a sturdy and spacious support structure, such as a trellis, pergola, or fence. When planning your chayote vine terrace garden, ensure that the chosen location has enough room for the vine to expand without overcrowding other plants or structures. If you’re growing multiple vines, space them at least 10-12 feet apart to allow for adequate air circulation and sunlight penetration.
What kind of soil is best for growing chayote?
Chayote vines prefer well-drained, fertile soil that is rich in organic matter. Before planting, amend the soil with compost, aged manure, or other organic amendments to improve its drainage, fertility, and water-holding capacity. A slightly acidic to neutral soil pH (around 6.0-7.0) is ideal for chayote growth. If your soil is heavy clay or sandy, consider building raised beds or using containers filled with a high-quality potting mix to provide a better growing environment for your chayote vine.
How often should I water my chayote vine?
Chayote vines require consistent moisture, especially during the growing season. Water deeply and regularly, ensuring that the soil remains consistently moist but not waterlogged. The frequency of watering will depend on factors such as the climate, soil type, and stage of growth. In hot, dry weather, you may need to water daily, while in cooler, wetter conditions, you can reduce the frequency. Mulching around the base of the vine can help retain moisture and suppress weeds.
How do I fertilize my chayote vine?
Chayote vines are heavy feeders and benefit from regular fertilization. Apply a balanced fertilizer (e.g., 10-10-10) every 4-6 weeks during the growing season. You can also supplement with organic fertilizers such as compost tea, fish emulsion, or seaweed extract. Avoid over-fertilizing, as this can lead to excessive vegetative growth at the expense of fruit production. Monitor the vine’s growth and adjust the fertilization schedule accordingly.
When is the best time to plant chayote?
The best time to plant chayote is in the spring, after the last frost has passed. Chayote requires a long growing season (around 150-180 days) to produce fruit, so it’s important to get it started early. You can start chayote indoors 6-8 weeks before the last frost date to give it a head start. Plant the entire fruit horizontally, with the sprout end slightly exposed. Once the seedlings have developed several leaves and the weather has warmed up, transplant them outdoors to your prepared terrace garden.
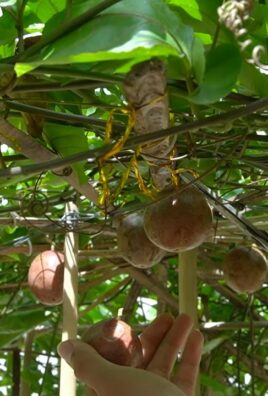
How long does it take for a chayote vine to produce fruit?
Chayote vines typically start producing fruit in the late summer or early fall, about 4-6 months after planting. The exact timing will depend on factors such as the climate, variety, and growing conditions. Be patient, as it may take some time for the vine to establish itself and start producing fruit. Once it starts, however, you can expect a bountiful harvest that can last for several weeks or even months.
Are there any common pests or diseases that affect chayote vines?
Chayote vines are generally resistant to pests and diseases, but they can occasionally be affected by problems such as aphids, spider mites, squash bugs, and powdery mildew. Regularly inspect your vine for signs of infestation or disease and take appropriate action if necessary. Organic pest control methods, such as insecticidal soap, neem oil, and companion planting, can be effective in managing pests. Ensure good air circulation and avoid overcrowding to prevent fungal diseases.
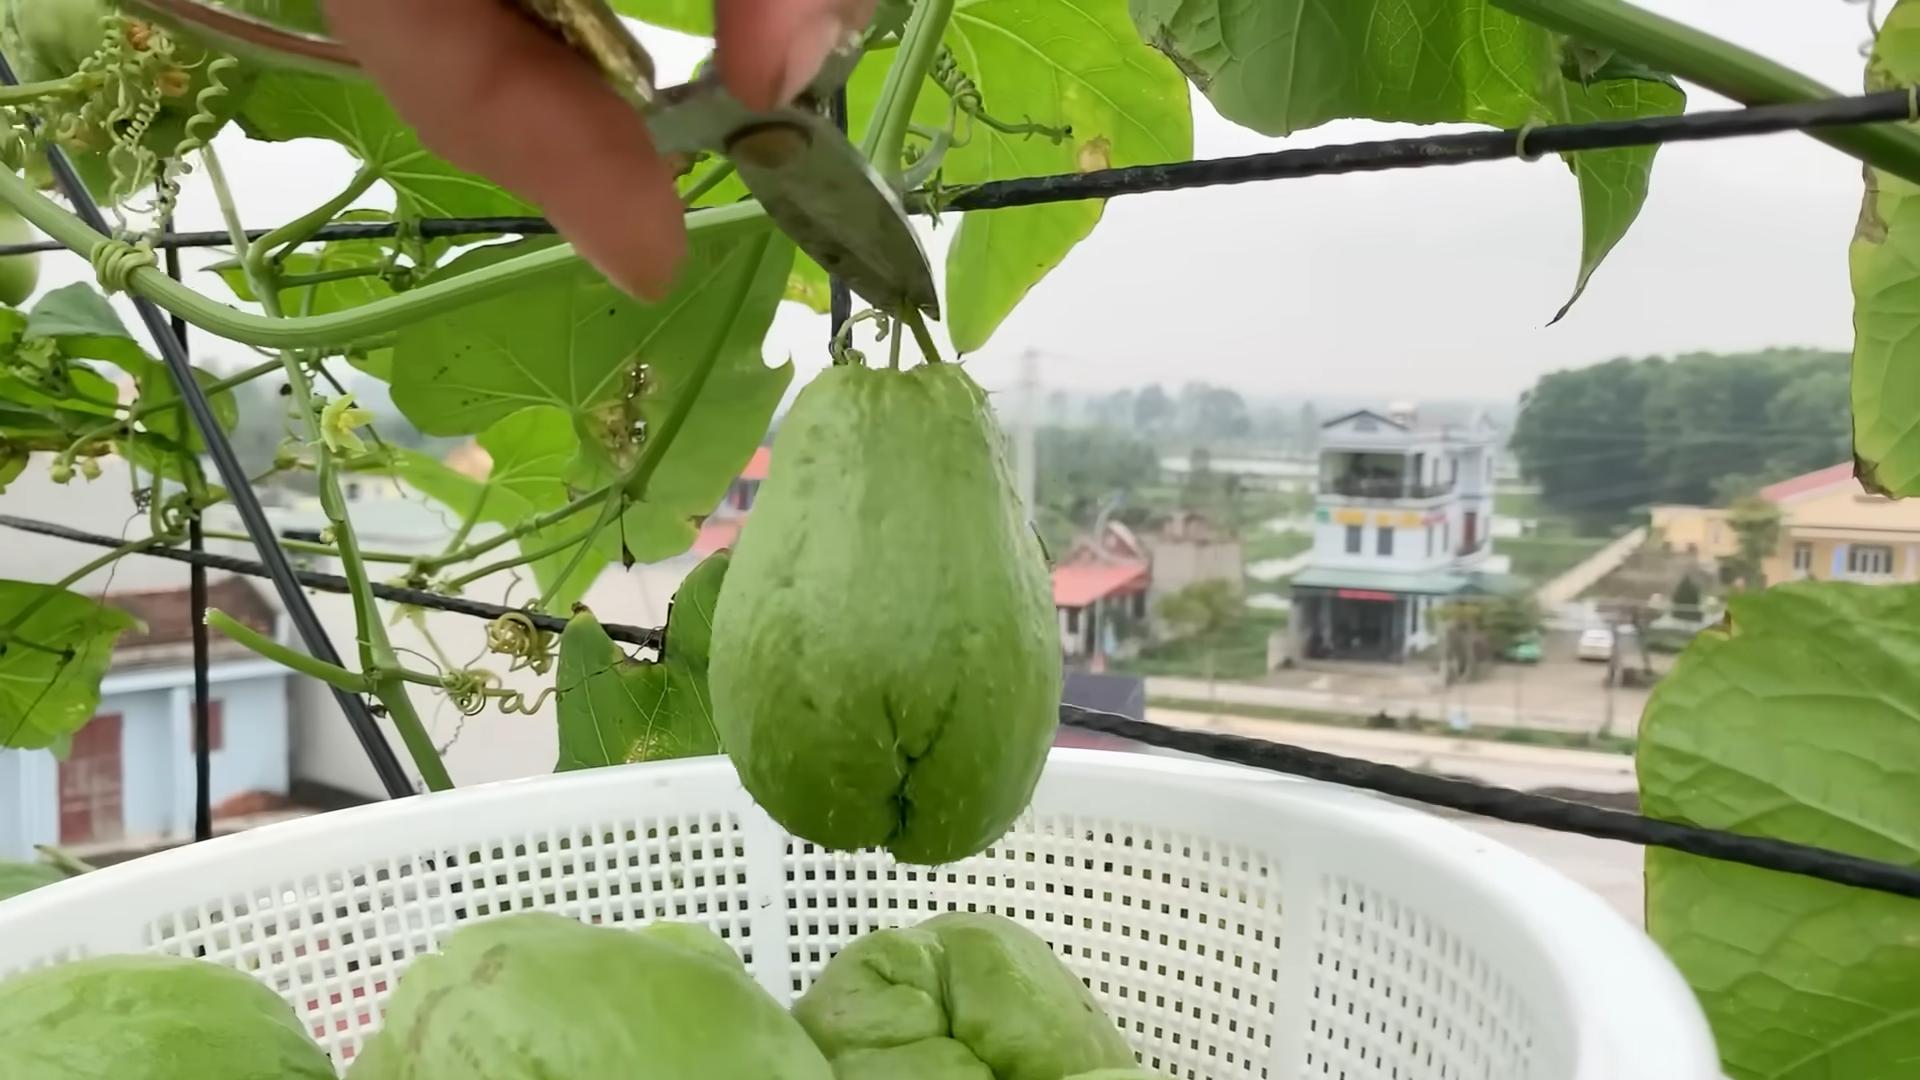
How do I harvest chayote squash?
Chayote squash is typically harvested when it is still young and tender, about 4-6 inches in length. The skin should be smooth and light green. Use a sharp knife or pruners to cut the squash from the vine, leaving a short stem attached. Chayote squash can be stored in the refrigerator for several weeks.
Can I grow chayote in a container?
Yes, you can grow chayote in a container, but it requires a large and sturdy container to accommodate its vigorous growth. Choose a container that is at least 20 gallons in size and has good drainage holes. Fill the container with a high-quality potting mix and provide a strong trellis or support structure for the vine to climb on. Water and fertilize regularly, and monitor the vine for pests and diseases. Container-grown chayote may not produce as much fruit as those grown in the ground, but it can still be a rewarding experience.
What are some ways to use chayote in cooking?
Chayote is a versatile ingredient that can be used in a variety of dishes. It can be eaten raw in salads, pickled, or cooked in soups, stews, stir-fries, and casseroles. It can also be used as a substitute for other vegetables such as zucchini, cucumber, or potatoes. Chayote can be boiled, steamed, baked, or grilled. Its mild flavor makes it a great canvas for absorbing other flavors. The seeds are also edible and can be roasted or ground into flour.
Is chayote a perennial or annual plant?
Chayote is a perennial plant in warmer climates (USDA zones 8-11), meaning it can live for several years. In colder climates, it is typically grown as an annual, as the vine will die back in the winter. However, the roots may survive if protected from frost, and the vine may regrow in the spring. To overwinter chayote in colder climates, you can dig up the roots and store them in a cool, dry place until spring.


Leave a Comment