
Clean Frying Pan Baking Soda: Is your trusty frying pan looking less than stellar? Are burnt-on food and stubborn grease clinging on for dear life? Don’t despair! I’m here to share a simple, yet incredibly effective, DIY trick that will have your frying pan sparkling like new again, all thanks to the power of baking soda!
For generations, baking soda has been a household staple, not just for baking, but also for its amazing cleaning properties. Our grandmothers knew the secret – this humble ingredient is a powerhouse when it comes to tackling tough stains and grime. Think of it as a natural, budget-friendly alternative to harsh chemical cleaners. It’s a win-win!
Let’s face it, nobody enjoys scrubbing burnt food off a frying pan. It’s time-consuming, frustrating, and often requires excessive elbow grease. But what if I told you there’s a way to make this chore significantly easier, faster, and less strenuous? This DIY trick using clean frying pan baking soda will not only save you time and energy but also extend the life of your favorite cookware. You’ll be amazed at how easily you can restore your frying pan to its former glory. So, ditch the harsh chemicals and get ready to discover the magic of baking soda!
DIY: Revive Your Grimy Frying Pan with Baking Soda Magic!
Okay, let’s face it, we’ve all been there. You’ve cooked a delicious meal, but the aftermath? A frying pan caked in burnt-on food and stubborn grease. Don’t despair! Before you resign yourself to endless scrubbing or, worse, throwing it away, I’m going to show you a super effective, budget-friendly way to bring your frying pan back to life using the power of baking soda. This method works wonders on stainless steel, cast iron (with a few modifications, which I’ll explain), and even some non-stick pans (test in an inconspicuous area first!).
What You’ll Need:
* Baking Soda (the star of the show!)
* White Vinegar (optional, but it adds some serious fizzing power)
* Water
* Dish Soap
* A Non-Abrasive Sponge or Scrub Brush (avoid steel wool on non-stick surfaces!)
* Paper Towels or a Soft Cloth
* (Optional) Rubber Gloves (to protect your hands)
* (For Cast Iron) Cooking Oil (like vegetable or canola oil)
Understanding the Science Behind the Sparkle
Baking soda, also known as sodium bicarbonate, is a mild alkali. This means it can react with acids (like the burnt food residue) to help loosen them from the pan’s surface. The fizzing action you get when you combine baking soda and vinegar is a chemical reaction that further aids in lifting the grime. The heat helps to accelerate the process, making it even more effective.
Step-by-Step Guide to a Sparkling Clean Frying Pan
Here’s the breakdown of how we’re going to tackle this cleaning project:
1. Initial Assessment and Prep:
* First, let’s take a good look at your frying pan. How bad is the build-up? Is it just a light coating of grease, or are we talking layers of carbonized food? This will help you determine how much baking soda and elbow grease you’ll need.
* Remove any loose food particles. Scrape off any large chunks of burnt food with a spatula or spoon. This will prevent them from clogging your drain later.
* Rinse the pan with warm water to get rid of any remaining loose debris.
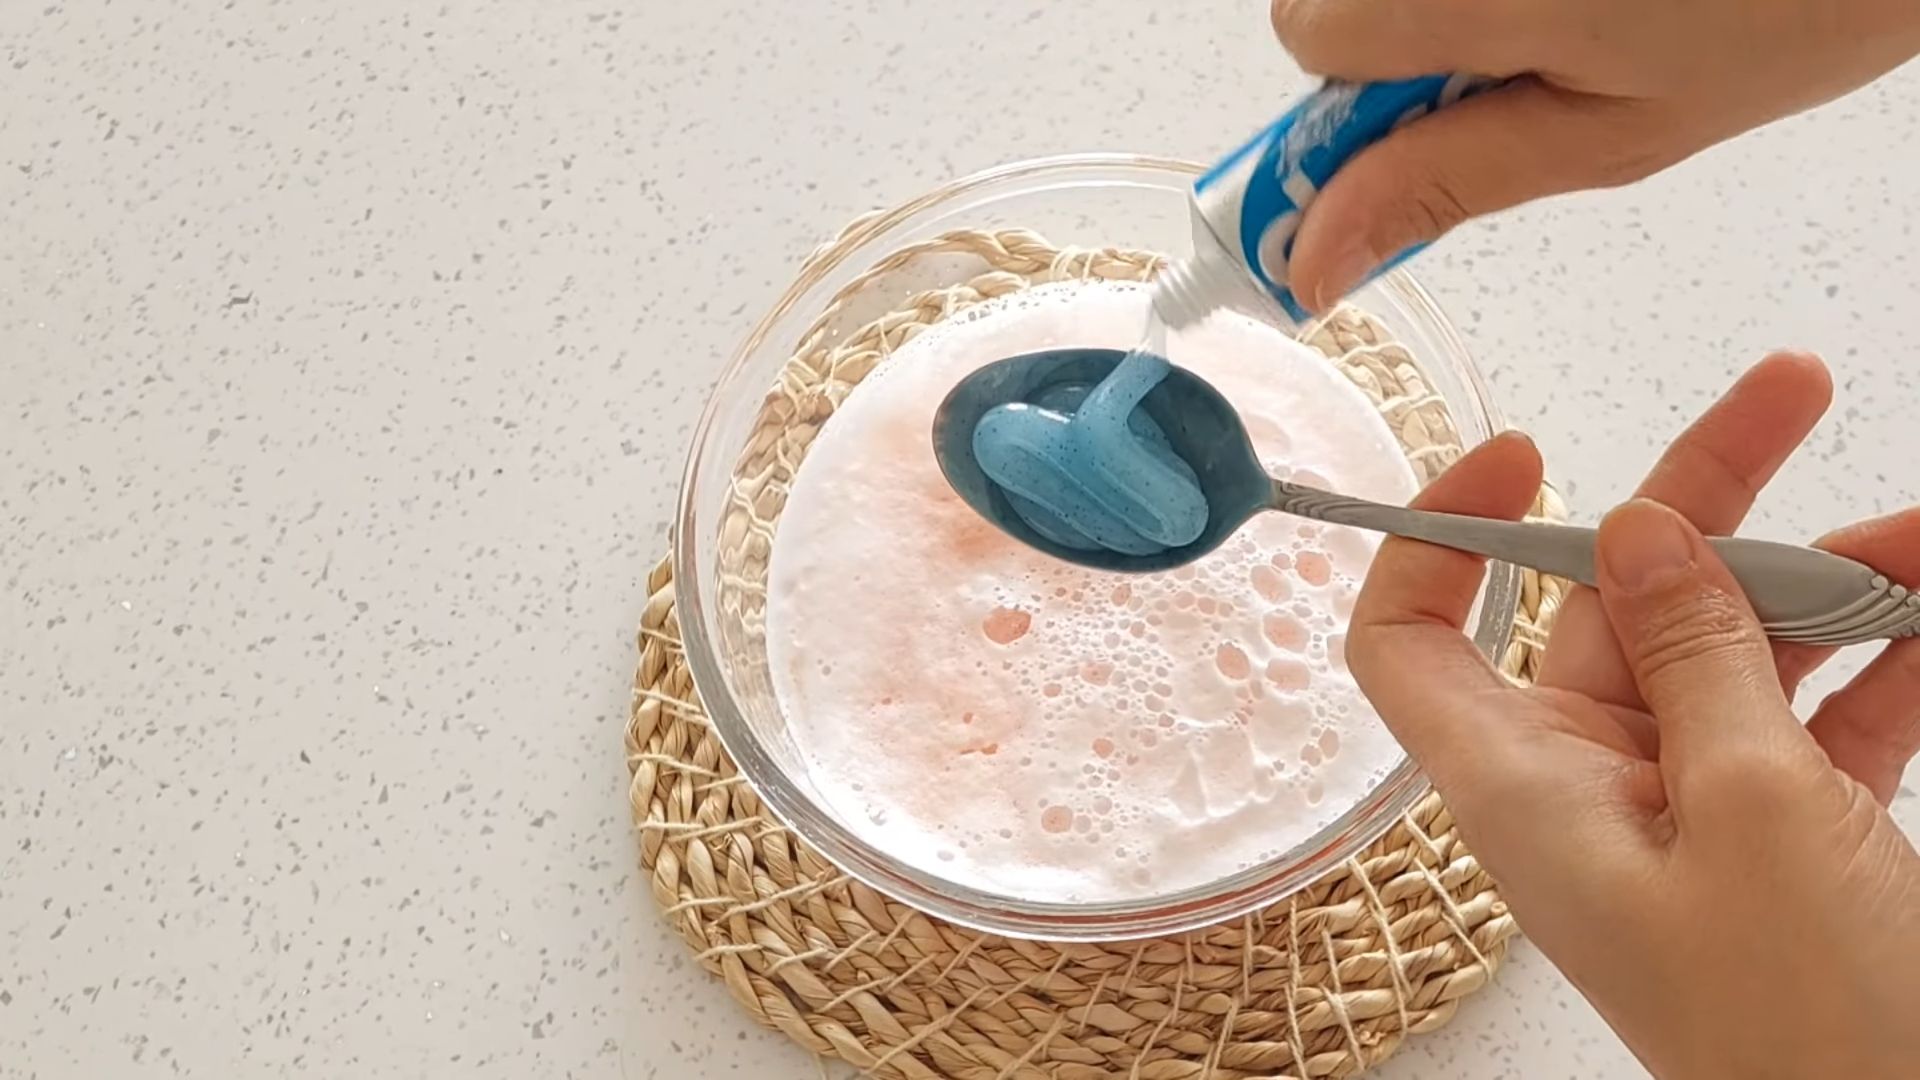
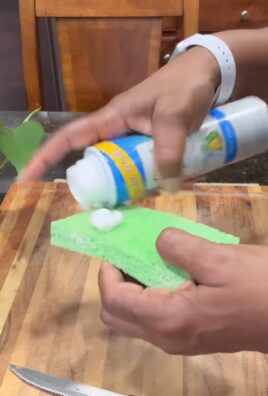
2. The Baking Soda Paste Power:
* In a bowl, mix baking soda with a small amount of water to form a thick paste. You want it to be spreadable but not too runny. A good ratio is about 3 parts baking soda to 1 part water.
* Apply the baking soda paste generously to the affected areas of the frying pan. Make sure to cover all the burnt-on food and grease. Don’t be shy – the more paste, the better!
* Let the paste sit for at least 30 minutes. For really stubborn messes, you can let it sit for several hours or even overnight. This gives the baking soda time to work its magic and loosen the grime.
3. The Vinegar Fizz (Optional, but Recommended):
* If you’re using vinegar, now’s the time to add it. Slowly pour a small amount of white vinegar over the baking soda paste. You’ll see it start to fizz and bubble – that’s the chemical reaction happening!
* Let the vinegar and baking soda mixture fizz for a few minutes. This will help to further loosen the burnt-on food.
* Be careful not to add too much vinegar at once, as it can cause the mixture to overflow.
4. Gentle Scrubbing Action:
* Using a non-abrasive sponge or scrub brush, gently scrub the affected areas of the frying pan. Avoid using steel wool or abrasive cleaners, especially on non-stick surfaces, as they can scratch the pan.
* Apply firm, even pressure while scrubbing. You should start to see the burnt-on food and grease lifting away.
* If the grime is particularly stubborn, you may need to reapply the baking soda paste and vinegar and let it sit for a bit longer before scrubbing again.
5. The Boiling Water Boost (For Extra Tough Cases):
* If the scrubbing isn’t quite doing the trick, try this: Fill the frying pan with water, add a few tablespoons of baking soda, and bring it to a boil on the stovetop.
* Let the mixture simmer for about 10-15 minutes. This will help to loosen even the most stubborn burnt-on food.
* Carefully pour out the hot water and baking soda mixture. Be careful not to burn yourself!
* Scrub the pan again with a non-abrasive sponge or scrub brush. You should find that the remaining grime comes off much more easily.
6. Dish Soap and Final Rinse:
* Once you’ve removed all the burnt-on food and grease, wash the frying pan with dish soap and warm water. This will remove any remaining baking soda residue and leave your pan sparkling clean.
* Rinse the pan thoroughly with warm water to remove all traces of soap.
7. Drying and Inspection:
* Dry the frying pan thoroughly with a paper towel or a soft cloth.
* Inspect the pan to make sure you’ve removed all the burnt-on food and grease. If you see any remaining spots, repeat the cleaning process.
Special Considerations for Different Types of Frying Pans
While the basic method is the same, here are some things to keep in mind when cleaning different types of frying pans:
Cleaning Stainless Steel Frying Pans
Stainless steel is generally very durable and can withstand a bit more scrubbing. You can use a slightly more abrasive scrub brush if needed, but still avoid steel wool to prevent scratches. The boiling water method works particularly well on stainless steel.
Cleaning Non-Stick Frying Pans
Non-stick surfaces are delicate and can be easily damaged by abrasive cleaners and scrubbing. Always use a non-abrasive sponge or cloth and avoid using steel wool or harsh chemicals. Test the baking soda paste in an inconspicuous area first to make sure it doesn’t damage the non-stick coating. Be extra gentle when scrubbing and avoid the boiling water method, as it can damage the non-stick coating over time.
Cleaning Cast Iron Frying Pans
Cast iron requires a slightly different approach because you don’t want to remove the seasoning (the layer of baked-on oil that protects the pan from rusting and gives it its non-stick properties).
1. Cleaning Cast Iron:
* After removing any loose food particles, scrub the pan with a non-abrasive brush and hot water. Avoid using soap unless absolutely necessary, as it can strip the seasoning.
* If you need to use soap, use a mild dish soap and rinse the pan thoroughly.
* To remove stubborn burnt-on food, you can use the baking soda paste method, but be very gentle when scrubbing.
* After cleaning, dry the pan thoroughly with a paper towel or cloth.
* Place the pan on the stovetop over low heat to ensure it’s completely dry.
* Once the pan is dry, add a small amount of cooking oil (like vegetable or canola oil) to the pan and rub it in with a paper towel.
* Place the pan in a preheated oven at 350 degrees Fahrenheit for about an hour to re-season it. This will help to maintain the pan’s non-stick properties and prevent rusting.
Preventing Future Build-Up
The best way to keep your frying pan clean is to prevent build-up in the first place. Here are a few tips:
* Clean your frying pan immediately after use. The longer you wait, the harder it will be to remove burnt-on food and grease.
* Avoid overheating your frying pan. Overheating can cause food to burn and stick to the pan.
* Use the right amount of oil or cooking spray. Too little oil can cause food to stick, while too much can lead to a build-up of grease.
* Don’t use metal utensils on non-stick surfaces. Metal utensils can scratch the non-stick coating.
* Store your frying pans properly. Avoid stacking them on top of each other, as this can scratch the surfaces.
Troubleshooting Tips
* If the baking soda paste dries out too quickly, add a little more water to keep it moist.
* If the vinegar doesn’t fizz, make sure you’re using white vinegar and that the baking soda paste is fresh.
* If you’re still having trouble removing burnt-on food, try using a commercial oven cleaner. However, be sure to follow the manufacturer’s instructions carefully and wear gloves and eye protection.
So there you have it! With a little baking soda, some elbow grease, and these helpful tips, you can revive even the grimiest frying pan and keep it looking like new for years to come. Happy cleaning!
Conclusion
So, there you have it! A simple, effective, and surprisingly satisfying way to breathe new life into your grimy frying pans using the power of baking soda. Forget spending hours scrubbing with harsh chemicals or resigning yourself to replacing your cookware prematurely. This DIY trick is a game-changer for anyone who values a clean kitchen and wants to extend the lifespan of their favorite frying pans.
Why is this a must-try? Because it’s economical, environmentally friendly, and, most importantly, it works! Baking soda’s gentle abrasive properties lift away stubborn grease and burnt-on food without scratching the surface of your pan. Plus, it’s a readily available ingredient that you likely already have in your pantry. No special trips to the store required!
But the beauty of this method lies in its adaptability. Feel free to experiment with variations to suit your specific needs and the level of grime on your pans. For instance, if you’re dealing with particularly stubborn stains, try adding a squeeze of lemon juice to the baking soda paste. The acidity of the lemon will help to break down the residue even further. Alternatively, for cast iron pans, you might want to use a coarser salt along with the baking soda for added scrubbing power, but remember to re-season the pan afterward.
Another variation involves the soaking time. While the recipe suggests a minimum of 30 minutes, don’t hesitate to let the baking soda paste sit for several hours or even overnight for heavily soiled pans. The longer it sits, the more effectively it can loosen the grime. You can also try heating the pan slightly after applying the paste (but before scrubbing) to help activate the baking soda and loosen the gunk. Just be careful not to overheat it and burn the paste.
This method isn’t just limited to frying pans, either. You can use this same baking soda cleaning technique on other cookware, like baking sheets, casserole dishes, and even stovetop burners. It’s a versatile solution for tackling all sorts of kitchen messes.
We are confident that this DIY frying pan cleaning method will become your go-to solution for maintaining sparkling clean cookware. It’s a simple yet powerful way to save time, money, and effort in the kitchen.
Now, it’s your turn! We encourage you to give this baking soda trick a try and see the amazing results for yourself. Don’t be shy about experimenting with different variations and finding what works best for your specific pans and cleaning needs.
And most importantly, we want to hear about your experience! Share your before-and-after photos, tips, and tricks in the comments below. Let’s create a community of clean-pan enthusiasts and help each other keep our kitchens sparkling! We are eager to learn from your experiences and see how this simple baking soda solution is transforming kitchens everywhere. So go ahead, grab your baking soda, and get ready to say goodbye to stubborn grime and hello to beautifully clean frying pans!
Frequently Asked Questions
Q: Can I use this baking soda method on all types of frying pans?
A: Generally, yes, this method is safe for most types of frying pans, including stainless steel, non-stick, ceramic, and even cast iron (with a slight modification). However, it’s always a good idea to test a small, inconspicuous area first, especially if you’re unsure about the material of your pan. For cast iron, remember to re-season the pan after cleaning to maintain its protective coating. Avoid using abrasive scrubbers on non-stick surfaces, opting for a soft sponge or cloth instead.
Q: How often should I clean my frying pans with baking soda?
A: The frequency depends on how often you use your frying pans and how much food residue accumulates. For pans used daily, a weekly cleaning with baking soda can help prevent buildup. For pans used less frequently, cleaning them as needed is sufficient. If you notice burnt-on food or stubborn stains, it’s a good time to give them a baking soda treatment. Regular cleaning not only keeps your pans looking their best but also helps to maintain their performance and extend their lifespan.
Q: What if the baking soda paste doesn’t remove all the grime?
A: If the baking soda paste isn’t completely removing the grime, there are a few things you can try. First, ensure you’re using enough baking soda and water to create a thick paste. Second, increase the soaking time. Let the paste sit for several hours or even overnight to allow it to penetrate and loosen the stubborn residue. You can also try adding a squeeze of lemon juice or a splash of vinegar to the paste for extra cleaning power. For particularly tough stains, gently scrub with a non-abrasive scouring pad or an old toothbrush. If all else fails, you might consider using a specialized cookware cleaner, but always follow the manufacturer’s instructions and test it in an inconspicuous area first.
Q: Can I use this method to clean the outside of my frying pans?
A: Yes, you can use this baking soda method to clean the outside of your frying pans as well. The same principles apply: create a paste of baking soda and water, apply it to the exterior of the pan, let it sit for a while, and then scrub gently. This can be particularly effective for removing grease splatters and burnt-on food from the bottom and sides of the pan. However, be mindful of any decorative finishes or coatings on the outside of the pan, and test a small area first to ensure the baking soda doesn’t damage the finish.
Q: Is baking soda safe to use on non-stick frying pans?
A: Yes, baking soda is generally safe to use on non-stick frying pans, but it’s important to be gentle. Avoid using abrasive scrubbers or scouring pads, as these can scratch and damage the non-stick coating. Instead, use a soft sponge or cloth to gently scrub the baking soda paste. Also, be sure to rinse the pan thoroughly after cleaning to remove any remaining baking soda residue. While baking soda is a mild abrasive, excessive scrubbing can still wear down the non-stick coating over time, so use a light touch and avoid harsh chemicals.
Q: How do I re-season a cast iron frying pan after cleaning it with baking soda?
A: Re-seasoning a cast iron frying pan after cleaning it with baking soda is crucial to protect it from rust and maintain its non-stick properties. Here’s how to do it:
1. Wash the pan with warm, soapy water and dry it thoroughly.
2. Apply a thin, even coat of cooking oil (such as vegetable oil, canola oil, or flaxseed oil) to the entire pan, inside and out.
3. Wipe off any excess oil with a clean cloth. The goal is to have a very thin layer of oil, almost like a sheen.
4. Place the pan upside down in a preheated oven at 350-400°F (175-200°C) for one hour.
5. Let the pan cool completely in the oven before using it.
Repeat this process several times to build up a good seasoning layer. Regular use of the pan will also help to maintain its seasoning.
Q: Can I use this method to remove rust from my frying pans?
A: While baking soda can help to remove light surface rust, it’s not a heavy-duty rust remover. For more significant rust, you may need to use a specialized rust remover or a more abrasive method, such as steel wool. However, if you’re dealing with just a bit of surface rust, try making a thicker paste of baking soda and water and applying it to the affected areas. Let it sit for a while, then scrub gently with a non-abrasive pad. Rinse thoroughly and dry the pan completely. After removing the rust, be sure to re-season the pan to protect it from further corrosion.
Q: What are some other uses for baking soda in the kitchen?
A: Baking soda is a versatile ingredient with many uses beyond cleaning frying pans. Here are a few examples:
* Deodorizing your refrigerator: Place an open box of baking soda in your refrigerator to absorb odors.
* Cleaning your microwave: Mix baking soda with water and microwave for a few minutes to loosen grime.
* Freshening your garbage disposal: Pour baking soda down the drain to neutralize odors.
* Baking: Baking soda is a key ingredient in many baked goods, helping them to rise and become light and fluffy.
* Soothing heartburn: Mix a teaspoon of baking soda with water and drink it to relieve heartburn (consult a doctor first).
Baking soda is a true kitchen staple with a wide range of uses, making it an essential ingredient to keep on hand.
Leave a Comment