
Container Squash Growing: Ever dreamt of harvesting plump, juicy squash right from your own patio? I know I have! There’s something incredibly satisfying about nurturing a plant from seed to table, and with a little know-how, even those of us without sprawling gardens can enjoy the bounty.
For centuries, squash has been a staple crop in many cultures, particularly in the Americas, where it was one of the “Three Sisters” – corn, beans, and squash – grown together for mutual benefit. This ancient tradition highlights the importance of squash as a source of nourishment and a symbol of sustainable agriculture. But you don’t need a sprawling field to participate in this rich history!
That’s where this DIY guide comes in. Maybe you’re short on space, or perhaps your soil isn’t ideal. Whatever the reason, container squash growing offers a fantastic solution. I’m going to share some simple yet effective tricks and hacks that will help you cultivate thriving squash plants in pots, even if you’re a complete beginner. Imagine the delicious squash pies, soups, and roasted vegetables you’ll be able to create with your homegrown harvest! Plus, it’s a fantastic way to add a touch of green to your balcony or patio. Let’s get started and unlock the secrets to successful container squash growing!

Growing Squash in Containers: A Comprehensive DIY Guide
Hey there, fellow gardening enthusiasts! I’m so excited to share my tried-and-true method for growing delicious squash right in containers. Whether you’re short on space, dealing with poor soil, or just want the convenience of a portable garden, container squash growing is totally doable and incredibly rewarding. I’ve had some amazing harvests using this method, and I’m confident you can too!
Choosing the Right Squash Variety
Before we dive into the nitty-gritty, let’s talk about squash varieties. Not all squash are created equal when it comes to container gardening. Bush varieties are your best bet because they’re more compact and don’t require as much sprawling space as vining types.
Here are some of my favorite bush squash varieties for containers:
* Zucchini: Black Beauty, Gold Rush, Eight Ball (round zucchini)
* Summer Squash: Sunburst (yellow pattypan), Crookneck
* Winter Squash: Butterbush (butternut), Table Ace (acorn), Gold Nugget (hubbard)
Important Note: Even bush varieties can get pretty big, so make sure you choose a container that’s large enough to accommodate their growth.
Materials You’ll Need
Okay, let’s gather our supplies! Here’s what you’ll need to get started:
* Large Container: Aim for at least 24 inches in diameter and 12 inches deep. The bigger, the better! I personally prefer using resin or plastic containers because they’re lightweight and durable. Terracotta pots are beautiful, but they can dry out quickly and are heavier to move.
* High-Quality Potting Mix: Don’t skimp on the potting mix! Use a well-draining mix specifically formulated for containers. Avoid using garden soil, as it can compact and hinder drainage. I like to use a mix of peat moss, perlite, and vermiculite.
* Squash Seeds or Seedlings: Choose your favorite bush variety! You can start from seed or purchase seedlings from a local nursery.
* Slow-Release Fertilizer: This will provide your squash plants with a steady supply of nutrients throughout the growing season.
* Watering Can or Hose: Essential for keeping your plants hydrated.
* Trowel or Shovel: For planting and transplanting.
* Optional:
* Tomato Cage or Small Trellis: For added support, especially for heavier squash varieties.
* Mulch: To help retain moisture and suppress weeds.
* Gardening Gloves: To protect your hands.
Step-by-Step Planting Guide
Alright, let’s get our hands dirty! Here’s how to plant your squash in containers:
1. Prepare the Container: Make sure your container has drainage holes. If not, drill some in the bottom. This is crucial for preventing root rot.
2. Fill with Potting Mix: Fill the container with potting mix, leaving about 2-3 inches of space at the top.
3. Add Slow-Release Fertilizer: Sprinkle a generous amount of slow-release fertilizer into the potting mix and gently mix it in. Follow the instructions on the fertilizer package for the correct amount.
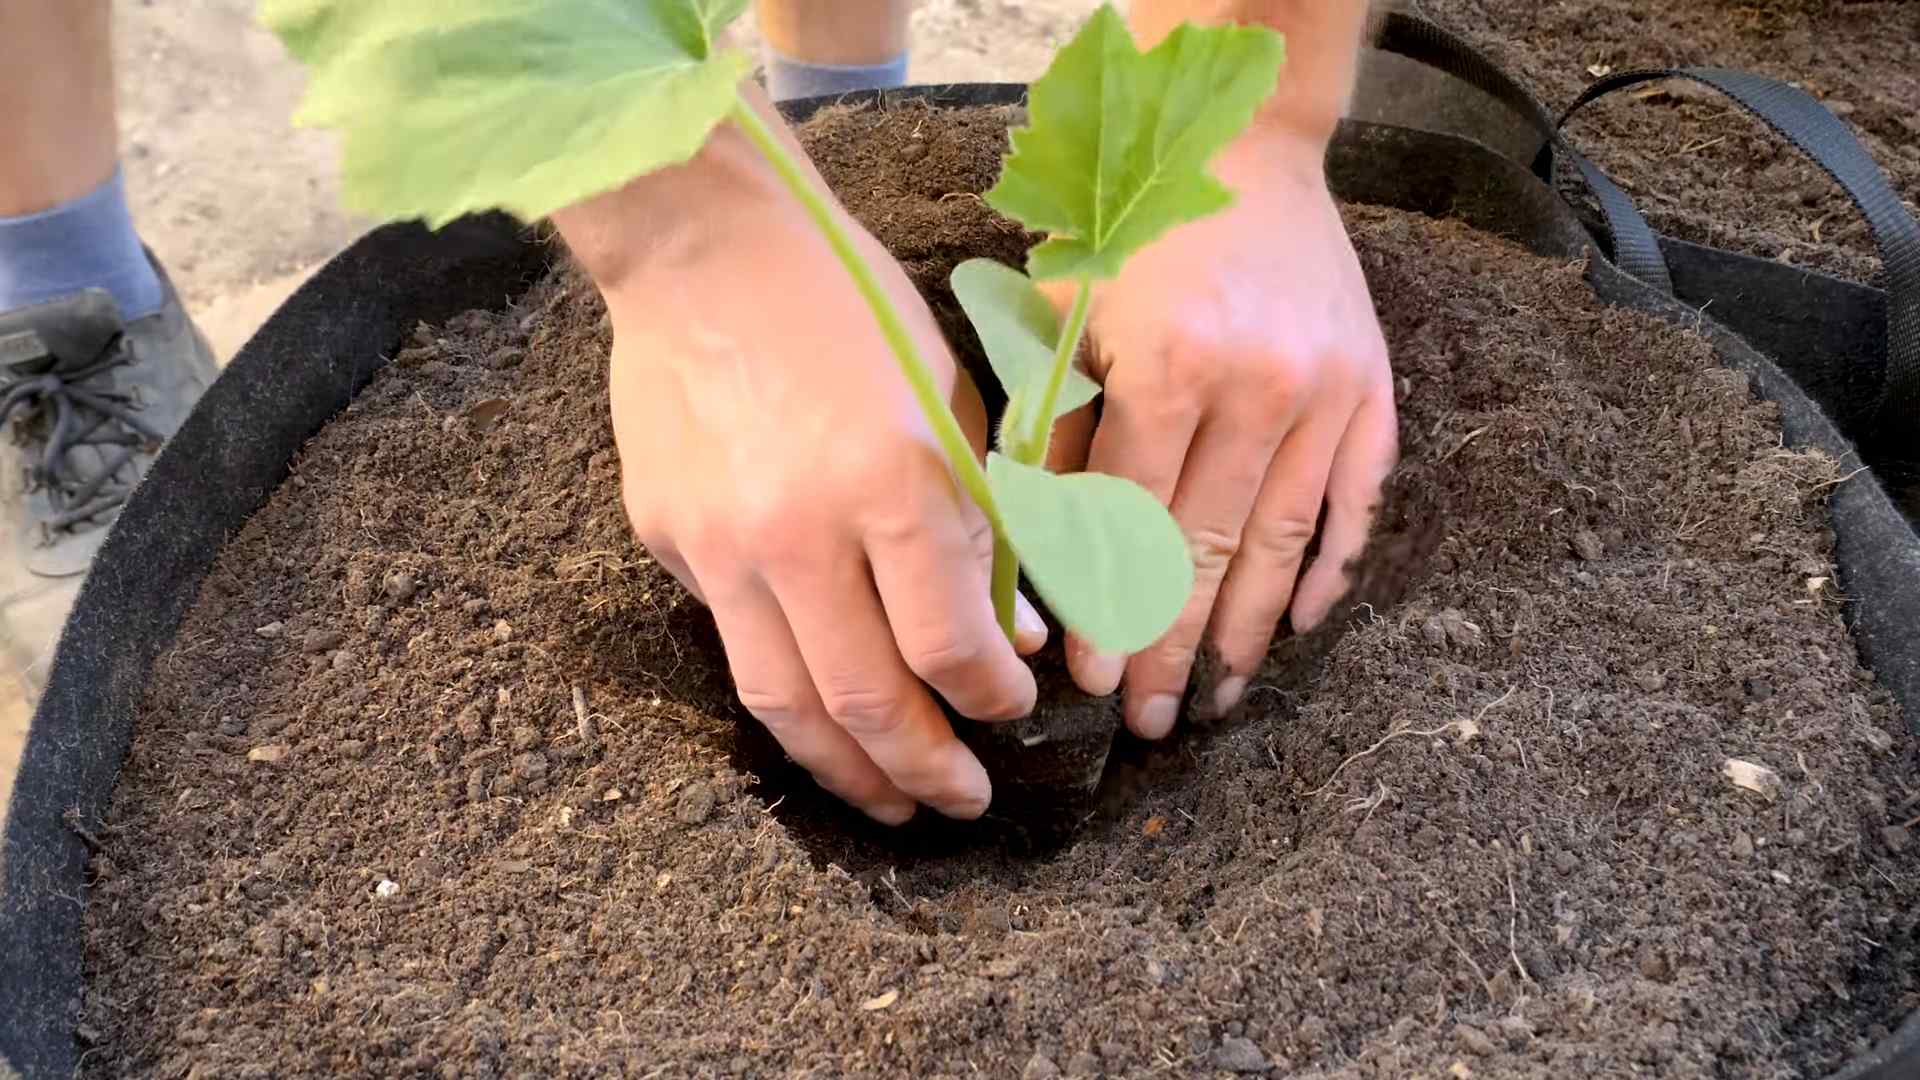
4. Plant Seeds or Seedlings:
* From Seed: Sow 2-3 seeds per container, about 1 inch deep. Space them a few inches apart. Once the seedlings emerge, thin them to the strongest plant.
* From Seedlings: Gently remove the seedling from its nursery pot and loosen the roots. Dig a hole in the potting mix that’s large enough to accommodate the root ball. Place the seedling in the hole and backfill with potting mix. Make sure the top of the root ball is level with the surrounding soil.
5. Water Thoroughly: Water the container deeply until water drains out of the drainage holes. This will help settle the soil and ensure the roots are well-hydrated.
6. Add Mulch (Optional): Apply a layer of mulch around the base of the plant to help retain moisture and suppress weeds. I like to use straw or wood chips.
7. Provide Support (Optional): If you’re growing a heavier squash variety, insert a tomato cage or small trellis into the container to provide support as the plant grows.
Caring for Your Container Squash
Now that your squash is planted, it’s time to provide it with the care it needs to thrive.
1. Watering: Squash plants need consistent moisture, especially during hot weather. Water deeply whenever the top inch of soil feels dry to the touch. Avoid overhead watering, as this can lead to fungal diseases. Instead, water at the base of the plant. I usually water my squash plants in the morning so the foliage has time to dry before nightfall.
2. Sunlight: Squash plants need at least 6-8 hours of sunlight per day. Place your container in a sunny location where it will receive plenty of direct sunlight.
3. Fertilizing: In addition to the slow-release fertilizer you added at planting time, you may need to supplement with liquid fertilizer every 2-3 weeks. Use a balanced fertilizer or one specifically formulated for vegetables. Follow the instructions on the fertilizer package.
4. Pollination: Squash plants have separate male and female flowers. The female flowers need to be pollinated in order to produce fruit. If you’re not seeing any fruit develop, you may need to hand-pollinate the flowers. To do this, use a small paintbrush to transfer pollen from the male flowers to the female flowers. You can identify the female flowers by the small fruit that’s already forming at the base of the flower.
5. Pest and Disease Control: Keep an eye out for common squash pests like squash bugs, squash vine borers, and aphids. You can control these pests with insecticidal soap or neem oil. Also, watch out for fungal diseases like powdery mildew. You can prevent powdery mildew by providing good air circulation and avoiding overhead watering. If you do see signs of powdery mildew, treat it with a fungicide.
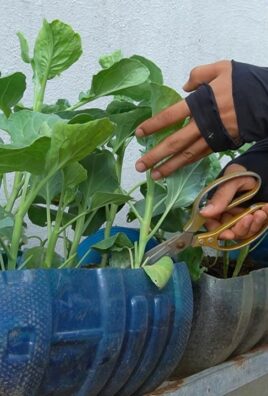
6. Pruning: While bush varieties are more compact, they can still get quite bushy. Prune away any yellowing or dead leaves to improve air circulation and prevent disease. You can also prune away some of the larger leaves to allow more sunlight to reach the developing fruit.
Harvesting Your Squash
The moment we’ve all been waiting for – harvesting! The timing of your harvest will depend on the specific squash variety you’re growing.
* Summer Squash (Zucchini, Yellow Squash): Harvest summer squash when they’re young and tender, usually when they’re about 6-8 inches long. The skin should be smooth and easily pierced with your fingernail. Regular harvesting will encourage the plant to produce more fruit.
* Winter Squash (Butternut, Acorn, Hubbard): Harvest winter squash when they’re fully mature and the skin is hard and tough. The stem should be dry and brown. Winter squash can be stored for several months in a cool, dry place.
To harvest your squash, use a sharp knife or pruners to cut the stem close to the fruit. Be careful not to damage the plant.
Troubleshooting Common Problems
Even with the best care, you may encounter some problems while growing squash in containers. Here are some common issues and how to address them:
* Yellowing Leaves: This could be a sign of overwatering, underwatering, nutrient deficiency, or pest infestation. Check the soil moisture and adjust your watering accordingly. Fertilize your plants regularly. Inspect the leaves for pests and treat them as needed.
* Lack of Fruit Production: This could be due to poor pollination, lack of sunlight, or nutrient deficiency. Hand-pollinate the flowers if necessary. Make sure your plants are getting enough sunlight. Fertilize your plants regularly.
* Powdery Mildew: This fungal disease can cause a white, powdery coating on the leaves. Prevent powdery mildew by providing good air circulation and avoiding overhead watering. Treat it with a fungicide if necessary.
* Squash Bugs: These pests can suck the sap from your squash plants, causing them to wilt and die. Handpick the bugs off the plants or spray them with insecticidal soap or neem oil.
* Squash Vine Borers: These pests can bore into the stems of your squash plants, causing them to wilt and die. Prevent squash vine borers by wrapping the base of the stems with aluminum foil or pantyhose. If you see signs of squash vine borers, you can try to remove them by slitting the stem and pulling them out.
Enjoying Your Harvest
Congratulations! You’ve successfully grown squash in containers. Now it’s time to enjoy the fruits (or rather, vegetables) of your labor. Summer squash is delicious grilled, sautéed, or added to salads. Winter squash can be roasted, baked, or used in soups and stews.
I hope this guide has been helpful. Happy gardening!
Conclusion
So, there you have it! Growing squash in containers isn’t just a possibility; it’s a rewarding and surprisingly simple way to bring the bounty of the garden to even the smallest of spaces. We’ve walked through the essentials, from selecting the right variety and container size to nurturing your plants with the proper soil, sunlight, and watering techniques.
But why is this DIY container squash growing trick a must-try? It boils down to accessibility, control, and sheer satisfaction. For apartment dwellers, those with limited yard space, or anyone looking to extend their growing season, containers offer a gateway to fresh, homegrown squash. You have complete control over the growing environment, ensuring optimal conditions for your plants to thrive. And let’s be honest, there’s nothing quite like the pride of harvesting a plump, vibrant squash that you nurtured from a tiny seed.
Beyond the basics, there’s plenty of room for experimentation. Consider companion planting in your containers. Marigolds can deter pests, while herbs like basil can enhance the flavor of your squash. You could also try different training methods, such as vertical gardening techniques, to maximize space and create a visually stunning display.
For those seeking a bit more challenge, explore different squash varieties. While bush varieties are generally recommended for containers, some vining varieties can also be successfully grown with proper support and pruning. Delicata squash, with its manageable size and delicious flavor, is another excellent option for container gardening.
Don’t be afraid to get your hands dirty and embrace the learning process. Every gardener, regardless of experience level, encounters challenges along the way. The key is to observe your plants closely, adapt your approach as needed, and celebrate your successes, no matter how small.
We wholeheartedly encourage you to give this DIY container squash growing method a try. It’s an investment of time and effort that yields delicious, nutritious rewards. And most importantly, we want to hear about your experiences! Share your tips, triumphs, and tribulations in the comments below. Let’s build a community of container squash enthusiasts and learn from each other. What varieties did you choose? What challenges did you overcome? What delicious recipes did you create with your homegrown squash? Your insights could inspire and empower other gardeners to embark on their own container squash adventures.
Remember, the journey of a thousand miles begins with a single seed. So, grab your containers, choose your squash variety, and get ready to experience the joy of growing your own food, right on your doorstep. Happy gardening!
Frequently Asked Questions (FAQ)
What is the best type of squash to grow in a container?
The best types of squash for container gardening are bush varieties. These varieties are more compact and don’t require as much space as vining varieties. Some excellent choices include:
* Bush Zucchini: These are prolific producers and come in various colors and shapes.
* Patty Pan Squash: These are known for their unique saucer-like shape and mild flavor.
* Spaghetti Squash (Bush Varieties): Some bush varieties of spaghetti squash are available and well-suited for containers.
* Delicata Squash: This smaller winter squash is a good option for larger containers.
While vining varieties can be grown in containers, they require significant support structures like trellises and regular pruning to manage their growth.
How big of a container do I need for growing squash?
The size of the container is crucial for successful container squash growing. A general rule of thumb is to use a container that is at least 24 inches in diameter and 12 inches deep. Larger containers are always better, as they provide more room for the roots to grow and hold more moisture. A 5-gallon bucket can work in a pinch for smaller bush varieties, but a 10-gallon or larger container is ideal. Ensure the container has adequate drainage holes to prevent waterlogging.
What kind of soil should I use for container squash growing?
Use a high-quality potting mix specifically designed for containers. Avoid using garden soil, as it can become compacted in containers and doesn’t drain well. A good potting mix should be lightweight, well-draining, and rich in organic matter. You can also amend the potting mix with compost or other organic fertilizers to provide additional nutrients. Consider adding perlite or vermiculite to improve drainage and aeration.
How much sunlight does container squash need?
Squash plants need at least 6-8 hours of direct sunlight per day to thrive. Choose a location for your containers that receives plenty of sunlight. If you live in a particularly hot climate, you may need to provide some afternoon shade to prevent the plants from overheating. If you don’t have enough natural sunlight, you can supplement with grow lights.
How often should I water my container squash?
Water your container squash regularly, especially during hot, dry weather. The soil should be kept consistently moist but not waterlogged. Check the soil moisture by sticking your finger about an inch into the soil. If it feels dry, it’s time to water. Water deeply, allowing the water to drain out of the bottom of the container. Avoid watering the foliage, as this can promote fungal diseases.
What kind of fertilizer should I use for container squash?
Squash plants are heavy feeders and require regular fertilization. Use a balanced fertilizer with an NPK ratio of 10-10-10 or 14-14-14. You can also use a fertilizer specifically formulated for vegetables. Fertilize your plants every 2-3 weeks, following the instructions on the fertilizer label. You can also supplement with compost tea or other organic fertilizers.
How do I deal with pests and diseases in container squash?
Monitor your plants regularly for pests and diseases. Common pests that affect squash plants include squash bugs, squash vine borers, and aphids. Common diseases include powdery mildew and squash mosaic virus.
* Pests: Handpick pests off the plants or use insecticidal soap or neem oil to control infestations. You can also use row covers to protect your plants from pests.
* Diseases: Ensure good air circulation around your plants and avoid overhead watering to prevent fungal diseases. Remove any infected leaves or plants immediately. You can also use a fungicide to control fungal diseases.
How do I know when my squash is ready to harvest?
The time it takes for squash to mature depends on the variety. Summer squash, like zucchini and patty pan squash, are typically ready to harvest about 50-60 days after planting. Winter squash, like butternut squash and acorn squash, take longer to mature, usually 80-100 days.
* Summer Squash: Harvest summer squash when they are young and tender. The skin should be smooth and easily punctured with your fingernail.
* Winter Squash: Harvest winter squash when the skin is hard and the stem is dry and brown. The squash should sound hollow when you tap it.
Can I grow different types of squash in the same container?
It’s generally not recommended to grow different types of squash in the same container, especially if they are vining varieties. Different varieties may have different growth habits and nutrient requirements, which can lead to competition and reduced yields. If you want to grow multiple types of squash, it’s best to plant them in separate containers.
What are some common problems when growing squash in containers?
Some common problems when growing squash in containers include:
* Lack of Sunlight: Squash plants need plenty of sunlight to thrive.
* Insufficient Watering: Container plants dry out quickly, so it’s important to water them regularly.
* Poor Drainage: Ensure your containers have adequate drainage holes to prevent waterlogging.
* Nutrient Deficiencies: Squash plants are heavy feeders and require regular fertilization.
* Pests and Diseases: Monitor your plants regularly for pests and diseases and take action promptly.
By addressing these common problems, you can increase your chances of success with container squash growing.

Leave a Comment