
DIY Bottle Gardening Kale: Ever dreamed of harvesting fresh, vibrant kale right from your windowsill, even if you don’t have a sprawling garden? I’m here to tell you it’s absolutely possible, and surprisingly easy! We’re diving into the wonderful world of upcycling and urban gardening with a clever trick that will bring the goodness of kale right into your home.
The concept of container gardening, a practice that has roots stretching back to ancient civilizations, has seen a resurgence in popularity. From the Hanging Gardens of Babylon to modern-day apartment balconies, people have always found ways to cultivate plants in limited spaces. Now, we’re taking it a step further by repurposing everyday plastic bottles into mini-kale farms.
Why should you try this DIY Bottle Gardening Kale hack? Well, for starters, it’s incredibly budget-friendly and eco-conscious. Instead of tossing those empty bottles, you’re giving them a new life while reducing waste. More importantly, growing your own kale ensures you have access to fresh, nutritious greens, free from harmful pesticides, whenever you need them. Plus, let’s be honest, there’s something incredibly satisfying about nurturing a plant from seed to harvest. So, grab your empty bottles, some potting soil, and let’s get started on this fun and rewarding project!
DIY Bottle Gardening: Grow Kale Indoors!
Hey there, fellow gardening enthusiasts! Are you itching to grow your own fresh kale but don’t have a sprawling backyard? No problem! I’m going to show you how to create a thriving kale garden right inside your home using recycled plastic bottles. It’s a fun, eco-friendly, and surprisingly easy project. Get ready to enjoy delicious, homegrown kale all year round!
What You’ll Need
Before we dive in, let’s gather our supplies. This is a pretty low-cost project, which is always a win in my book!
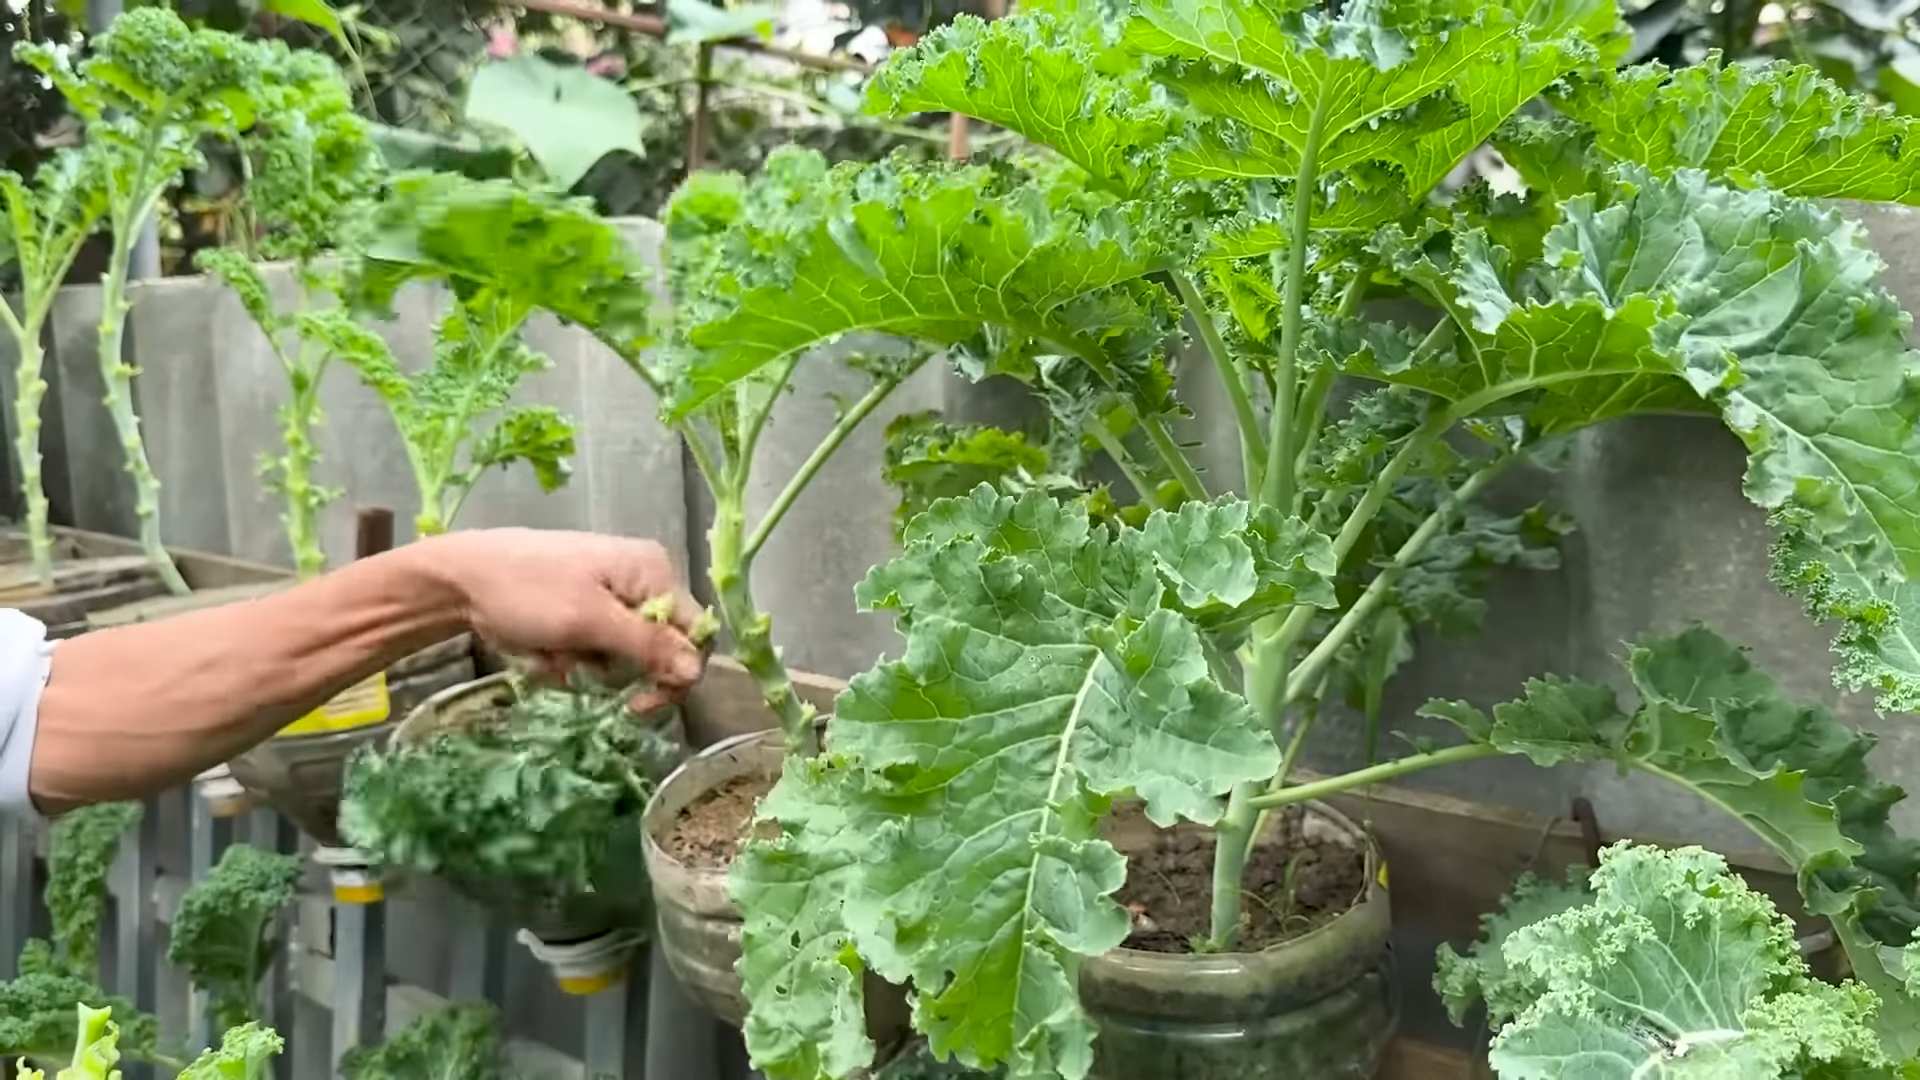
* Plastic Bottles: You’ll need at least two large plastic bottles (like the ones from soda or water). The bigger, the better, as it gives your kale more room to grow. Make sure they’re clean and dry.
* Kale Seeds: Choose your favorite variety of kale! There are so many options, from curly kale to dinosaur kale (also known as Lacinato).
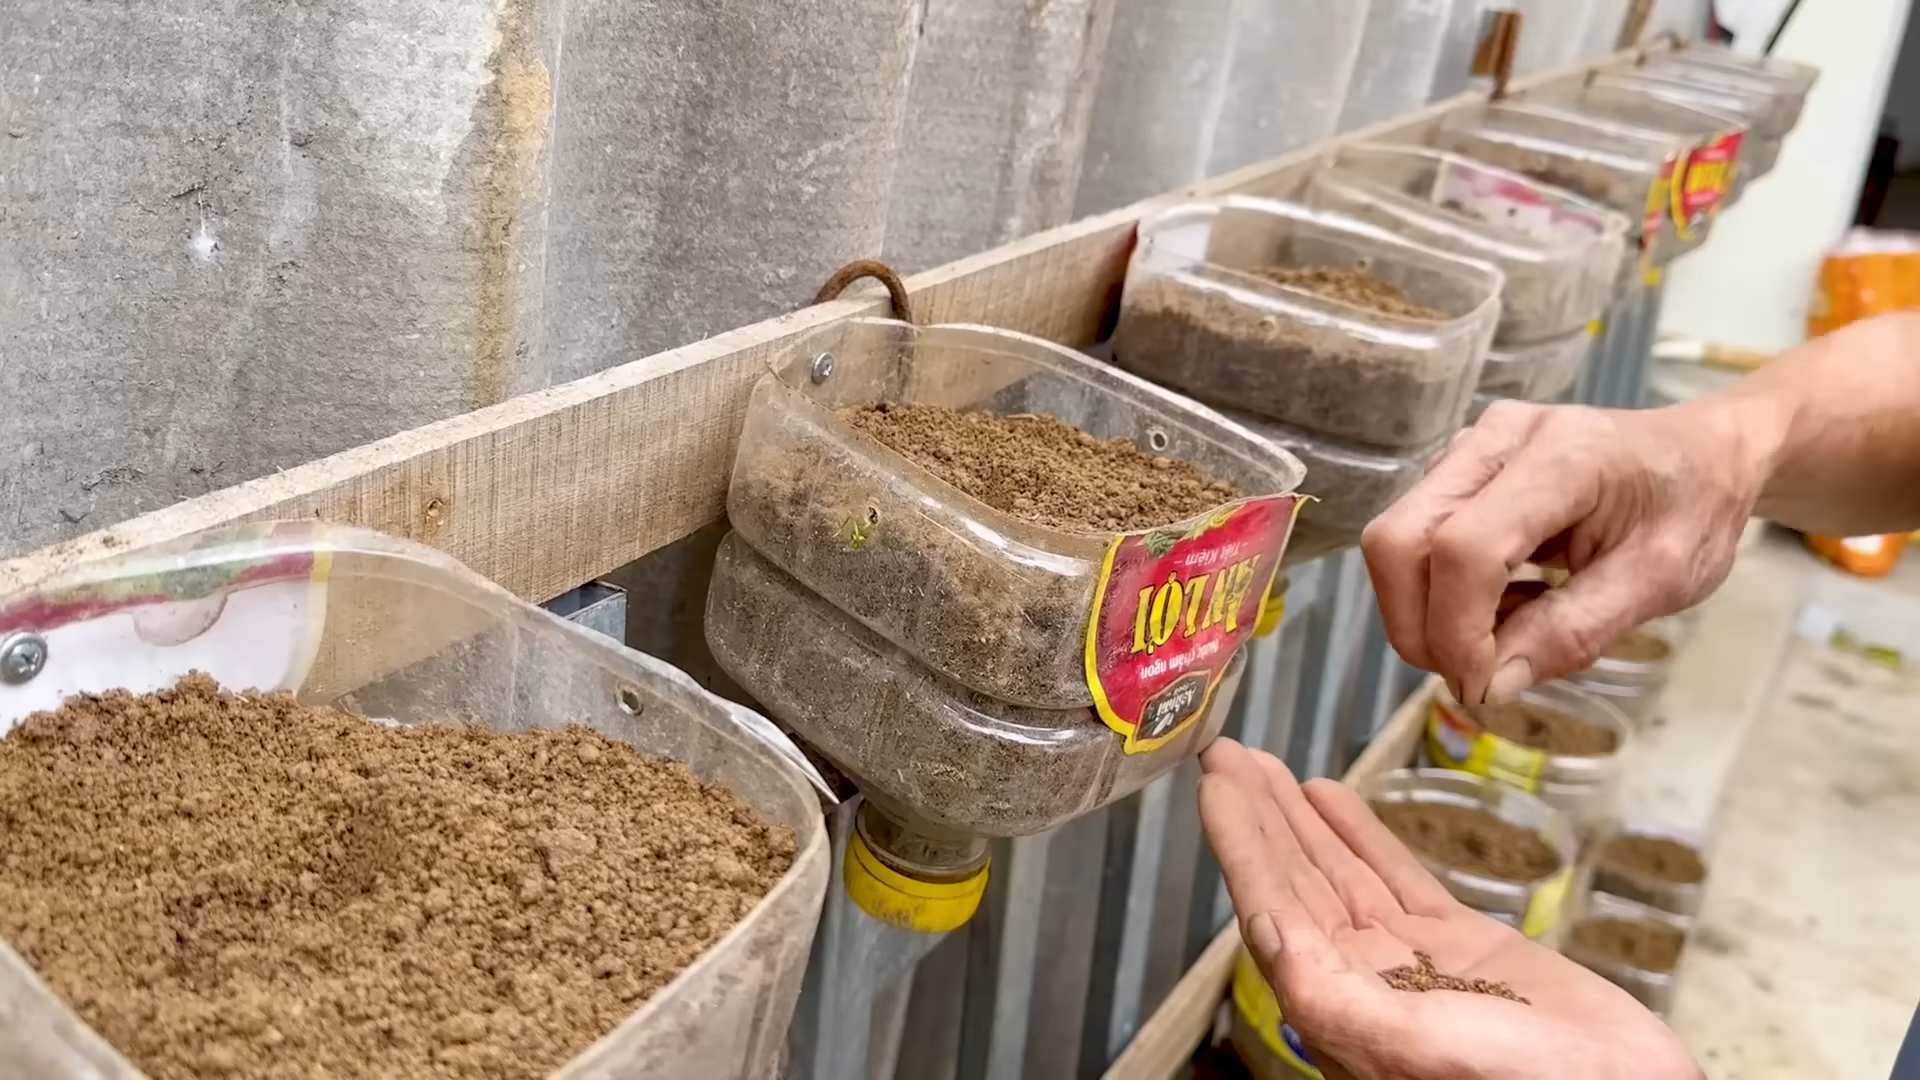
* Potting Soil: A good quality potting mix is essential for healthy kale growth.
* Scissors or Utility Knife: For cutting the plastic bottles. Be careful!
* Drill or Nail and Hammer: To create drainage holes.
* Gravel or Small Stones: For drainage at the bottom of the bottle.
* Water: Of course!
* Spray Bottle: For misting the seedlings.
* Optional: Plant labels, gloves, a small trowel or spoon.
Preparing the Bottles
This is where we transform those humble plastic bottles into mini-gardens.
1. Clean the Bottles: Thoroughly wash the plastic bottles with soap and water to remove any residue. Rinse them well and let them dry completely. This is important to prevent mold or bacteria growth.
2. Cut the Bottles:
* For the first bottle (the one that will hold the soil), cut off the top portion, about one-third of the way down. You’ll be left with a container that looks like a pot.
* For the second bottle (the one that will act as a water reservoir), cut it in half. You’ll use the bottom half as is. The top half, with the bottle cap, will be inverted and placed inside the bottom half.
3. Create Drainage Holes:
* In the bottom of the bottle that will hold the soil (the “pot”), drill several drainage holes. If you don’t have a drill, you can carefully use a nail and hammer to create the holes. Make sure they’re big enough to allow water to drain but not so big that the soil will fall through.
* In the bottle cap of the inverted top half of the second bottle, drill a hole. This will allow the soil to wick up water from the reservoir.
4. Assemble the Water Reservoir: Invert the top half of the second bottle (with the bottle cap and hole) and place it inside the bottom half of the second bottle. This creates a self-watering system.
Planting the Kale Seeds
Now for the fun part – planting the kale!
1. Add Drainage Material: Place a layer of gravel or small stones at the bottom of the “pot” (the first bottle). This will further improve drainage and prevent the roots from sitting in water.
2. Fill with Potting Soil: Fill the “pot” with potting soil, leaving about an inch of space at the top. Gently pat down the soil to remove any air pockets.
3. Sow the Seeds: Sprinkle the kale seeds evenly over the surface of the soil. Don’t overcrowd them; give them some space to grow. A good rule of thumb is to space them about an inch apart.
4. Cover the Seeds: Lightly cover the seeds with a thin layer of potting soil (about ¼ inch).
5. Water Gently: Use a spray bottle to gently mist the soil. You want to moisten the soil without disturbing the seeds.
6. Place the “Pot” into the Reservoir: Carefully place the “pot” (the first bottle with soil and seeds) on top of the inverted top half of the second bottle, which is sitting in the bottom half of the second bottle (the water reservoir).
7. Add Water to the Reservoir: Pour water into the bottom half of the second bottle (the reservoir) until it reaches just below the bottom of the “pot.” The soil will wick up the water as needed.
Caring for Your Kale Seedlings
This is where patience comes in. But trust me, watching those little seedlings sprout is incredibly rewarding!
1. Provide Light: Kale needs plenty of light to grow. Place your bottle garden in a sunny spot, such as a windowsill that receives at least 6 hours of direct sunlight per day. If you don’t have enough natural light, you can supplement with a grow light.
2. Maintain Moisture: Check the water level in the reservoir regularly and refill as needed. The soil should stay consistently moist but not soggy. You can also mist the seedlings with water every day or two to keep them hydrated.
3. Thin the Seedlings: Once the seedlings have developed a few sets of true leaves (the leaves that look like miniature kale leaves), you’ll need to thin them out. This means removing some of the seedlings to give the remaining ones more space to grow. Choose the strongest, healthiest-looking seedlings and gently snip off the weaker ones at the base with scissors. Aim to have about 2-3 inches of space between each plant.
4. Fertilize (Optional): If you want to give your kale an extra boost, you can fertilize it with a diluted liquid fertilizer every few weeks. Follow the instructions on the fertilizer packaging.
Harvesting Your Kale
The moment you’ve been waiting for!
1. When to Harvest: You can start harvesting kale leaves when they are about 4-6 inches long.
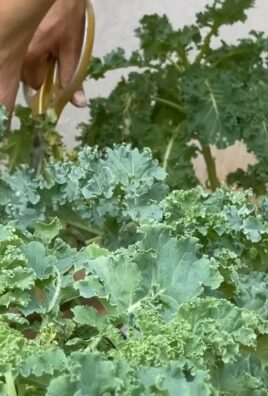
2. How to Harvest: Harvest the outer leaves first, leaving the inner leaves to continue growing. Simply snip off the leaves at the base with scissors or garden shears.
3. Enjoy Your Harvest: Wash the kale leaves thoroughly and enjoy them in salads, smoothies, soups, or stir-fries. Freshly harvested kale tastes amazing!
Troubleshooting
Even with the best intentions, sometimes things don’t go exactly as planned. Here are a few common issues you might encounter and how to address them:
* Seedlings Not Germinating: Make sure the soil is consistently moist and that the seeds are getting enough light. If the temperature is too cold, germination may be delayed.
* Yellowing Leaves: This could be a sign of overwatering or underwatering. Check the soil moisture and adjust your watering accordingly. Yellowing leaves can also indicate a nutrient deficiency, so consider fertilizing.
* Leggy Seedlings: Leggy seedlings are tall and spindly, usually due to insufficient light. Move your bottle garden to a brighter location or supplement with a grow light.
* Pests: Keep an eye out for pests like aphids or spider mites. If you spot any, you can try spraying the leaves with a mixture of water and dish soap.
Expanding Your Bottle Garden
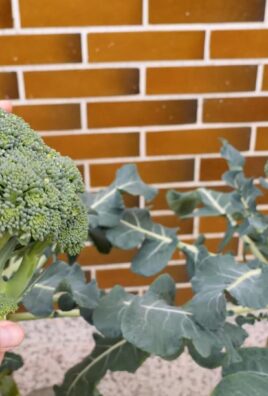
Once you’ve mastered growing kale in bottles, why stop there? You can use the same technique to grow other leafy greens like spinach, lettuce, and arugula. You can also experiment with herbs like basil, mint, and parsley. The possibilities are endless!
Important Considerations:
* Bottle Type: While any plastic bottle can technically work, thicker bottles are more durable and less likely to tip over.
* Sunlight: Kale needs a good amount of sunlight. If you don’t have a sunny windowsill, consider using a grow light.
* Watering: Don’t overwater! Soggy soil can lead to root rot. Let the top inch of soil dry out before watering again.
* Ventilation: Good air circulation is important to prevent fungal diseases. Make sure your bottle garden is not in a stuffy or humid environment.
I hope you found this guide helpful! Growing kale in bottles is a rewarding and sustainable way to enjoy fresh, homegrown produce. Happy gardening!
Conclusion
So, there you have it! Transforming a simple plastic bottle into a thriving kale garden is not just a fun project; it’s a sustainable, space-saving, and incredibly rewarding way to grow your own fresh greens. We’ve walked you through each step, from preparing the bottle to nurturing your kale seedlings, and hopefully, you’re now brimming with confidence to embark on this exciting DIY adventure.
Why is this DIY bottle gardening kale trick a must-try? Because it democratizes gardening. You don’t need acres of land, expensive equipment, or even a green thumb to enjoy the taste of homegrown kale. It’s perfect for apartment dwellers, balcony gardeners, or anyone looking to reduce their environmental footprint. Plus, it’s a fantastic way to recycle those plastic bottles that might otherwise end up in a landfill.
But the beauty of this project lies in its adaptability. Feel free to experiment with different types of kale. Curly kale, Lacinato kale (also known as dinosaur kale), and Red Russian kale all thrive in container gardens. You can also try companion planting. Consider adding herbs like thyme or rosemary to your bottle garden; they not only add flavor to your cooking but also help deter pests.
Another variation to consider is the type of soil you use. While we recommended a well-draining potting mix, you can also create your own blend using compost, perlite, and vermiculite. This allows you to tailor the soil composition to the specific needs of your kale plants.
Don’t be afraid to get creative with the bottle design too! Paint the bottles with vibrant colors, add decorative labels, or even create a vertical garden by hanging multiple bottle gardens on a wall or fence. The possibilities are endless!
The key to success is consistent care. Remember to water your kale regularly, provide adequate sunlight, and fertilize as needed. Keep an eye out for pests and diseases, and address them promptly. With a little attention, your bottle garden will reward you with a bountiful harvest of fresh, nutritious kale.
We are confident that this DIY bottle gardening kale project will not only provide you with delicious greens but also spark a newfound appreciation for the power of sustainable gardening. So, grab a bottle, some soil, and kale seeds, and get started today!
We’re eager to hear about your experiences. Share your photos, tips, and challenges in the comments below. Let’s build a community of bottle gardeners and inspire others to embrace this eco-friendly and rewarding hobby. Happy gardening!
Frequently Asked Questions (FAQ)
What kind of plastic bottle is best for bottle gardening kale?
Ideally, you should use a food-grade plastic bottle. Look for bottles that have the recycling symbol with a number 1 (PET or PETE) or a number 2 (HDPE). These plastics are generally considered safe for growing food. Avoid bottles with the number 3 (PVC), 6 (PS), or 7 (Other), as they may leach harmful chemicals into the soil. A 2-liter soda bottle or a larger water bottle works well, providing ample space for the kale roots to grow. Make sure to thoroughly clean the bottle with soap and water before using it.
How much sunlight does my bottle gardening kale need?
Kale thrives in full sun, which means it needs at least 6 hours of direct sunlight per day. If you don’t have a sunny spot outdoors, you can supplement with grow lights. Place the bottle garden near a south-facing window for maximum sunlight exposure. If you notice the leaves are pale or leggy, it’s a sign that your kale isn’t getting enough light. Rotate the bottle garden regularly to ensure all sides receive equal sunlight.
How often should I water my bottle gardening kale?
The frequency of watering depends on several factors, including the weather, the size of the bottle, and the type of soil you’re using. Generally, you should water your kale when the top inch of soil feels dry to the touch. Avoid overwatering, as this can lead to root rot. Make sure the bottle has drainage holes to allow excess water to escape. During hot weather, you may need to water your kale daily. In cooler weather, you can water it every few days.
What kind of soil should I use for bottle gardening kale?
A well-draining potting mix is ideal for bottle gardening kale. You can purchase a pre-made potting mix from a garden center or create your own blend using compost, perlite, and vermiculite. Compost provides nutrients, perlite improves drainage, and vermiculite helps retain moisture. Avoid using garden soil, as it can be too heavy and compact, which can suffocate the roots.
Do I need to fertilize my bottle gardening kale?
Yes, kale is a heavy feeder and benefits from regular fertilization. Use a balanced liquid fertilizer diluted to half strength. Fertilize every two to three weeks during the growing season. You can also add slow-release fertilizer granules to the soil when you plant the kale. Look for a fertilizer that is specifically formulated for leafy greens.
How do I protect my bottle gardening kale from pests?
Common pests that affect kale include aphids, cabbage worms, and flea beetles. You can control these pests by handpicking them off the plants, spraying them with insecticidal soap, or using neem oil. Companion planting with herbs like thyme or rosemary can also help deter pests. Regularly inspect your kale plants for signs of infestation.
How do I harvest my bottle gardening kale?
You can start harvesting kale leaves when they are about 4-6 inches long. Harvest the outer leaves first, leaving the inner leaves to continue growing. This will encourage the plant to produce more leaves. Use scissors or a knife to cut the leaves near the base of the plant. Avoid harvesting more than one-third of the plant at a time.
Can I grow other vegetables in a bottle garden besides kale?
Yes, you can grow a variety of other vegetables in a bottle garden, including lettuce, spinach, herbs, and even small tomatoes. Choose vegetables that have shallow root systems and don’t require a lot of space. Consider the size of the bottle and the amount of sunlight available when selecting vegetables.
How long will my bottle gardening kale last?
With proper care, your bottle gardening kale can last for several months. Kale is a cool-season crop and thrives in temperatures between 60°F and 70°F. In warmer climates, it may bolt (go to seed) prematurely. You can extend the life of your kale by providing shade during the hottest part of the day and watering it regularly.
What do I do with the bottle garden when the kale is finished?
Once the kale plant has finished producing, you can compost the soil and recycle the plastic bottle. Alternatively, you can clean the bottle and reuse it for another planting. Consider growing different vegetables or herbs in the bottle garden.
Leave a Comment