
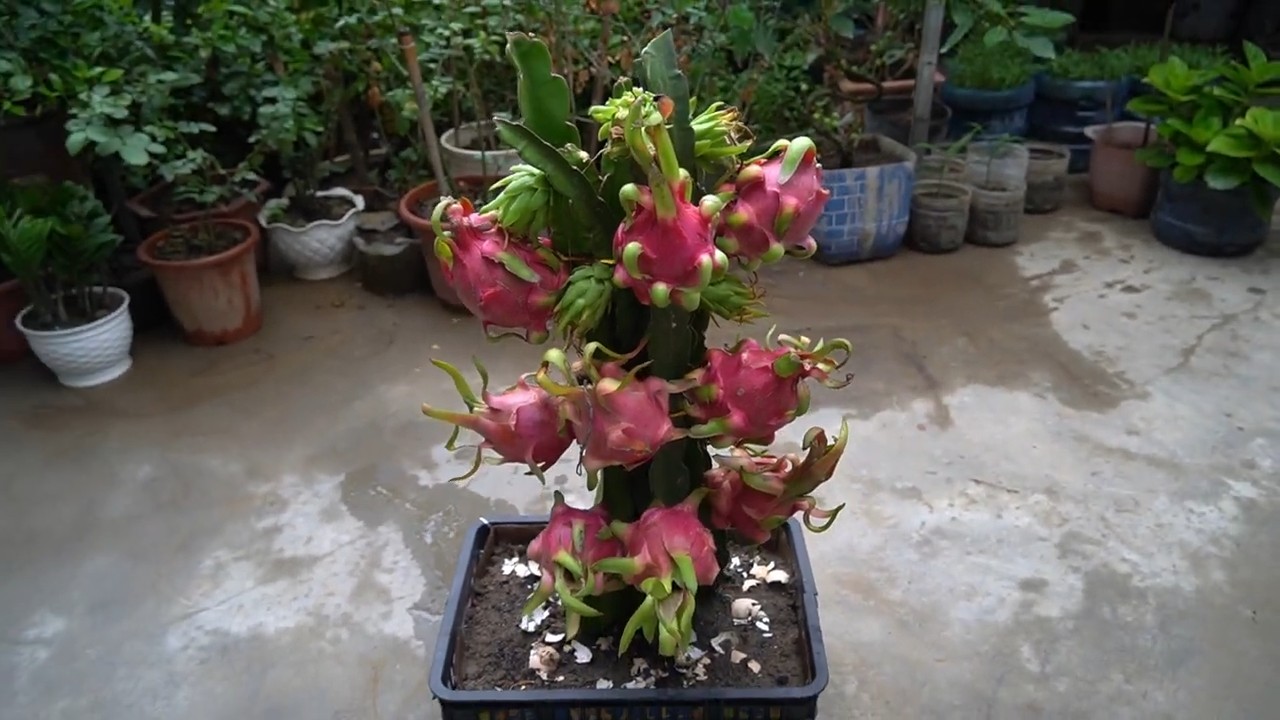
Dragon Fruit Cuttings Propagation: Ever dreamt of having your own exotic dragon fruit vine cascading with vibrant, otherworldly fruit? It’s easier than you think! Forget expensive nursery plants; I’m going to show you how to unlock the secrets of propagating your own dragon fruit from cuttings, turning a simple snip into a thriving, fruit-bearing beauty.
For centuries, dragon fruit, also known as pitaya, has been cultivated in Southeast Asia and Latin America, revered not only for its delicious taste but also for its striking appearance. Imagine bringing that touch of the tropics to your own backyard! But why spend a fortune on established plants when you can easily multiply your dragon fruit collection with this simple DIY method?
Many gardeners shy away from propagation, thinking it’s complicated or requires special equipment. But I’m here to tell you that dragon fruit cuttings propagation is surprisingly straightforward and rewarding. This guide will provide you with all the essential tips and tricks to successfully root your cuttings, save money, and enjoy the satisfaction of growing your own dragon fruit from scratch. Whether you’re a seasoned gardener or just starting out, this DIY project is perfect for adding a touch of the exotic to your home garden. Let’s get started!
Dragon Fruit Propagation: Your DIY Guide for Home Cultivation
Hey plant friends! Have you ever wondered how you can grow that exotic, vibrant pink fruit, the dragon fruit, yourself? I’ll show you how you can do it easily with cuttings! It’s not as difficult as it looks, and with a little patience, you could soon be harvesting your own dragon fruits. Let’s get started!
What you need: The Material List
Before we begin, here is a list of everything you’ll need:
- Dragon fruit cuttings: Preferably from a healthy, fruit-bearing plant. They should be at least 20-30 cm (8-12 inches) long.
- Sharp knife or pruning shears: For making clean cuts on the cuttings.
- Rooting hormone (optional): Speeds up root formation but is not strictly necessary.
- Planting pots: With good drainage. The size depends on the size of the cuttings, but a diameter of 15-20 cm (6-8 inches) is a good start.
- Cactus soil or well-draining potting mix: Dragon fruits do not like waterlogged soil.
- Water: To moisten the soil.
- Spray bottle: For misting the cuttings.
- Support stakes (optional): Dragon fruits are climbing plants and need support.
- Patience: Root formation can take several weeks.
The Preparation: Cutting and Preparing Cuttings
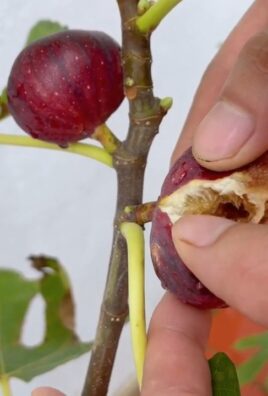
- Select cuttings: Look for healthy shoots on your dragon fruit plant. They should be strong and free of diseases or pests. It’s best to take shoots that are a bit older, as they are more likely to form roots.
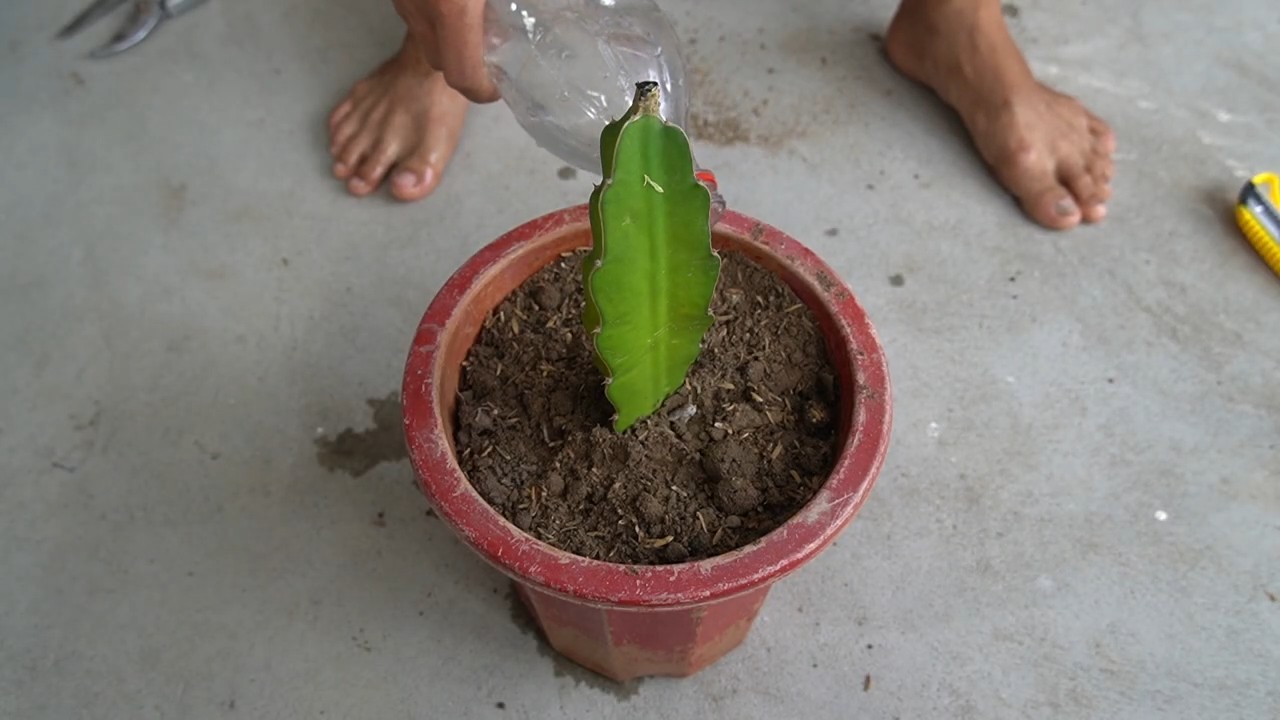
- Cut the cuttings: Use a sharp knife or pruning shears to cut off the shoots. Ensure the cut is clean to prevent infections. The cuttings should, as mentioned, be about 20-30 cm (8-12 inches) long.
- Let the cuttings dry: This is an important step! Place the cuttings in a dry, shady place for 5-7 days. This allows a callus (a type of scar tissue) to form on the cut surface, which prevents fungi and bacteria from entering and promotes root formation. This step is crucial to avoid rot.
- Rooting hormone (optional): If you wish, you can dip the cut surface of the cuttings in rooting hormone. This speeds up root formation but is not mandatory. I’ve had good experiences with it, but it also works without.
Planting: Into the Soil!
- Prepare the pots: Fill the planting pots with cactus soil or well-draining potting mix. Make sure the pots have good drainage so that water can run off well. Dragon fruits cannot tolerate waterlogged soil!
- Plant the cuttings: Stick the cuttings about 5-7 cm (2-3 inches) deep into the soil. Make sure the callus (the dried cut surface) is well covered with soil.
- Watering: Water the cuttings gently so that the soil is moist but not wet. Avoid waterlogging!
- Choose a location: Place the pots in a bright, warm place, but avoid direct sunlight, especially in the first few weeks. A semi-shady spot is ideal.
The Care: Patience is Required!
- Watering: Water the cuttings only when the soil is dry. Dragon fruits are succulent-like and tolerate drought better than waterlogging. Check the soil moisture by sticking your finger about 2-3 cm (about an inch) deep into the soil.
- Misting: Mist the cuttings regularly with water to increase humidity. This promotes root formation.
- Fertilizing (optional): After about 4-6 weeks, when the cuttings have formed roots, you can start fertilizing. Use a cactus fertilizer or a mild liquid fertilizer. But don’t fertilize too often; once a month is sufficient.
- Support stakes: Since dragon fruits are climbing plants, they need support. As soon as the cuttings start to grow, you can give them support stakes to climb on. Bamboo sticks or trellises are well-suited for this.
- Be patient: Root formation can take several weeks. Be patient and don’t give up! You’ll see, it’s worth it.
Repotting: When it Gets Crowded
As the dragon fruit plant grows larger and the pot becomes too small, you will need to repot it.
- Prepare a new pot: Choose a larger pot with good drainage. Fill it with cactus soil or well-draining potting mix.
- Carefully remove the plant from the old pot: Gently loosen the soil from the edge of the pot and carefully pull the plant out. Be careful not to damage the roots.
- Plant in the new pot: Place the plant in the new pot and fill it up with soil. Water the plant gently.
- Choose a location: Place the plant in a bright, warm spot.
Overwintering: Dragon Fruits Like It Warm
Dragon fruits are not winter-hardy and must be kept in a frost-free environment during winter.
- Bring it indoors: Before the first frost arrives, you should bring the dragon fruit plant inside.
- Bright location: Place the plant in a bright, cool place.
- Water less: The plant needs less water in winter. Only water it when the soil is dry.
- Do not fertilize: You should not fertilize the plant in winter.
Common Problems and Solutions
- Rot: If the cuttings are rotting, it is usually due to too much moisture. Make sure the soil is well-draining and do not water too much.
- No root formation: If the cuttings have not formed roots after several weeks, it may be due to too little light or too low a temperature. Move the pots to a brighter, warmer location.
- Pests: Dragon fruits can be infested by pests such as mealybugs or spider mites. Check the plants regularly and treat the pests with a suitable remedy if necessary.
Additional Tips for Success
- Patience: Propagating dragon fruit takes time and patience. Don’t give up if it doesn’t work right away.
- Cleanliness: Maintain cleanliness while working to avoid infections. Use clean tools and pots.
- Observation: Observe the plants regularly to identify problems early.
- Experimentation: Try different methods to find out what works best for you.
I hope this guide helps you to propagate your own dragon fruits! It is an exciting project, and with a little effort, you will soon be rewarded with a bountiful harvest. Good luck!
Conclusion
So, there you have it! Propagating dragon fruit from cuttings is not only surprisingly simple, but it’s also an incredibly rewarding experience. Forget shelling out big bucks for established plants at the nursery. With a little patience and these straightforward steps, you can cultivate your own thriving dragon fruit garden, bursting with exotic flavor and visual appeal.
Why is this DIY trick a must-try? Because it empowers you to take control of your garden, expand your collection affordably, and witness the magic of plant propagation firsthand. Imagine the satisfaction of harvesting your own dragon fruit, knowing you nurtured it from a simple cutting. It’s a connection to nature that’s hard to beat. Plus, it’s a fantastic way to share the joy of gardening with friends and family – gifting them rooted cuttings is a thoughtful and unique present.
But the fun doesn’t stop there! Feel free to experiment with different varieties of dragon fruit. Try propagating cuttings from red-fleshed, white-fleshed, or even yellow-fleshed varieties to create a diverse and colorful harvest. You can also explore different potting mixes to see what works best in your specific climate and growing conditions. Some gardeners swear by a mix of perlite, peat moss, and compost, while others prefer a more well-draining cactus mix. Don’t be afraid to tweak the process to suit your needs.
Consider the support structure you’ll use for your dragon fruit plants. While a simple stake will do in the early stages, these plants are vigorous climbers and will eventually require a sturdy trellis or post. Get creative with your support system – a repurposed tree branch, a custom-built trellis, or even a sturdy fence can all work beautifully.
And remember, patience is key. Dragon fruit cuttings can take several weeks or even months to root, so don’t get discouraged if you don’t see results immediately. Just keep the soil consistently moist (but not soggy), provide plenty of sunlight, and trust the process.
We are confident that you will be successful in your **dragon fruit cuttings propagation** journey.
Now it’s your turn! We encourage you to give this DIY trick a try and share your experience with us. Did you encounter any challenges? What tips and tricks did you discover along the way? Post your photos and stories in the comments below – we can’t wait to see your dragon fruit gardens flourish! Let’s build a community of dragon fruit enthusiasts and learn from each other’s successes (and occasional setbacks). Happy growing!
Frequently Asked Questions (FAQ)
1. What is the best time of year to propagate dragon fruit cuttings?
The ideal time to propagate dragon fruit cuttings is during the warmer months, typically spring or early summer. This is when the plants are actively growing and will root more readily. However, if you live in a climate with consistently warm temperatures, you can propagate dragon fruit cuttings year-round. Avoid propagating during the coldest months, as the cuttings may struggle to root in cooler conditions.
2. How long does it take for dragon fruit cuttings to root?
Rooting time can vary depending on several factors, including the variety of dragon fruit, the temperature, and the humidity. Generally, you can expect to see roots forming within 2-4 weeks. However, it may take longer, sometimes up to 6-8 weeks, for the cuttings to develop a strong root system. Be patient and continue to provide the cuttings with consistent moisture and sunlight.
3. What type of soil is best for rooting dragon fruit cuttings?
Dragon fruit cuttings need a well-draining soil mix to prevent rot. A good option is a mix of equal parts perlite, peat moss, and compost. You can also use a commercially available cactus or succulent potting mix. Avoid using heavy garden soil, as it can retain too much moisture and lead to root rot. Ensure the pot you use has drainage holes to allow excess water to escape.
4. How much sunlight do dragon fruit cuttings need?
Dragon fruit cuttings need bright, indirect sunlight to root properly. Avoid placing them in direct sunlight, as this can scorch the cuttings. A location near an east-facing or west-facing window is ideal. If you don’t have access to natural sunlight, you can use a grow light to provide the cuttings with the necessary light.
5. How often should I water dragon fruit cuttings?
Water dragon fruit cuttings regularly to keep the soil consistently moist, but not soggy. Check the soil moisture level daily and water when the top inch of soil feels dry to the touch. Avoid overwatering, as this can lead to root rot. During the warmer months, you may need to water more frequently than during the cooler months.
6. How do I know if my dragon fruit cutting has rooted?
The easiest way to tell if your dragon fruit cutting has rooted is to gently tug on it. If you feel resistance, it means that roots have formed and are anchoring the cutting in the soil. You can also carefully remove the cutting from the pot and inspect the roots. Look for small, white roots emerging from the cut end of the stem.
7. Can I propagate dragon fruit cuttings in water?
Yes, you can propagate dragon fruit cuttings in water. Place the cut end of the cutting in a jar or glass of water, ensuring that the leaves are not submerged. Change the water every few days to prevent the growth of bacteria. Once the roots are about an inch long, you can transplant the cutting into a pot with well-draining soil.
8. What are some common problems when propagating dragon fruit cuttings?
Some common problems when propagating dragon fruit cuttings include root rot, fungal infections, and pest infestations. Root rot is usually caused by overwatering or poor drainage. Fungal infections can occur in humid environments. Pests such as mealybugs and scale can also attack dragon fruit cuttings. To prevent these problems, use well-draining soil, avoid overwatering, provide good air circulation, and inspect the cuttings regularly for pests.
9. How do I care for my dragon fruit plant after it has rooted?
Once your dragon fruit cutting has rooted and established itself in its pot, you can start to care for it as you would a mature dragon fruit plant. Provide it with plenty of sunlight, water it regularly, and fertilize it with a balanced fertilizer every few months. As the plant grows, it will need a support structure to climb on.
10. Can I grow dragon fruit in a container?
Yes, dragon fruit can be grown successfully in containers. Choose a large pot with drainage holes and use a well-draining potting mix. Dragon fruit plants in containers will need to be watered and fertilized more frequently than plants grown in the ground. Also, be sure to provide a sturdy trellis or support structure for the plant to climb on. Container-grown dragon fruit plants can be moved indoors during the winter months in colder climates.
11. What are the best varieties of dragon fruit to propagate from cuttings?
Most dragon fruit varieties can be propagated from cuttings. Some popular varieties include ‘American Beauty,’ ‘Physical Graffiti,’ ‘Halley’s Comet,’ and ‘Yellow Dragon.’ Choose a variety that is well-suited to your climate and growing conditions. You can also experiment with different varieties to see which ones you prefer.
12. How do I prevent my dragon fruit cuttings from rotting?
Preventing rot is crucial for successful **dragon fruit cuttings propagation**. Use a well-draining potting mix, avoid overwatering, and ensure good air circulation. You can also dip the cut end of the cutting in rooting hormone, which contains a fungicide that can help prevent rot. If you notice any signs of rot, such as soft, mushy spots on the cutting, remove the affected area immediately.
Leave a Comment