
Grow Angled Luffa: Your Guide to a Bountiful Harvest and DIY Wonders
Growing angled luffa isn’t just about cultivating a fascinating vine; it’s about embarking on a rewarding journey of self-sufficiency and creative expression. I’ve always loved the idea of growing my own food, and the angled luffa, with its unique properties, presented a particularly exciting challenge. This fascinating plant, with its origins tracing back centuries to Asia, offers more than just delicious young fruits – it provides the raw material for creating amazing, sustainable DIY projects. From the ancient practice of using luffa as a natural sponge to its modern applications in crafting, this versatile plant has a rich history interwoven with human ingenuity.
Why should you consider growing angled luffa? Well, for starters, it’s incredibly rewarding to nurture a plant from seed to harvest, knowing exactly where your produce comes from. Beyond the satisfaction of homegrown vegetables, growing angled luffa opens up a world of DIY possibilities. Once the fruits mature, you can easily transform them into eco-friendly, naturally exfoliating bath sponges or even unique crafting materials. This eliminates the need for commercially produced sponges, reducing your environmental impact and saving you money in the process. This guide will walk you through every step, from planting your Grow Angled Luffa seeds to harvesting and crafting with the mature fruits, ensuring you have a bountiful harvest and a wealth of DIY projects to enjoy.
Ready to get your hands dirty and discover the magic of growing angled luffa? Let’s begin!
Growing Angled Luffa: A Complete DIY Guide
I’ve always loved the idea of growing my own things, and luffa gourds are particularly fascinating. Not only are they useful, but the whole process, from seed to sponge, is incredibly rewarding. This guide will walk you through everything you need to know to successfully grow your own angled luffa gourds.
Phase 1: Planning and Preparation
- Choose the right location: Luffa needs plenty of sunshine – at least six to eight hours a day. Select a sunny spot in your garden with well-drained soil. Poor drainage can lead to root rot.
- Prepare the soil: Luffa thrives in rich, fertile soil. Amend your soil with compost or well-rotted manure to improve drainage and nutrient content. A soil test can help determine if you need to add any specific nutrients.
- Gather your supplies: You’ll need luffa seeds (angled luffa is recommended for its ease of growth and sponge quality), gardening gloves, a trowel or spade, a watering can, and possibly some plant supports (more on this later).
- Decide on your planting method: You can either direct sow your seeds outdoors or start them indoors in seed trays about 4-6 weeks before the last expected frost. Direct sowing is generally easier, but starting indoors gives you a head start.
Phase 2: Planting Your Luffa Seeds
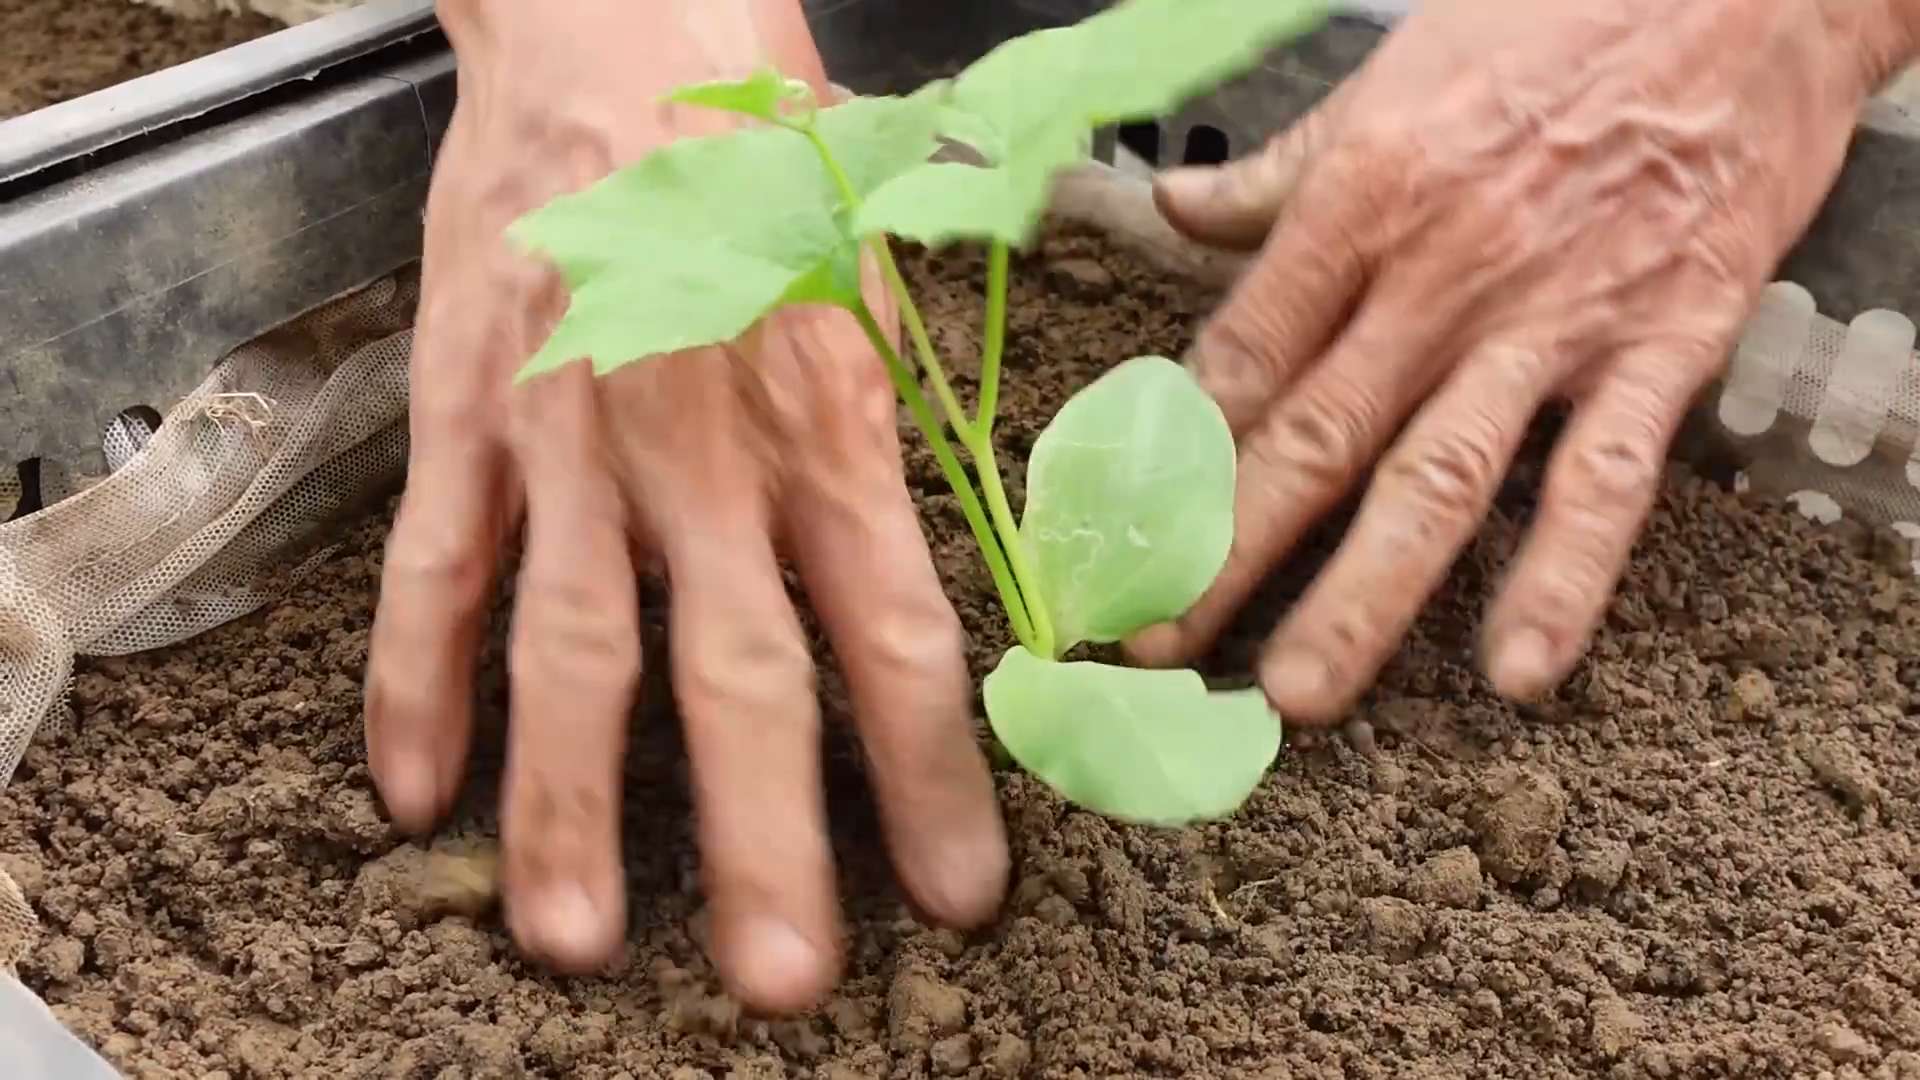
- Direct sowing (if starting outdoors): Wait until the soil has warmed up and all danger of frost has passed. Plant seeds about 1 inch deep and 2-3 feet apart in rows spaced 3-4 feet apart. This spacing allows for the vines to spread.
- Starting seeds indoors (optional): Fill seed trays with seed-starting mix. Plant one or two seeds per cell, about 1 inch deep. Keep the soil moist and warm (around 70-75°F). Once seedlings have a few true leaves, transplant them outdoors after the last frost.
- Watering: Water deeply and regularly, especially during dry spells. Consistent moisture is crucial for healthy growth. Avoid overwatering, which can lead to fungal diseases.
Phase 3: Caring for Your Luffa Plants
- Providing support: Luffa vines can grow quite long and heavy. Provide support using sturdy trellises, fences, or stakes. This will keep the vines off the ground, preventing rot and making harvesting easier. You can train the vines to climb using twine or clips.
- Fertilizing: While luffa isn’t a heavy feeder, a balanced fertilizer applied every few weeks can promote vigorous growth and fruit production. Follow the instructions on the fertilizer packaging for application rates.
- Pest and disease control: Regularly inspect your plants for pests like aphids, squash bugs, or vine borers. Handpick pests or use insecticidal soap if necessary. Good air circulation helps prevent fungal diseases. Ensure proper spacing between plants to allow for good airflow.
- Weed control: Keep the area around your luffa plants free of weeds to reduce competition for nutrients and water. Mulching can help suppress weeds and retain soil moisture.
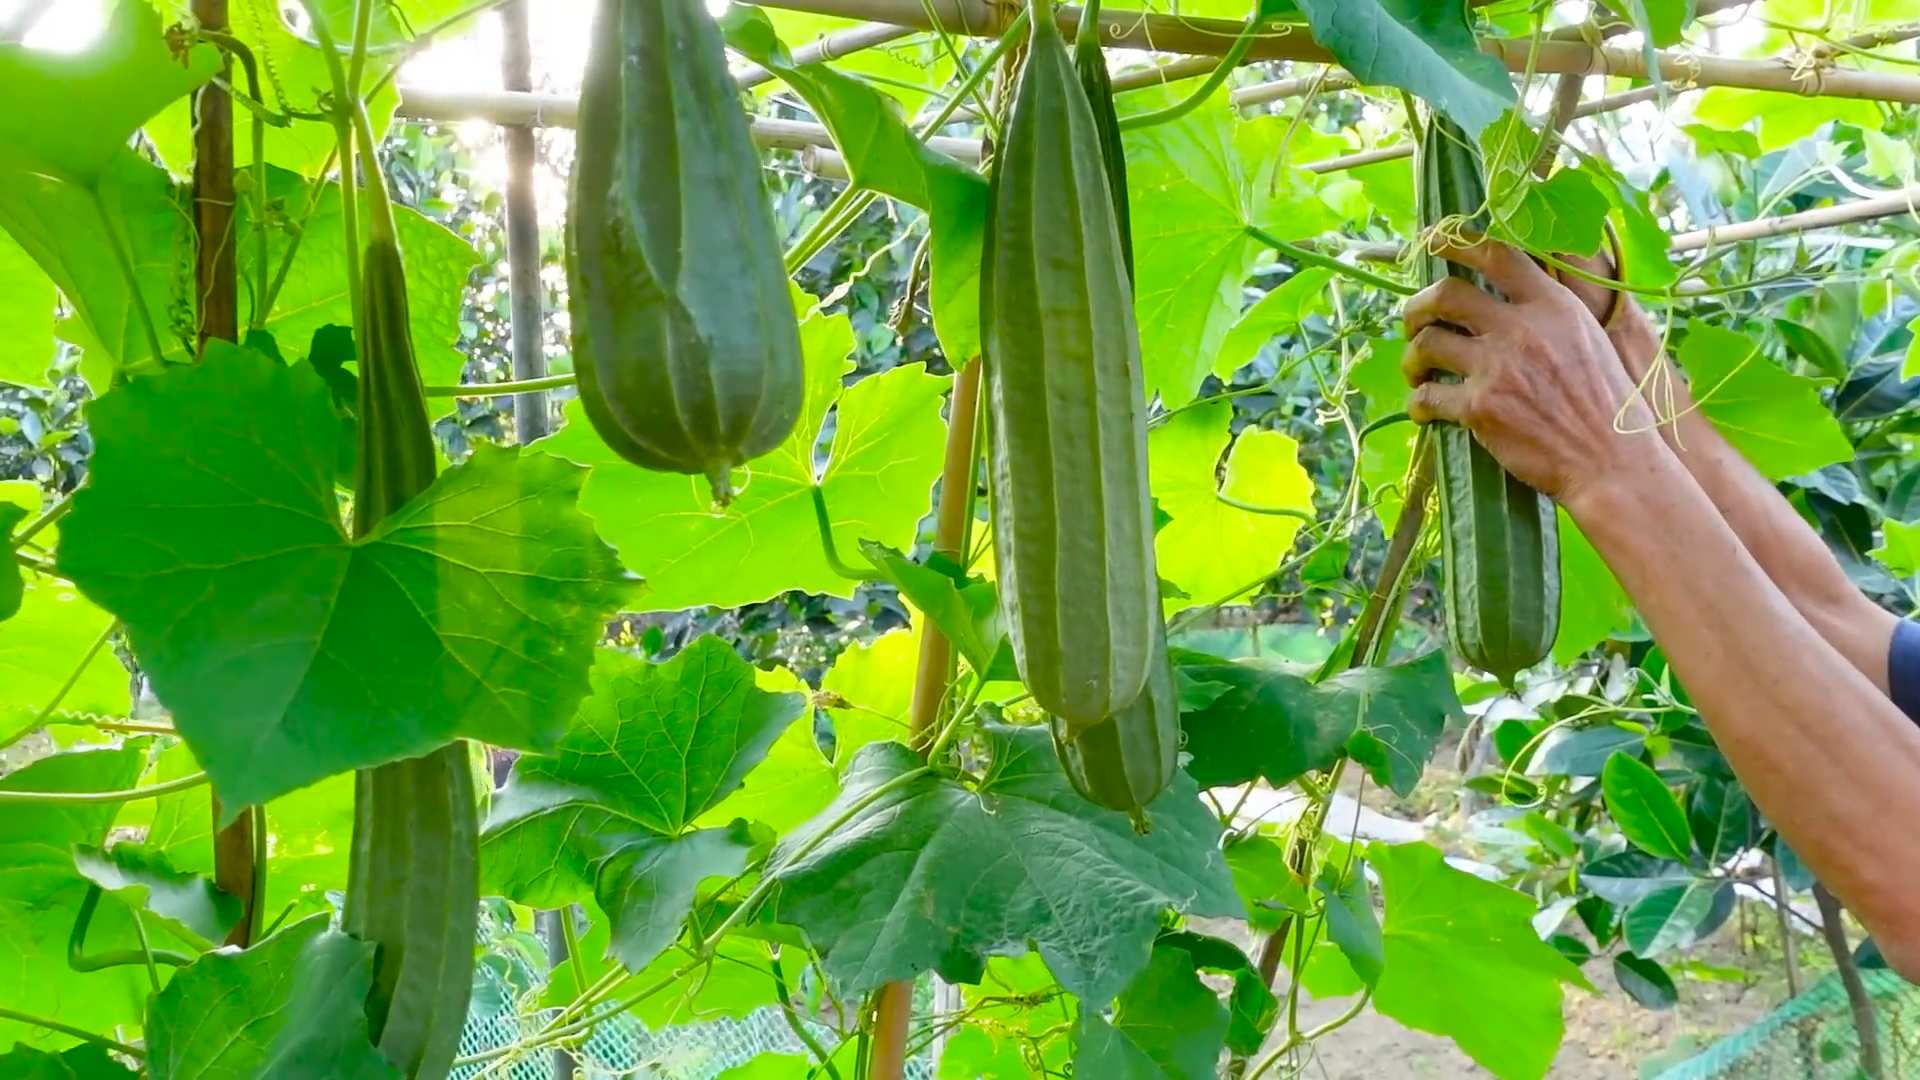
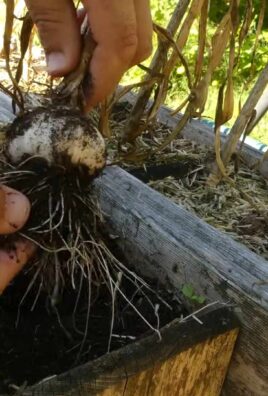
Phase 4: Harvesting Your Luffa Gourds
- Identifying ripe luffa: Luffa gourds are ready for harvest when they turn a light brown or beige color and the skin feels hard and dry. This usually happens 3-4 months after flowering. The vines will often start to dry out as well.
- Harvesting: Carefully cut the luffa gourds from the vine using a sharp knife or pruning shears. Leave about an inch of stem attached to each gourd.
- Curing: After harvesting, allow the luffa gourds to cure in a dry, well-ventilated area for several weeks. This allows the inside to dry completely. You can hang them upside down or lay them flat.
- Preparing the luffa sponges: Once completely dry, the outer skin will easily peel away, revealing the fibrous sponge inside. You can use a stiff brush or your fingers to remove any remaining seeds or pulp. Rinse thoroughly with water and allow to air dry completely.
Phase 5: Troubleshooting Common Problems
- Yellowing leaves: This can indicate nutrient deficiencies, overwatering, or pest infestations. Check your soil, adjust your watering schedule, and inspect for pests.
- Poor fruit set: Insufficient pollination can lead to poor fruit set. Ensure adequate pollinators (bees) are present or hand-pollinate the flowers if necessary.
- Root rot: Poor drainage is the main cause of root rot. Improve soil drainage by adding organic matter and avoid overwatering.
- Powdery mildew: This fungal disease thrives in humid conditions. Improve air circulation and consider using a fungicide if necessary. Prevention is key!
Growing your own luffa sponges is a rewarding experience. With a little patience and care, you’ll be enjoying your homemade, sustainable sponges in no time. Remember to always research your local climate and adjust your planting and care accordingly. Happy gardening!
Conclusion
So there you have it – a complete guide to growing your own angled luffa! This DIY trick isn’t just about saving money on loofahs; it’s about connecting with nature, understanding the growth cycle of a fascinating plant, and enjoying the immense satisfaction of harvesting something you’ve nurtured from seed. Growing your own angled luffa is a rewarding experience that yields beautiful, sustainable, and incredibly effective natural loofahs. The process is surprisingly simple, even for beginner gardeners, and the results are well worth the effort. You’ll be amazed by the texture and quality of your homemade luffas, far superior to anything you’ll find in a store.
Beyond the simple satisfaction of creating your own natural bath products, growing angled luffa offers a unique opportunity to explore sustainable living. By choosing to grow your own, you’re reducing your reliance on mass-produced, often chemically treated, alternatives. This simple act contributes to a smaller carbon footprint and promotes a more environmentally conscious lifestyle. And let’s not forget the sheer beauty of the luffa plant itself – its vibrant yellow flowers and sprawling vines add a touch of exotic charm to any garden.
We encourage you to experiment with different growing techniques and variations. Try different soil types, explore companion planting to enhance growth, or even attempt growing your angled luffa in containers if space is limited. The possibilities are endless! Perhaps you could try different varieties of luffa, exploring the subtle differences in texture and size. You might even consider drying your luffas using different methods to see how it affects the final product. The journey of growing your own angled luffa is as much about the process as it is about the final result.
Don’t hesitate to share your experiences with us! We’d love to hear about your successes, challenges, and any innovative techniques you discover along the way. Post your photos on social media using #GrowAngledLuffa and tag us – we can’t wait to see your bountiful harvest and the beautiful, sustainable loofahs you’ve created. Embrace the challenge, enjoy the journey, and experience the joy of growing your own angled luffa. You won’t regret it!
Frequently Asked Questions
What type of soil is best for growing angled luffa?
Angled luffa thrives in well-drained, fertile soil with a slightly acidic to neutral pH (6.0-7.0). Amend heavy clay soils with compost or other organic matter to improve drainage. Sandy soils may benefit from the addition of organic matter to retain moisture.
How much sunlight does an angled luffa plant need?
Angled luffa requires at least six to eight hours of direct sunlight per day to flourish. Choose a sunny location in your garden for optimal growth and fruit production. Insufficient sunlight can lead to poor growth and reduced yield.
When is the best time to plant angled luffa seeds?
The best time to plant angled luffa seeds is after the last frost, when the soil has warmed up and the risk of freezing temperatures has passed. This typically falls between late spring and early summer, depending on your climate. You can start seeds indoors several weeks before the last frost for an earlier harvest.
How often should I water my angled luffa plants?
Water your angled luffa plants regularly, especially during dry periods. Aim for consistent moisture but avoid overwatering, which can lead to root rot. The frequency of watering will depend on your climate and soil conditions. Check the soil moisture regularly and water when the top inch feels dry.
How do I know when my angled luffas are ready to harvest?
Angled luffas are ready for harvest when the vines have dried and turned brown, and the fruits feel hard and dry to the touch. This typically occurs in the fall, several months after flowering. You’ll know they are ready when they rattle slightly when shaken.
What can I do with my harvested angled luffas?
Once harvested, allow your angled luffas to dry completely. Then, simply peel away the outer husk to reveal the soft, spongy luffa inside. You can use these natural loofahs for bathing, scrubbing, or even as a natural cleaning tool. They are completely biodegradable and environmentally friendly.
Can I grow angled luffa in containers?
Yes, you can grow angled luffa in containers, provided they are large enough to accommodate the plant’s extensive root system. Choose a container at least 15-20 gallons in capacity and ensure it has adequate drainage holes. You may need to water more frequently in containers than in the ground.
What are some common problems when growing angled luffa?
Some common problems include pests like aphids or squash bugs, and diseases like powdery mildew. Regularly inspect your plants for signs of pests or diseases and take appropriate action, such as using insecticidal soap or neem oil for pests, and ensuring good air circulation to prevent fungal diseases. Proper spacing and watering can also help prevent many issues.
Can I save seeds from my harvested luffas to plant next year?
Yes, you can save seeds from your harvested luffas for planting the following year. Allow the luffas to dry completely, then remove the seeds and store them in a cool, dry place until the next planting season. Ensure the seeds are thoroughly dry before storing to prevent mold or rot.
Where can I buy angled luffa seeds?
Angled luffa seeds are readily available online from various seed suppliers and garden centers. You can also find them at some local nurseries, depending on your location. Be sure to choose reputable sources to ensure seed viability.
Leave a Comment