
Grow Asparagus at Home and unlock a world of fresh, flavorful spears right in your backyard! Imagine stepping outside and harvesting your own delicious asparagus, ready to be steamed, grilled, or added to your favorite dishes. No more relying on store-bought options that can be expensive and lack that just-picked freshness. This isn’t just about gardening; it’s about connecting with nature, enjoying the fruits (or rather, vegetables!) of your labor, and adding a touch of gourmet to your everyday meals.
Asparagus has a rich history, dating back to ancient Greece and Rome, where it was prized for its medicinal properties and culinary delights. The Romans even developed sophisticated cultivation techniques to ensure a steady supply of this delicacy. Today, the tradition continues, and you can easily bring this ancient practice into your own garden.
Why should you learn to grow asparagus at home? Well, for starters, homegrown asparagus tastes significantly better than anything you can buy in a store. Plus, it’s a sustainable and cost-effective way to enjoy this nutritious vegetable. Asparagus is packed with vitamins, minerals, and antioxidants, making it a healthy addition to your diet. And let’s be honest, there’s something incredibly satisfying about nurturing a plant from its early stages to a bountiful harvest. In this article, I’ll share my favorite DIY tricks and hacks to help you successfully grow asparagus at home, even if you’re a complete beginner. Get ready to transform your garden and your plate!
Growing Asparagus Yourself: Your Comprehensive DIY Guide
Hello garden friends! I am thrilled to show you today how you can easily grow asparagus, this royal vegetable, right at home. It might seem a bit intimidating at first, but with the right preparation and patience, you’ll soon be enjoying your very own asparagus harvest. Let’s get started!
Why Grow Asparagus Yourself?
Before we get into the details, let me briefly explain why it’s worth growing your own asparagus:
- Freshness: Nothing tastes better than freshly harvested asparagus straight from your own garden.
- Quality: You have full control over the growing methods and can ensure that your asparagus is free of harmful pesticides.
- Cost Savings: Although the initial investment can be a bit higher, you’ll save money in the long run as you won’t have to buy asparagus anymore.
- Sustainability: You reduce transportation distances and support a sustainable lifestyle.
- Satisfaction: It’s just a great feeling to grow and harvest something yourself!
What You Need: The Materials List
Before we start, you should make sure you have everything you need on hand. Here is a list of the materials and tools you’ll need for growing asparagus:
- Asparagus plants (crowns): One or two-year-old crowns are best. They are more robust and establish themselves faster. I recommend choosing varieties like ‘Huchels Leistung’ or ‘Gijnlim’, as they are well-suited for home gardens.
- Gardening gloves: To protect your hands.
- Spade or digging fork: For digging the planting trenches.
- Pruning shears: For cutting back the asparagus plants.
- Compost or well-rotted manure: To improve the soil.
- Organic fertilizer: For an optimal supply of nutrients.
- Watering can or garden hose: For watering the plants.
- Mulch material (e.g., straw or wood chips): To protect the soil and control weeds.
- Patience: Asparagus needs time to grow and thrive!
Preparation: The Right Location and Soil
The success of your asparagus project largely depends on choosing the right location and preparing the soil properly.
- Location: Asparagus loves the sun! Choose a sunny spot in your garden that receives at least six hours of direct sunlight per day. Avoid shady areas, as this can hinder growth.
- Soil: Asparagus prefers well-drained, sandy loam soil with a pH between 6.5 and 7.5. Heavy, clay soils should be improved before planting.
- Soil Improvement: If your soil is too clayey, you can loosen it with sand, compost, and well-rotted manure. This improves drainage and ensures better aeration for the roots. I recommend preparing the soil in the fall before planting in the spring.
- Weed Control: Thoroughly remove all weeds and roots from the planting area. Asparagus is sensitive to weed competition, especially in the first few years.
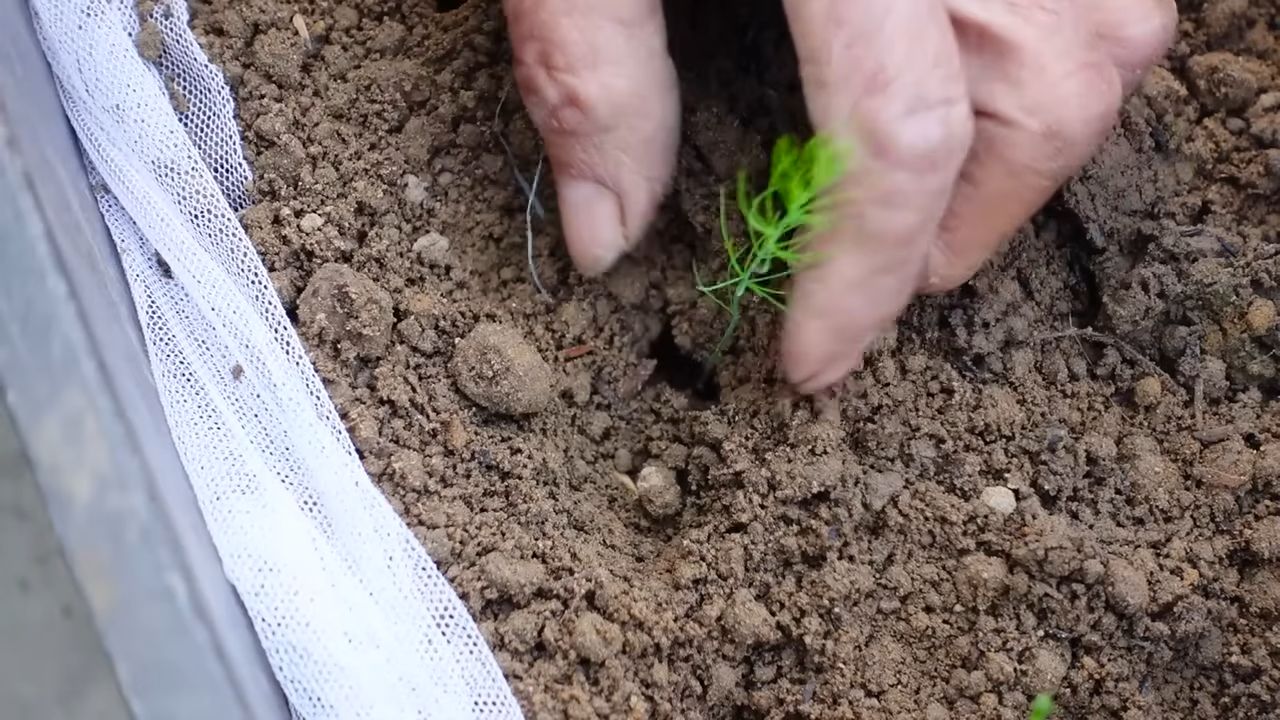
Planting: Step by Step to Your Asparagus Bed
Now comes the exciting part: planting the asparagus plants!
- Dig Trenches: Dig trenches about 20-25 cm (8-10 inches) deep and 30 cm (12 inches) wide. The distance between the trenches should be about 120-150 cm (4-5 feet).
- Prepare the Soil: Loosen the soil at the bottom of the trenches and mix in compost or well-rotted manure. This serves as a nutrient reserve for the young plants.
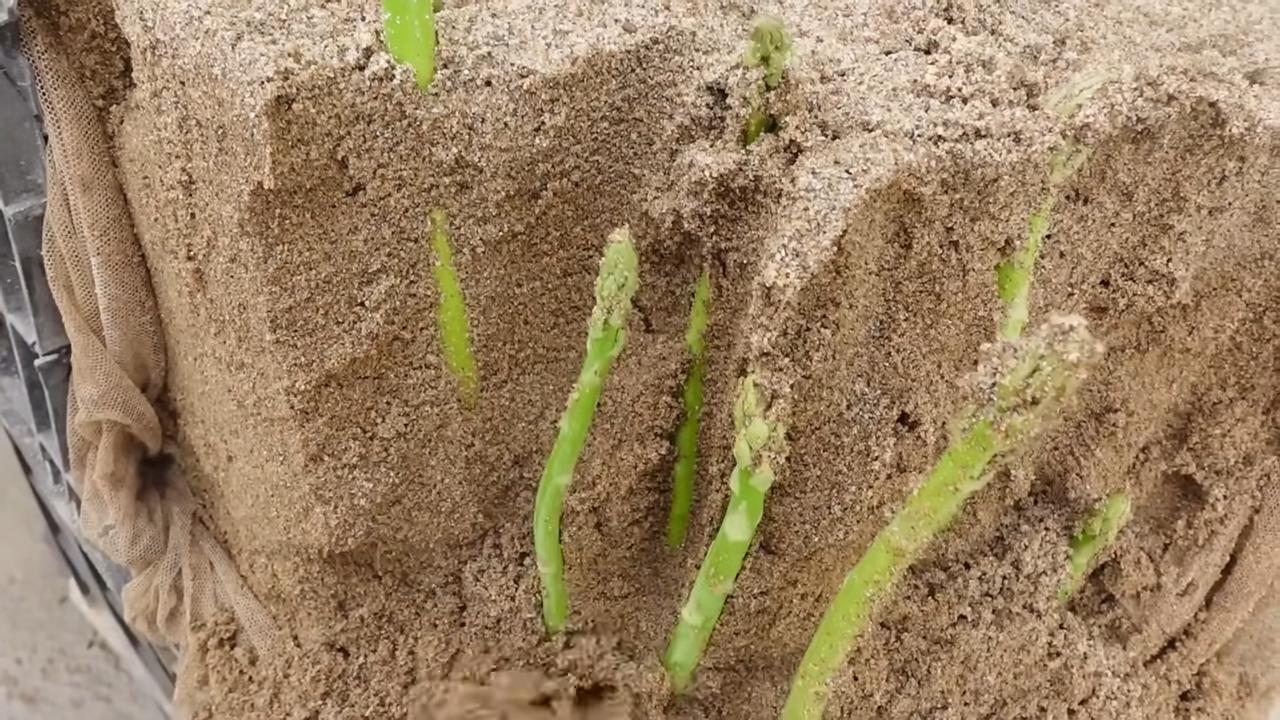
- Place the Plants: Place the asparagus crowns in the trenches with the buds facing up. The distance between the plants should be about 30-45 cm (12-18 inches).
- Hilling: Initially, cover the crowns with only about 5 cm (2 inches) of soil. As the plants grow, gradually add more soil until the trenches are completely filled. This encourages the formation of new shoots.
- Watering: Water the plants thoroughly after planting. Make sure the soil is moist but not wet.
- Mulching: Cover the soil around the plants with mulch material like straw or wood chips. This helps to retain moisture, suppress weeds, and protect the soil from temperature fluctuations.
Care: Keeping Your Asparagus Healthy and Strong
Proper care is crucial for a bountiful asparagus harvest.
- Watering: Asparagus needs regular watering, especially during dry periods. Make sure the soil stays evenly moist, but avoid waterlogging.
- Fertilizing: Fertilize the plants in the spring and after the harvest with an organic fertilizer. This provides them with the necessary nutrients for healthy growth. I like to use horn shavings or compost tea.
- Weed Control: Keep the asparagus bed free of weeds. Weeds compete with the asparagus plants for nutrients and water.
- Disease and Pest Control: Asparagus can be affected by various diseases and pests. Watch for signs of infestation and take action if necessary. I recommend using natural pest control methods.
- Leave the Foliage: In the fall, let the asparagus foliage stand until it is brown and dry. It serves as protection for the roots and stores nutrients for the next year. Only cut the foliage back in late fall or early spring.
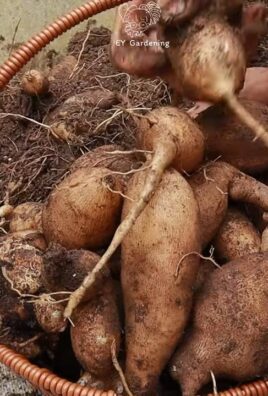
The Harvest: Patience Pays Off!
The harvest is the culmination of your asparagus efforts, but patience is required!
- Waiting Period: You should not harvest any asparagus in the first year after planting. In the second year, you can have a short harvest period of about two weeks. From the third year on, you can harvest fully.
- Harvest Time: The best time to harvest asparagus is in the morning when the spears are still cool and crisp.
- Harvesting Method: Cut the asparagus spears about 2-5 cm (1-2 inches) below the soil surface with a special asparagus knife or a sharp knife. Be careful not to damage the surrounding plants.
- Harvest Frequency: Harvest the asparagus spears regularly, about every one to two days. This encourages the formation of new shoots.
- End of Harvest: Stop harvesting by mid-June at the latest, so the plants have enough time to regenerate for the next year.
Extra Tips for a Successful Asparagus Harvest
- Variety Selection: Choose asparagus varieties that are suitable for your climate and soil conditions.
- Soil Analysis: Have your soil analyzed to ensure it contains the right nutrients.
- Regular Checks: Regularly check your asparagus plants for diseases and pests.
- Mulching: Mulching helps to retain moisture and suppress weeds.
- Patience: Asparagus needs time to grow and thrive. Be patient and don’t give up!
I hope this guide has helped you to grow asparagus at home.
Conclusion
So, there you have it! Growing asparagus at home isn’t just a gardening project; it’s an investment in years of delicious, healthy harvests. Forget those flimsy, expensive spears from the grocery store. Imagine stepping into your backyard and snipping off plump, vibrant asparagus, bursting with flavor, knowing exactly where it came from and how it was grown. This DIY trick transforms your garden into a sustainable source of one of spring’s most prized vegetables.
Why is this a must-try? Because it’s more than just saving money. It’s about connecting with your food, understanding the growing process, and enjoying the unparalleled taste of freshly harvested produce. It’s about the satisfaction of nurturing something from a tiny crown to a thriving plant that provides for you and your family for decades to come. And let’s be honest, there’s a certain bragging right that comes with serving a dish featuring asparagus you grew yourself!
But the benefits don’t stop there. Growing your own asparagus allows you to control the growing environment, ensuring it’s free from harmful pesticides and herbicides. You can tailor the soil and watering schedule to perfectly suit your plants’ needs, resulting in healthier, more flavorful spears. Plus, asparagus is a perennial, meaning it comes back year after year, providing a consistent source of fresh vegetables with minimal effort once established.
Looking for variations? Consider planting different varieties of asparagus to extend your harvest season and enjoy a range of flavors. ‘Jersey Knight’ is a popular choice for its high yields and disease resistance, while ‘Purple Passion’ offers a unique color and sweeter taste. You can also experiment with companion planting, pairing your asparagus with herbs like parsley and basil, which can help deter pests and improve soil health. Another interesting variation is to try growing asparagus in raised beds or containers, which can be particularly useful if you have poor soil or limited space. This allows for better drainage and easier weed control.
Don’t be intimidated by the initial setup. While it requires some patience in the first few years, the long-term rewards are well worth the effort. Think of it as planting a legacy – a gift to yourself and future generations. The key is to start with healthy crowns, prepare the soil properly, and provide consistent care.
We wholeheartedly encourage you to give this DIY trick a try. Start small, perhaps with just a few crowns, and see how it goes. Once you taste the difference between homegrown asparagus and store-bought, you’ll be hooked!
We’re confident that you’ll find the experience rewarding and the results delicious. So, grab your gardening gloves, prepare your soil, and get ready to enjoy the bounty of your own asparagus patch.
And most importantly, we want to hear about your experience! Share your tips, successes, and challenges in the comments below. Let’s build a community of home asparagus growers and learn from each other. What variety did you choose? What challenges did you face, and how did you overcome them? Your insights could help other aspiring gardeners embark on their own asparagus-growing journey. Let’s cultivate a thriving community of home gardeners, one asparagus spear at a time!
Frequently Asked Questions (FAQ)
How long does it take to grow asparagus from crowns?
Patience is key when growing asparagus. While you can technically harvest a few spears in the second year after planting crowns, it’s best to wait until the third year for a more substantial harvest. This allows the plants to establish a strong root system, ensuring a more productive and longer-lasting crop. In the first year, focus on letting the ferns grow and develop without harvesting any spears. In the second year, you can harvest lightly for a couple of weeks. By the third year, you can enjoy a full harvest for 6-8 weeks. Remember, the more you allow the plants to mature, the more abundant your future harvests will be.
What is the best soil for growing asparagus?
Asparagus thrives in well-drained, fertile soil with a slightly acidic to neutral pH (6.0-7.0). Before planting, amend the soil with plenty of organic matter, such as compost or well-rotted manure. This will improve drainage, aeration, and nutrient content. Asparagus roots can grow quite deep, so ensure the soil is loose and workable to a depth of at least 12-18 inches. Avoid heavy clay soils, as they can become waterlogged and lead to root rot. If you have clay soil, consider growing asparagus in raised beds or containers with a well-draining potting mix. A soil test can help you determine the pH and nutrient levels of your soil, allowing you to make necessary amendments before planting.
How much sun does asparagus need?
Asparagus requires at least 6-8 hours of direct sunlight per day to thrive. Choose a planting location that receives full sun throughout the growing season. Insufficient sunlight can result in weak, spindly spears and reduced yields. If you live in a particularly hot climate, some afternoon shade may be beneficial to prevent the ferns from scorching. However, ensure the plants still receive ample sunlight during the morning and early afternoon hours.
How often should I water asparagus?
Asparagus needs consistent moisture, especially during the growing season. Water deeply and regularly, ensuring the soil remains consistently moist but not waterlogged. Avoid overhead watering, as this can promote fungal diseases. Instead, water at the base of the plants, using a soaker hose or drip irrigation system. During dry spells, you may need to water more frequently. Mulching around the plants can help retain moisture and suppress weeds. In the fall, after the ferns have turned brown, you can reduce watering frequency.
What are common asparagus pests and diseases?
Asparagus beetles are a common pest that can damage the spears and ferns. Handpicking the beetles and larvae is an effective control method for small infestations. You can also use insecticidal soap or neem oil. Asparagus rust is a fungal disease that can cause orange pustules on the ferns. Ensure good air circulation around the plants and avoid overhead watering to prevent rust. Remove and destroy any infected ferns. Fusarium wilt is another fungal disease that can cause yellowing and wilting of the plants. Choose disease-resistant varieties and ensure good soil drainage to prevent Fusarium wilt.
When should I fertilize asparagus?
Fertilize asparagus in early spring, before the spears emerge, and again after the harvest season. Use a balanced fertilizer, such as 10-10-10, or a fertilizer specifically formulated for vegetables. Follow the instructions on the fertilizer package for application rates. You can also amend the soil with compost or well-rotted manure to provide a slow-release source of nutrients. Avoid over-fertilizing, as this can lead to excessive fern growth and reduced spear production.
How do I harvest asparagus?
Harvest asparagus spears when they are 6-8 inches tall and about as thick as your finger. Use a sharp knife to cut the spears at ground level. Avoid damaging the surrounding spears or crowns. Harvest spears regularly throughout the harvest season, which typically lasts for 6-8 weeks. As the harvest season progresses, the spears may become thinner and less tender. At the end of the harvest season, allow the ferns to grow and develop, as they will provide energy for the plants to produce spears the following year.
Can I grow asparagus in containers?
Yes, you can grow asparagus in containers, but you’ll need a large container (at least 18 inches in diameter and depth) to accommodate the plant’s extensive root system. Use a well-draining potting mix and ensure the container has drainage holes. Water regularly and fertilize as needed. Container-grown asparagus may require more frequent watering and fertilization than asparagus grown in the ground. Choose a sunny location for your container and protect it from strong winds.
How long will my asparagus plants last?
With proper care, asparagus plants can last for 15-20 years or even longer. The key is to provide them with the right growing conditions, including well-drained soil, plenty of sunlight, and regular watering and fertilization. Protect the plants from pests and diseases and allow the ferns to grow and develop after the harvest season. By following these tips, you can enjoy a bountiful harvest of fresh asparagus for many years to come.
Leave a Comment