
Grow Bag Cantaloupe Success: Your Ticket to Sweet, Juicy Melons!
Have you ever dreamed of biting into a perfectly ripe, sun-kissed cantaloupe, bursting with flavor, grown right in your own backyard? I know I have! But the thought of sprawling vines taking over my garden always seemed a bit daunting. That’s where the magic of grow bags comes in! This DIY guide is your secret weapon to achieving grow bag cantaloupe success, even if you have limited space or a less-than-perfect garden.
Cantaloupes, with their vibrant orange flesh and intoxicating aroma, have been cultivated for centuries. Originating in Africa and India, they were prized by ancient Egyptians and Romans for their sweetness and refreshing qualities. Today, they remain a beloved fruit worldwide, symbolizing summer and abundance. But let’s face it, growing them can be tricky! Traditional methods often require ample space and careful attention to soil conditions.
That’s why I’m so excited to share this DIY trick with you. Using grow bags allows you to control the growing environment, optimize drainage, and even move your plants to chase the sun! Plus, it’s a fantastic way to garden if you’re short on space, live in an apartment, or simply want to try a new and innovative approach. With this guide, you’ll learn everything you need to know to achieve grow bag cantaloupe success, from choosing the right variety to harvesting your delicious, homegrown melons. Get ready to impress your friends and family with your green thumb – let’s get growing!
Grow Bag Cantaloupe: My Secret to Sweet Summer Success!
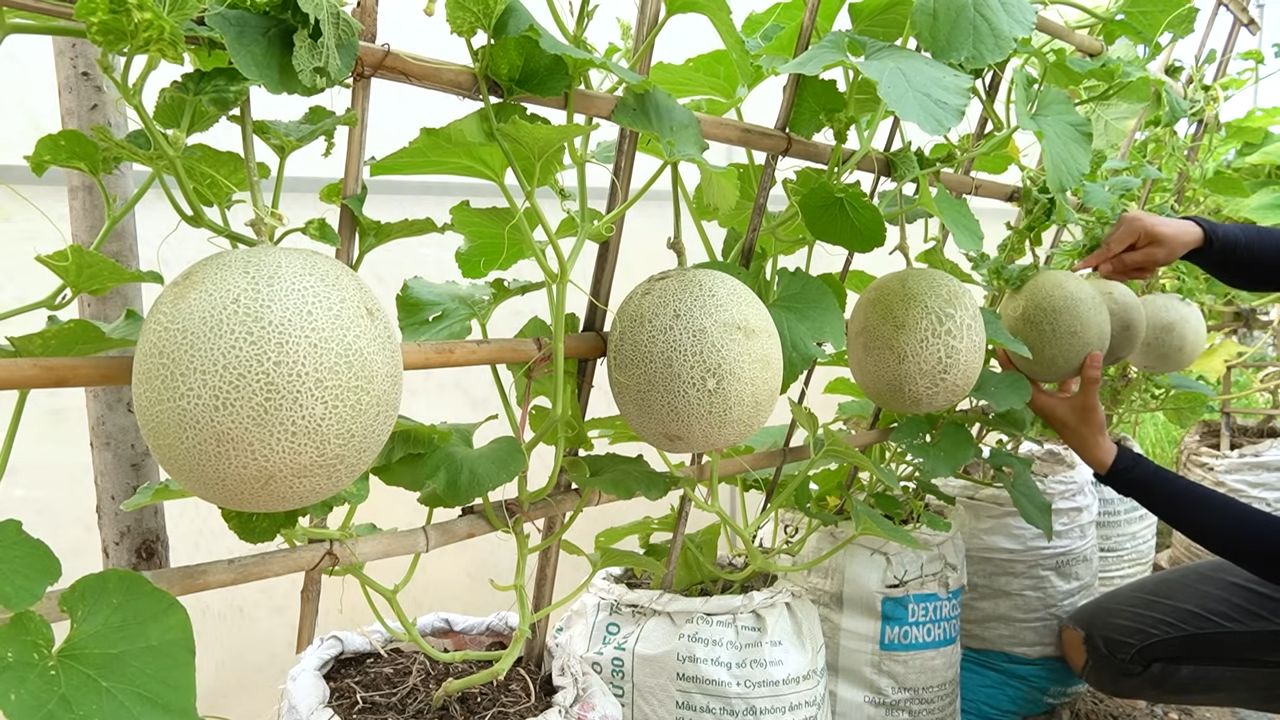
Hey there, fellow gardeners! I’m so excited to share my tried-and-true method for growing delicious, juicy cantaloupe right in grow bags. Forget sprawling vines taking over your garden; this method is perfect for small spaces, patios, or anyone who wants to control their cantaloupe’s environment. I’ve had incredible success with this, and I know you can too!
Why Grow Bags for Cantaloupe?
Before we dive in, let’s talk about why grow bags are fantastic for cantaloupe:
* Excellent Drainage: Cantaloupe hates soggy roots. Grow bags provide superior drainage compared to traditional pots, preventing root rot and promoting healthy growth.
* Air Pruning: As roots reach the edge of the bag, they’re naturally “air pruned,” which encourages the plant to develop a denser, more efficient root system.
* Portability: Need to move your cantaloupe to a sunnier spot or protect it from a sudden frost? No problem! Grow bags are lightweight and easy to move.
* Warmth: The dark fabric of grow bags absorbs heat, which cantaloupe loves. This can give you a head start in cooler climates.
* Space Saving: As I mentioned before, grow bags are perfect for small spaces. You can grow a surprisingly large cantaloupe plant in a relatively small area.
Choosing the Right Grow Bag and Variety
* Grow Bag Size: I recommend a minimum of 15 gallons, but 20-25 gallons is even better. Cantaloupe needs plenty of room for its roots to spread.
* Fabric: Opt for a breathable fabric grow bag. I prefer felt or a similar material.
* Cantaloupe Variety: Choose a variety that’s well-suited to your climate and growing season. Some of my favorites include:
* ‘Minnesota Midget’: A compact variety perfect for smaller gardens.
* ‘Sugar Cube’: Known for its exceptional sweetness.
* ‘Hales Best Jumbo’: A classic, reliable variety.
* ‘Athena’: Disease resistant and produces large melons.
Materials You’ll Need
* Grow bag (15-25 gallons)
* High-quality potting mix (see my recipe below!)
* Cantaloupe seeds or seedlings
* Trellis or support system (optional, but highly recommended)
* Watering can or hose
* Balanced fertilizer (e.g., 10-10-10)
* Organic mulch (straw, wood chips, etc.)
* Gardening gloves
* Hand trowel or small shovel
My Secret Potting Mix Recipe for Cantaloupe
The right potting mix is crucial for cantaloupe success. Here’s my go-to recipe:
* 1 part compost (provides nutrients and improves drainage)
* 1 part peat moss or coco coir (retains moisture)
* 1 part perlite or vermiculite (improves drainage and aeration)
* A handful of slow-release fertilizer (provides a steady supply of nutrients)
* A sprinkle of Epsom salts (magnesium helps with fruit production)
Mix everything thoroughly in a large container or on a tarp.
Step-by-Step Guide to Growing Cantaloupe in Grow Bags
Alright, let’s get our hands dirty! Here’s how I grow my cantaloupe in grow bags:
Phase 1: Starting Seeds or Transplanting Seedlings
1. Start Seeds Indoors (Optional): If you live in a cooler climate with a shorter growing season, I highly recommend starting your cantaloupe seeds indoors about 4-6 weeks before the last expected frost. Sow the seeds about ½ inch deep in small pots filled with seed-starting mix. Keep the soil moist and warm (around 70-80°F). Once the seedlings have a few sets of true leaves, they’re ready to be transplanted.
2. Direct Sowing (Warmer Climates): If you live in a warmer climate, you can direct sow the seeds directly into the grow bag after the danger of frost has passed and the soil has warmed up to at least 65°F. Sow 2-3 seeds per hill, about ½ inch deep. Once the seedlings emerge, thin them to the strongest one.
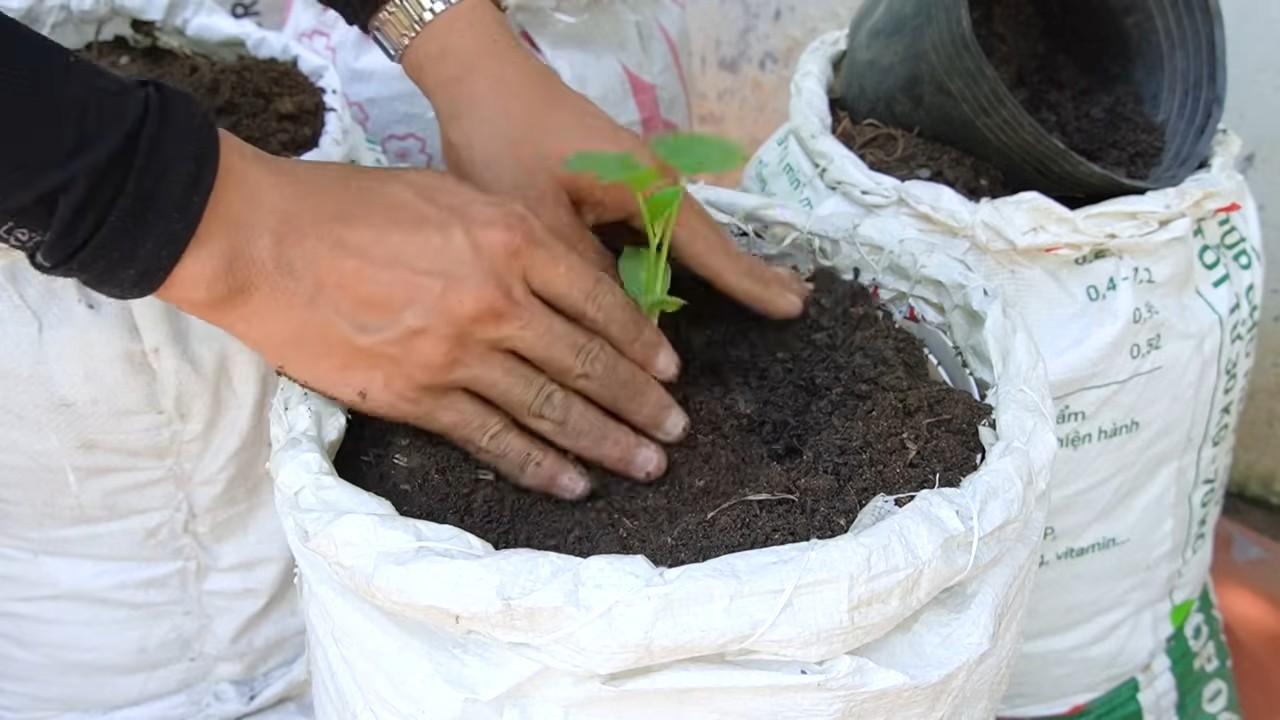
3. Prepare the Grow Bag: Fill the grow bag with your prepared potting mix, leaving about 2-3 inches of space at the top.
4. Transplant Seedlings (If Applicable): Gently remove the seedlings from their pots, being careful not to damage the roots. Dig a small hole in the center of the grow bag and place the seedling in the hole. Backfill with potting mix and gently firm the soil around the base of the plant.
5. Water Thoroughly: Water the grow bag thoroughly after planting, making sure the soil is evenly moist.
Phase 2: Providing Support and Encouraging Growth
1. Install a Trellis (Highly Recommended): Cantaloupe vines can get quite long and heavy, so providing a trellis or support system is essential. This will help keep the fruit off the ground, improve air circulation, and prevent diseases. You can use a tomato cage, a sturdy trellis, or even a DIY structure made from bamboo stakes and twine. I find that a sturdy A-frame trellis works best for me.
2. Train the Vines: As the cantaloupe vines grow, gently train them to climb the trellis. Use soft plant ties or twine to secure the vines to the support structure.
3. Water Regularly: Cantaloupe needs consistent moisture, especially during hot weather. Water deeply whenever the top inch of soil feels dry to the touch. Avoid overhead watering, as this can promote fungal diseases. I prefer to water at the base of the plant.
4. Fertilize Regularly: Cantaloupe is a heavy feeder, so regular fertilization is important. Use a balanced fertilizer (e.g., 10-10-10) every 2-3 weeks, following the instructions on the package. You can also supplement with compost tea or other organic fertilizers.
5. Mulch Around the Base: Apply a layer of organic mulch (straw, wood chips, etc.) around the base of the plant to help retain moisture, suppress weeds, and regulate soil temperature.
6. Pinch Off Excess Flowers: While it might seem counterintuitive, pinching off some of the excess flowers can actually improve the size and quality of the remaining fruit. Focus on allowing 3-4 cantaloupes to mature per plant.
Phase 3: Pollination and Fruit Development
1. Hand Pollination (If Necessary): Cantaloupe relies on bees and other pollinators to transfer pollen from the male flowers to the female flowers. If you’re not seeing a lot of bee activity in your garden, you may need to hand-pollinate the flowers yourself. To do this, use a small paintbrush to collect pollen from the male flowers (which have a long, thin stem) and transfer it to the female flowers (which have a small, immature fruit at the base).
2. Support Developing Fruit: As the cantaloupes grow larger, they may need additional support to prevent them from breaking off the vine. You can use slings made from pantyhose or netting to support the fruit.
3. Monitor for Pests and Diseases: Keep an eye out for common cantaloupe pests and diseases, such as aphids, squash bugs, and powdery mildew. Take action promptly to prevent infestations or diseases from spreading. I prefer to use organic pest control methods, such as insecticidal soap or neem oil.
Phase 4: Harvesting Your Sweet Reward
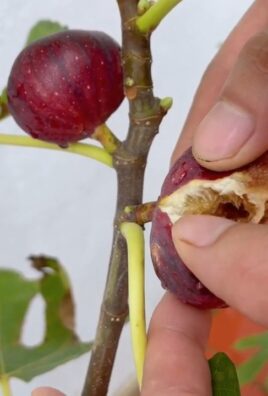
1. Check for Ripeness: Knowing when to harvest cantaloupe can be tricky, but here are a few signs to look for:
* The stem starts to crack and separate from the fruit.
* The skin turns from green to a tan or yellowish color.
* The melon has a sweet, fragrant aroma.
* The blossom end softens slightly.
2. Harvest Carefully: Once the cantaloupe is ripe, gently twist it off the vine. Be careful not to damage the fruit.
3. Enjoy Your Harvest! Slice open your homegrown cantaloupe and enjoy the sweet, juicy flavor. Store any leftover cantaloupe in the refrigerator.
Troubleshooting Tips
* Yellowing Leaves: This could be a sign of overwatering, underwatering, or nutrient deficiency. Check the soil moisture and adjust your watering schedule accordingly. Fertilize with a balanced fertilizer.
* Powdery Mildew: This fungal disease can cause a white, powdery coating on the leaves. Improve air circulation, avoid overhead watering, and treat with a fungicide if necessary.
* Lack of Fruit: This could be due to poor pollination. Try hand-pollinating the flowers or attracting more pollinators to your garden.
* Fruit Rot: This can be caused by excessive moisture or contact with
Conclusion
So, there you have it! Cultivating cantaloupe in grow bags might seem unconventional, but as we’ve explored, it’s a remarkably effective method for producing delicious, homegrown melons, even if you’re short on space or dealing with less-than-ideal soil conditions. The benefits are undeniable: improved drainage, better temperature control, and the ability to move your plants to the sunniest spot in your garden. This DIY trick isn’t just about growing cantaloupe; it’s about empowering you to take control of your food source and enjoy the unparalleled flavor of freshly harvested produce.
But why is this method a must-try? Simply put, it levels the playing field. Cantaloupes can be finicky, demanding specific conditions to thrive. Grow bags provide that controlled environment, mitigating common challenges like root rot and nutrient deficiencies. You’re essentially creating a mini-oasis perfectly tailored to your cantaloupe’s needs. Plus, the satisfaction of nurturing a tiny seed into a juicy, fragrant melon is an experience that’s hard to beat.
Don’t be afraid to experiment with variations! Consider trying different grow bag sizes to see what works best for your specific cantaloupe variety. You could also explore companion planting, adding herbs like basil or marigolds to your grow bags to deter pests and attract pollinators. Another exciting avenue is to experiment with different soil mixes. While the recommended mix is a great starting point, you might find that adding more compost or perlite enhances drainage and nutrient availability even further. For those in cooler climates, consider using dark-colored grow bags to absorb more heat and extend the growing season. You can also try growing other melon varieties like honeydew or even smaller watermelons in grow bags using the same principles.
We wholeheartedly encourage you to give this DIY grow bag cantaloupe method a try. It’s a rewarding project that yields tangible results – delicious, homegrown cantaloupe that will impress your friends and family. The taste difference between store-bought and homegrown is truly remarkable. Imagine biting into a perfectly ripe cantaloupe, bursting with sweetness and flavor, knowing that you nurtured it from seed to harvest.
More importantly, we want to hear about your experiences! Share your successes, your challenges, and any tips or tricks you discover along the way. Did you try a different soil mix? Did you find a particularly effective pest control method? Your insights could help other gardeners achieve their own grow bag cantaloupe success. Post your photos and stories on social media using relevant hashtags, or leave a comment below. Let’s build a community of grow bag cantaloupe enthusiasts and learn from each other. Your journey to delicious, homegrown cantaloupe starts now!
Frequently Asked Questions (FAQ)
What size grow bag is best for cantaloupe?
A 15-20 gallon grow bag is generally recommended for cantaloupe. This provides ample space for the root system to develop and allows for sufficient soil volume to retain moisture and nutrients. Smaller grow bags might restrict root growth, leading to smaller melons or reduced yields. If you’re growing a particularly large cantaloupe variety, you might even consider a 25-gallon bag. Remember to choose a grow bag made from breathable fabric, as this will promote air pruning of the roots and prevent them from becoming root-bound.
How often should I water my cantaloupe in a grow bag?
Watering frequency depends on several factors, including the weather, the size of the plant, and the type of soil mix you’re using. Generally, you should water your cantaloupe when the top inch of soil feels dry to the touch. During hot, sunny weather, you might need to water daily, or even twice a day. In cooler or cloudier weather, you can water less frequently. The key is to monitor the soil moisture and adjust your watering schedule accordingly. Avoid overwatering, as this can lead to root rot. Grow bags offer better drainage than traditional pots, but it’s still important to be mindful of waterlogged conditions.
What kind of soil mix should I use for cantaloupe in a grow bag?
A well-draining, nutrient-rich soil mix is essential for growing cantaloupe in grow bags. A good starting point is a mix of equal parts potting soil, compost, and perlite. The potting soil provides a base for the mix, the compost adds nutrients and improves water retention, and the perlite enhances drainage and aeration. You can also add a slow-release fertilizer to the mix to provide a steady supply of nutrients throughout the growing season. Avoid using garden soil in grow bags, as it can become compacted and poorly drained.
How much sun does cantaloupe need in a grow bag?
Cantaloupe requires at least 6-8 hours of direct sunlight per day to thrive. Choose a location for your grow bag that receives plenty of sunlight throughout the day. If you live in a particularly hot climate, you might consider providing some afternoon shade to prevent the plants from overheating. The beauty of using grow bags is that you can easily move them to follow the sun or provide shade as needed.
How do I fertilize cantaloupe in a grow bag?
Cantaloupe are heavy feeders and require regular fertilization to produce large, sweet melons. In addition to incorporating a slow-release fertilizer into the soil mix at planting time, you should also fertilize your plants every 2-3 weeks with a balanced liquid fertilizer. Look for a fertilizer that is specifically formulated for fruits and vegetables. Follow the instructions on the fertilizer label carefully to avoid over-fertilizing, which can damage the plants. You can also supplement with compost tea or other organic fertilizers.
How do I prevent pests and diseases on my cantaloupe in a grow bag?
Regularly inspect your plants for signs of pests or diseases. Common pests that affect cantaloupe include aphids, squash bugs, and cucumber beetles. You can control these pests with insecticidal soap, neem oil, or by hand-picking them off the plants. Common diseases include powdery mildew and fusarium wilt. To prevent these diseases, ensure good air circulation around the plants, avoid overhead watering, and use disease-resistant cantaloupe varieties. Companion planting with herbs like basil or marigolds can also help deter pests and attract beneficial insects.
When is the best time to harvest cantaloupe from a grow bag?
Knowing when to harvest cantaloupe is crucial for enjoying the best flavor. Cantaloupe are ripe when they slip easily from the vine with a gentle tug. The skin will also turn from green to a tan or yellowish color, and the melon will have a fragrant aroma. Avoid picking cantaloupe that are still firmly attached to the vine, as they will not be as sweet or flavorful. Once harvested, cantaloupe can be stored at room temperature for a few days or in the refrigerator for up to a week.
Can I grow cantaloupe in a grow bag in a container on a balcony or patio?
Absolutely! This is one of the biggest advantages of using grow bags. As long as your balcony or patio receives at least 6-8 hours of direct sunlight per day, you can successfully grow cantaloupe in a grow bag. Make sure the container is sturdy enough to support the weight of the grow bag and the mature plant. Also, be mindful of watering, as containers tend to dry out more quickly than in-ground gardens.
What are some good cantaloupe varieties to grow in grow bags?
Smaller cantaloupe varieties tend to perform best in grow bags. Some popular choices include ‘Sugar Cube’, ‘Minnesota Midget’, and ‘Jenny Lind’. These varieties are known for their compact size, early maturity, and delicious flavor. However, you can also try growing larger varieties in grow bags, as long as you provide them with adequate support and space.
Can I reuse grow bags for cantaloupe next year?
Yes, you can reuse grow bags for cantaloupe in subsequent years. After harvesting your cantaloupe, remove the plant debris and wash the grow bag thoroughly with soap and water. Allow the bag to dry completely before storing it. You can also amend the soil with fresh compost and fertilizer before replanting. However, if you had any disease problems with your cantaloupe, it’s best to use a new grow bag to prevent the disease from recurring.
Leave a Comment