
Grow Chili Peppers at Home and ignite your culinary adventures! Have you ever dreamt of adding a fiery kick to your dishes with peppers you’ve nurtured yourself? Imagine the satisfaction of plucking vibrant, spicy chilies straight from your own garden, knowing exactly where they came from and how they were grown. It’s not just a dream; it’s an achievable reality with a few simple tricks and DIY hacks!
The cultivation of chili peppers dates back thousands of years, with evidence suggesting their use in South America as early as 6,000 BC. These fiery fruits weren’t just a food source; they held cultural significance, used in rituals and traditional medicine. Today, the global love for chili peppers continues to grow, and bringing that passion into your own backyard is easier than you think.
Many people shy away from home gardening, thinking it’s too complicated or time-consuming. But growing chili peppers at home doesn’t have to be a daunting task. With the right knowledge and a few clever DIY techniques, even beginners can enjoy a bountiful harvest. This article is your guide to unlocking the secrets of successful chili pepper cultivation, offering practical tips and tricks to help you grow chili peppers at home, regardless of your experience level. So, let’s ditch the store-bought peppers and embark on this exciting journey together!
Growing Chili Peppers at Home: A Spicy DIY Adventure!
Hey there, fellow spice enthusiasts! Ever dreamt of harvesting your own fiery chili peppers right from your backyard or even your windowsill? Well, dream no more! I’m going to walk you through the entire process of growing chili peppers at home, from seed to sizzling harvest. Trust me, it’s easier than you think, and the satisfaction of adding your homegrown heat to your dishes is unbeatable.
Choosing Your Chili Pepper Variety
Before we dive into the nitty-gritty, let’s talk about choosing the right chili pepper for you. The world of chili peppers is vast and varied, ranging from mild and fruity to scorching hot. Consider your taste preferences, the space you have available, and your local climate.
Here’s a quick rundown of some popular varieties:
* **Bell Peppers:** Okay, not technically chili peppers, but a great starting point for beginners. They’re sweet, mild, and easy to grow.
* **Jalapeños:** A classic choice with a moderate heat level. Perfect for salsas, poppers, and adding a kick to your meals.
* **Serranos:** A step up in heat from jalapeños, with a bright, grassy flavor.
* **Cayenne Peppers:** These slender red peppers pack a punch and are often dried and ground into powder.
* **Habaneros:** Enter the realm of serious heat! Habaneros are fruity and floral, but also incredibly spicy.
* **Ghost Peppers (Bhut Jolokia):** For the truly daring! Ghost peppers are among the hottest in the world. Handle with extreme caution!
* **Scotch Bonnets:** Similar in heat to habaneros, with a distinctive fruity flavor.
Once you’ve chosen your variety, you can purchase seeds online, at your local garden center, or even save seeds from a chili pepper you’ve enjoyed.
Starting Your Chili Pepper Seeds
Chili peppers need a long growing season, so it’s best to start your seeds indoors 6-8 weeks before the last expected frost.
Here’s what you’ll need:
* Chili pepper seeds
* Seed starting trays or small pots
* Seed starting mix (a light, well-draining soil)
* Spray bottle
* Heat mat (optional, but recommended)
* Grow light (optional, but recommended)
Now, let’s get started:
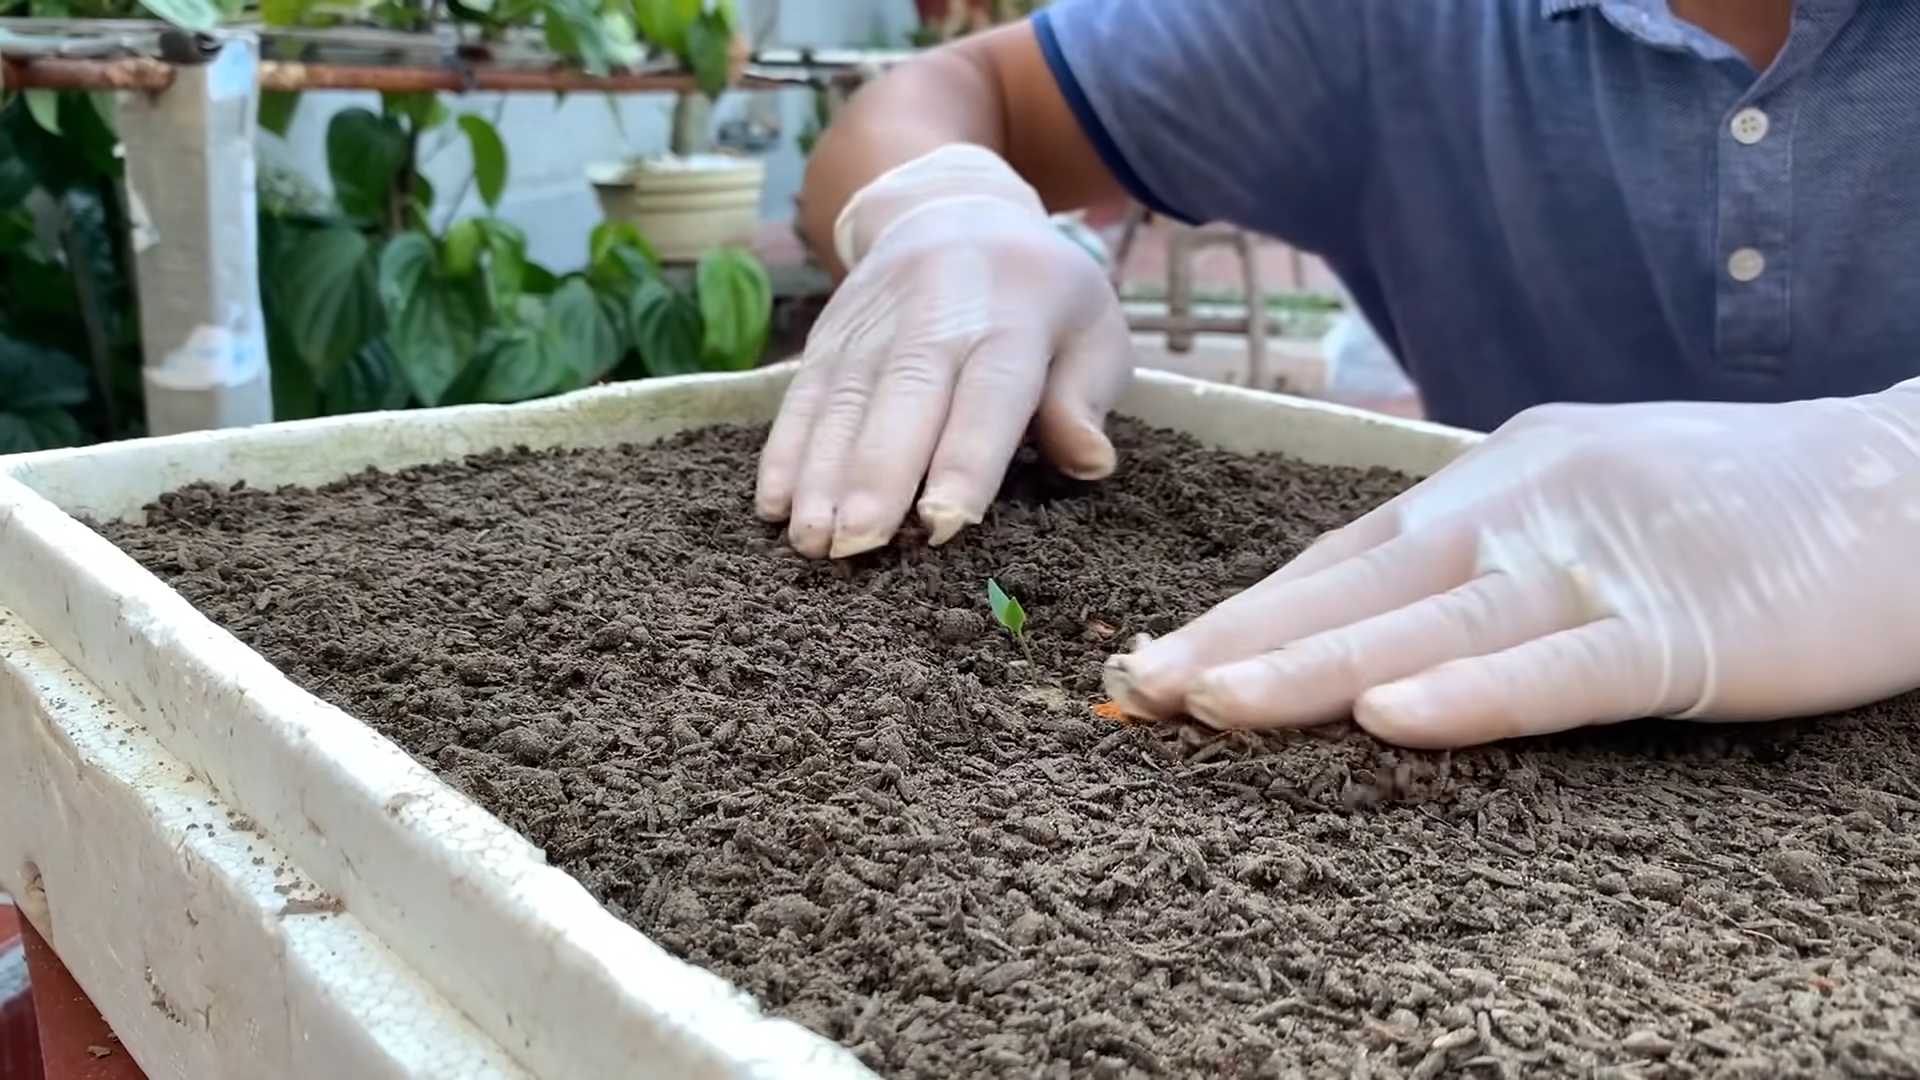
1. **Prepare your seed starting trays or pots:** Fill them with seed starting mix, leaving about half an inch of space at the top. Gently pat down the soil.
2. **Sow the seeds:** Place 2-3 seeds in each cell or pot, about ¼ inch deep.
3. **Water gently:** Use a spray bottle to moisten the soil. Avoid overwatering, as this can lead to damping off (a fungal disease that kills seedlings).
4. **Provide warmth:** Place the trays or pots on a heat mat to maintain a soil temperature of 75-85°F (24-29°C). This will help the seeds germinate faster.
5. **Provide light:** If you don’t have a sunny windowsill, use a grow light to provide 14-16 hours of light per day. Position the light a few inches above the seedlings.
6. **Keep the soil moist:** Check the soil daily and water gently when the top inch feels dry.
7. **Be patient:** Chili pepper seeds can take anywhere from 1-3 weeks to germinate, depending on the variety and conditions.
Transplanting Your Seedlings
Once your seedlings have developed their first set of true leaves (the leaves that look like miniature versions of the adult plant’s leaves), it’s time to transplant them into larger pots.
Here’s what you’ll need:
* Larger pots (4-6 inches in diameter)
* Potting mix (a richer soil than seed starting mix)
* Trowel
Here’s how to transplant:
1. **Prepare the larger pots:** Fill them with potting mix, leaving about an inch of space at the top.
2. **Gently remove the seedlings from the seed starting trays or pots:** Use a trowel or your fingers to carefully loosen the soil around the seedlings. Be careful not to damage the roots.
3. **Transplant the seedlings:** Make a hole in the potting mix in the larger pots and gently place the seedlings in the hole. Cover the roots with soil and gently pat down the soil.
4. **Water thoroughly:** Water the seedlings well after transplanting.
5. **Provide light and warmth:** Continue to provide light and warmth, as you did with the seed starting trays.
Hardening Off Your Seedlings
Before you can plant your chili pepper seedlings outdoors, you need to “harden them off.” This process gradually acclimates the seedlings to outdoor conditions, such as sunlight, wind, and temperature fluctuations.
Here’s how to harden off your seedlings:
1. **Start slowly:** Begin by placing the seedlings outdoors in a sheltered location for just an hour or two each day.
2. **Gradually increase the time:** Over the course of a week or two, gradually increase the amount of time the seedlings spend outdoors each day.
3. **Protect from harsh conditions:** Protect the seedlings from strong winds, direct sunlight, and frost.
4. **Monitor the seedlings:** Watch for signs of stress, such as wilting or sunburn. If you see any signs of stress, bring the seedlings back indoors.
Planting Your Chili Peppers Outdoors
Once your seedlings are hardened off and the danger of frost has passed, it’s time to plant them outdoors.
Here’s what you’ll need:
* Your hardened-off chili pepper seedlings
* Garden trowel
* Compost or other organic matter
* Fertilizer (optional)
* Stakes or cages (optional, but recommended for taller varieties)
Here’s how to plant:
1. **Choose a sunny location:** Chili peppers need at least 6-8 hours of sunlight per day.
2. **Prepare the soil:** Amend the soil with compost or other organic matter to improve drainage and fertility.
3. **Dig holes:** Dig holes that are slightly larger than the root balls of the seedlings. Space the holes 18-24 inches apart, depending on the variety.
4. **Plant the seedlings:** Gently remove the seedlings from their pots and place them in the holes. Cover the roots with soil and gently pat down the soil.
5. **Water thoroughly:** Water the seedlings well after planting.
6. **Fertilize (optional):** If desired, fertilize the seedlings with a balanced fertilizer.
7. **Stake or cage (optional):** For taller varieties, provide support with stakes or cages to prevent the plants from falling over.
Caring for Your Chili Pepper Plants
Now that your chili pepper plants are in the ground, it’s time to provide them with the care they need to thrive.
Here are some tips for caring for your chili pepper plants:
* **Water regularly:** Water the plants deeply whenever the top inch of soil feels dry. Avoid overwatering, as this can lead to root rot.
* **Fertilize regularly:** Fertilize the plants every 2-3 weeks with a balanced fertilizer.
* **Weed regularly:** Keep the area around the plants free of weeds.
* **Pinch off flowers (optional):** Pinching off the first few flowers can encourage the plant to produce more foliage and ultimately more peppers.
* **Protect from pests and diseases:** Monitor the plants for pests and diseases and take action as needed. Common pests include aphids, spider mites, and whiteflies. Common diseases include blossom end rot and fungal infections.
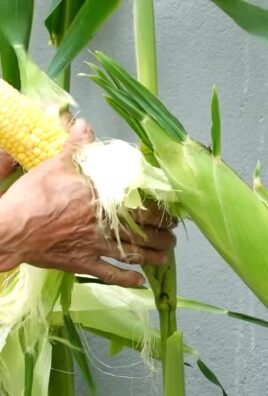
Harvesting Your Chili Peppers
The moment you’ve been waiting for! Harvesting your own chili peppers is incredibly rewarding.
Here’s how to harvest:
1. **Wait for the peppers to ripen:** Chili peppers will change color as they ripen, typically from green to red, yellow, or orange, depending on the variety.
2. **Harvest when fully ripe:** Harvest the peppers when they are fully ripe and have reached their mature color.
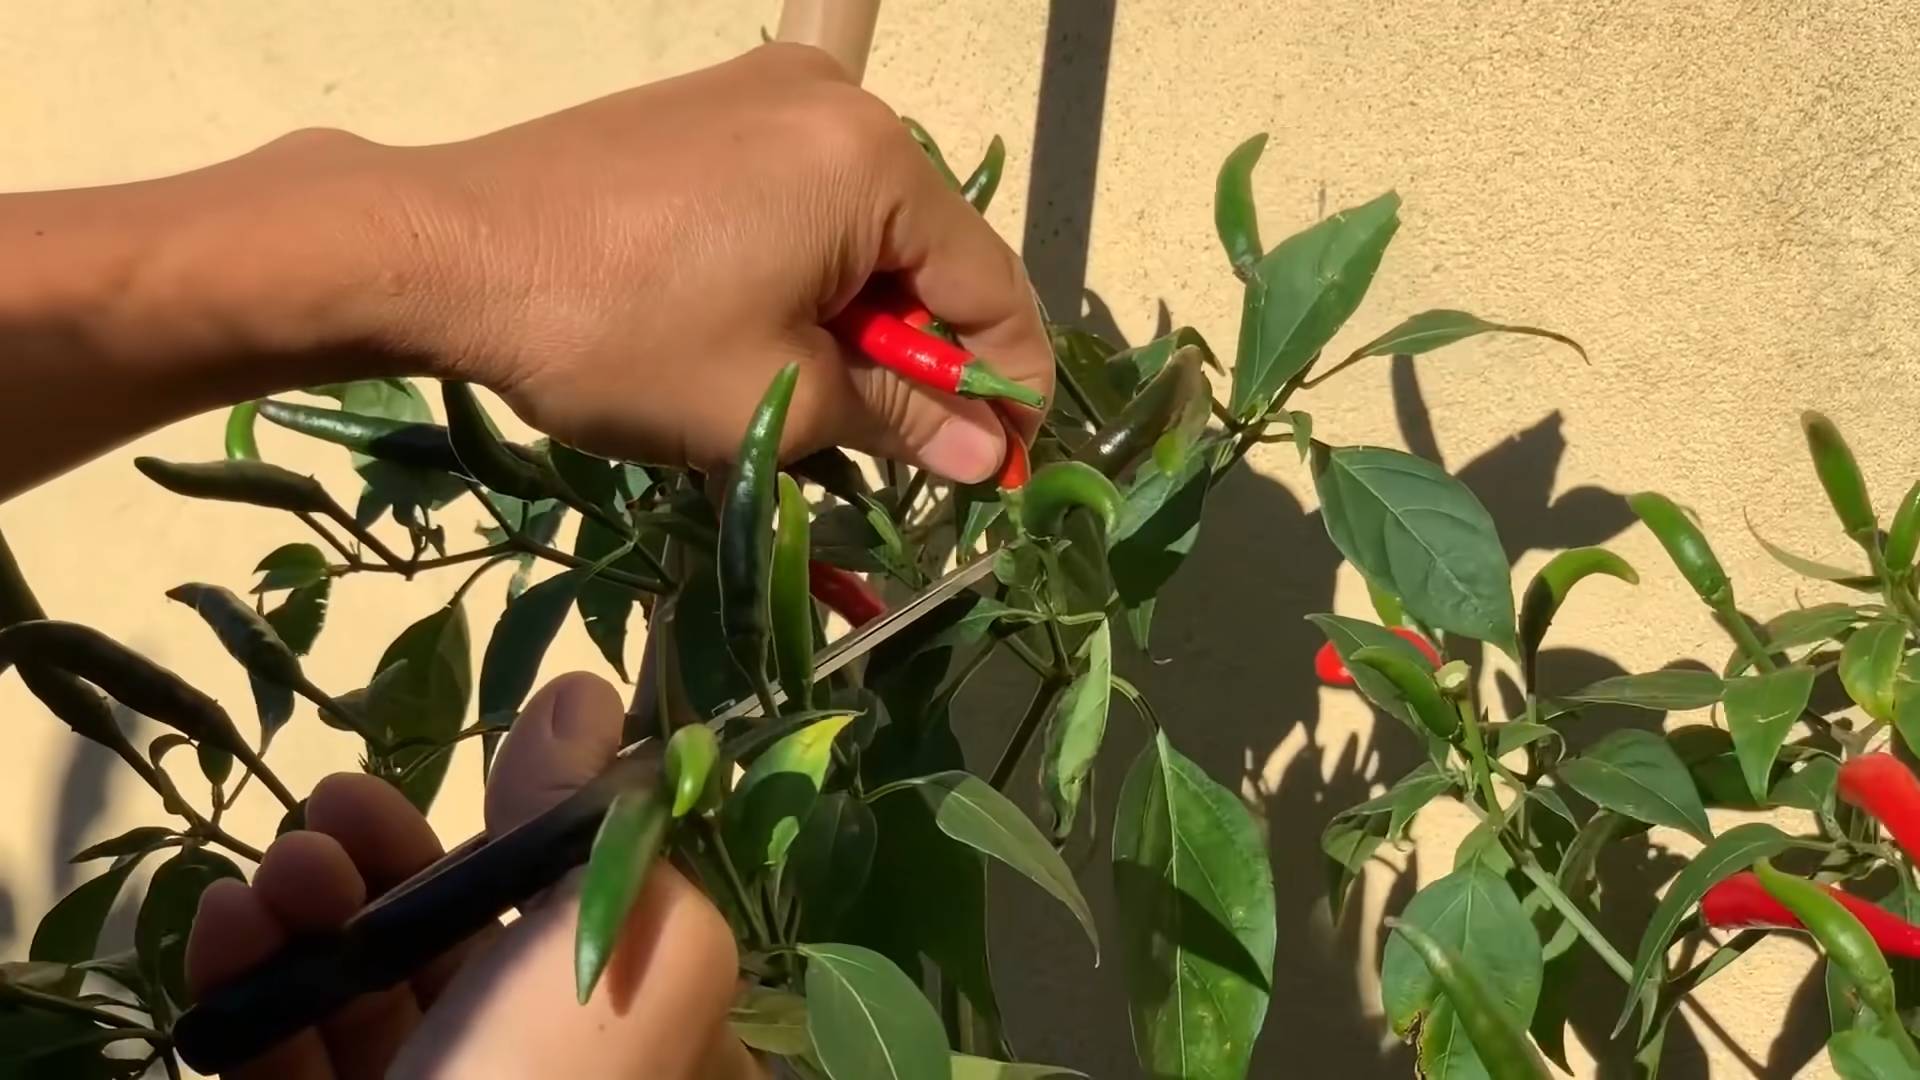
3. **Use pruning shears or scissors:** Use pruning shears or scissors to cut the peppers from the plant, leaving a small stem attached.
4. **Handle with care:** Be careful when handling hot peppers, as the oils can irritate your skin. Wear gloves if necessary.
Using and Storing Your Chili Peppers
Now that you’ve harvested your chili peppers, it’s time to enjoy them!
Here are some ways to use your chili peppers:
* **Fresh:** Use fresh chili peppers in salsas, sauces, stir-fries, and other dishes.
* **Dried:** Dry chili peppers for later use. You can dry them in a dehydrator, in the oven, or by hanging them in a warm, dry place.
* **Pickled:** Pickle chili peppers for a tangy and spicy treat.
* **Frozen:** Freeze chili peppers for long-term storage.
Here are some tips for storing your chili peppers:
Conclusion
So, there you have it! Growing chili peppers at home isn’t just a fun gardening project; it’s a gateway to a world of fresh, flavorful possibilities. We’ve walked you through the essential steps, from selecting the right seeds to nurturing your plants and harvesting your fiery bounty. But why should you bother with all this effort when you can simply buy chili peppers at the store? The answer lies in the unparalleled freshness, the control you have over the growing process (ensuring organic practices if you desire), and the sheer satisfaction of nurturing something from seed to table.
Imagine the vibrant colors of your homegrown chili peppers adorning your kitchen counter, the spicy aroma filling the air as you prepare your favorite dishes. Think of the bragging rights you’ll earn when you tell your friends that the heat in that salsa came straight from your garden! Beyond the immediate gratification, growing your own chili peppers connects you to the natural world, fostering a deeper appreciation for the food you consume.
This DIY trick is a must-try because it empowers you to customize your chili pepper experience. Want a milder flavor? Opt for Anaheim or Poblano varieties. Craving intense heat? Scotch Bonnets or Habaneros are your go-to choices. You can even experiment with different growing mediums, fertilizers, and pruning techniques to optimize your yield and flavor profile.
Consider these variations to elevate your chili pepper growing game:
* **Hydroponics:** For those with limited space or a desire for a more controlled environment, hydroponic chili pepper cultivation offers a fascinating alternative.
* **Container Gardening:** If you don’t have a traditional garden, don’t fret! Chili peppers thrive in containers, making them perfect for balconies, patios, or even indoor spaces with sufficient sunlight.
* **Companion Planting:** Enhance your chili pepper’s growth by planting beneficial companions like basil, carrots, or onions nearby. These plants can deter pests and improve soil health.
* **Fermenting Your Harvest:** Transform your surplus chili peppers into delicious fermented sauces or pastes, preserving their flavor and adding a probiotic boost to your diet.
Growing chili peppers at home is more than just a hobby; it’s an investment in your culinary creativity, your connection to nature, and your overall well-being. It’s a chance to experiment, learn, and share the fruits (or rather, the peppers!) of your labor with loved ones.
We wholeheartedly encourage you to embark on this exciting journey. Don’t be afraid to get your hands dirty, embrace the challenges, and celebrate the successes. And most importantly, don’t forget to share your experiences with us! We’d love to hear about your favorite varieties, your unique growing techniques, and the delicious dishes you create with your homegrown chili peppers. Share your photos and stories on our social media channels using #HomegrownChili or leave a comment below. Let’s build a community of passionate chili pepper enthusiasts and inspire others to discover the joys of growing their own. So, grab some seeds, get planting, and get ready to spice up your life!
Frequently Asked Questions
What is the best time of year to start growing chili peppers?
The ideal time to start growing chili peppers depends on your climate. In general, you should start seeds indoors 6-8 weeks before the last expected frost. This allows the seedlings to develop a strong root system before being transplanted outdoors. If you live in a warmer climate with a longer growing season, you can start seeds directly outdoors after the last frost has passed. However, starting indoors provides a head start and allows you to control the growing environment more effectively. Consider using a heat mat to encourage germination and a grow light to provide adequate light for the seedlings.
What kind of soil is best for growing chili peppers?
Chili peppers thrive in well-draining, fertile soil with a slightly acidic pH (around 6.0-6.8). A good potting mix for containers should contain a blend of peat moss, perlite, and vermiculite. For garden beds, amend the soil with compost or well-rotted manure to improve drainage and fertility. Avoid heavy clay soils, as they can retain too much moisture and lead to root rot. You can also add slow-release fertilizer to the soil at planting time to provide a steady supply of nutrients throughout the growing season. Regular soil testing can help you determine if your soil needs any amendments.
How much sunlight do chili peppers need?
Chili peppers require at least 6-8 hours of direct sunlight per day to thrive. Choose a location in your garden or on your patio that receives ample sunlight throughout the day. If you are growing chili peppers indoors, supplement with grow lights to ensure they receive enough light. Insufficient sunlight can lead to leggy growth, reduced flowering, and smaller, less flavorful peppers. Rotate your plants regularly to ensure even light exposure on all sides.
How often should I water my chili pepper plants?
Water chili pepper plants regularly, especially during hot, dry weather. The soil should be kept consistently moist but not waterlogged. Overwatering can lead to root rot, while underwatering can stress the plants and reduce yields. Check the soil moisture by sticking your finger about an inch deep into the soil. If it feels dry, it’s time to water. Water deeply and thoroughly, allowing the water to drain out of the bottom of the pot. Avoid watering the foliage, as this can promote fungal diseases. Mulching around the base of the plants can help retain moisture and suppress weeds.
What are some common pests and diseases that affect chili peppers?
Chili peppers can be susceptible to various pests and diseases, including aphids, spider mites, whiteflies, blossom-end rot, and fungal diseases. Regularly inspect your plants for signs of infestation or disease. Treat infestations with insecticidal soap or neem oil. Prevent blossom-end rot by ensuring consistent watering and providing adequate calcium to the soil. Improve air circulation around the plants to prevent fungal diseases. Consider using organic pest control methods to minimize the use of harmful chemicals.
How do I harvest chili peppers?
Harvest chili peppers when they have reached their mature color and size. The color will vary depending on the variety. Use pruning shears or scissors to cut the peppers from the plant, leaving a small stem attached. Handle the peppers carefully to avoid bruising or damaging them. Wear gloves when handling hot peppers to avoid skin irritation. You can harvest chili peppers at different stages of ripeness, depending on your preference. Green chili peppers are typically milder in flavor, while fully ripe peppers are hotter and more flavorful.
How do I store chili peppers?
There are several ways to store chili peppers, depending on how long you want to keep them. Fresh chili peppers can be stored in the refrigerator for up to a week. For longer storage, you can dry, freeze, or pickle them. To dry chili peppers, string them together and hang them in a well-ventilated area until they are completely dry. You can also use a dehydrator. To freeze chili peppers, wash and dry them thoroughly, then place them in a freezer bag or container. To pickle chili peppers, follow a canning recipe to ensure proper preservation.
Can I grow chili peppers indoors year-round?
Yes, you can grow chili peppers indoors year-round with proper care. Provide adequate light, either with natural sunlight or grow lights. Maintain a consistent temperature and humidity level. Water regularly and fertilize as needed. Pollinate the flowers manually by gently shaking the plants or using a small brush to transfer pollen from one flower to another. Choose compact varieties that are well-suited for indoor growing.
How do I make my chili peppers hotter?
Several factors can influence the heat level of chili peppers, including genetics, growing conditions, and stress. To increase the heat of your chili peppers, provide them with plenty of sunlight, water them regularly, and avoid over-fertilizing. Stressing the plants slightly by withholding water for short periods can also increase the heat level. Choose varieties that are known for their high heat levels, such as Scotch Bonnets or Habaneros. Remember that the heat level of chili peppers can vary even within the same variety.
Leave a Comment