
Grow chili peppers in soil bags? Absolutely! Forget fancy gardens and endless digging. I’m here to tell you that fiery flavor is within reach, even if you only have a balcony or a sunny patio. For centuries, chili peppers have added zest to cuisines around the globe, from the ancient Aztecs who used them in rituals to the fiery curries of India. But you don’t need to be a seasoned farmer to cultivate these vibrant fruits.
Are you tired of bland meals and store-bought peppers that lack that authentic kick? Do you dream of harvesting your own supply of fresh, spicy chilies, ready to add a burst of flavor to your favorite dishes? Then this DIY guide is for you! I’m going to show you how to grow chili peppers in soil bags, a simple, cost-effective, and space-saving method that anyone can master.
This method is perfect for beginners because it minimizes the risk of soilborne diseases and provides excellent drainage. Plus, it’s incredibly easy to move your chili plants around to chase the sun or protect them from unexpected frost. So, grab your soil bags, some chili pepper seeds (or seedlings), and let’s get started on this exciting journey to homegrown heat!
DIY Chili Pepper Paradise: Growing Hot Peppers in Soil Bags
Hey fellow chili enthusiasts! Are you dreaming of a fiery harvest but short on garden space? Or maybe you just want a super easy way to grow your own peppers? Well, you’re in the right place! I’m going to walk you through a fantastic DIY project: growing chili peppers directly in soil bags. It’s simple, effective, and perfect for beginners and seasoned gardeners alike. Get ready to spice up your life!
Why Grow Chili Peppers in Soil Bags?
Before we dive in, let’s talk about why this method is so awesome:
* Space-Saving: Ideal for balconies, patios, or small yards. You don’t need a traditional garden bed.
* Easy Drainage: Soil bags naturally provide excellent drainage, preventing root rot.
* Portability: You can easily move the bags to chase the sun or protect them from frost.
* Cost-Effective: It’s a budget-friendly way to grow a lot of peppers.
* Less Weeding: The enclosed environment minimizes weed growth.
* Warm Soil: The dark bags absorb heat, which chili peppers love!
What You’ll Need
Gathering your supplies is the first step to success. Here’s what you’ll need:
* Soil Bags: Choose heavy-duty plastic soil bags. The size depends on the variety of chili pepper you want to grow. Larger varieties like bell peppers or jalapenos will need larger bags. I usually go for bags that are around 20-30 gallons. You can often find these at garden centers or online.
* Potting Mix: Don’t skimp on the potting mix! Use a high-quality, well-draining mix specifically formulated for vegetables. Avoid using garden soil directly, as it can compact and hinder drainage. I like to use a mix that contains peat moss, perlite, and vermiculite.
* Chili Pepper Seedlings or Seeds: You can start your own seeds indoors or purchase seedlings from a nursery. Choose varieties that suit your taste and climate. Some popular choices include jalapenos, serranos, habaneros, and cayenne peppers.
* Slow-Release Fertilizer: This will provide your plants with a steady supply of nutrients throughout the growing season. Look for a fertilizer specifically formulated for tomatoes and vegetables, as it will have the right balance of nutrients for chili peppers.
* Watering Can or Hose: For watering your plants.
* Sharp Knife or Scissors: For making drainage holes and planting holes in the soil bag.
* Gloves: To protect your hands.
* Optional: Stakes or Cages: For supporting taller or bushier varieties of chili peppers.
* Optional: Mulch: To help retain moisture and suppress weeds. Straw, wood chips, or shredded bark work well.
Step-by-Step Guide: Planting Your Chili Peppers
Alright, let’s get our hands dirty! Here’s how to plant your chili peppers in soil bags:
1. Prepare the Soil Bag
* Choose a Sunny Location: Chili peppers need at least 6-8 hours of direct sunlight per day. Select a spot that gets plenty of sun.
* Lay the Bag Flat: Place the soil bag on a level surface in your chosen location.
* Create Drainage Holes: This is crucial! Use your knife or scissors to poke several drainage holes in the bottom of the bag. Space them about 6-8 inches apart. I usually make about 10-12 holes per bag.
* Cut Planting Holes: Now, cut holes in the top of the bag for your chili pepper plants. The number of holes depends on the size of the bag and the spacing requirements of your chosen variety. Generally, you can plant 2-3 smaller pepper plants (like cayenne or serrano) in a standard-sized soil bag, or 1-2 larger plants (like jalapeno or bell pepper). Space the holes at least 12-18 inches apart to allow for adequate growth. I usually cut circular holes about 6-8 inches in diameter.
2. Fill the Soil Bag
* Partially Fill the Bag: Add potting mix to the bag, filling it about two-thirds full.
* Incorporate Fertilizer: Sprinkle the slow-release fertilizer evenly over the potting mix, following the instructions on the fertilizer package.
* Mix Well: Gently mix the fertilizer into the potting mix with your hands or a small trowel.
* Add More Soil: Continue adding potting mix until the bag is almost full, leaving a few inches of space at the top.
3. Plant Your Chili Pepper Seedlings
* Gently Remove Seedlings: Carefully remove the chili pepper seedlings from their containers. If they are root-bound (roots tightly circling the pot), gently loosen the roots with your fingers.
* Plant the Seedlings: Dig a small hole in the potting mix within each planting hole. Place the seedling in the hole, ensuring that the top of the root ball is level with the surrounding soil.
* Backfill with Soil: Gently backfill the hole with potting mix, firming the soil around the base of the plant.
* Water Thoroughly: Water the newly planted seedlings thoroughly, until water drains out of the drainage holes.
4. Mulch (Optional)
* Apply Mulch: If you’re using mulch, spread a 2-3 inch layer of mulch around the base of each plant. This will help retain moisture, suppress weeds, and regulate soil temperature.
5. Support (Optional)
* Install Stakes or Cages: If you’re growing taller or bushier varieties of chili peppers, install stakes or cages to provide support. This will prevent the plants from falling over under the weight of the fruit. Insert the stakes or cages into the soil near the base of the plant, being careful not to damage the roots.
Caring for Your Chili Peppers
Now that your chili peppers are planted, it’s time to provide them with the care they need to thrive.
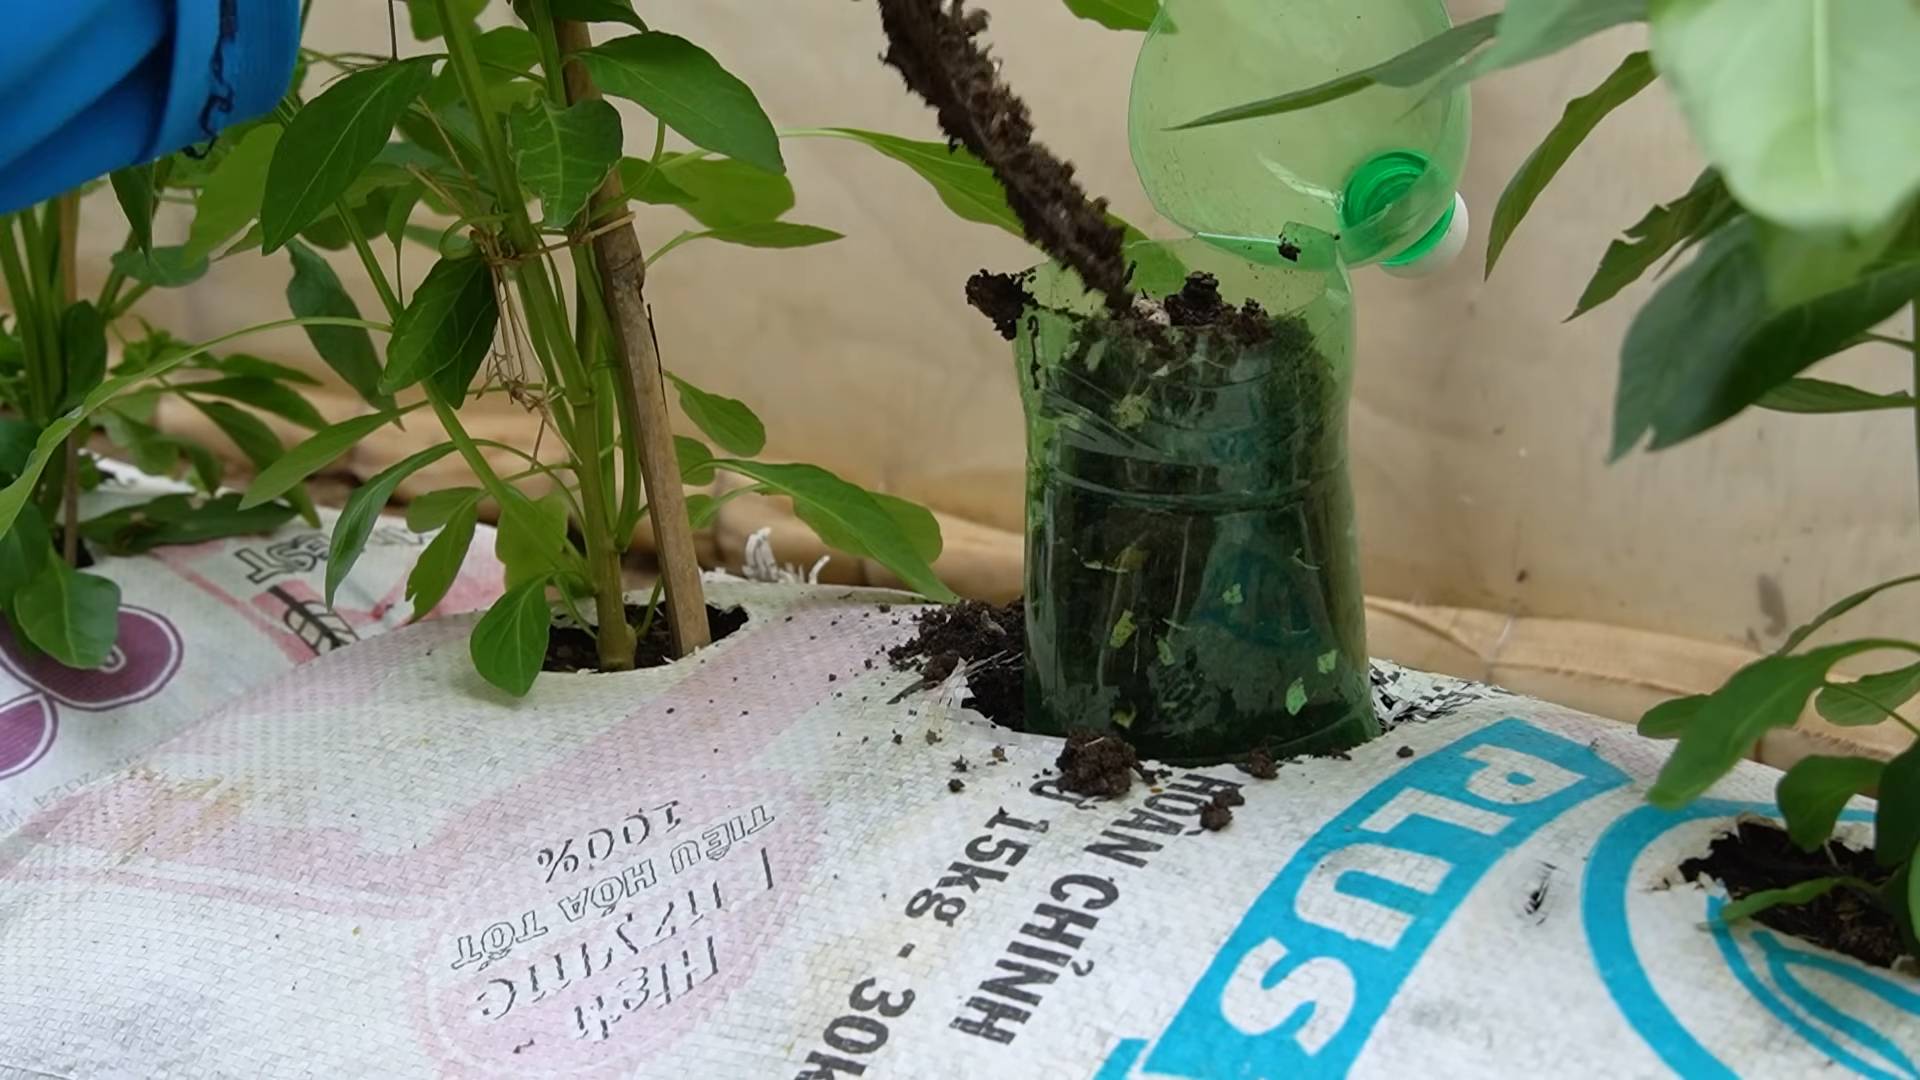
1. Watering
* Water Regularly: Chili peppers need consistent moisture, especially during hot weather. Water deeply whenever the top inch of soil feels dry to the touch. Avoid overwatering, as this can lead to root rot.
* Water in the Morning: Water in the morning to allow the foliage to dry before nightfall, which can help prevent fungal diseases.
* Use a Watering Can or Hose: Water gently at the base of the plant, avoiding wetting the foliage.
2. Fertilizing
* Supplement with Liquid Fertilizer: Even with slow-release fertilizer, your chili peppers may benefit from occasional feedings with a liquid fertilizer. Use a balanced fertilizer or one specifically formulated for tomatoes and vegetables. Follow the instructions on the fertilizer package. I usually fertilize every 2-3 weeks during the growing season.
3. Pruning
* Prune for Air Circulation: Pruning can help improve air circulation and prevent diseases. Remove any yellowing or dead leaves. You can also prune away some of the lower branches to encourage upward growth.
* Pinch Off Flowers (Optional): If you want to encourage bushier growth, you can pinch off the first few flowers that appear. This will direct the plant’s energy towards vegetative growth rather than fruit production.
4. Pest and Disease Control
* Monitor for Pests: Keep an eye out for common chili pepper pests, such as aphids, spider mites, and whiteflies. Inspect your plants regularly and take action promptly if you notice any signs of infestation.
* Use Organic Pest Control Methods: If you find pests, try using organic pest control methods, such as insecticidal soap or neem oil.
* Prevent Diseases: To prevent diseases, ensure good air circulation, avoid overwatering, and remove any diseased leaves promptly.
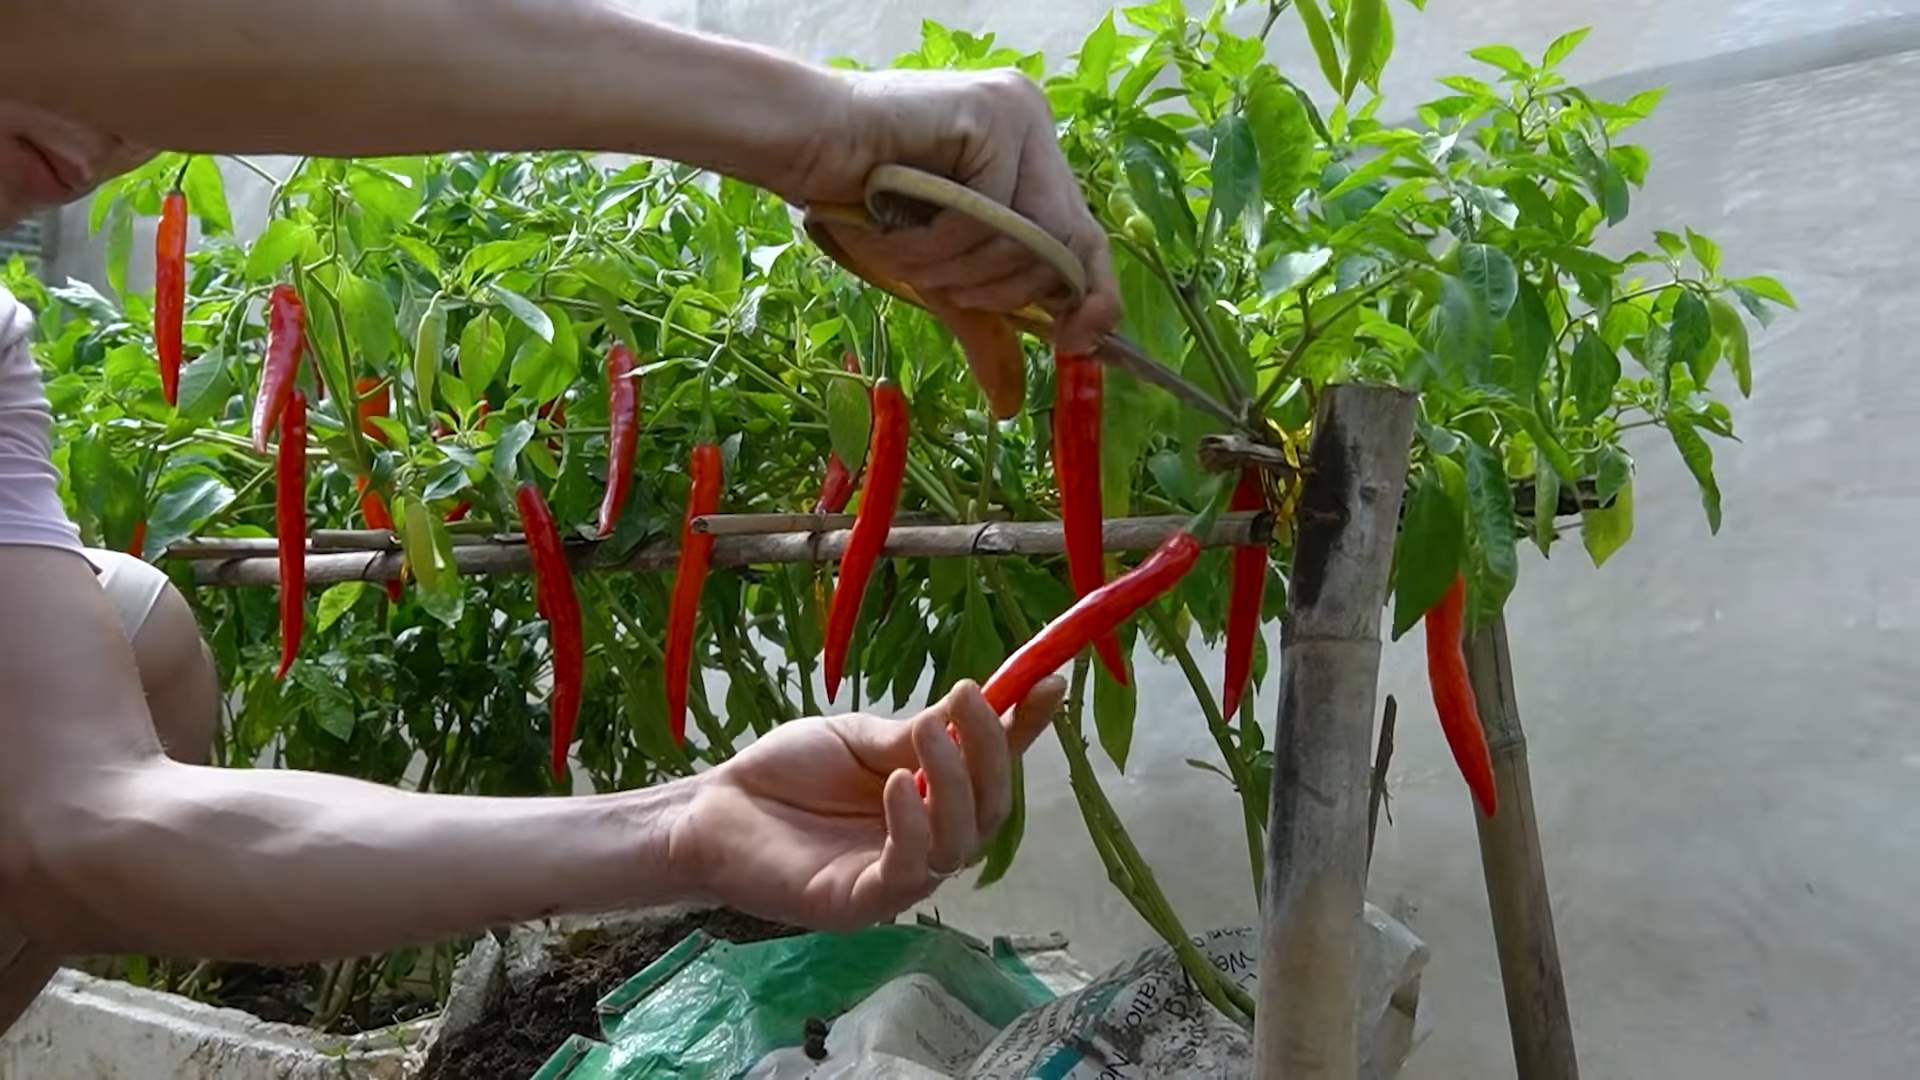
5. Harvesting
* Harvest When Ripe: Chili peppers are typically ready to harvest when they reach their mature color and size. The exact timing depends on the variety.
* Use Scissors or Pruners: Use scissors or pruners to cut the peppers from the plant, leaving a small stem attached.
* Handle with Care: Be careful when handling hot peppers, as the oils can irritate your skin. Wear gloves if necessary.
Troubleshooting
Even with the best care, you might encounter some challenges along the way. Here are a few common problems and how to address them:
* Yellowing Leaves: This could be a sign of nutrient deficiency, overwatering, or underwatering. Check the soil moisture and fertilize if necessary.
* Blossom End Rot: This is a calcium deficiency that causes the bottom of the peppers to rot. Ensure consistent watering and consider adding calcium to the soil.
* Pest Infestations: Treat pests promptly with organic pest control methods.
* Lack of Fruit: This could be due to insufficient sunlight, poor pollination,
Conclusion
So, there you have it! Transforming ordinary soil bags into thriving chili pepper gardens is not just a cost-effective solution, it’s a rewarding experience that brings the joy of homegrown produce right to your doorstep. We’ve explored how to create these self-contained ecosystems, offering a simple yet effective method for cultivating vibrant and flavorful chili peppers, even in limited spaces.
Why is this DIY trick a must-try? Because it empowers you to take control of your chili pepper cultivation, ensuring the best possible growing conditions. You bypass the uncertainties of store-bought seedlings and the potential for soil-borne diseases. You’re creating a personalized environment where your chili peppers can flourish, resulting in a bountiful harvest of fiery goodness. Plus, the satisfaction of nurturing your plants from start to finish is an unparalleled feeling.
But the beauty of this method lies in its adaptability. Feel free to experiment with different chili pepper varieties. From the mild Anaheim to the scorching Scotch Bonnet, the choice is yours! Consider adding companion plants like basil or marigolds to deter pests and enhance the overall health of your chili pepper plants. You can also adjust the soil composition to suit the specific needs of your chosen variety. Some chili peppers thrive in slightly acidic soil, while others prefer a more neutral pH.
Don’t be afraid to get creative with your soil bag gardens. You can paint the bags to add a touch of personality to your outdoor space. Or, you can group them together to create a visually appealing display. The possibilities are endless!
We understand that embarking on a new gardening adventure can be daunting, but we assure you that this DIY trick is incredibly easy to master. With a little bit of preparation and a touch of patience, you’ll be harvesting your own chili peppers in no time.
We wholeheartedly encourage you to give this DIY trick a try. Experience the joy of growing your own chili peppers and savor the unmatched flavor of homegrown produce. And most importantly, share your experience with us! We’d love to hear about your successes, your challenges, and any variations you’ve discovered along the way. Your feedback will help us refine this method and inspire other gardeners to embark on their own chili pepper growing journey. Let’s cultivate a community of passionate chili pepper enthusiasts! Remember, the key to success lies in understanding the specific needs of your chosen chili pepper variety and providing them with the optimal growing conditions. This DIY method using grow chili peppers soil bags offers a fantastic foundation for achieving just that.
Frequently Asked Questions (FAQ)
What type of soil is best for growing chili peppers in soil bags?
The ideal soil for chili peppers is well-draining, nutrient-rich, and slightly acidic to neutral (pH 6.0-7.0). A good mix would be equal parts of potting soil, compost, and perlite or vermiculite. The potting soil provides the base, the compost adds essential nutrients, and the perlite or vermiculite improves drainage and aeration. Avoid using garden soil directly in the bags, as it can become compacted and hinder root growth. You can also amend the soil with slow-release fertilizer to provide a steady supply of nutrients throughout the growing season. Consider adding bone meal for phosphorus, which promotes strong root development and abundant flowering.
How often should I water my chili peppers in soil bags?
Watering frequency depends on several factors, including the weather, the size of the soil bag, and the stage of growth of your chili pepper plants. As a general rule, water deeply when the top inch of soil feels dry to the touch. Avoid overwatering, as this can lead to root rot. During hot and dry weather, you may need to water daily. In cooler or more humid conditions, you can water less frequently. Check the soil moisture regularly and adjust your watering schedule accordingly. A good way to check is to stick your finger about an inch into the soil. If it feels dry, it’s time to water. If it feels moist, wait a day or two and check again.
How much sunlight do chili peppers need in soil bags?
Chili peppers thrive in full sun, requiring at least 6-8 hours of direct sunlight per day. Choose a location for your soil bags that receives ample sunlight throughout the day. If you live in a particularly hot climate, you may need to provide some afternoon shade to prevent the plants from scorching. If you’re growing your chili peppers indoors, supplement with grow lights to ensure they receive adequate light. Insufficient sunlight can lead to leggy growth, reduced flowering, and smaller fruit.
What are some common pests and diseases that affect chili peppers in soil bags, and how can I prevent them?
Common pests that affect chili peppers include aphids, spider mites, whiteflies, and pepper hornworms. Common diseases include fungal diseases like powdery mildew and blossom end rot. To prevent pests, inspect your plants regularly and remove any infested leaves or stems. You can also use insecticidal soap or neem oil to control pests. To prevent diseases, ensure good air circulation around your plants and avoid overwatering. Water at the base of the plants to avoid wetting the foliage. You can also use a fungicide to prevent or treat fungal diseases. Blossom end rot is caused by a calcium deficiency, so amend your soil with calcium-rich amendments like bone meal or crushed eggshells.
Can I reuse the soil bags for growing chili peppers next year?
While you can technically reuse the soil bags, it’s generally recommended to replace the soil each year. This is because the soil can become depleted of nutrients and may harbor pests or diseases. If you choose to reuse the soil, amend it with fresh compost and fertilizer to replenish the nutrients. You can also sterilize the soil by baking it in the oven or microwaving it to kill any pests or diseases. However, replacing the soil is the best way to ensure healthy and productive chili pepper plants.
What size soil bag is best for growing chili peppers?
A 10-20 gallon soil bag is generally sufficient for growing one or two chili pepper plants. The larger the bag, the more room the roots will have to grow, and the more water the soil will retain. However, larger bags can also be more difficult to move. Choose a size that is appropriate for the size of your plants and the amount of space you have available.
How do I know when my chili peppers are ripe?
The color of ripe chili peppers varies depending on the variety. Some chili peppers turn red when ripe, while others turn yellow, orange, or even purple. The best way to determine if a chili pepper is ripe is to check its color and firmness. Ripe chili peppers should be firm and have a vibrant color. You can also taste a small piece of the chili pepper to see if it has reached its desired level of spiciness.
Can I grow different varieties of chili peppers in the same soil bag?
While it’s possible to grow different varieties of chili peppers in the same soil bag, it’s generally not recommended. Different varieties of chili peppers have different growth habits and nutrient requirements. Growing them together can lead to competition for resources and reduced yields. It’s best to grow each variety in its own separate soil bag.
How do I overwinter my chili pepper plants in soil bags?
If you live in a climate with cold winters, you can overwinter your chili pepper plants in soil bags indoors. Before the first frost, prune back the plants and move them to a cool, bright location. Water sparingly throughout the winter, allowing the soil to dry out slightly between waterings. In the spring, gradually acclimate the plants to outdoor conditions before transplanting them back into the garden.
What are some good companion plants for chili peppers in soil bags?
Good companion plants for chili peppers include basil, marigolds, onions, garlic, and carrots. Basil helps to repel pests and improve the flavor of chili peppers. Marigolds deter nematodes and other soil pests. Onions and garlic repel aphids and other insects. Carrots help to loosen the soil and improve drainage. Avoid planting chili peppers near beans or brassicas (cabbage, broccoli, cauliflower), as these plants can inhibit their growth.
Leave a Comment