
Grow Choi Sum at Home: Imagine stepping into your backyard and harvesting fresh, vibrant Choi Sum for your dinner – a truly rewarding experience! This isn’t just a dream; it’s an achievable reality with a little know-how and some simple DIY tricks. For centuries, cultivating your own food has been a cornerstone of many cultures, connecting us to the earth and providing sustenance. In Asian cultures, leafy greens like Choi Sum are not only dietary staples but also symbols of prosperity and good health.
But why should you bother learning to grow Choi Sum at home? In today’s world, where grocery store produce can be expensive and often lacks the freshness and flavor of homegrown vegetables, having your own garden offers a fantastic solution. Plus, you have complete control over what goes into your food, ensuring it’s free from harmful pesticides and chemicals. This DIY guide will provide you with easy-to-follow steps and clever hacks to successfully cultivate this delicious and nutritious vegetable, even if you have limited space or gardening experience. Get ready to embark on a fulfilling journey of growing your own food and enjoying the incredible taste of freshly harvested Choi Sum!
Growing Choi Sum at Home: Your DIY Guide to a Bountiful Harvest
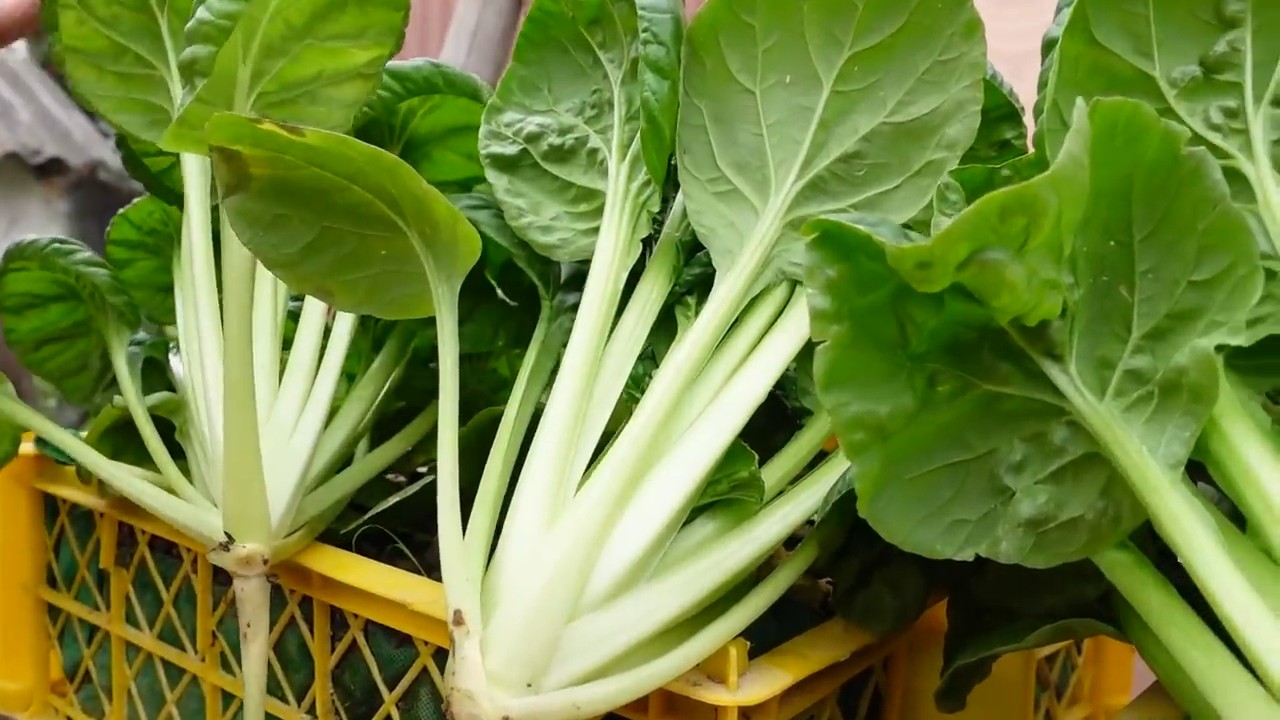
Hey gardening friends! Are you excited to harvest fresh, crisp Choi Sum right from your own garden? Choi Sum, also known as Chinese flowering cabbage, is super easy to grow and provides you with a wealth of vitamins and minerals. In this article, I will show you step-by-step how to successfully grow Choi Sum at home, whether you have a large garden or just a small balcony. Let’s get started!
What you need for growing Choi Sum
Before we begin, here is a list of everything you will need:
- Choi Sum seeds: You can find them in any well-stocked garden center or online. Look for fresh seeds for a better germination rate.
- Seed starting mix or potting soil: Special seed starting mix is finer and lower in nutrients, ideal for germination. Potting soil is richer and well-suited for later transplanting.
- Seedling pots or trays: Small pots or trays are perfect for starting seeds indoors.
- Larger pots or a garden bed: For later transplanting the young plants.
- Watering can or spray bottle: For gentle watering.
- Gardening gloves: To keep your hands clean.
- Optional: A mini-greenhouse or a clear plastic cover to speed up germination.
- Optional: Organic fertilizer to promote growth.
The Preparation: The Key to Success
Good preparation is the be-all and end-all for a successful harvest. Here are the steps you should follow:
- Choosing the right time: Choi Sum is a cool-weather vegetable. The best time for sowing is in the spring (March-May) or in the late summer/autumn (August-September). Avoid the hot summer months, as Choi Sum does not tolerate heat well.
- Preparing the location: Choi Sum loves the sun but also needs some protection from the midday sun. A semi-shady location is ideal. If you are growing Choi Sum in a pot, you can simply place the pot in a suitable location. In a garden bed, you should loosen the soil well and remove any weeds.
- Preparing the soil: Choi Sum prefers well-drained, humus-rich soil. If you are using potting soil, you can mix in some compost or organic fertilizer to make the soil even more nutrient-rich.
Sowing: How to get the seeds to germinate
Now let’s get down to business! Here I will show you how to sow the Choi Sum seeds correctly:
- Prepare the seedling pots: Fill the seedling pots or trays with seed starting mix. Press the soil down lightly.
- Sow the seeds: Distribute the Choi Sum seeds evenly on the soil. You can sow about 2-3 seeds per pot. Cover the seeds with a thin layer of soil (approx. 0.5 cm).
- Watering: Moisten the soil carefully with a spray bottle or a watering can with a sprinkler head. Make sure the soil is moist but not wet.
- Provide warmth and moisture: Place the seedling pots in a warm, bright place. A mini-greenhouse or a clear plastic cover can help to retain moisture and speed up germination. Ventilate the cover regularly to prevent mold.
- Be patient: Germination usually takes 5-10 days. Keep the soil moist during this time.
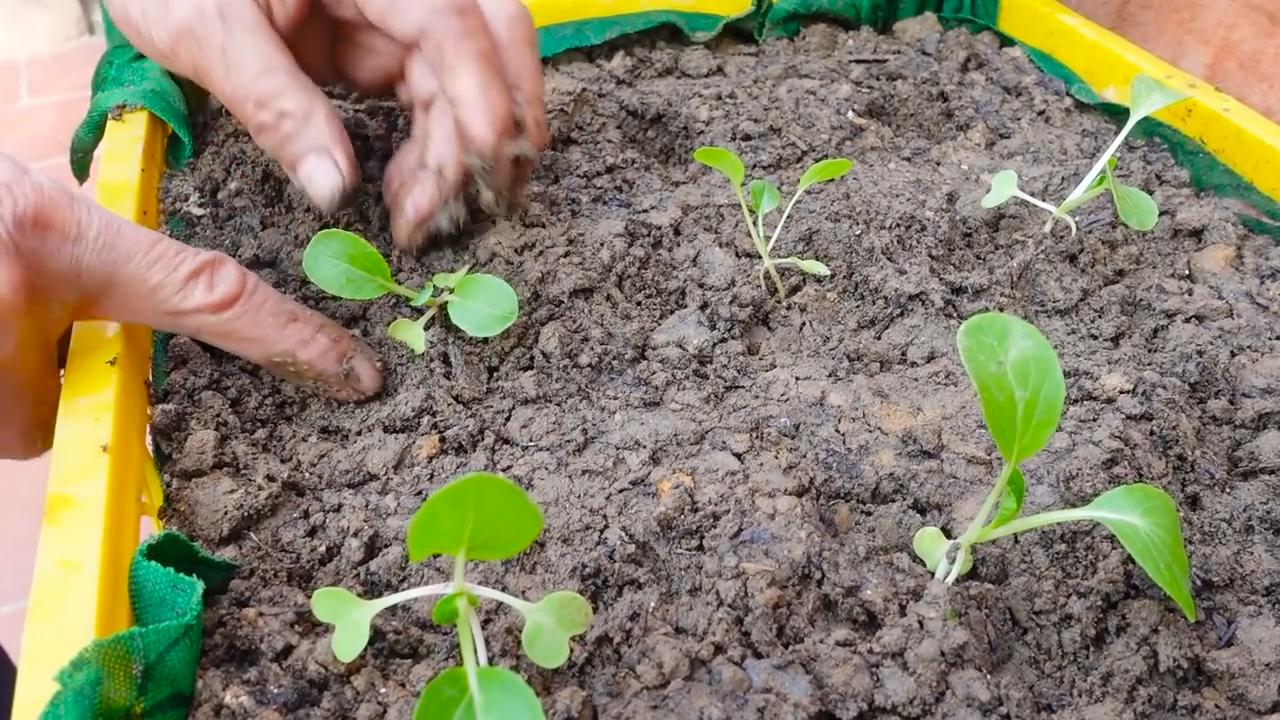
Transplanting: Giving the young plants more space
Once the young plants have developed a few leaves (about 2-3 weeks after sowing), it’s time to transplant them.
- Preparation of the pots or the garden bed: Fill larger pots or prepare the garden bed. Make sure the soil is well loosened and enriched with compost or organic fertilizer.
- Carefully lift the young plants: Carefully remove the young plants from the seedling pots. Be careful not to damage the roots. If you have sown several seeds in one pot, you can remove the weakest plants to give the stronger plants more space.
- Planting: Place the young plants in the prepared pots or the garden bed. The distance between the plants should be about 15-20 cm.
- Watering in: Water the young plants thoroughly after planting.
The Care: How to keep your Choi Sum plants healthy and strong
Proper care is crucial for a bountiful harvest. Here are a few tips:
- Watering: Choi Sum needs regular watering, especially during dry periods. Make sure the soil is always moist, but avoid waterlogging. It is best to water early in the morning or late in the evening to minimize evaporation.
- Fertilizing: Fertilize your Choi Sum plants regularly with organic fertilizer. You can use compost tea or diluted nettle manure, for example. Fertilize about every 2-3 weeks.
- Weed control: Keep the bed or pots free of weeds. Weeds compete with the Choi Sum plants for nutrients and water.
- Protection from pests: Choi Sum can be infested by various pests, such as slugs, flea beetles, or cabbage whites. Check your plants regularly and remove pests manually. You can also use natural pesticides, such as neem oil or garlic spray.
- Protection from heat: When it gets very hot, you should protect your Choi Sum plants from the direct midday sun. You can cover them with a shade cloth, for example.
The Harvest: The Reward for Your Efforts
After about 4-6 weeks, you can harvest your Choi Sum plants.
- Choosing the right time: Harvest the Choi Sum plants when they are about 15-20 cm high. The leaves should still be tender and crisp.
- Harvesting: Cut the Choi Sum plants just above the ground. You can also harvest only individual leaves to allow the plant to continue growing.
- Storage: Choi Sum does not keep for very long. It is best to process it immediately after harvesting. It will keep in the refrigerator for about 2-3 days.
Common Problems and Solutions
Problems can also arise when growing Choi Sum. Here are a few common problems and how you can solve them:
- Yellow leaves: Yellow leaves can be a sign of a nutrient deficiency or overwatering. Fertilize your plants regularly and make sure the soil is well-drained.
- Pests: Check your plants regularly for pests and combat them with natural pesticides if necessary.
- Premature bolting: If Choi Sum bolts (forms flowers) too early, the leaves become bitter. This can be caused by heat or drought. Ensure adequate watering and protect your plants from the midday sun.
Choi Sum in the Kitchen: Versatile and Delicious
Choi Sum is super versatile and can be prepared in many different ways. You can, for example, steam, fry, boil, or use it raw in a salad. It goes well with Asian dishes, soups, stews, and much more.
Conclusion
So, there you have it! Growing your own Choi Sum at home is not only achievable, but it’s also incredibly rewarding. Forget those wilted, overpriced bunches at the supermarket. Imagine stepping out into your garden or onto your balcony and harvesting fresh, vibrant Choi Sum whenever you need it. The difference in taste and texture is simply undeniable. This DIY trick is a must-try for anyone who appreciates fresh, healthy, and flavorful vegetables.
But the benefits extend beyond just taste. You’re also in complete control of what goes into your food. No more worrying about harmful pesticides or unknown chemicals. You can grow your Choi Sum organically, ensuring that you and your family are consuming the healthiest possible produce. Plus, gardening is a fantastic stress reliever and a great way to connect with nature.
Don’t be afraid to experiment! While we’ve outlined a basic method, there are plenty of variations you can try. For example, if you live in a particularly hot climate, consider providing your Choi Sum with some afternoon shade to prevent bolting. You can also try different soil mixes to see what works best for your specific growing conditions. Some gardeners even swear by companion planting, growing herbs like dill or chamomile alongside their Choi Sum to deter pests.
Ready to take the plunge and grow your own Choi Sum? We encourage you to give it a try! It’s easier than you might think, and the results are well worth the effort. Start small, perhaps with just a few plants, and see how you go. Once you get the hang of it, you can expand your operation and enjoy a continuous supply of fresh Choi Sum throughout the growing season.
And most importantly, we want to hear about your experiences! Share your tips, tricks, and successes (and even your failures!) in the comments below. Let’s create a community of home gardeners who are passionate about growing their own food. Together, we can learn from each other and make the process even easier and more enjoyable. So, grab your seeds, get your hands dirty, and start growing your own delicious Choi Sum today! You’ll be amazed at how satisfying it is to harvest your own homegrown vegetables. This simple DIY trick will transform your meals and your connection to the food you eat.
Frequently Asked Questions (FAQ)
What is Choi Sum and why should I grow it?
Choi Sum, also known as Chinese flowering cabbage, is a leafy green vegetable popular in Asian cuisine. It’s packed with vitamins and minerals, including Vitamin C, Vitamin K, and calcium. Growing it yourself ensures you have access to fresh, healthy produce free from harmful pesticides. Plus, homegrown Choi Sum tastes significantly better than store-bought varieties.
How much sunlight does Choi Sum need?
Choi Sum thrives in full sun, requiring at least 6 hours of direct sunlight per day. However, in hotter climates, providing some afternoon shade can prevent bolting (premature flowering). If you’re growing indoors, use grow lights to supplement natural sunlight.
What kind of soil is best for growing Choi Sum?
Choi Sum prefers well-draining, fertile soil with a pH between 6.0 and 7.5. Amend your soil with compost or other organic matter to improve drainage and nutrient content. A good quality potting mix is ideal for container gardening.
How often should I water my Choi Sum plants?
Keep the soil consistently moist, but not waterlogged. Water deeply whenever the top inch of soil feels dry to the touch. Avoid overhead watering, as this can promote fungal diseases. Drip irrigation or soaker hoses are excellent options.
How long does it take for Choi Sum to grow?
Choi Sum is a fast-growing vegetable. You can typically harvest it within 4-6 weeks after planting. The exact time will depend on the variety, growing conditions, and climate.
How do I know when my Choi Sum is ready to harvest?
Harvest Choi Sum when the flower stalks are just beginning to form, but before the flowers open. The leaves should be tender and green. You can harvest the entire plant at once or harvest individual leaves as needed.
What are some common pests and diseases that affect Choi Sum?
Common pests include aphids, flea beetles, and cabbage worms. Diseases include downy mildew and clubroot. Regularly inspect your plants for signs of pests or diseases and take appropriate action. Organic pest control methods, such as neem oil or insecticidal soap, are often effective. Ensure good air circulation to prevent fungal diseases.
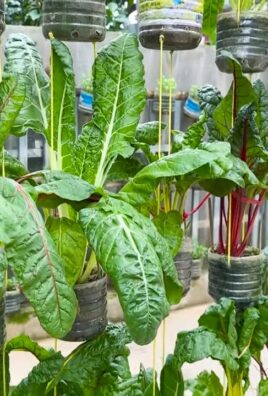
Can I grow Choi Sum in containers?
Yes, Choi Sum grows well in containers. Choose a container that is at least 6-8 inches deep and wide. Use a good quality potting mix and ensure the container has drainage holes.
Can I grow Choi Sum indoors?
Yes, you can grow Choi Sum indoors, especially if you have access to grow lights. Provide adequate light, water, and nutrients. Indoor growing is a great option for extending the growing season or for those who live in apartments or with limited outdoor space.
What are some good companion plants for Choi Sum?
Good companion plants for Choi Sum include dill, chamomile, rosemary, and thyme. These herbs can help deter pests and attract beneficial insects. Avoid planting Choi Sum near other members of the brassica family, such as broccoli or cabbage, as they can attract the same pests and diseases.
How do I prevent Choi Sum from bolting?
Bolting (premature flowering) can occur when Choi Sum is exposed to high temperatures or stress. To prevent bolting, provide afternoon shade in hot climates, water regularly, and avoid letting the soil dry out. Choose bolt-resistant varieties if you live in a warm climate.
Can I save seeds from my Choi Sum plants?
Yes, you can save seeds from your Choi Sum plants, but it requires allowing the plants to flower and produce seed pods. However, keep in mind that Choi Sum can cross-pollinate with other members of the brassica family, so the seeds may not be true to type.
How do I store harvested Choi Sum?
Store harvested Choi Sum in the refrigerator in a plastic bag or container. It will keep for several days. For longer storage, you can blanch and freeze it.
What are some ways to cook with Choi Sum?
Choi Sum can be stir-fried, steamed, boiled, or added to soups and stews. It’s a versatile vegetable that can be used in a variety of dishes. Try stir-frying it with garlic and ginger, or adding it to your favorite noodle soup.
Is growing Choi Sum at home worth the effort?
Absolutely! Growing your own Choi Sum is a rewarding experience that provides you with fresh, healthy, and delicious vegetables. It’s also a great way to connect with nature and learn about the food you eat. The taste difference between homegrown and store-bought Choi Sum is significant, making the effort well worth it.
Leave a Comment